Working with SQL Report Parameters

SQL Report Parameters are a cornerstone in database reporting since they offer both flexibility and a profound depth of analysis. Grasping this essential topic can significantly elevate your reporting capabilities and unlock a more tailored and interactive data experience.

What are report parameters?

Report parameters in SQL are dynamic values that can be accepted as input by the report from the end user. serve multiple functions: they can filter data directly within the report, modify its presentation, and link to associated reports.

In this article, we will show you how to create a parameter specifically designed for data filtering within a report. Using dbForge Studio for SQL Server, you have the flexibility to filter data both on the client side and directly at the database server level. We'll explore both methods in detail.

Client-side filtering

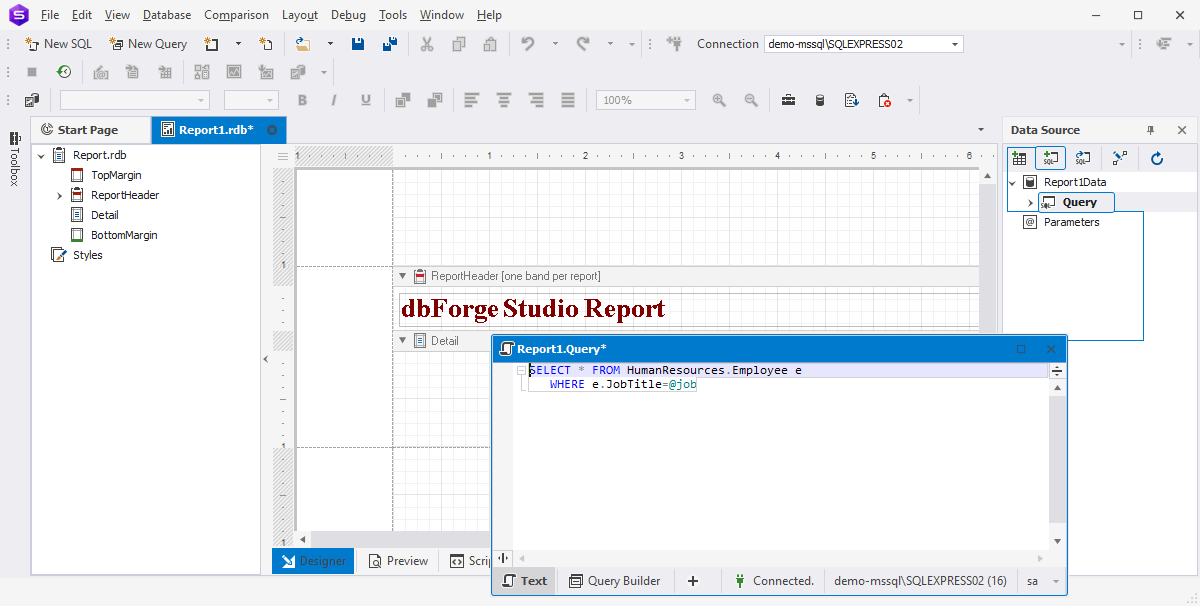
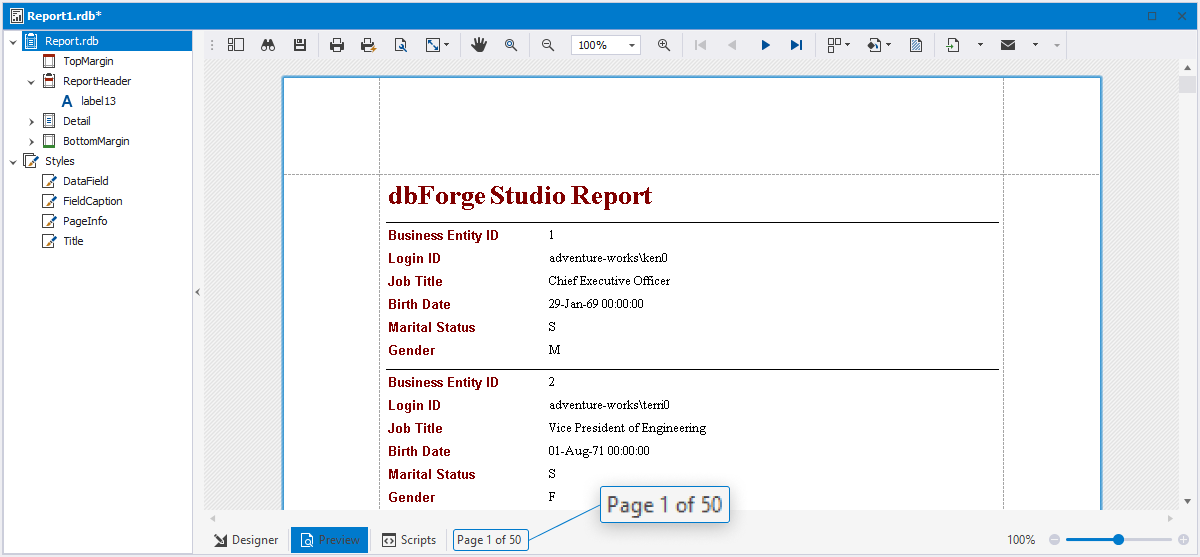
With help of SQL Report Builder, we created a report, showing information about employees.

dbForge SQL Report Designer

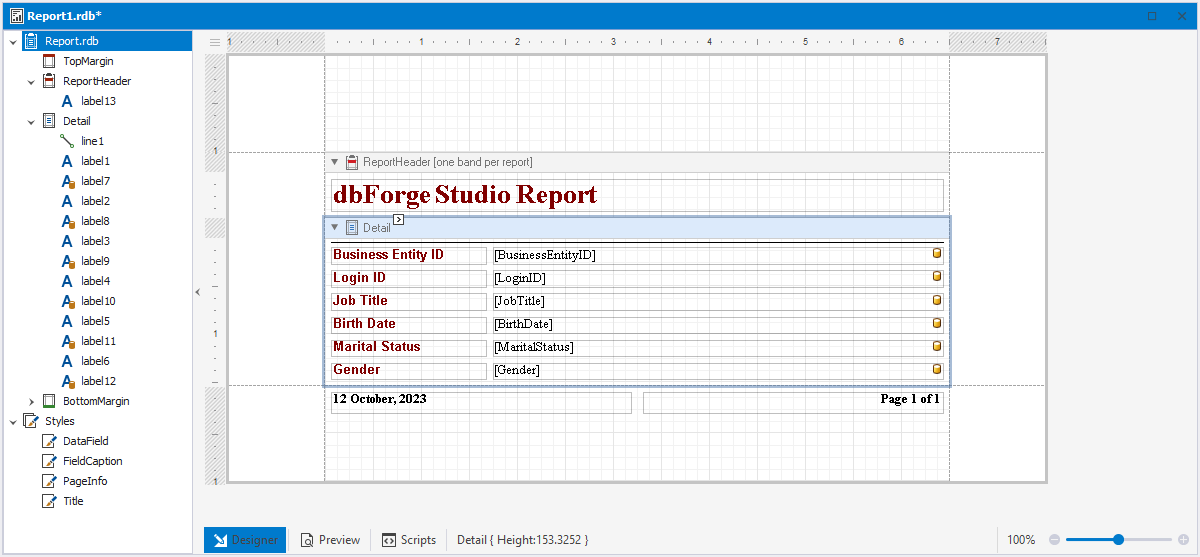
Yet, the report ended up being extensive and somewhat challenging to navigate. To address this, we'll add a parameter to filter the data by Job Title.

SQL Report example

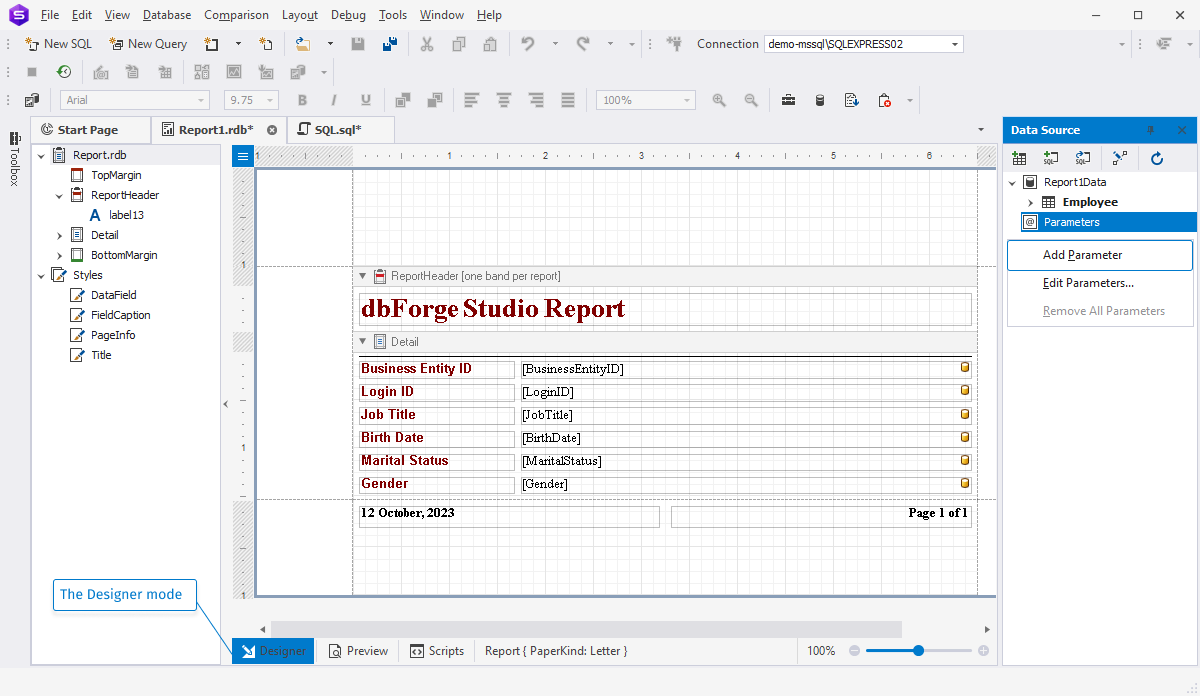
Step 1: Add a report parameter in dbForge Studio for SQL Server

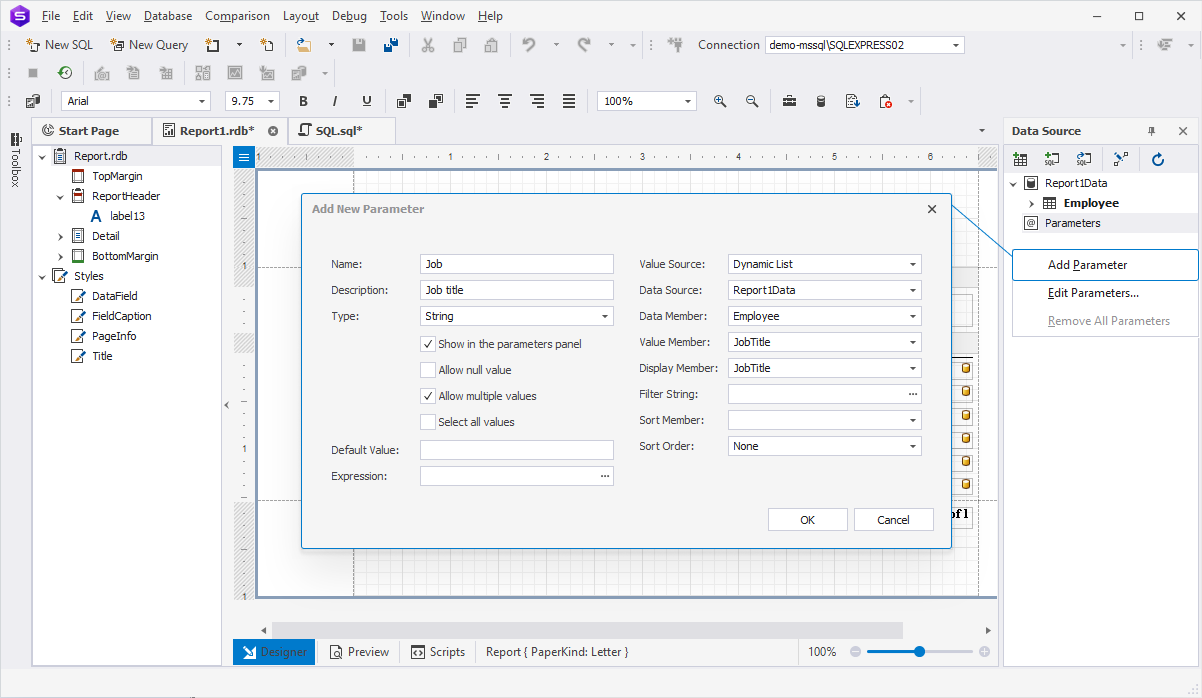
To start creating a parameter, return to the Designer mode. Then, navigate to Data Source, right-click on Parameters, and select Add Parameter.

Add a parameter to a SQL database report

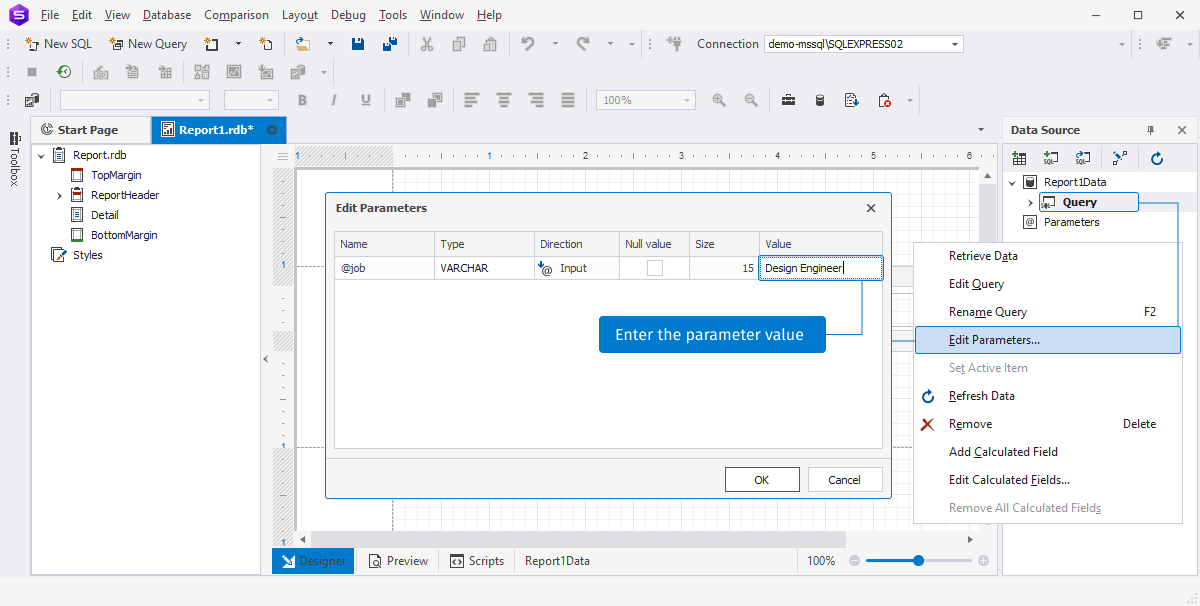
In the Add New Parameter dialog that will appear, specify the parameter's Name, Description (which end-users will see in Print Preview), Type and Default Value. For our report, we name the parameter "Job" and select the String type.

Following that, in the Value Source dropdown, select Dynamic List to configure the values for the parameter. Then, specify the Data Source and Data Member associated with the parameter. The Value Member indicates the data field supplying the values to the parameter, while the Display Member pinpoints the data field that offers display names for those parameter values. For our scenario, both the Value Member and Display Member are identical.

Add a new report parameter

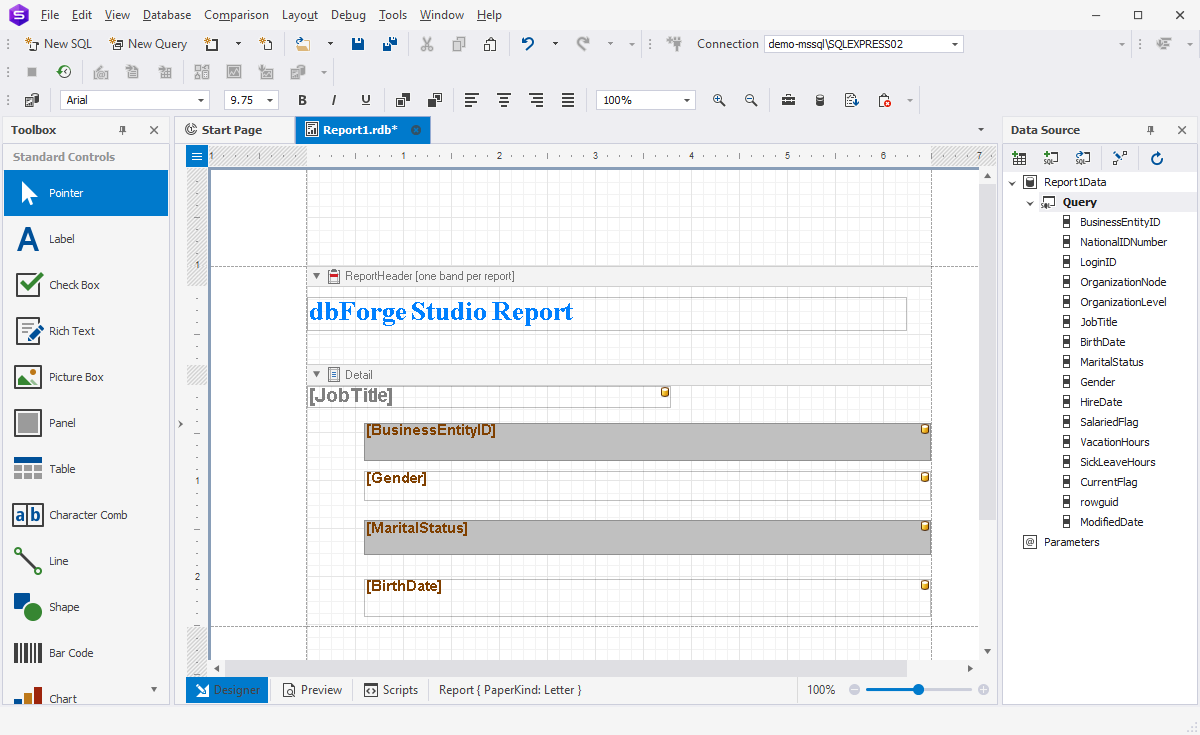
Once you've finished creating parameter, it will appear in the Data Source panel.

Set up filtering by the created parameter

Now, to apply the created parameter to the report, click the hamburger icon situated in the top-left corner of the Report Designer. This will bring up the Report Tasks dialog.

Report tasks window

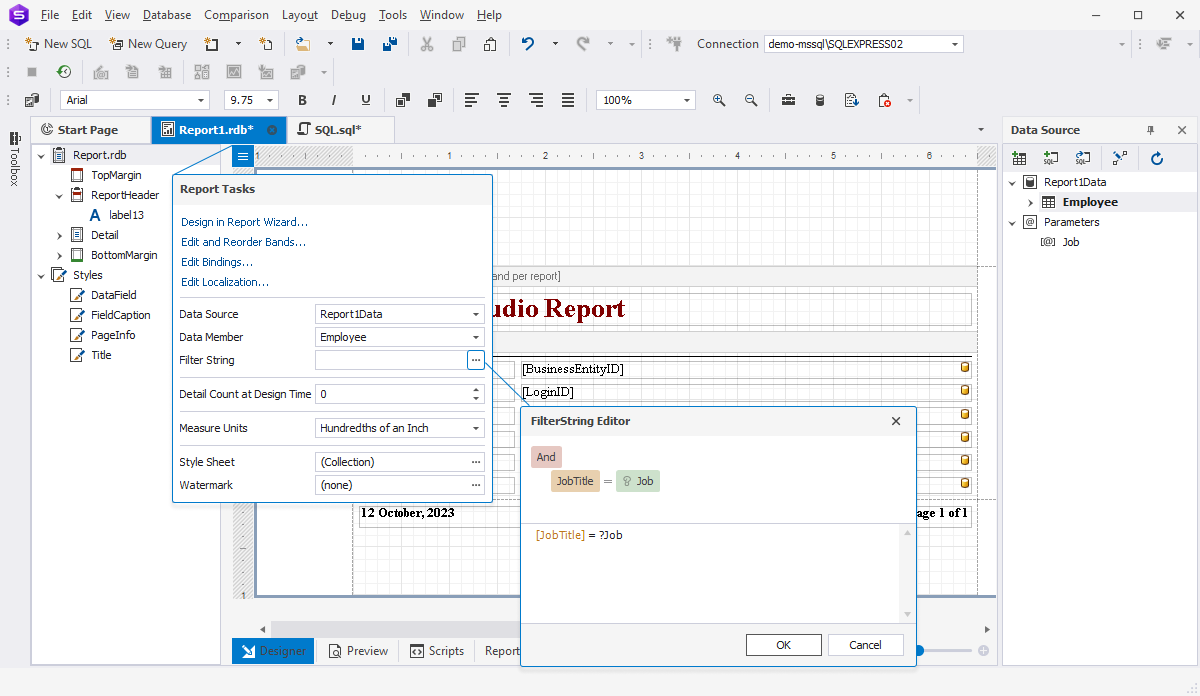
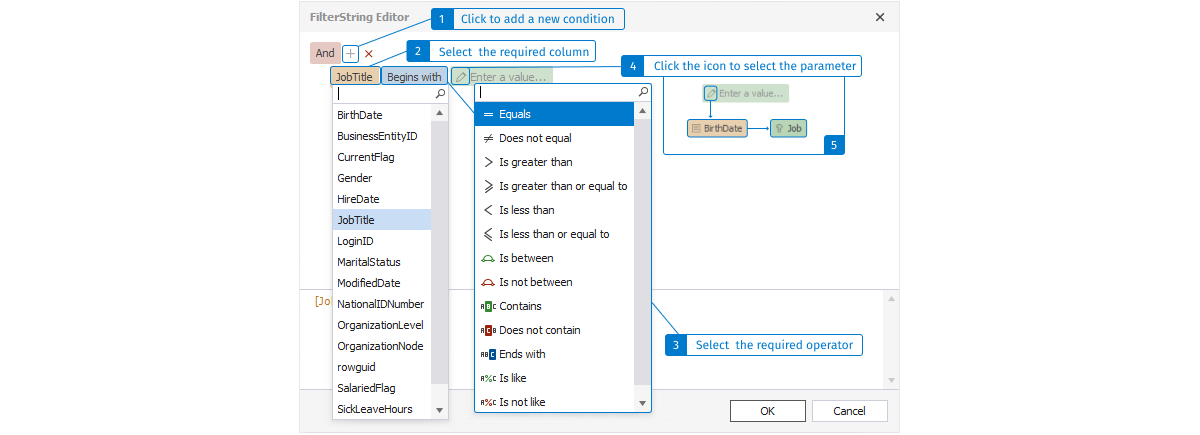
In the Report Tasks dialog, click the plus icon and select Add Condition. Then click the first element in the condition pattern that appears and select the required column - in our case, it is JobTitle. Then click the second element and select the condition operator - we select Equals. And finally click the pencil icon twice to select the parameter. As we have only one parameter in the Data Source, it is automatically shown near the question icon. Once done, click OK.

Add a filter to report tasks

Preview the created SQL Report

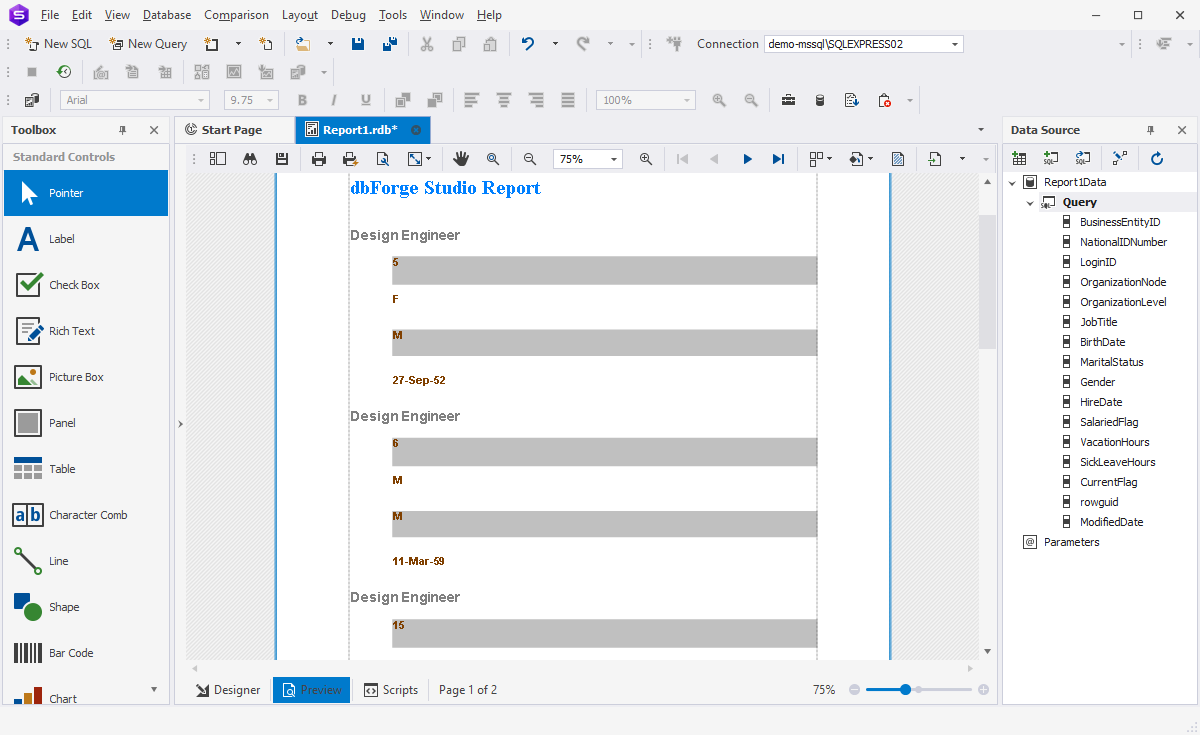
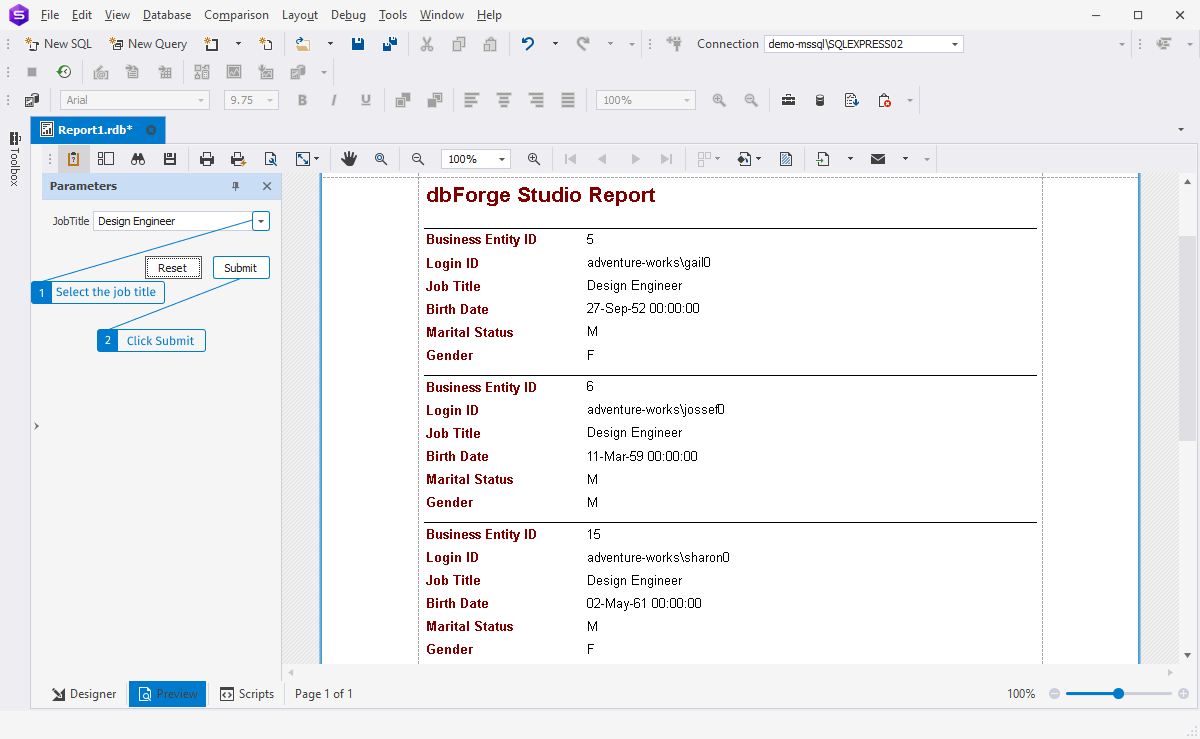
Switch to the Preview mode to see the result. In the Parameters pane, you should now see our newly-created parameter. Select a job title from the drop-down list and click Submit. The report will be filtered by the selected criterion.

Preview the SQL Report

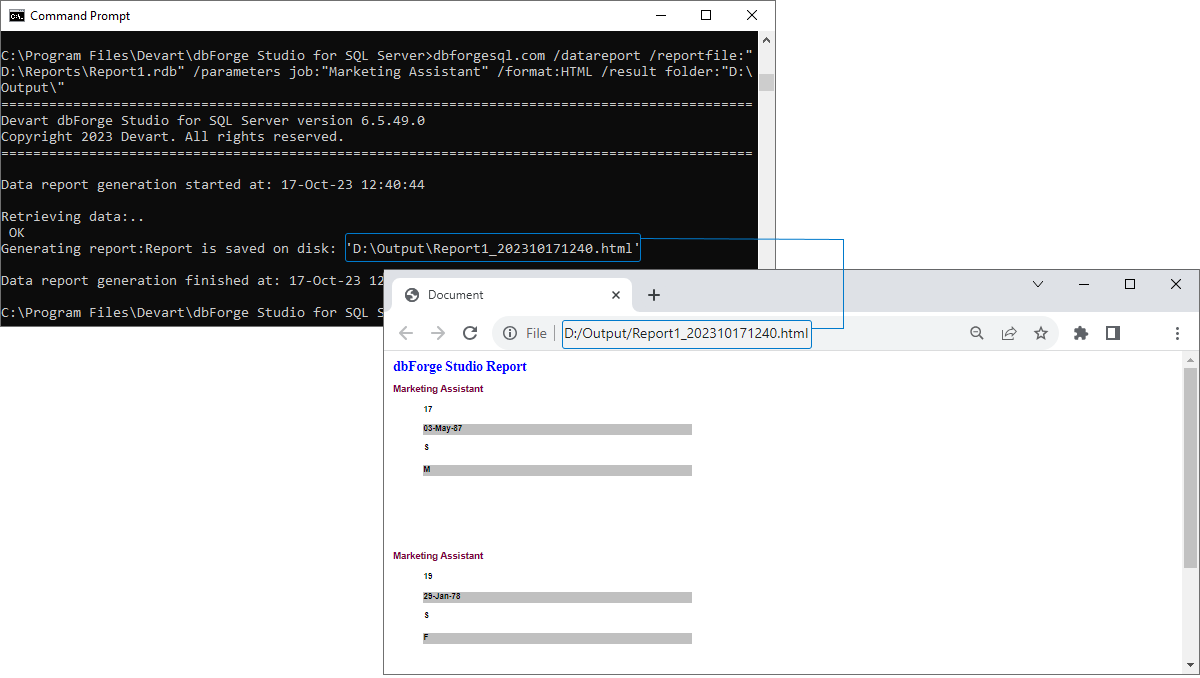
Step 4: Save or print the SQL report

If satisfied with the previewed report, you can either print or save it. Simply click the appropriate button on dbForge Studio's toolbar.

Server-side filtering

Database server-side filtering allows you to optimize query performance by filtering data directly at the database server before sending it to the client application. It involves applying filtering conditions to SQL queries, reducing the amount of data transferred over the network, and improving overall database efficiency.

Step 1: Create a query-based report

For illustrative purposes, we've generated a query-based report using the same conditions that were used for client-side filtering.

Preview the SQL Report

Step 2: Design the report

Using dbForge Studio's report designer, you can add elements such as tables, charts, text boxes, images, and more to create the desired layout. You have the ability to customize the appearance, formatting, and style of these elements to align with your report's design.

Preview the SQL Report

Step 3: Edit parameters

To filter the data in the generated report, right-click the Query node within the Data Source, and then select Edit Parameters. In the Edit Parameters dialog that opens, enter a value for the @job parameter. In our case, this value corresponds to a specific job title. Then, click OK.

Preview the SQL Report

Step 3: Preview and save or print the report

This step involves previewing your report to ensure its accuracy and presentation. Once you're satisfied with how it looks, you can choose to save it for future reference or print it as needed, making it accessible for sharing or documentation.

Preview the SQL Report

Create a parameterized SQL report via command line

With dbForge Studio for SQL Server's support for a command-line interface, you now have the capability to effortlessly create parameterized SQL reports through command-line operations. This feature proves indispensable for automation and seamless integration needs. By automating the generation of reports with precise parameters, you can achieve efficient and scheduled report delivery, data extraction, and harmonious integration with other systems, ultimately enhancing streamlined, data-driven decision-making processes within organizations.

Step 1: Design and save a query-based report

In dbForge Studio for SQL Server create a query-based report. Once done save it.

Preview the SQL Report

Step 2: Use CLI to input parameters and create a report

2.1 In the Command Prompt, navigate to the directory where the Studio is located.

cd C:\Program Files\Devart\dbForge Studio for SQL Server\
								

2.2 Run the following command with the required parameters.

dbforgesql.com /datareport /reportfile:"D:\Reports\Report1.rdb" /parameters job:"Marketing Assistant" /format:HTML /result folder:"D:\Output\"
								

dbForge Studio for SQL Server will create a report with the parameters you specified via the command line and store it in the designated location.

Preview the SQL Report

Conclusion

dbForge Studio for SQL Server opens up a world of possibilities in the realm of database reporting. Its handling of parameters offers both flexibility and depth of analysis, enabling tailored and interactive data experiences. Alongside the Report Designer, the Studio provides a wealth of useful functionalities that enhance the overall database development and administration experience.