How to import data from the command line
In database management, the command line is a valuable ally for those seeking optimized workflows.
Despite the level of your expertise, this guide will help you unveil the power of importing SQL data directly from the command line
with a step-by-step procedure for efficient data import with ease.
Importing data from the command line may have multiple advantages over other import techniques, including:
- Automation and scripting: CL allows for automation of data import processes, such as repetitive tasks, batch operations, or scheduled jobs, using scripts
- Batch processing: CL allows importing large volumes of data in a single operation using batch files for cases such as dealing with regular updates or bulk data transfers
- Ease of integration: CL interfaces can be easily integrated into existing workflows, scripts, or applications
- Resource efficiency: CLI tools often operate with lower resource overhead than graphical interfaces, which can be advantageous when working with large datasets or in environments where resource consumption needs to be optimized
- Headless operation: CL operates in a 'headless' mode, meaning it doesn't require a graphical user interface
- Remote operations: CLI tools often support remote execution, allowing you to import data into a database located on a remote server
- Error handling and logging: CLI tools often provide robust error handling and logging capabilities, ensuring that any issues during the data import process are recorded and can be easier identified and fixed
- Security considerations: CLI operations can be secured through user authentication and authorization mechanisms
In this article, we'll explore how to automate the data import process using the command line. To achieve this, we'll create a template file with all import settings using the Data Import Wizard built into dbForge Studio for SQL Server
and then perform import by specifying the name of this file in the command line instead of going through all wizard pages.
To create a template file
Let's now create a template file for data import in the Data Import wizard.
Note that you can specify parameters such as the connection or input file directly in the command line. However, any values assigned to these parameters in your template file
will be overridden. Also, the command line does not support importing data into a new table.
1. Open the Data Import wizard using one of the following ways:
- On the ribbon, select Database > Import Data.
- In Database Explorer, right-click the required database and select Tools > Import Data.
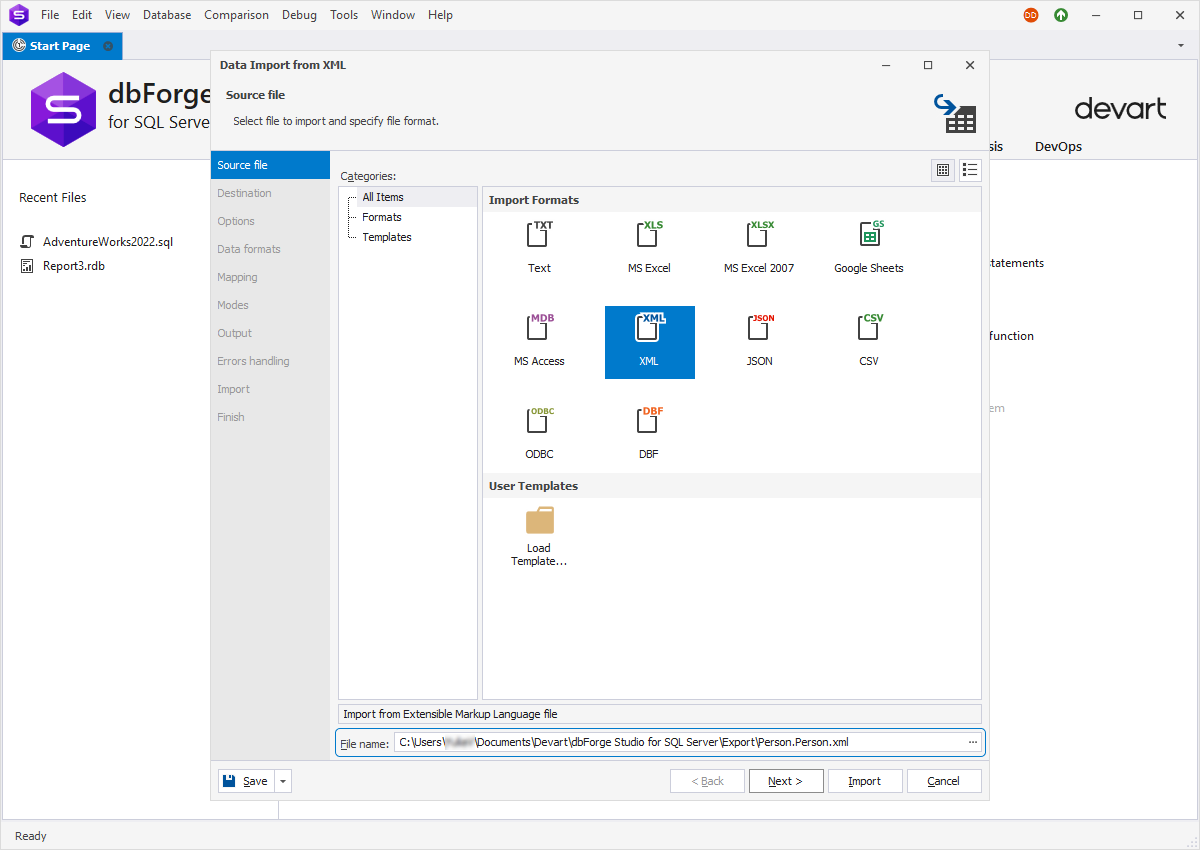
2. On the Source file page of the Data Import wizard, select the file format to import and specify the file name in the File name field to load the source file you want to import.
To proceed, click Next.
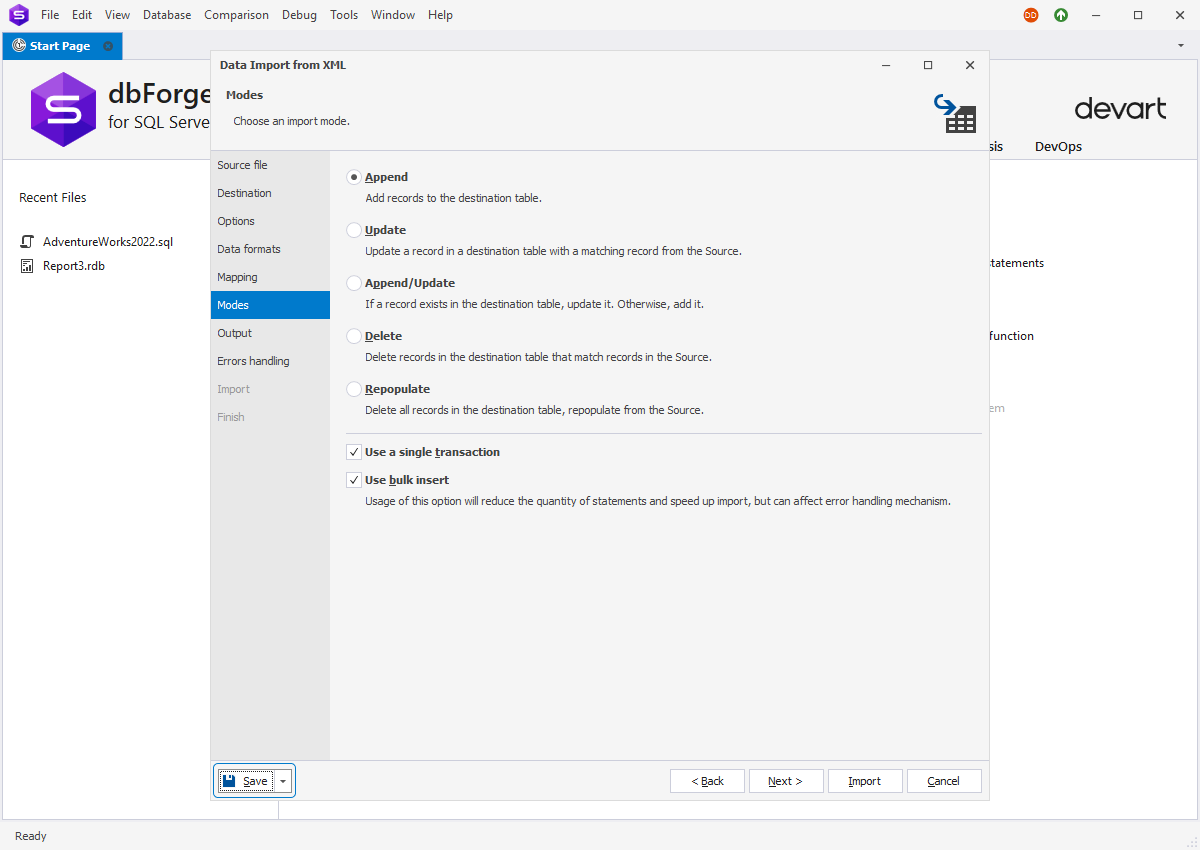
2. Go through all wizard pages to specify the necessary information and settings.
3. Once done, select Save Template from the Save dropdown menu at the bottom of any of the wizard's pages. In the Save As window that opens,
specify the path to the file and its name, and click Save. The file will be saved with the .dit extension.
4. Close the wizard.
We would like to note that:
- The generated file does not contain password information for security purposes. If the Save Password option is selected for the specified connection in dbForge Studio for SQL Server,
no further action is required regarding the password. If not, you must set the password using the
/password option.
-
Creating a template file does not require initiating the import process by clicking Import in the wizard.
Import data from the command line
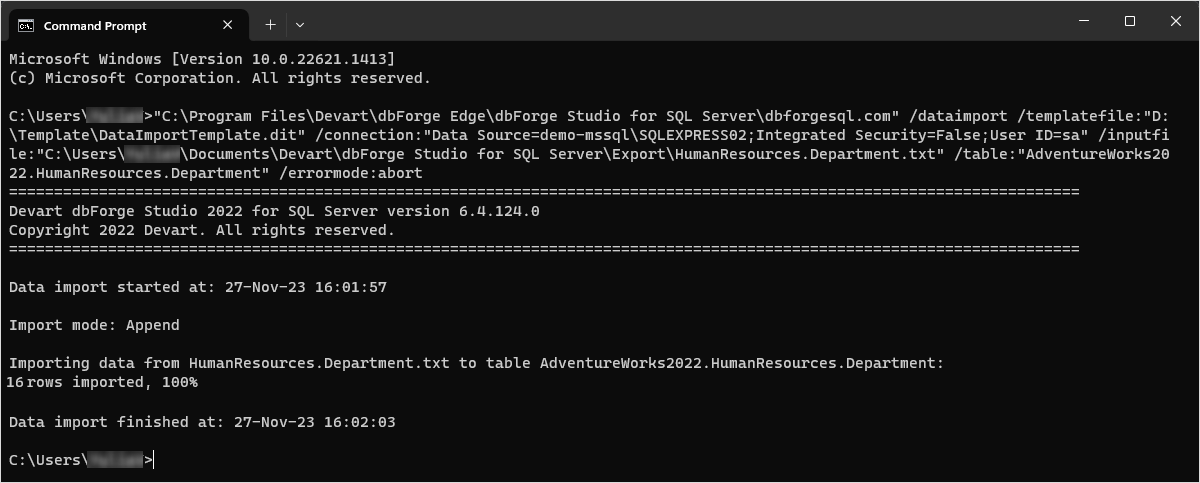
1. Start the Command Prompt.
2. Type a path to the dbforgesql.com file located in dbForge Studio for SQL Server installation folder on your PC, and press the SPACE key.
3. Specify the operation you want to perform - data import - and the path to the template file.
/dataimport /templatefile: < filepath >
4. Press the SPACE key and type all other arguments you need.
5. To run the process, press ENTER.
Conclusion
In the article, we examined how to automate the data import process from the command line using the template file with settings
generated with the help of the Data Import tool built into dbForge Studio for SQL Server. This operation is beneficial for repetitive tasks or
regular updates. Besides the powerful Data Import tool, the Studio provides all the tools and functionalities required for efficient database development, management, administration,
testing, reporting, and deployment.