
NHibernate Database-First Tutorial
The following walkthrough describes how to generate a model from the existing database, manually add and edit classes and components, generate C# code for the model.
We will use the standard Northwind database. For more information on how to download and install this database, see here.
Prerequisites
In order to complete this walkthrough, you will need access to the database server you are using. You will also need a data provider corresponding to the server installed on your system. The Northwind database must be created on the server. In Microsoft Visual Studio, you should create a new project that will be used for the purpose of this walkthrough.
Creating a Model from the Existing Database
To create a model from your existing database, perform the following sequence of actions:
In the Solution Explorer window, right-click the name of your project.
From the shortcut menu, select the Add command and select the New Item option.
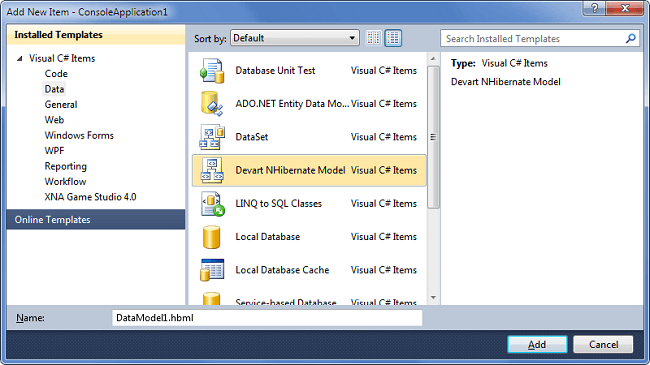
In the Installed Templates column of the Add New Item window, select Data.
In the central column of the Add New Item window, select Devart NHibernate Model.
Click Add.
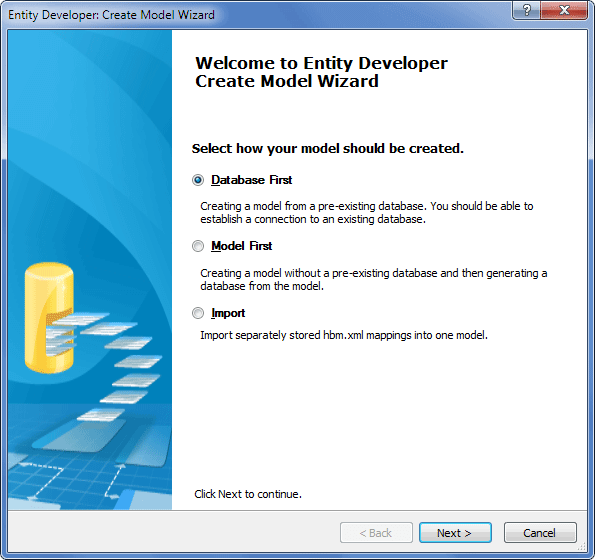
Ensure that the Database First option is selected and click Next.

Note: This page may differ from the one pictured above, depending on which provider is selected.
On the Set up data connection properties page, set up the connection to the database.
(Optional) To check that the connection is valid, click Test connection. If the connection cannot be established, correct the entered data and repeat this step.
Click Next.
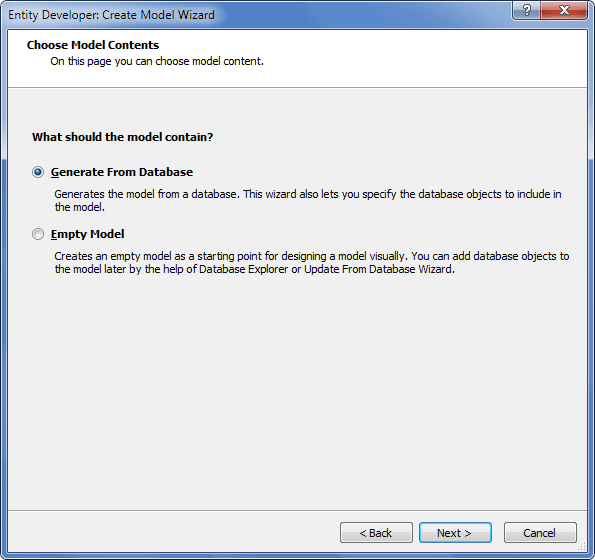
On this page, select the Generate From Database option and click Next.
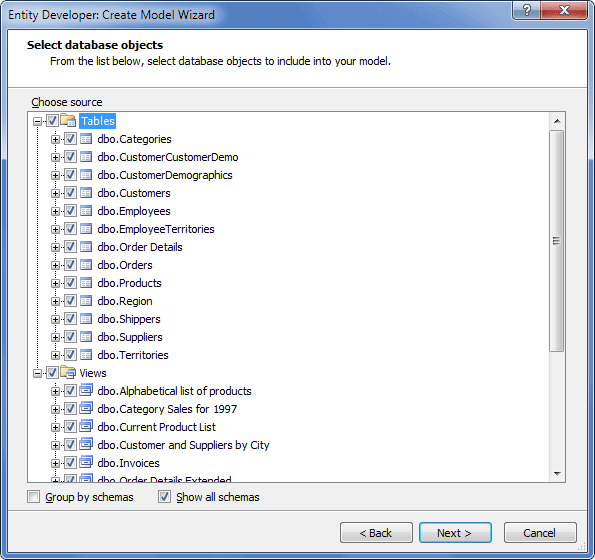
On the Select database objects page, select the tables and/or views that are to be included in the model and click Next.
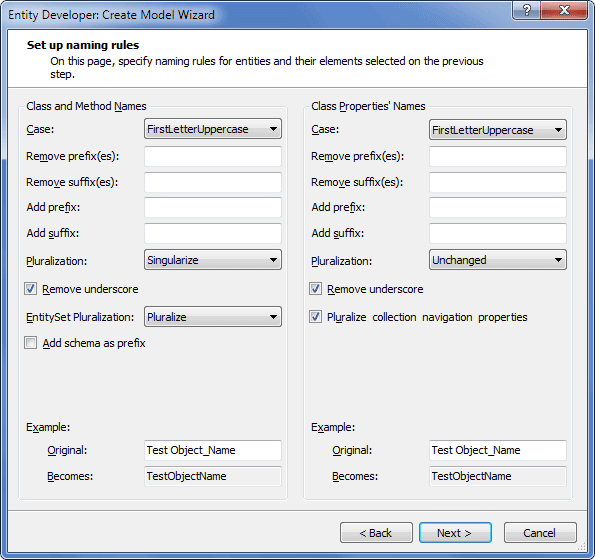
On the Set up naming rules page, define the naming rules for your model and click Next.
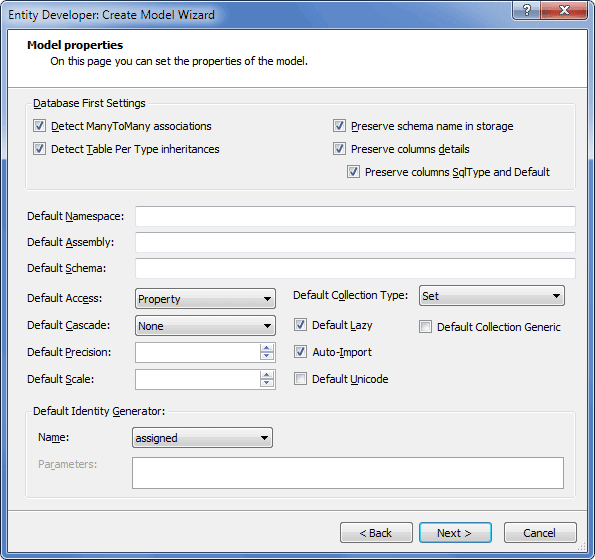
On the Model properties page, define the settings of your model.
Note: On the Model Properties page, pay attention to the following:
- Keep the Detect ManytoMany associations check box selected to automatically detect many-to-many associations.
- Keep the Detect Table Per Type inheritances check box selected to automatically detect inheritances of that type.
- Using the Preserve columns details and Preserve columns SqlType and Default check boxes, you may preserve either full information about the column or only full information about the type to obtain a database-independent model. After creating such a database-independent model, you can easily create a database on a different server using the Update to Database functionality.
Click Next.
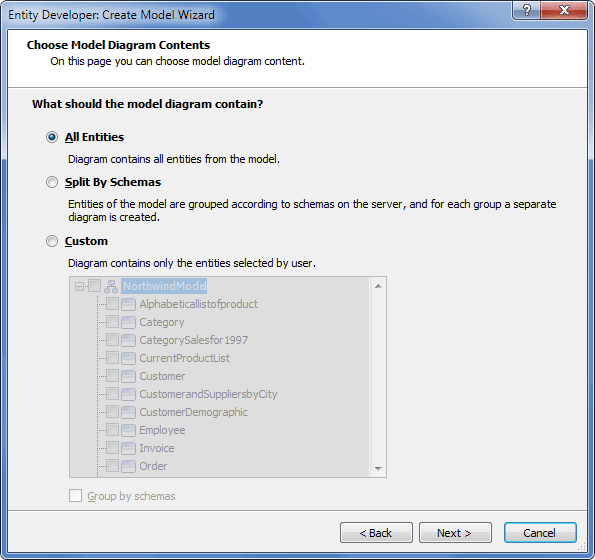
On the Choose Model Diagram Contents page, select, which entities should be displayed on the diagram. There are three options: All Entities (all entities are displayed on the diagram), Split by Schemas (entities of a schema are displayed on a separate diagram), or Custom (manually select the required entities).
Click Next.
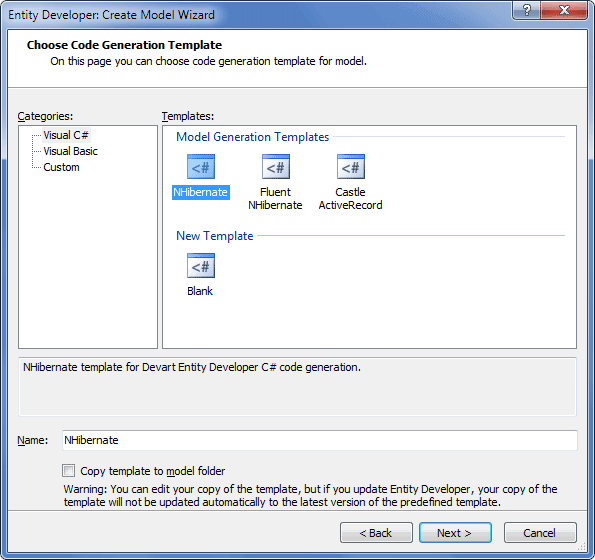
Select the required code generation template and click Next.
On the final window of the wizard click Finish.
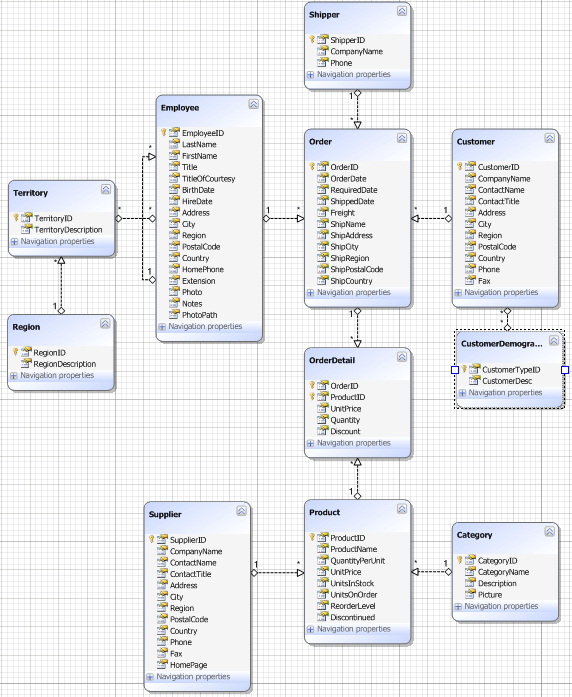
The model is successfully created:
Mapping and Code Generation Setup
This section explains how to set up mapping and code generation in NHibernate models.
For the purpose of mapping and code generation, you may need to create and define folders, into which mapping and generated code will be saved, as well as other parameters available in the Properties window of the selected template.
The definition of output folders for mapping and code generation is optional, if such folders are of no importance for you, go directly to Step 11 of the procedure.
To define folders for mapping and code generation, perform the following sequence of actions:
In your project in the Solution Explorer window, create a folder for mapping (for example, Mapping) and a folder for generated code (for example, Entities).
Navigate to the Model Explorer window, select the template and click to display the Properties window for the selected template.
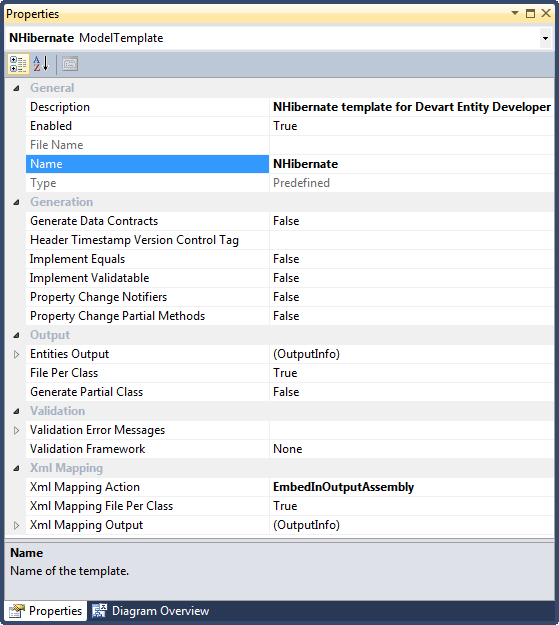
In the Output section of the model properties, click the Entities Output line and then click the displayed three-dotted button.
In the Select Project Folder dialog box, select the appropriate folder for entities (for example, the Entities folder that was created in Step 1 of this procedure) and click OK.
Select an appropriate value for the File Per Class property.
To enable the entity property validation mechanism in the Validation section locate the Validation Framework row and select the appropriate framework; use the Validation Error Messages row to apply error messages stored in the application resources.
In the Xml Mapping section of the template properties, to define the way of mapping file processing during build time select the appropriate value for the Xml Mapping Action property.
To generate separate mapping files per class, set the Xml Mapping File Per Class property to True; to generate one mapping file, set this property to False.
Click in the Xml Mapping Output line and click the three-dotted line to open the Select Project Folder window.
In the Select Project Folder window, select the appropriate folder for mapping files (for example, the Mapping folder that was created in Step 1 of this procedure) and click OK.
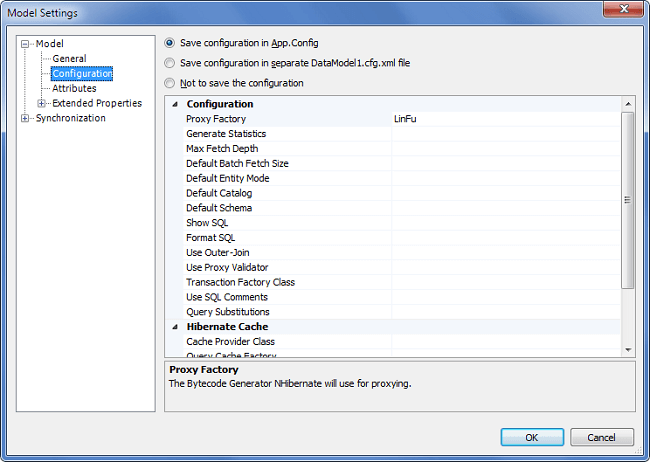
(Optional) To specify additional parameters for your application (app.config) or web-application (web.config), for example, to change the Proxy Factory setting, right-click the diagram, select the Model Settings menu item from the shortcut menu and in the tree area select Configuration.
Note: On mapping and code generation, the NHibernate library is added to the configuration of your application, provided that this library is available from the Global Assembly Collection. If this library is stored elsewhere, in the Solution Explorer window, right-click Reference, select the Add reference command from the shortcut menu and follow the on-screen instructions to add the library to the configuration of your application.
-
To generate code and mapping, save the model.
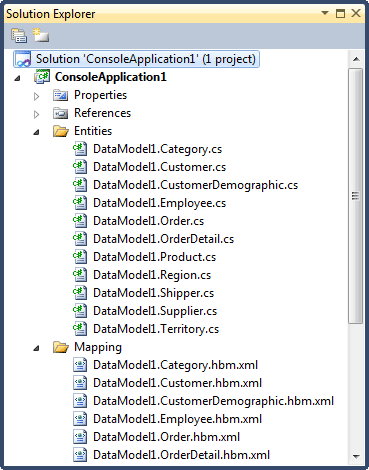
Entities and mapping files are successfully generated and stored in the specified folders:
This completes the procedure for creating a model from the existing database.