This guide provides a detailed step-by-step walkthrough for creating an ASP.NET Core Blazor Web App that performs full CRUD (Create, Read, Update, Delete)
operations on a MySQL database. We will build the application progressively, with each section representing a complete, functional stage of development.
Why dotConnect for MySQL?
Advanced ORM support
Fully supports EF Core, Dapper, NHibernate, LinqConnect, and other technologies for efficient data management.
Full ADO.NET compliance
Conforms to the latest ADO.NET standards and innovations for seamless integration with .NET applications.
MySQL-specific data types
Offers many MySQL-specific features and fully supports all unique data types for accurate and complete data representation.
Secure connection options
Provides robust security with support for SSL/SSH connections, connecting via proxy servers, embedded servers, and HTTP tunneling.
IDE integration
Features native integration with Visual Studio and complete design-time support for accelerated development.
Priority support & frequent updates
Includes priority support, detailed documentation, and regular updates for continuous improvement.
Download and activate dotConnect for MySQL
You can start using dotConnect for MySQL immediately with a 30-day free trial. Choose one of the following installation options:
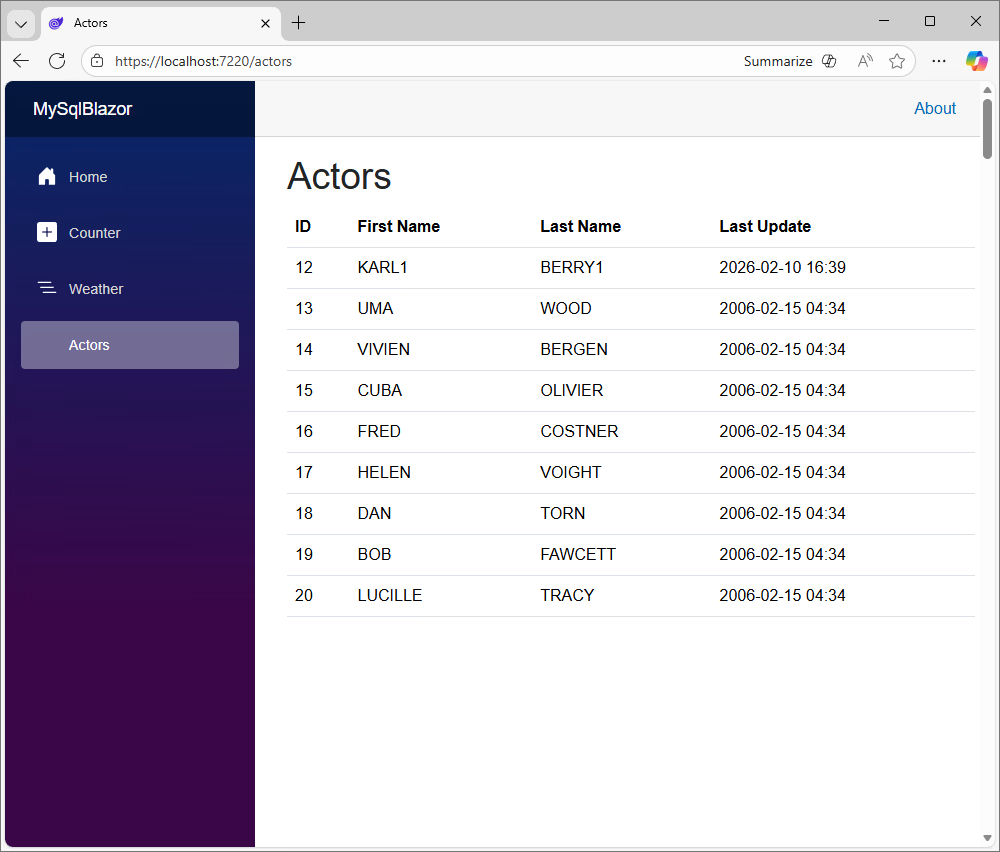
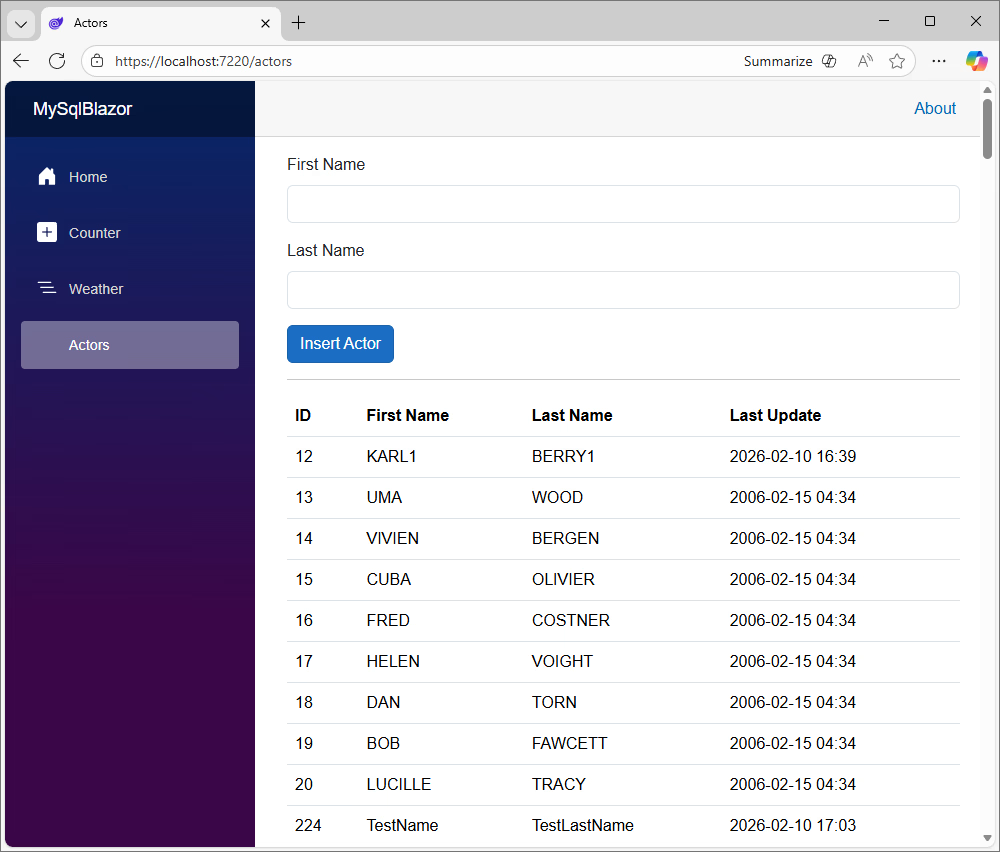
In this foundational step, our goal is to establish a connection to the MySQL database and display data in a read-only table. This ensures our database connection and data service are correctly
configured and provides the base upon which we will build the other CRUD operations.
Data model (Actor.cs)
In your project, create a new folder named Data. Inside it, create a class file named Actor.cs. This class will act as a model to hold the data for each actor record.
In the Data folder, create a new class ActorService.cs. This service will contain the logic to interact with the database. Note that we will use Dependency
Injection to provide this service to our components, so the class is not static.
// Program.csusing MySqlBlazor.Data;
// ... other using statementsvar builder = WebApplication.CreateBuilder(args);
// Add services to the container.
builder.Services.AddRazorComponents()
.AddInteractiveServerComponents();
// Register the ActorService
builder.Services.AddScoped<ActorService>();
var app = builder.Build();
// ...
Actors page (Actors.razor)
In the Components/Pages folder, create a new Razor component named Actors.razor. This page will fetch and display the data.
You have now built a functional, read-only Blazor application that connects to a MySQL database and displays the data in a table. This confirms that your core setup,
including dependency injection and data retrieval, is working correctly.
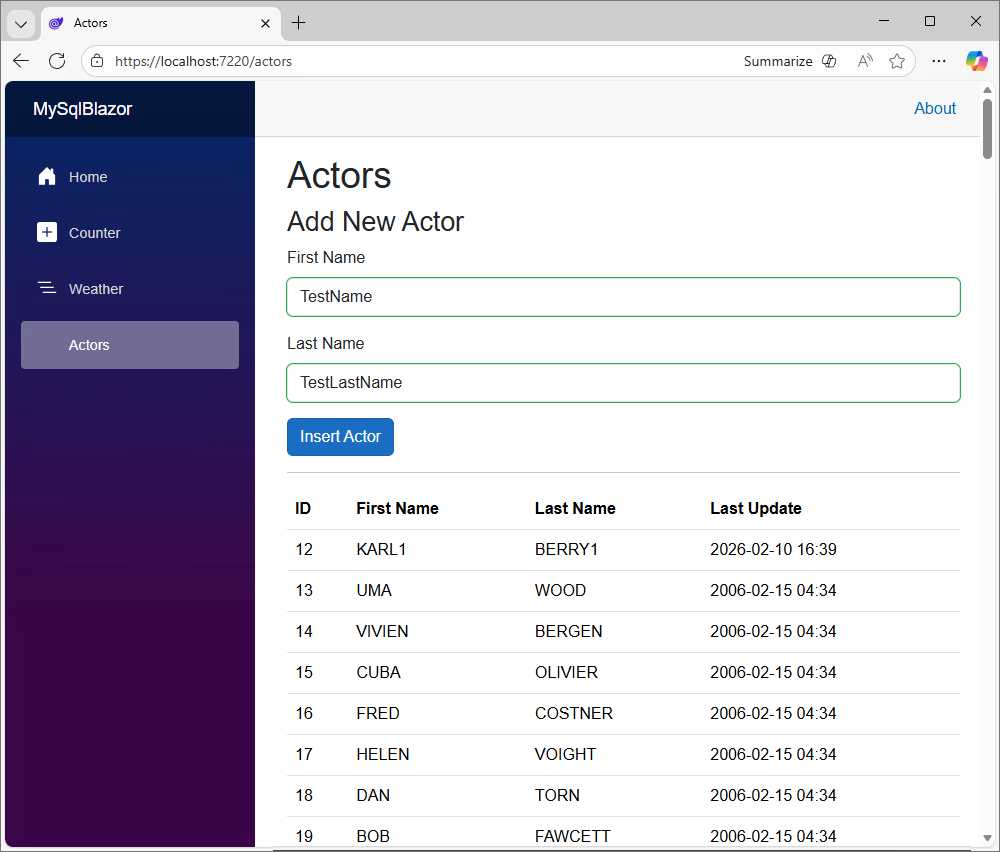
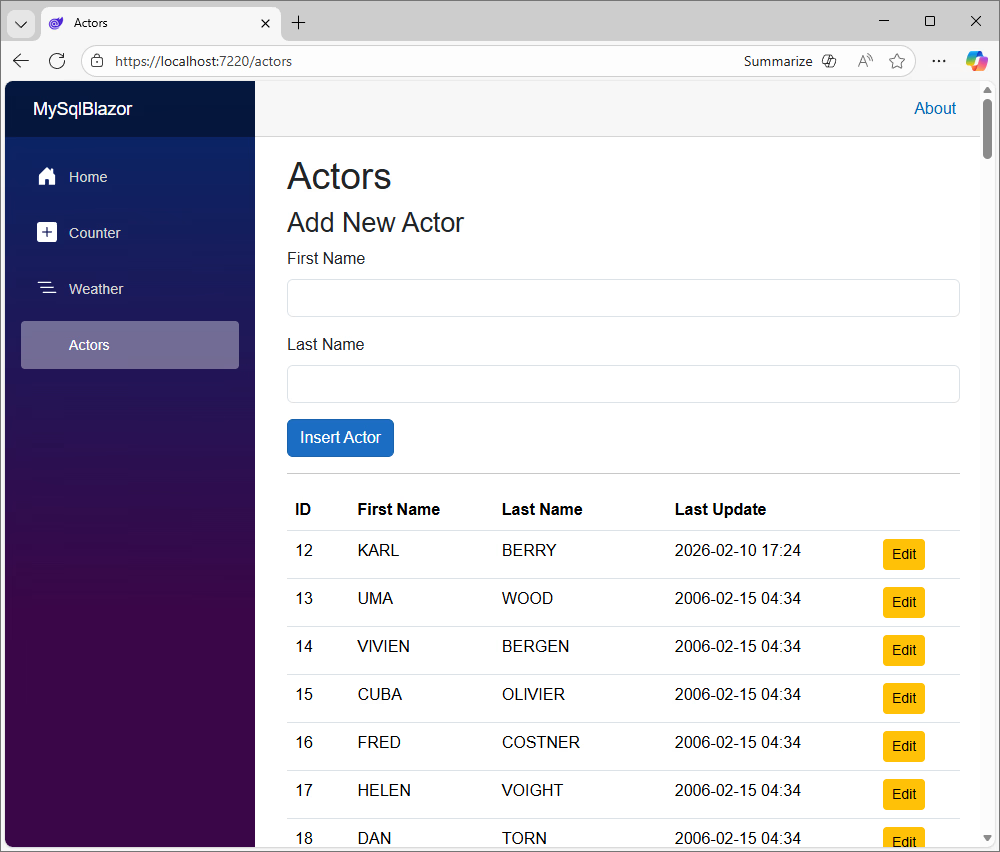
Insert data
Now we will enhance the application by adding the ability to create new records. This involves adding an EditForm to the UI and implementing the corresponding logic
to execute an INSERT SQL command.
Update the UI (Actors.razor)
Modify Actors.razor to add a dedicated EditForm for creating new actors.
@code {
private List<Actor>? actors;
private Actor newActor = new(); // Object to hold new actor data for addingprivate Actor actorToEdit = new(); // Object to hold actor data for editing (initialized later)protectedoverrideasync Task OnInitializedAsync()
{
await LoadActors();
}
privateasync Task LoadActors()
{
actors = await ActorSvc.GetAllActorsAsync();
}
privateasync Task HandleInsert()
{
await ActorSvc.InsertActorAsync(newActor);
newActor = new(); // Clear the form after insertawait LoadActors(); // Refresh the list
}
// HandleUpdate, SetActorForUpdate, and ClearForm methods will be added/modified in Step 3
}
The application can now add new records to the database. Users can input data into the form, press the Insert Actor button, and see the table update immediately with the new entry.
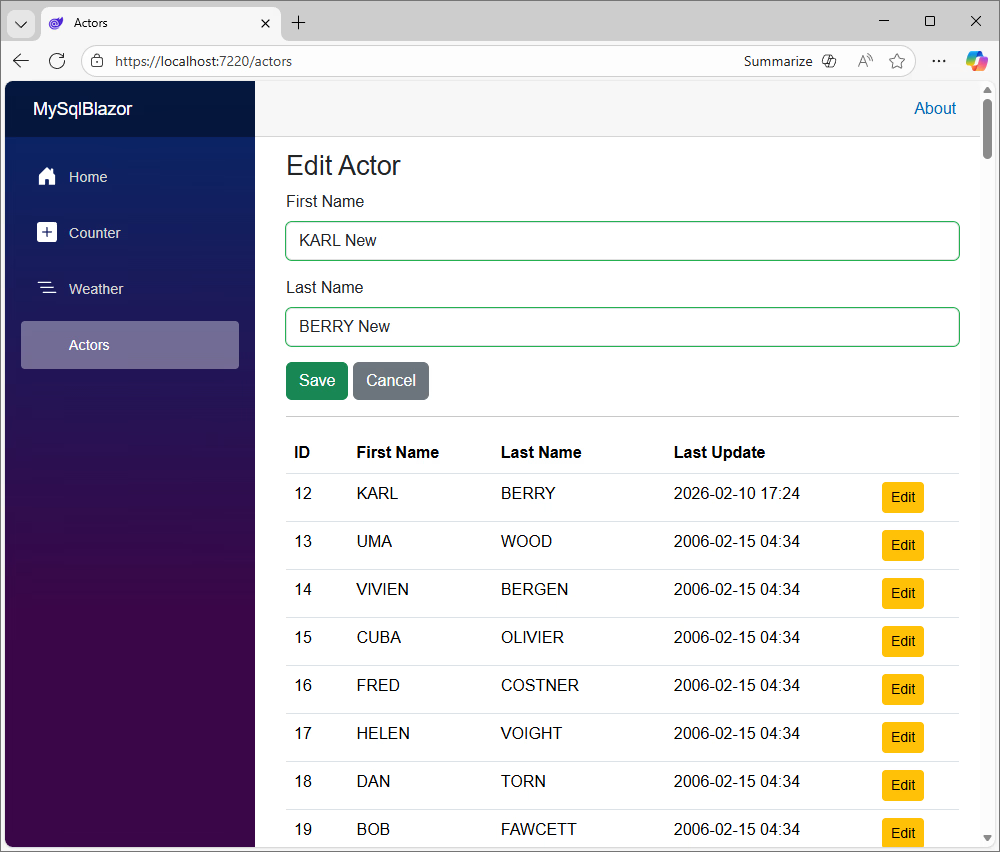
Update data
In this step, we will implement the ability to edit existing records. This requires adding Edit buttons to our table and logic to populate the form for editing. We will reuse the same EditForm.
Update the UI (Actors.razor)
Modify Actors.razor to include a conditional EditForm for updating actors and add Edit and Delete buttons to each row in the table.
@code {
private List<Actor>? actors;
private Actor newActor = new(); // For new actor inputprivate Actor actorToEdit = new(); // For editing existing actorsprotectedoverrideasync Task OnInitializedAsync()
{
await LoadActors();
}
privateasync Task LoadActors()
{
actors = await ActorSvc.GetAllActorsAsync();
}
privateasync Task HandleInsert()
{
await ActorSvc.InsertActorAsync(newActor);
newActor = new(); // Clear the form after insertawait LoadActors();
}
privatevoidSetActorForUpdate(Actor actor)
{
// Create a copy to avoid modifying the list directly
actorToEdit = new Actor
{
ActorId = actor.ActorId,
FirstName = actor.FirstName,
LastName = actor.LastName
};
}
privateasync Task HandleUpdate()
{
await ActorSvc.UpdateActorAsync(actorToEdit);
ClearForm();
await LoadActors(); // Refresh the list
}
privatevoidClearForm()
{
actorToEdit = new(); // Reset actorToEdit for next edit/add
}
// HandleDelete method will be added in Step 4
}
The application now supports editing data. Users can click Edit on an actor, change their details in the form, and save the changes to the database.
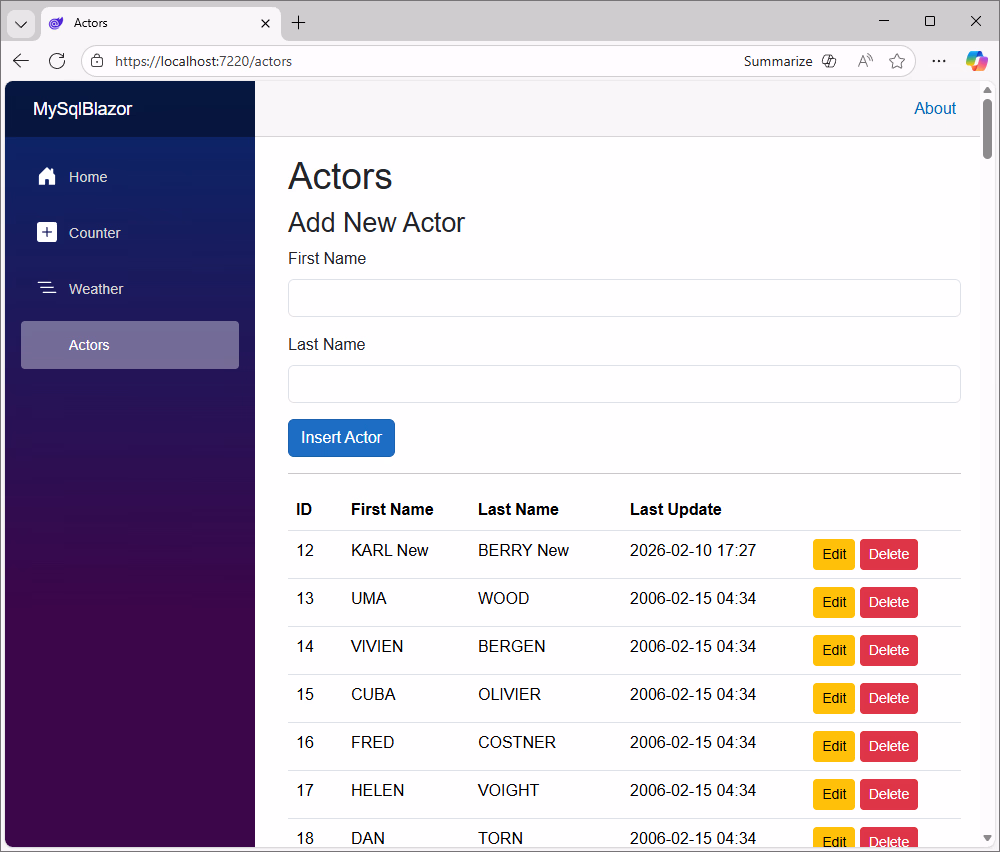
Delete data
In the final step, we will implement the delete functionality. This involves adding a Delete button and using Blazor's JavaScript Interop feature to show a confirmation dialog.
Update the UI (Actors.razor)
Add a Delete button to each row in the actor table.
// Data/ActorService.cs// ... (add this async method inside the ActorService class)publicasync Task DeleteActorAsync(int actorId)
{
usingvar connection = new MySqlConnection(_connectionString);
await connection.OpenAsync();
usingvar command = new MySqlCommand("DELETE FROM actor WHERE actor_id = :actor_id", connection);
command.Parameters.AddWithValue(":actor_id", actorId);
await command.ExecuteNonQueryAsync();
}
Update the UI Logic (Actors.razor)
Inject the IJSRuntime service and add the HandleDelete method to the @code block. This method will use JavaScript to ask the user for confirmation before deleting.
@code {
private List<Actor>? actors;
private Actor newActor = new(); // For new actor inputprivate Actor actorToEdit = new(); // For editing existing actorsprotectedoverrideasync Task OnInitializedAsync()
{
await LoadActors();
}
privateasync Task LoadActors()
{
actors = await ActorSvc.GetAllActorsAsync();
}
privateasync Task HandleInsert()
{
await ActorSvc.InsertActorAsync(newActor);
newActor = new(); // Clear the form after insertawait LoadActors();
}
privatevoidSetActorForUpdate(Actor actor)
{
// Create a copy to avoid modifying the list directly
actorToEdit = new Actor
{
ActorId = actor.ActorId,
FirstName = actor.FirstName,
LastName = actor.LastName
};
}
privateasync Task HandleUpdate()
{
await ActorSvc.UpdateActorAsync(actorToEdit);
ClearForm();
await LoadActors(); // Refresh the list
}
privatevoidClearForm()
{
actorToEdit = new(); // Reset actorToEdit for next edit/add
}
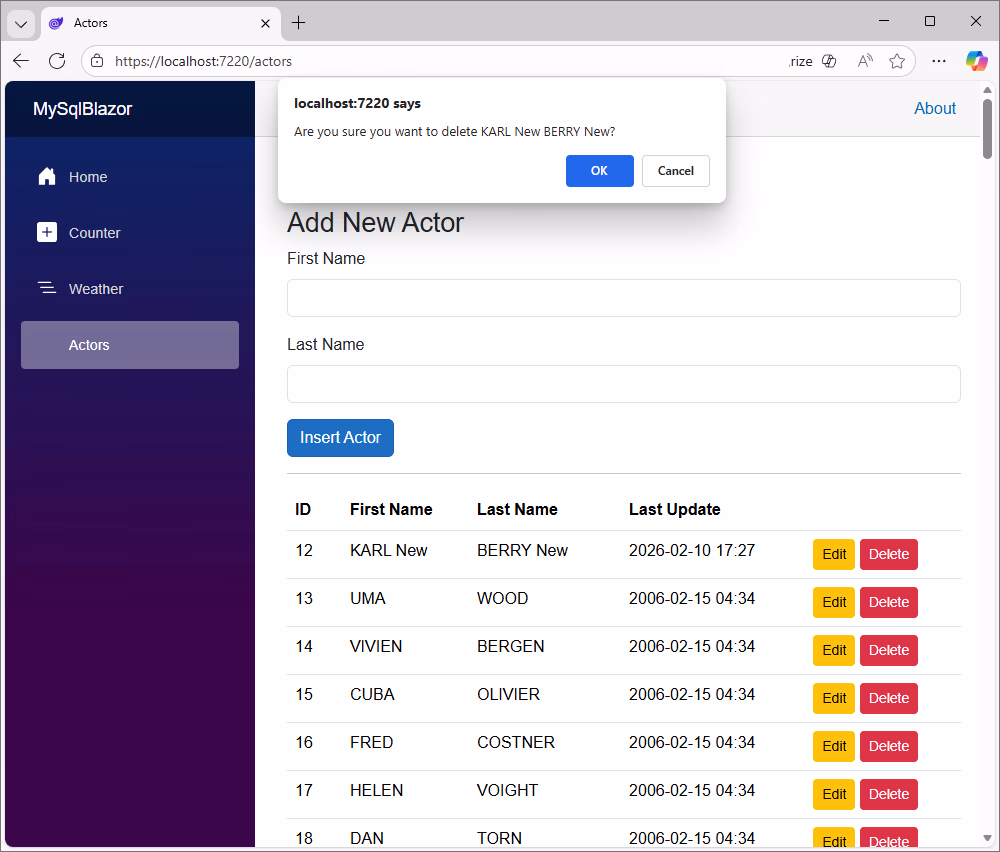
privateasync Task HandleDelete(Actor actor)
{
bool confirmed = await JSRuntime.InvokeAsync<bool>("confirm", $"Are you sure you want to delete {actor.FirstName}{actor.LastName}?");
if (confirmed)
{
await ActorSvc.DeleteActorAsync(actor.ActorId);
await LoadActors(); // Refresh the list
}
}
}
You have now completed the Blazor application. It has full CRUD functionality, allowing users to read, create, update, and delete records from the MySQL database in a modern web interface.
Video tutorial: How to Connect a .NET Blazor Application to a MySQL Database
Conclusion
Now you know how to connect a Blazor application to a MySQL database using dotConnect for MySQL.
You know how to create new tables, insert data into them, read, update, and delete records. Which means you are all set to try dotConnect for MySQL in your real-life project.
Simply download dotConnect for MySQL for a free 30-day trial and give it a go today!
FAQ
How do you install and activate dotConnect for MySQL in a .NET project?
Install dotConnect for MySQL via the EXE installer or by adding the Devart.Data.MySql NuGet package to your project, then obtain your personal activation key from your Devart Customer Portal and include it in the connection string via the License key parameter for a working connection.
How do you create a connection to MySQL using dotConnect in C#?
Define a connection string that includes host, user ID, password, database, and the License key value, then create a MySqlConnection instance with this string and call Open() for it inside a try-catch block to test and handle connection errors.
How do you enable SSL/TLS for secure MySQL connections with dotConnect?
Add Protocol=SSL and specify the SSL CA Cert, SSL Cert, and SSL Key file paths in the connection string, then open the MySqlConnection connection to establish an encrypted SSL/TLS connection.
Can you connect to MySQL using Entity Framework Core and dotConnect?
Yes, you can either use Entity Developer to visually create an EF Core model from the database or run Scaffold-DbContext with a dotConnect connection string (including the License key) to generate the DbContext and entity classes.
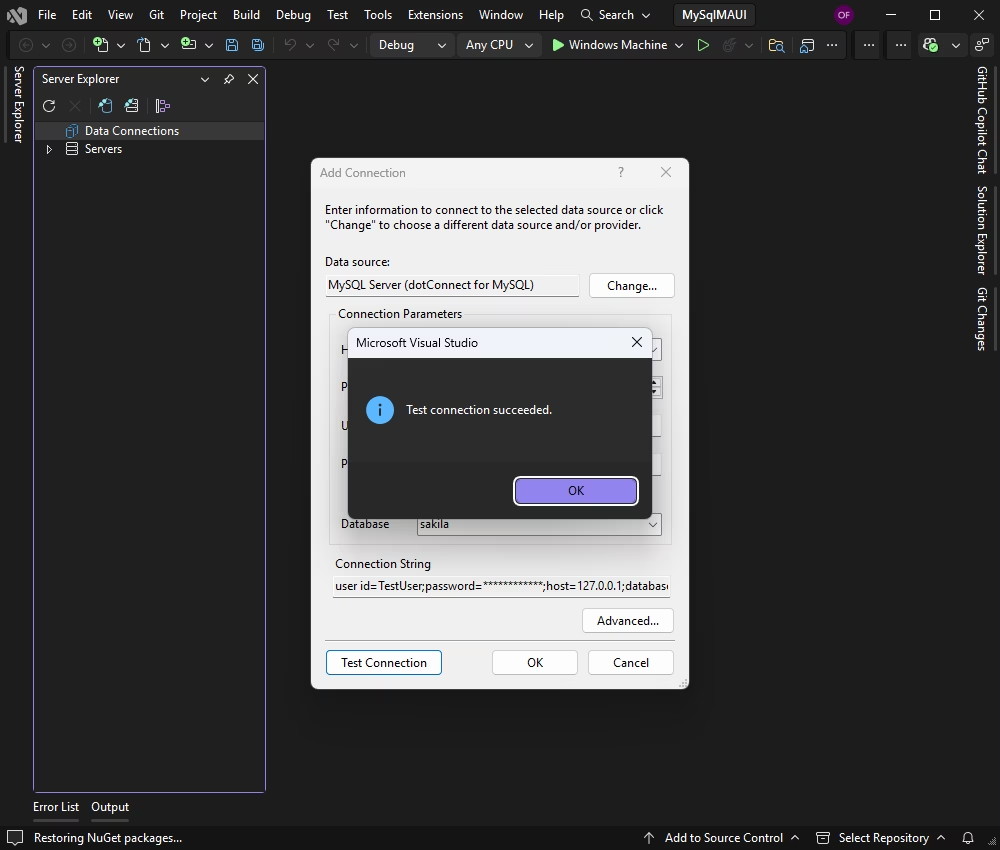
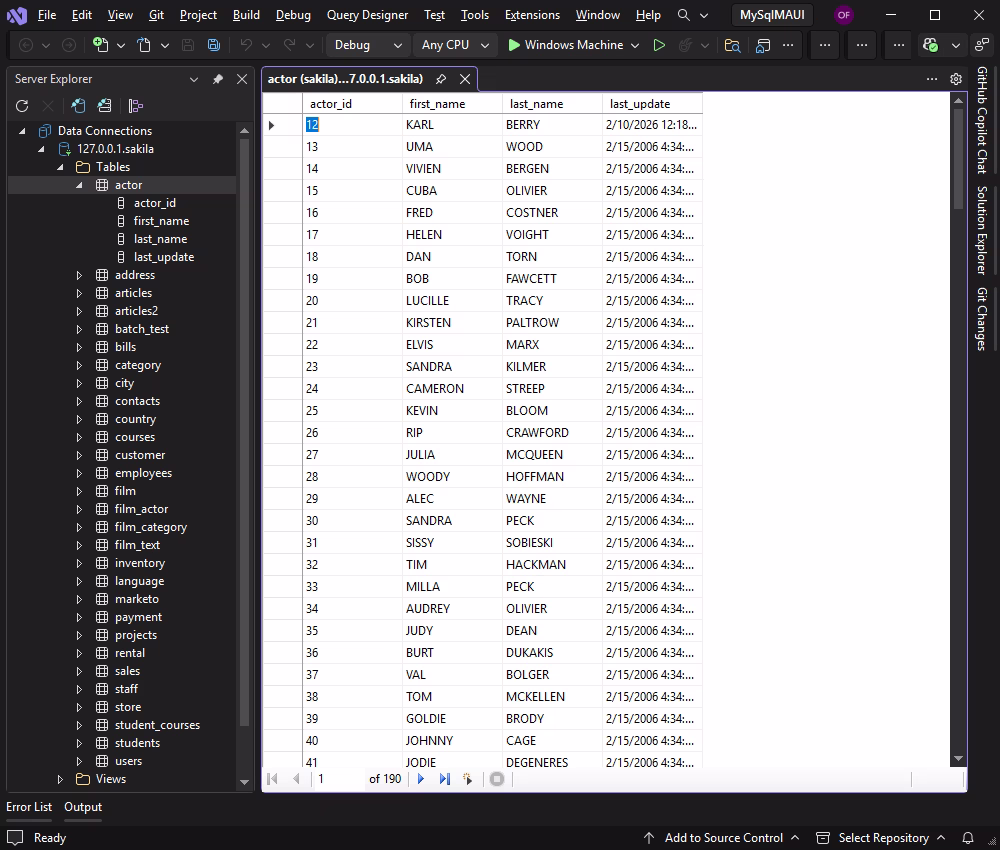
Is it possible to connect to MySQL using Visual Studio Server Explorer with dotConnect?
Yes, in Visual Studio Server Explorer, you add a new Data Connection, choose dotConnect for MySQL as the data provider, enter your MySQL server credentials, test the connection, and then browse and manage data directly from the IDE.
I'm a technical content writer who loves turning complex topics — think SQL, connectors, and backend chaos–into content that actually makes sense (and maybe even makes you smile). I write for devs, data folks, and curious minds who want less fluff and more clarity. When I'm not wrangling words, you'll find me dancing salsa, or hopping between cities.