Getting Started With Devart ODBC Driver for Google BigQuery
ODBC is a standard API that enables applications to access data from databases and cloud services using SQL, without requiring knowledge of the underlying data source.
Devart ODBC Driver for Google BigQuery is a high-performance connectivity solution for Google BigQuery on Windows. It enables ODBC-compliant tools, including BI and reporting platforms, IDEs, spreadsheets, and scripting languages, to connect to BigQuery and work with its data using standard SQL. The Driver communicates with BigQuery directly over HTTPS and can also operate through a proxy server when direct access is unavailable.
This guide walks you through installing the Driver, configuring an ODBC data source, and testing the connection to Google BigQuery.
Prerequisites
Before you begin, ensure that your environment meets the requirements for connecting to Google BigQuery through the Devart ODBC Driver:
- OS: Any 32-bit or 64-bit version of Windows (Windows Vista and higher), including Windows Terminal Server, that supports .NET Framework 4.5
- .NET Framework 4.5 or later
- Google Cloud account with BigQuery API enabled
- BigQuery project ID and dataset ID from the Google Cloud BigQuery Console
- Google account with project access or Google Service Account
Installation process
Installing the Devart ODBC Driver for Google BigQuery is straightforward. All you need to do is download it to your computer and follow the installation wizard's instructions.
1. Download the ODBC Driver for Google BigQuery from the Devart website, open it, and click Next.
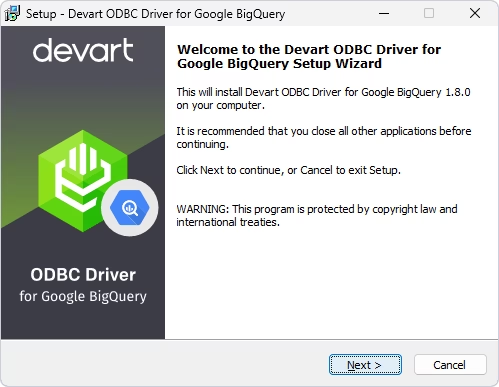
The .exe file enables a customizable and flexible installation process that can include checking for and installing additional components and dependencies. The .msi installer is more standardized and only installs the Driver.
Choose the .exe file for manual installations on individual computers. For enterprise deployments and automated flows, the .msi installer may be a more suitable choice.
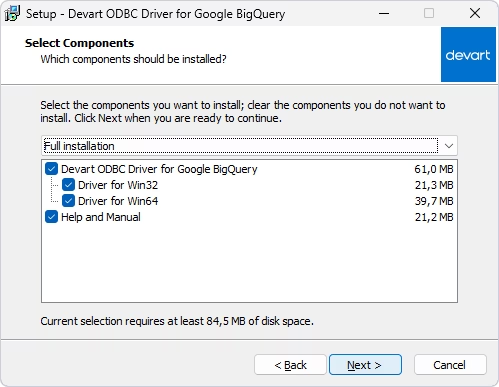
2. Follow the wizard's steps: accept the license agreement and select the destination folder for the Driver. On the Select Components page, choose the 32-bit, 64-bit, or both versions of the Driver, as required by your applications, and click Next. Optionally, install Help and Manual.
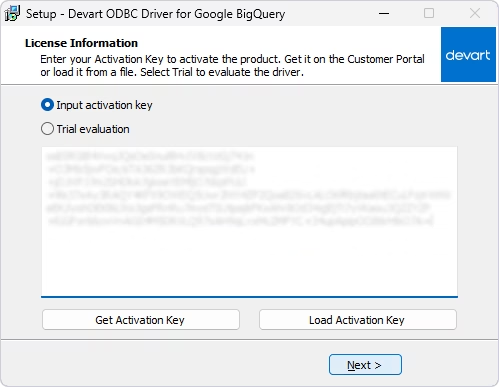
3. To activate the Driver, select Input activation key and enter your key. You can find it in the registration email or your Customer Portal. To do this, click Get Activation Key.
If the activation key is saved on your computer, click Load Activation Key and select the corresponding file.
For Trial evaluation, no activation key is required.
4. Complete the installation by clicking Next to proceed and pressing Finish.
The ODBC Driver for Google BigQuery can also be installed using silent installation on Windows.
Configuring an ODBC data source
After installing the Devart ODBC Driver for Google BigQuery, you need to create a Data Source Name (DSN) for your ODBC connection and verify the connection details. Follow these steps to configure the Driver on Windows.
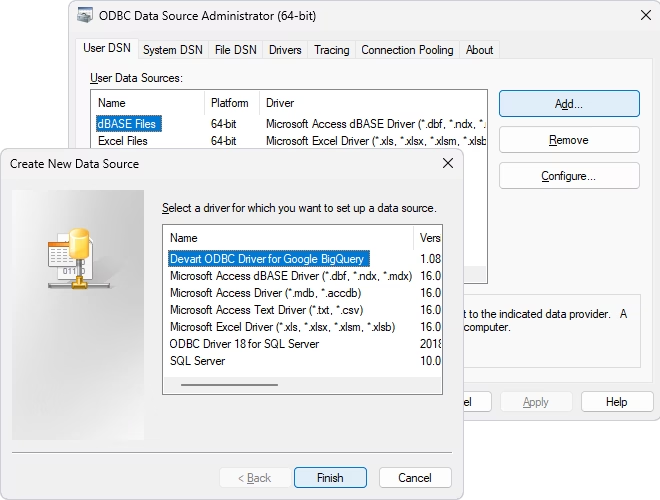
1. Enter ODBC Data Sources in the Windows Search field and find the ODBC Data Source Administrator that matches the bitness of your third-party application. Open the ODBC Data Source Administrator, select User DSN or System DSN, and click Add. In the dialog box, select Devart ODBC Driver for Google BigQuery and click Finish.
2. In the setup dialog, enter your Project ID and Dataset ID.
3. To authenticate, you can use either your User Account or your Service Account.
If you are authenticating with your User Account:
- Select User Account in the Authentication field and click Sign in to Google BigQuery to obtain the Refresh Token.
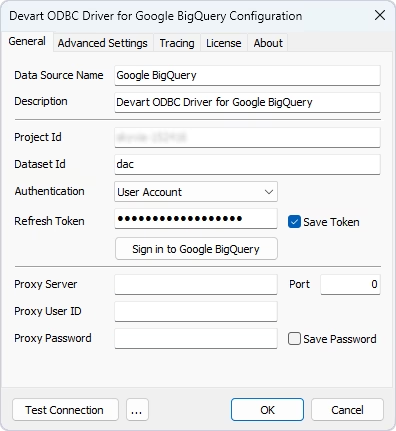
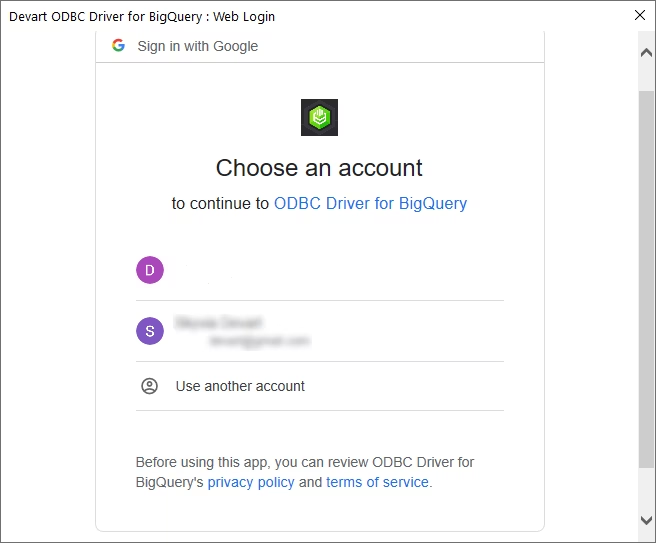
- Sign in to your Google account associated with your BigQuery account.
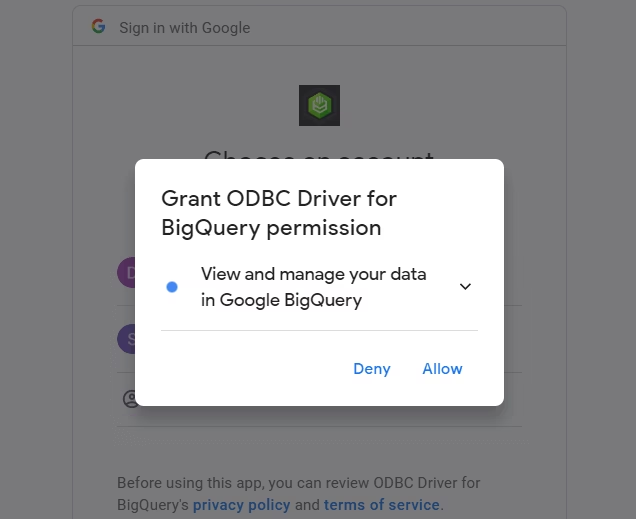
- Grant the Driver permission to view and manage BigQuery data.
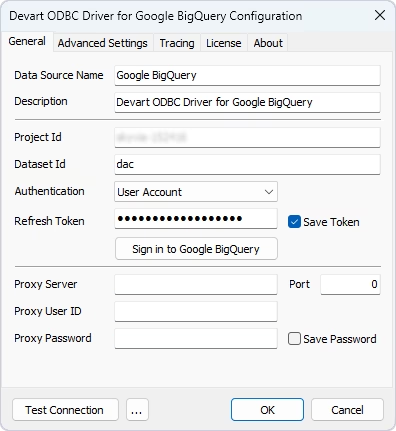
- The Refresh Token field will be filled in automatically. Select Save Token to store it.
If you are using your Service Account:
- Select Service Account in the Authentication field and click Private Key JSON.
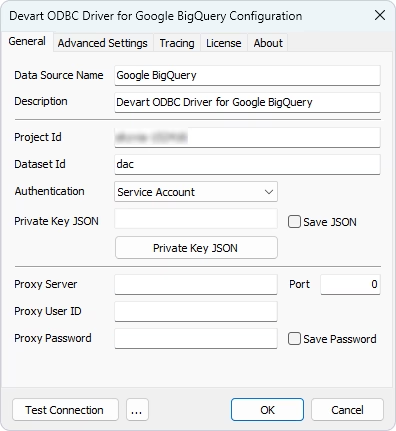
- Paste the contents of your service account key or click Load to import it from a JSON file, then click Close. You can generate the private key in the Google Cloud Console under IAM & Admin > Service Accounts.
4. Once the connection settings are configured, click Test Connection in the configuration dialog.
If all parameters are valid, the Driver displays a success message.
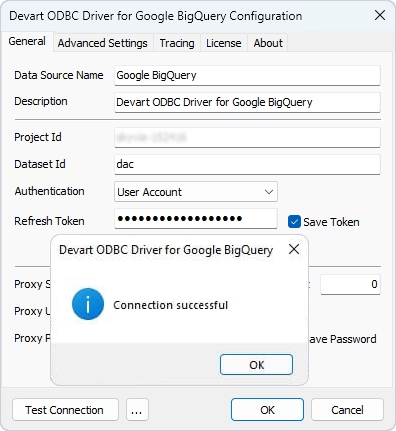
5. Click OK to save the DSN settings.
Troubleshooting
If the connection fails, check the following common causes:
- Invalid or expired refresh token: Re-authenticate by clicking Sign in to Google BigQuery and ensure Save Token is enabled.
- Incorrect Project ID or Dataset ID: Verify the values in the Google Cloud Console. Note that the Project ID is different from the Project Name.
- BigQuery API not enabled: In the Google Cloud Console, navigate to APIs & Services and ensure that the BigQuery API is enabled for your project.
- Insufficient permissions: Ensure that the authenticated User or Service Account has the required BigQuery permissions, such as those associated with BigQuery Data Viewer and BigQuery Job User roles.
- Network or proxy restrictions: If your environment uses a proxy server, configure the proxy settings and credentials in the connection dialog. Also, verify that outbound HTTPS connections to Google Cloud services are allowed.
- Invalid OAuth credentials: Verify that the Client ID and Client Secret (if used) are valid and correspond to the correct Google Cloud project.
- Incorrect authentication method: Ensure that the selected authentication method (OAuth, Service Account, etc.) matches your Google Cloud configuration.
- Service Account configuration issues: When using a Service Account, verify that the JSON key file is valid and that the Service Account has access to the target project and datasets.
- Dataset or table access restrictions: Confirm that the authenticated account has access to the specified dataset and its objects.
- System date and time are incorrect: OAuth authentication may fail if the local system clock differs significantly from the actual time.
More information
For more advanced setup details, connection string parameters, and usage instructions, refer to the official Devart ODBC documentation.