Getting started with Devart ODBC Driver for Azure Synapse Analytics
To connect ODBC-compatible applications to Azure Synapse Analytics, you need an ODBC driver and access to the Azure Synapse Analytics server.
Devart ODBC Driver for Azure Synapse Analytics provides direct connectivity to Azure Synapse Analytics on Windows, macOS, and Linux. It enables BI and reporting tools, IDEs, spreadsheets, programming languages, and other ODBC-compatible applications to access Azure Synapse Analytics data using standard SQL.
This guide shows you how to install and activate the Driver, configure an ODBC data source (DSN), connect to Azure Synapse Analytics using a DSN or connection string, and troubleshoot common connection issues.
Quick start: Connect to Azure Synapse Analytics with ODBC
To connect to Azure Synapse Analytics using the Devart ODBC Driver:
- Download and install the Driver for Windows, macOS, or Linux.
- Activate the Driver using your activation key, or continue with the 30-day trial. On Windows and macOS this is a step in the installer; on Linux, run the activator afterwards.
- Create an ODBC data source (DSN) and select Devart ODBC Driver for Azure Synapse Analytics.
- Configure the connection by specifying the Azure Synapse Analytics server, port, database, user ID, and password.
- Use the DSN in your ODBC-compatible application to connect to Azure Synapse Analytics and work with its data.
The following sections provide detailed installation and configuration instructions for each supported operating system.
Prerequisites
Before you begin, make sure your environment meets the following requirements:
- Operating system: 32-bit or 64-bit Windows (including Windows Terminal Server), macOS x64 or ARM (Apple silicon), Linux x86 and x64.
- ODBC driver manager: Included with Windows. On macOS, install iODBC. On Linux, install unixODBC.
- Connection details: Azure Synapse Analytics server URL and valid account credentials.
- DSN configuration tool (optional): On macOS and Linux, you can use Devart ODBC Administrator to create and manage data sources through a graphical interface. The tool is distributed separately from the Driver and is available on the Devart website. Alternatively, configure data sources manually in the odbc.ini file.
- Activation key: A purchased version of the Driver requires an activation key. For evaluation purposes, you can use the trial version, which is valid for 30 days from installation.
- Administrator rights: Required to install the Driver on all supported operating systems.
For a complete list of supported database servers, operating systems, and third-party tools, see the ODBC Driver for Azure Synapse Analytics compatibility page.
Install the ODBC Driver
Installing the Devart ODBC Driver for Azure Synapse Analytics is straightforward. All you need to do is download the package for your operating system and follow the installation instructions.
Install the Driver on Windows
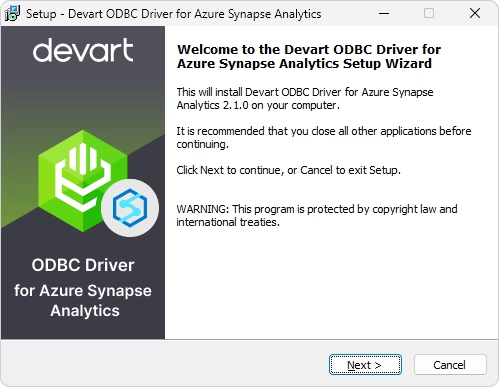
1. Download the ODBC Driver for Azure Synapse Analytics from the Devart website, open it, and click Next.
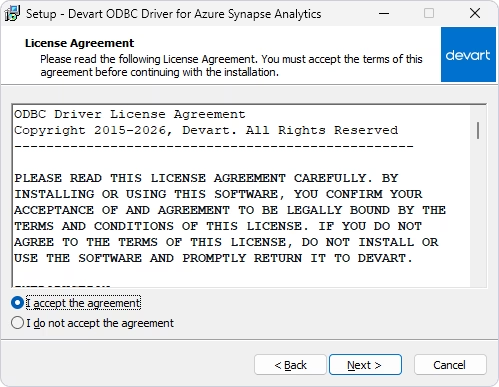
2. Read the License Agreement, select I accept the agreement, and click Next.
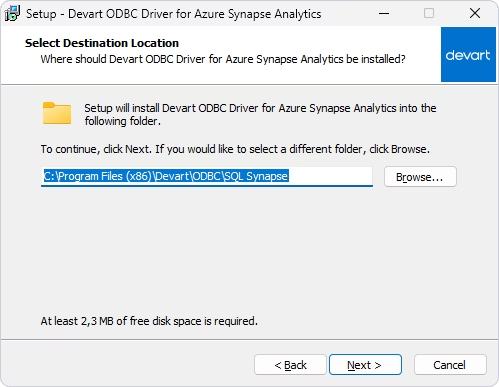
3. On the Select Destination Location page, keep the default folder or click Browse to choose another one, and click Next.
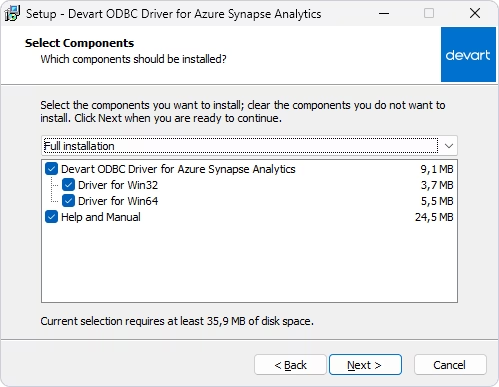
4. On the Select Components page, select the components to install, then click Next.
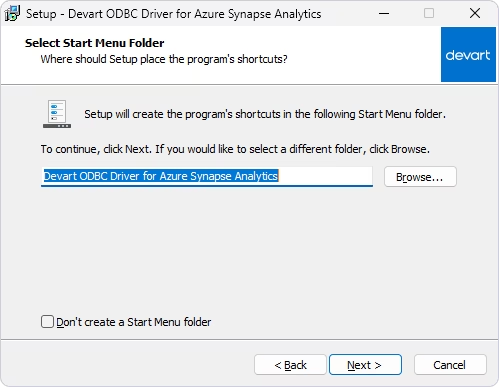
5. On the Select Start Menu Folder page, specify the folder for the Driver shortcuts. To skip creating a Start Menu folder, select Don't create a Start Menu folder. Click Next, then click Install.
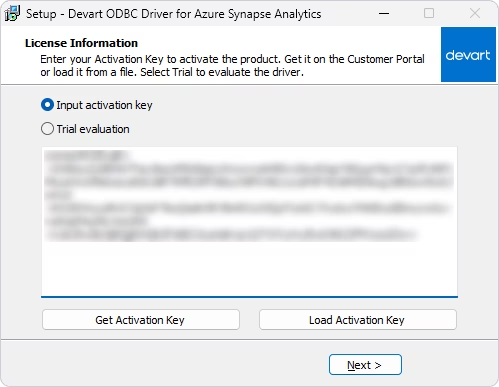
6. On the License Information page, select Input activation key and enter your key. You can find it in the registration email or your Customer Portal. To open the Customer Portal, click Get Activation Key.
If the activation key is saved on your computer, click Load Activation Key and select the corresponding file.
To evaluate the Driver without a purchased key, select Trial evaluation.
7. Click Next, then click Finish to complete the installation.
Install the Driver on macOS
1. Download the ODBC Driver for Azure Synapse Analytics PKG file from the Devart website and double-click the package to run it.
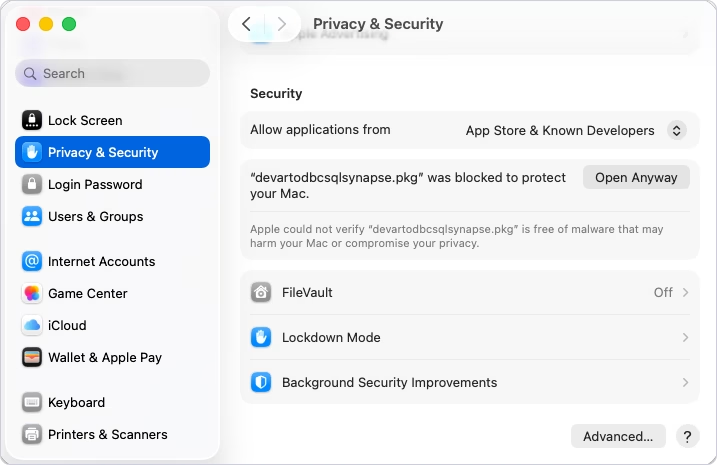
macOS may block the installation package because Apple cannot verify it. If this happens, allow the package manually:
- Dismiss the warning.
- Open System Settings > Privacy & Security. On macOS 12 and earlier, open System Preferences > Security & Privacy > General.
- Find the message about the blocked package, and click Open Anyway.
- Confirm that you want to open the package, and enter your administrator password if prompted.
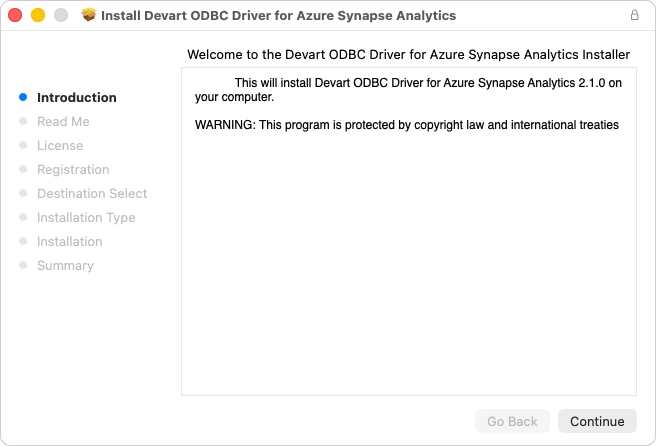
2. In the installer, click Continue.
3. Read the license agreement and click Agree.
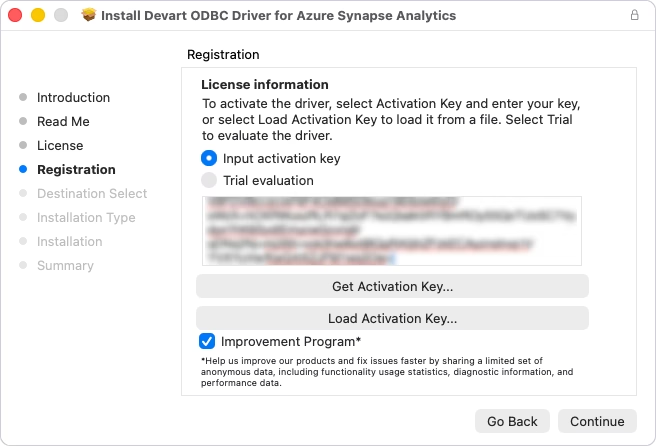
4. On the Registration page, select Input activation key and enter your key, or click Load Activation Key and select the file that contains it. To evaluate the Driver without a purchased key, select Trial evaluation. Click Continue.
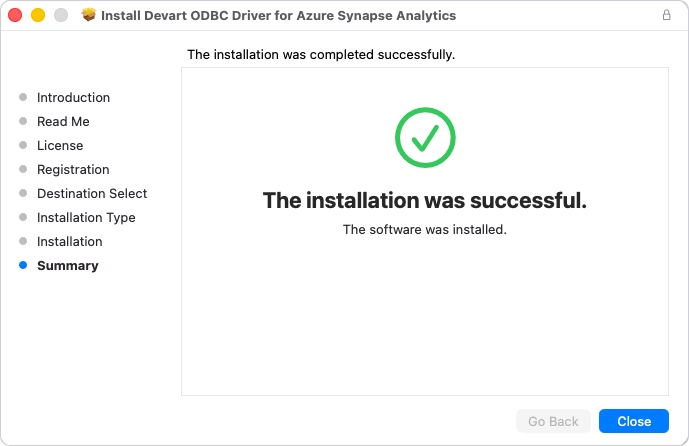
5. On the Installation Type page, click Install. To choose which components to install, click Customize first. When the installation finishes, click Close.
You can also activate the Driver later from the Terminal. Navigate to /Library/ODBC/Devart/SqlSynapse and run the activator with your key.
Install the Driver on Linux
On Linux, the Driver requires the unixODBC driver manager, which must be installed separately. Follow the track that matches the package format of your distribution.
DEB-based distributions, such as Ubuntu and Debian
The commands below apply to Ubuntu 26.04 LTS, 24.04 LTS, and 22.04 LTS.
1. Install the unixODBC driver manager.
2. Download the DEB package from the Devart website.
3. Open a terminal, navigate to the folder that contains the package, and install the package and its required dependencies.
4. Activate the Driver. Navigate to the folder where it is installed, /usr/share/devart/odbcsqlsynapse, and run the activator with your key.
5. Verify that the Driver is registered.
The output should include [Devart ODBC Driver for Azure Synapse Analytics].
Then verify that the DSN created during installation is registered.
The output should include the automatically created DSN.
RPM-based distributions, such as CentOS, RHEL, and Fedora
The commands below apply to CentOS Stream 9.
1. Install the unixODBC driver manager:
2. Download the RPM package.
3. Open a terminal, navigate to the folder that contains the package, and install the package and its required dependencies.
4. Activate the Driver. Navigate to the installation folder and run the activator with your key:
5. Verify that the Driver is registered:
The output should include [Devart ODBC Driver for Azure Synapse Analytics].
Then verify that the DSN created during installation is registered:
The output should include the automatically created DSN.
Configure an ODBC data source
In this guide, you create a Data Source Name (DSN) for the ODBC connection and verify the connection details. A DSN stores connection settings, such as the server URL and credentials that applications use to connect to Azure Synapse Analytics. Applications can also connect without a DSN, by passing the same parameters in a connection string.
Configure a DSN on Windows
1. In Windows Search, enter ODBC Data Sources, and open the ODBC Data Source Administrator that matches the bitness of your application.
2. Select the User DSN, System DSN, or File DSN tab, and click Add:
- User DSN — Available only to the user who creates it.
- System DSN — Available to all users on the computer.
- File DSN — Stores connection settings in a file that can be shared between computers where the required ODBC driver is installed.
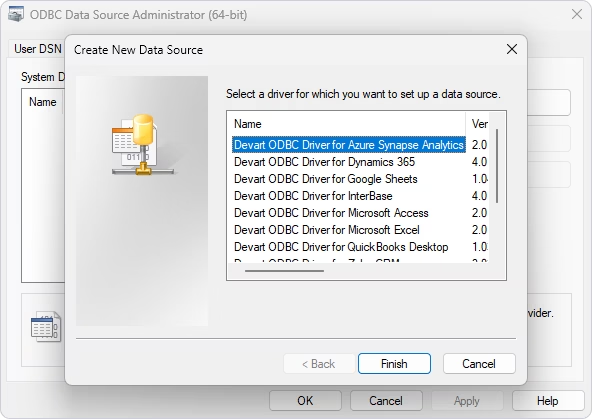
3. In the Create New Data Source dialog, select Devart ODBC Driver for Azure Synapse Analytics, and click Finish.
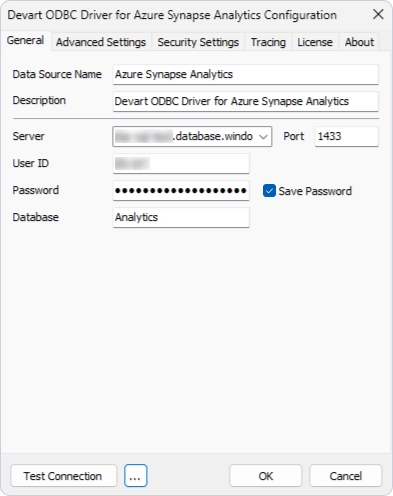
4. In the Devart ODBC Driver for Azure Synapse Analytics Configuration dialog, enter a Data Source Name and an optional Description. In the Server field, enter the URL of the Azure Synapse Analytics instance to which you are going to connect. Specify the Port for connecting to the Azure Synapse Analytics server (the default port number is 1433).
Provide your Azure Synapse Analytics user ID and password. In the Database field, enter the name of the database you need to access.
5. Optional: Click Test Connection to verify the connection settings.
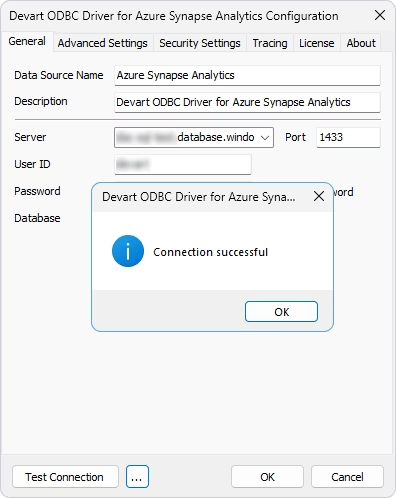
6. Click OK to save the DSN settings.
To secure the connection with an SSH tunnel or to fine-tune metadata, timeout, and compatibility behavior, use the Security Settings and Advanced Settings tabs of the same dialog. For details, see Secure connections.
Configure a DSN on macOS
DSNs are managed in Devart ODBC Administrator, a graphical tool that is distributed separately from the Driver. Download and install it before you continue.
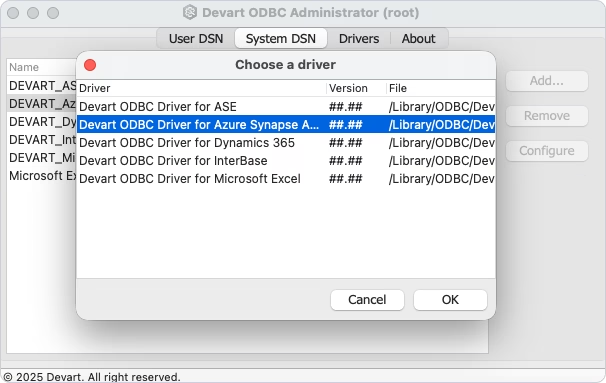
1. Open Devart ODBC Administrator (root), select the System DSN tab (recommended), and click Add. Enter your password when prompted.
2. In the Choose a driver dialog, select Devart ODBC Driver for Azure Synapse Analytics and click OK.
3. In the Devart ODBC Driver for Azure Synapse Analytics Configuration dialog that opens, enter a Data Source Name and an optional Description. In the Server field, enter the URL of the Azure Synapse Analytics instance to which you are going to connect. Specify the Port for connecting to the Azure Synapse Analytics server (the default port number is 1433).
Provide your Azure Synapse Analytics user ID and password. In the Database field, enter the name of the database you need to access.
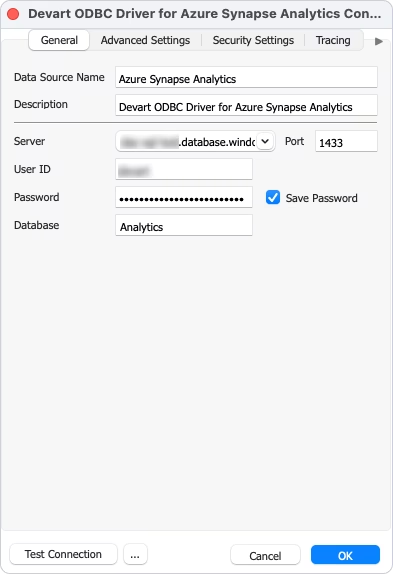
4. Optional: Click Test Connection to verify the connection details.
5. Click OK to save the DSN settings.
Alternatively, edit the odbc.ini file directly. The installation creates a sample DSN named DEVART_AZURESYNAPSEANALYTICS that you can adjust. Use /Library/ODBC/odbc.ini for a system-wide DSN or ~/.odbc.ini for a user-specific one:
[DEVART_AZURESYNAPSEANALYTICS]
Driver=Devart ODBC Driver for Azure Synapse Analytics
Server=your_azure_synapse_analytics_server_url
Port=your_azure_synapse_analytics_port
User ID=your_azure_synapse_analytics_user_id
Password=your_azure_synapse_analytics_password
Database=your_azure_synapse_analytics_database_name
Save and close the file.
Configure a DSN on Linux
As on macOS, Devart ODBC Administrator is distributed separately from the Driver. Download and install it from the Devart website before you continue.
1. Open Devart ODBC Administrator (root), select the System DSN tab, and click Add.
2. In the Choose a driver dialog, select Devart ODBC Driver for Azure Synapse Analytics and click OK.
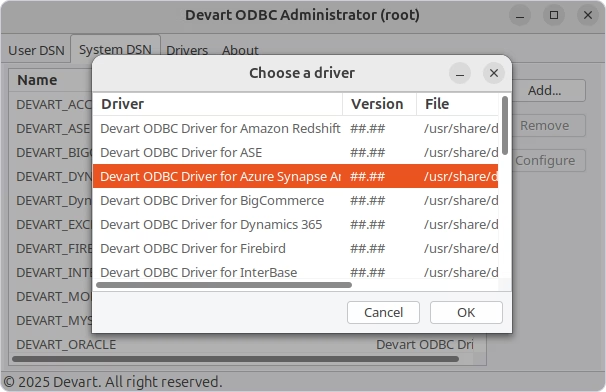
3. Enter a Data Source Name, an optional Description, and the connection parameters: the Azure Synapse Analytics server address, port number, your user ID, and password. In the Database field, specify the database you need to access.
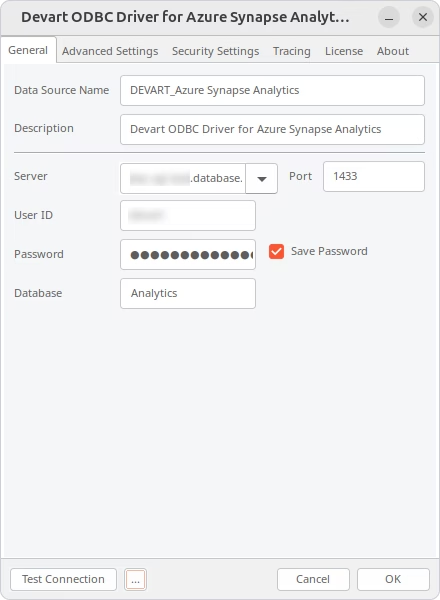
4. Optional: Click Test Connection to verify the connection settings.
5. Click OK to save the DSN settings.
Alternatively, define the DSN in /etc/odbc.ini. The installation creates a sample DSN named DEVART_AZURESYNAPSEANALYTICS that you can adjust:
[DEVART_AZURESYNAPSEANALYTICS]
Driver=Devart ODBC Driver for Azure Synapse Analytics
Server=your_azure_synapse_analytics_server_url
Port=your_azure_synapse_analytics_port
User ID=your_azure_synapse_analytics_user_id
Password=your_azure_synapse_analytics_password
Database=your_azure_synapse_analytics_database_name
To verify the data source from a terminal, connect to it with isql, the command-line tool provided by unixODBC. Replace <your_dsn_name> with the name of your DSN:
Connect to Azure Synapse Analytics using a connection string
In addition to using a DSN, you can connect to Azure Synapse Analytics by specifying the connection parameters directly in an ODBC connection string. This type of connection is known as a DSN-less connection.
The following table summarizes when to use each connection method:
| Connection method | How it works | Best for |
|---|---|---|
| DSN | Stores the connection settings in a configured ODBC data source. Applications connect by specifying the DSN name. | Desktop applications, BI and reporting tools, and reusable connections configured on a client computer |
| DSN-less | Specifies the Driver, server, credentials, and other settings directly in a connection string. No DSN needs to be created beforehand. | Applications, scripts, and automated deployments where connection settings are managed programmatically |
For a DSN-less connection, use the following connection string as a starting point:
DRIVER={Devart ODBC Driver for Azure Synapse Analytics};Server=your_server_address;Port=your_port_number;Database=your_database;User ID=your_user_id;Password=your_passwordReplace the placeholder values with your connection details:
- Server — the address of the Azure Synapse Analytics server.
- Port — the port number for the connection. The default port is 1433.
- User ID — your Azure Synapse Analytics username.
- Password — your Azure Synapse Analytics password.
- Database — the name of the database.
You can also specify advanced connection parameters to configure connection timeout, string types, ODBC behavior, and other Driver settings.
For the complete list of supported options, see Azure Synapse Analytics ODBC connection string parameters.
For examples of using a connection string in different programming languages, see Using Azure Synapse Analytics in third-party tools.
Troubleshooting
If you cannot connect to Azure Synapse Analytics through the Devart ODBC Driver, use the following solutions to resolve common connection issues.
"Product is not activated or has been deactivated" error
This error occurs when the Driver has not been activated or its activation is no longer valid. Activation is required for both purchased and trial versions.
- Windows: Open the DSN configuration dialog, go to the License tab, click Input Activation Key, and enter your activation key.
- macOS and Linux: In Devart ODBC Administrator, select the DSN and click Configure. On the License tab of the configuration dialog, click Input Activation Key and enter your activation key. Alternatively, run the sqlsynapseodbcactivator utility from the Driver installation folder with your activation key.
After activation, test the connection again.
ODBC data source not found or Driver not available
If your application cannot find the DSN or the Devart ODBC Driver for Azure Synapse Analytics, check the application and Driver bitness.
A 32-bit application cannot use a DSN created in the 64-bit ODBC Data Source Administrator, and a 64-bit application cannot use a DSN created in the 32-bit administrator.
Make sure that:
- The DSN is created in the ODBC administrator that matches your application's bitness.
- The corresponding 32-bit or 64-bit version of the Driver is installed.
- The application is configured to use the correct DSN.
Cannot connect to the Azure Synapse Analytics server
If the Driver cannot reach the Azure Synapse Analytics server, verify the server and network settings:
- Make sure the Server field contains the correct server name.
- Check that the DSN configuration contains the correct port number.
- Verify that the Azure Synapse Analytics server is reachable from the client computer.
- Verify that the target database exists.
Authentication fails
If the Azure Synapse Analytics server is reachable but authentication fails, check the connection credentials:
- Verify the User ID and Password.
- Make sure that SQL authentication is not disabled on your Azure Synapse Analytics server.
- Ensure that the authenticated user has access to the Azure Synapse Analytics environment.
- If Save Password is cleared, the application must provide the password at runtime. Applications that cannot display a password prompt may fail to connect.
Azure Synapse Analytics connection times out
If the server is available but the connection takes too long to establish, increase Connection Timeout on the Advanced Settings tab. The default connection timeout is 15 seconds.
Also check the network connection and make sure the Azure Synapse Analytics server is not overloaded or temporarily unavailable.
Additional resources
After you install and configure Devart ODBC Driver for Azure Synapse Analytics, use the following resources to continue setting up and working with your connections:
- Connection string parameters — Browse the complete list of connection options for configuring server access, timeouts, IP version, ODBC behavior, and other Driver settings.
- Azure Synapse Analytics integrations — Find step-by-step guides for connecting BI, reporting, analytics, and other ODBC-compatible tools to Azure Synapse Analytics.
- Use the Driver from programming languages — Connect to Azure Synapse Analytics from various third-party tools and applications written in Python, C#, C/C++, Go, Node.js, PHP, R, Visual Basic, and other supported languages.
- ODBC Driver for Azure Synapse Analytics documentation — Explore installation, configuration, connectivity, and advanced Driver features.