Getting started with Devart ODBC Driver for Stripe
To connect ODBC-compatible applications to Stripe, you need an ODBC driver and access to a Stripe account.
Devart ODBC Driver for Stripe enables connectivity to Stripe on Windows, allowing BI and reporting tools, IDEs, spreadsheets, programming languages, and other ODBC-compatible applications to access its data using standard SQL. The Driver can connect directly via HTTPS or via a proxy, and it does not require additional client software.
This guide shows you how to install and activate the Driver, configure an ODBC data source (DSN), connect to Stripe using a DSN or connection string, and troubleshoot common connection issues.
Quick start: Connect to Stripe with ODBC
To connect to Stripe using the Devart ODBC Driver:
- Download and install the Driver for Windows.
- Activate the Driver using your activation key, or continue with the 30-day trial.
- Create an ODBC data source (DSN) and select Devart ODBC Driver for Stripe.
- Configure the connection by entering your Stripe account ID and secret key.
- Use the DSN in your ODBC-compatible application to connect to Stripe and work with its data.
The following sections provide detailed installation and configuration instructions.
Prerequisites
Before you begin, make sure your environment meets the following requirements:
- Operating system: 32-bit or 64-bit Windows (including Windows Terminal Server). The Driver is compatible with all Windows versions (Windows Vista and later) that support .NET Framework 4.5.
- ODBC driver manager: Included with Windows.
- Connection details: An active Stripe account, its account ID, and a secret API key.
- Activation key: A purchased version of the Driver requires an activation key. For evaluation purposes, you can use the trial version, which is valid for 30 days from installation.
- Administrator rights: Required to install the Driver.
For a complete list of supported platforms and third-party tools, see the ODBC Driver for Stripe compatibility page.
Install the ODBC Driver
Installing the Devart ODBC Driver for Stripe is straightforward. All you need to do is download the installer and follow the installation instructions.
1. Download the Driver for Stripe from the Devart website, run the installer, and click Next.
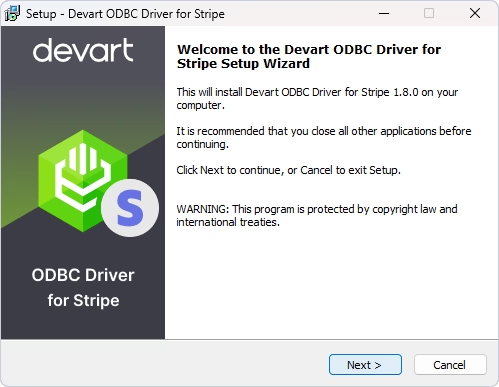
If the installation folder already exists or another version of the Driver is installed, a warning appears. Click Yes to overwrite the existing files. We recommend that you uninstall the previous version of the Driver before installing a new one.
2. Read the License Agreement, select I accept the agreement, and click Next.
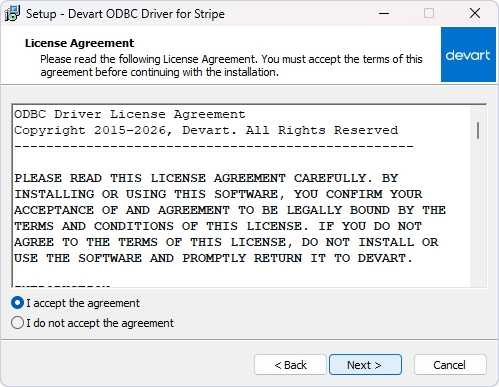
3. On the Select Destination Location page, keep the default folder or click Browse to choose another one, and click Next.
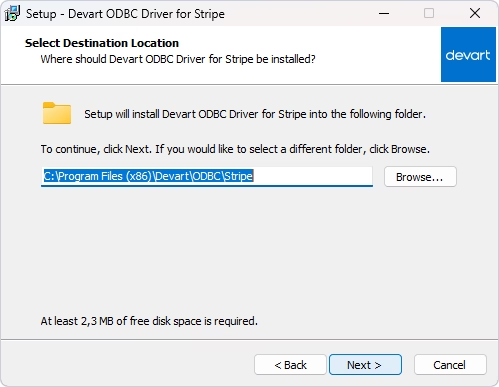
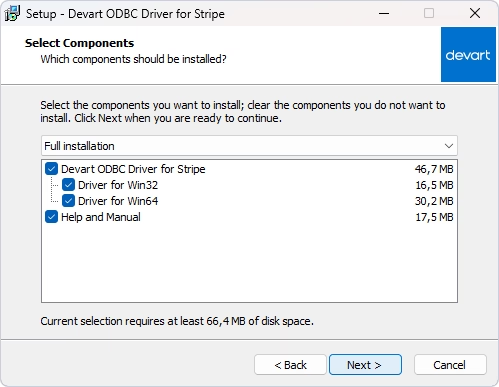
4. On the Select Components page, select the components to install, then click Next:
- Select Driver for Win32, Driver for Win64, or both, depending on the bitness of your applications.
- Select or clear the checkbox for Help and Manual to choose whether to install the documentation.
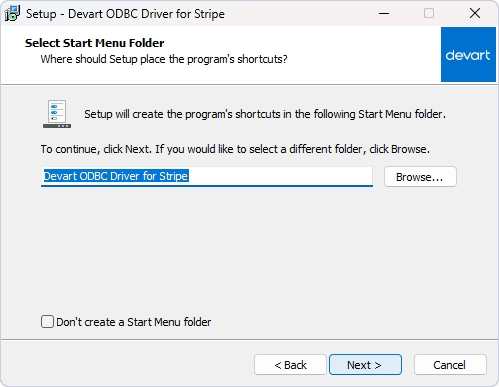
5. On the Select Start Menu Folder page, specify the folder for the Driver shortcuts. To skip creating a Start Menu folder, select Don't create a Start Menu folder. Click Next, then click Install.
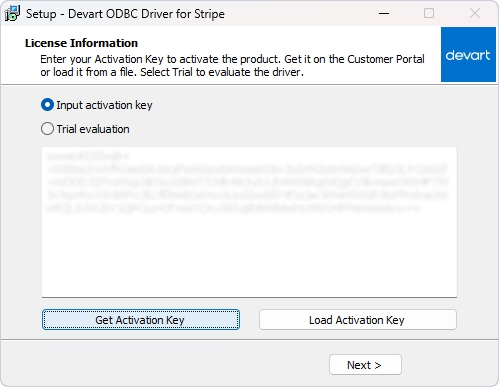
6. On the License Information page, select Input activation key and enter your key. You can find it in the registration email or your Customer Portal. To open the Customer Portal, click Get Activation Key.
If the activation key is saved on your computer, click Load Activation Key and select the corresponding file.
To evaluate the Driver without a purchased key, select Trial evaluation.
7. Click Next, then click Finish to complete the installation.
Configure an ODBC data source
In this guide, you create a Data Source Name (DSN) for the ODBC connection and verify the connection details. A DSN stores connection settings, such as the account ID and secret key, that applications use to connect to Stripe. Applications can also connect without a DSN by passing the same parameters in a connection string.
To configure an ODBC data source, follow the steps outlined below.
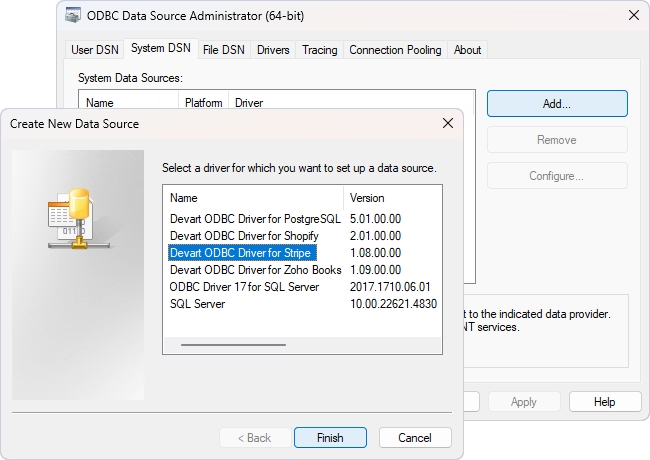
1. In Windows Search, enter ODBC Data Sources, and open the ODBC Data Source Administrator that matches the bitness of your application.
2. Go to the User DSN, System DSN, or File DSN tab, and click Add:
- User DSN — Available only to the user who creates it.
- System DSN — Available to all users on the computer.
- File DSN — Stores connection settings in a file that can be shared between computers where the required ODBC Driver is installed.
3. In the Create New Data Source dialog, select Devart ODBC Driver for Stripe, and click Finish.
4. In the Devart ODBC Driver for Stripe Configuration dialog, enter a Data Source Name and an optional Description.
5. Specify the Stripe authentication details:
- Account Id — The ID of your Stripe account. It starts with acct_.
- Secret Key — The secret API key of your Stripe account.
Select Save Key to store the key in the DSN settings.
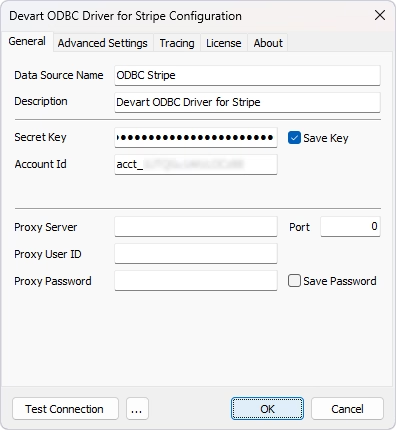
6. Optional: Click Test Connection to verify the connection settings.
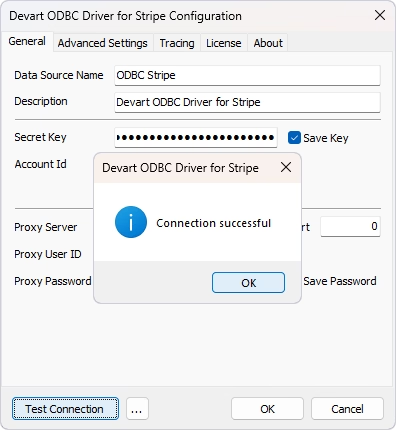
7. Click OK to save the DSN settings.
To fine-tune metadata, timeout, and compatibility behavior, use the Advanced Settings tab of the same dialog.
Connect to Stripe using a connection string
In addition to using a DSN, you can connect to Stripe by specifying the connection parameters directly in an ODBC connection string. This type of connection is known as a DSN-less connection.
The following table summarizes when to use each connection method:
| Connection method | How it works | Best for |
|---|---|---|
| DSN | Stores the connection settings in a configured ODBC data source. Applications connect by specifying the DSN name. | Desktop applications, BI and reporting tools, and reusable connections configured on a client computer. |
| DSN-less | Specifies the Driver and connection parameters directly in a connection string. No DSN needs to be created beforehand. | Applications, scripts, and automated deployments where connection settings are managed programmatically. |
Use the following connection string configuration as a reference.
Replace the placeholder values with your actual Account ID and Secret Key for Stripe.
For the complete list of supported options, see the Stripe ODBC connection string parameters page.
Troubleshooting
If you cannot connect to Stripe through the Devart ODBC Driver, refer to the following list of common connection issues and their solutions.
You get a "Product is not activated or has been deactivated" error
This error occurs when the Driver has not been activated or its activation is no longer valid. Activation is required for both purchased and trial versions.
Open the DSN configuration dialog, go to the License tab, click Input Activation Key, and enter your activation key. After activation, test the connection again.
The ODBC data source is not found or the Driver is not available
If your application cannot find the DSN or the Devart ODBC Driver for Stripe, check the application and Driver bitness.
A 32-bit application cannot use a DSN created in the 64-bit ODBC Data Source Administrator, and a 64-bit application cannot use a DSN created in the 32-bit administrator.
Make sure that:
- The DSN is created in the ODBC administrator that matches your application's bitness.
- The corresponding 32-bit or 64-bit version of the Driver is installed.
- The application is configured to use the correct DSN.
Connection fails
If Stripe is reachable but authentication fails, check the Account Id and Secret Key values.
Make sure that the secret key is copied completely, has not been rolled or revoked in the Stripe Dashboard, and belongs to the specified account. If you rolled the key, open the ODBC Data Source Administrator, select the DSN you configured for the ODBC Driver for Stripe, click Configure, enter the new key, and test the connection again.
Stripe connection times out
If the connection to Stripe takes too long to establish, increase Connection Timeout on the Advanced Settings tab. Also, check the network connection. If your network requires a proxy to access the internet, specify Proxy Server, Port, Proxy User ID, and Proxy Password on the General tab of the DSN configuration dialog.
Additional resources
After you install and configure Devart ODBC Driver for Stripe, use the following resources to continue setting up and working with your connections:
- Stripe ODBC connection string parameters — Browse the complete list of connection options for configuring authentication, proxy settings, timeouts, ODBC behavior, and other Driver settings.
- Supported ODBC API functions — Explore the currently supported ODBC functions.
- Using in third-party tools — Find step-by-step guides for connecting BI, reporting, analytics, and other ODBC-compatible tools to Stripe.
- Documentation — Get full information on installing, configuring, and using the Devart ODBC Driver for Stripe.