dbForge Data Compare for MySQL Tour
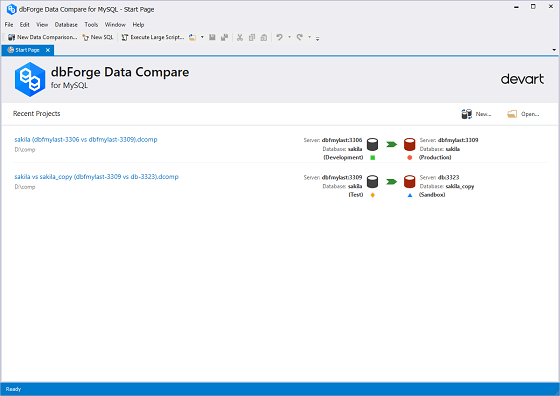
Read and make sure how easy data comparison and synchronization is with dbForge Data Compare for MySQL. Click the screenshots for details.
Read and make sure how easy data comparison and synchronization is with dbForge Data Compare for MySQL. Click the screenshots for details.
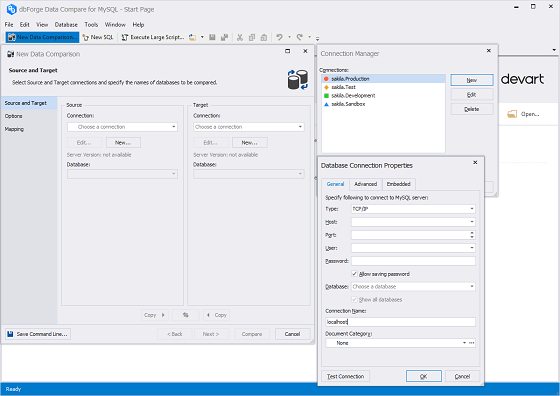
To create a database connection, click the New button in the wizard. The Database Connection Properties window appears.
Enter the details for the Host, Port, User, and Password fields. This information is required to connect to MySQL Server. Click OK to finish the creation.
Come back to the New Schema Comparison wizard and select this connection in the drop-down list of the Connection field.
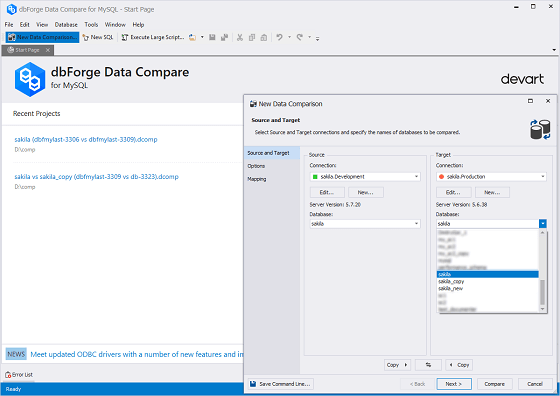
In the data comparison wizard select the databases to compare. They are called Source and Target.
Source is the database which contents is inserted to Target during synchronization. Target is the database which contents you compare and synchronize with Source.
Tip: To swap Source and Target, click the swap button. To set up additional comparison options, click the Next button. To start the comparison, click Compare.
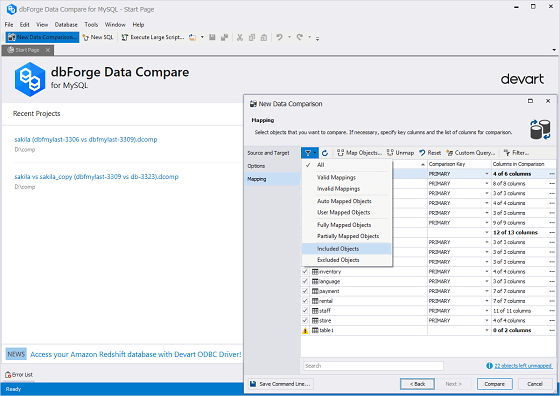
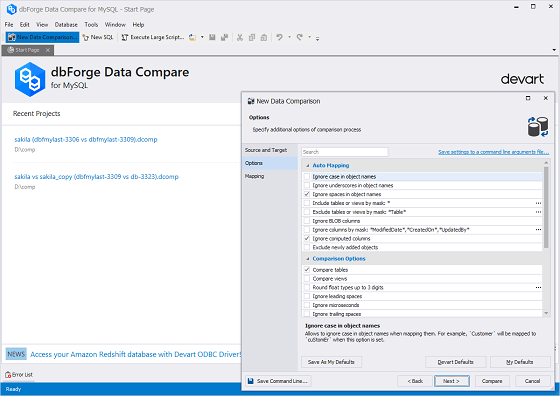
Tip: To select what object types should be compared, use Object filter.
By default, Data Compare compares tables in selected databases. Views can be compared too.
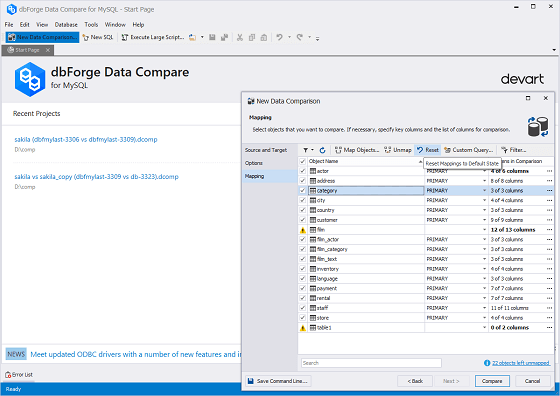
See the list of objects, automatically selected for comparison, on the Mapping wizard page. You can change the list manually to include only necessary objects into comparison.
Tip: Unselect the check box next to Object Name in the grid to unselect all check boxes at once, then select the check boxes next to the required objects.
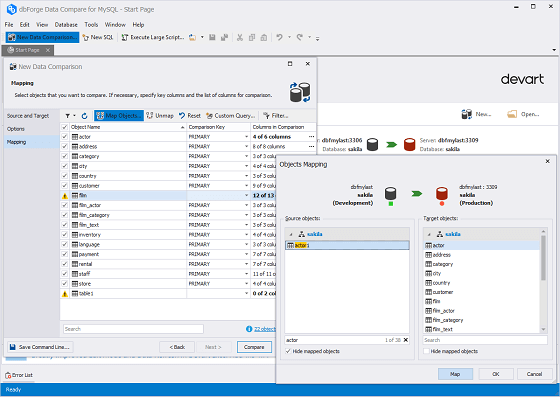
Map tables and views with the different data structure manually in several clicks.
Tip: Click Map Objects button and select Source and Target objects in the open window, then click OK. The selected pair of objects will appear in the grid on the Mapping wizard page and be compared.
Tip: To map multiple pairs of Source and Target objects without closing and opening the window many times, click the Map button after the first selected pair of objects. When you manually select all required objects, click OK to see them in the grid on the Mapping wizard page.
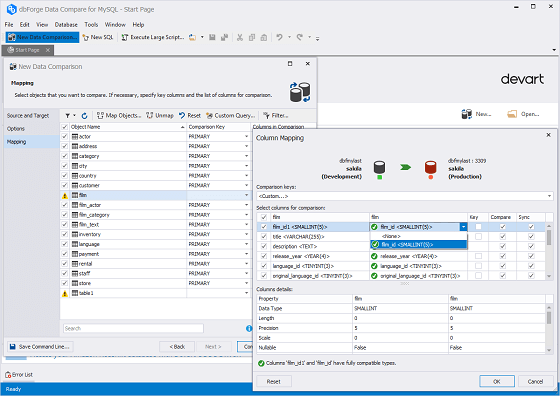
See how many columns of each object can be compared in the Columns in Comparison field of the grid.
Tip: To map the columns manually, in the Column in Comparison field for the required object, click the ellipsis button. The open window will show all columns of the selected object and their details.
Automatically mapped columns are marked with the green icon. Columns, which are incompatible, are marked with the red icon. Select required Target columns from the drop-down list and click OK.
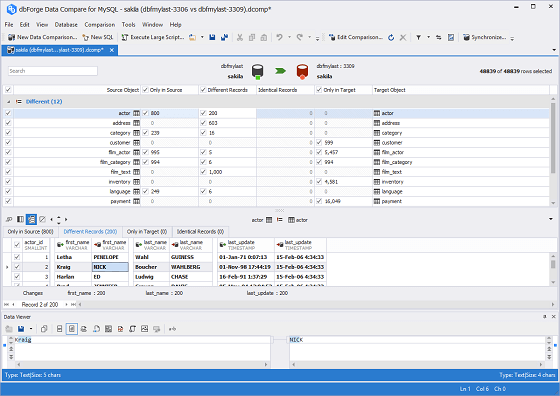
See the full info about compared objects in the DataComparison window. Select only required objects or separate records of objects to synchronize .
The top grid shows all compared objects. The bottom grid shows the records of the selected object in groups - Identical, Different, Only in Source, and Only in Target - and each group on the separate tab.
Tip: For better understanding, filter the objects in the top grid, e.g., to see Only in Source objects.
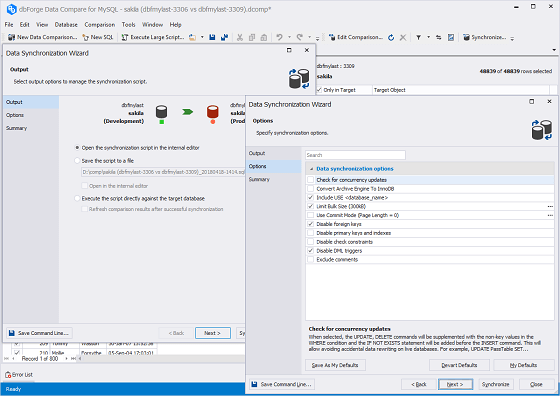
Use the synchronization wizard to accurately synchronize the Target database with
the Source one. Backup the Target database before synchronization. Select what you
want to do with the synchronization script:
- Execute against the Target database
- Save to a file
- Open in SQL editor - (for the final review and manual editing)
Tip: To close the wizard, click the Cancel button.
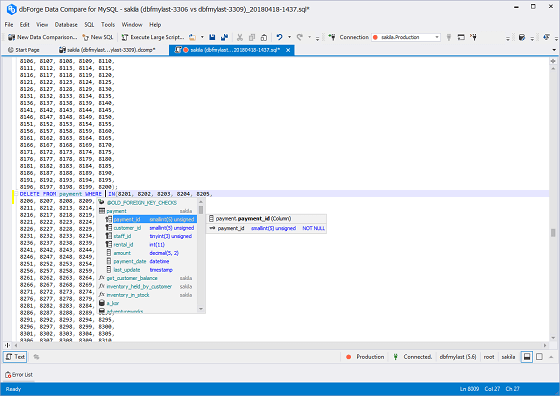
Use SQL editor to view and edit synchronization scripts, create and execute queries against the selected database.
Tip: To open SQL editor, click the New SQL button.
Tip: When the query is executed, see the query results in the Data window at the bottom. Find rich data management options in the right-click menu.
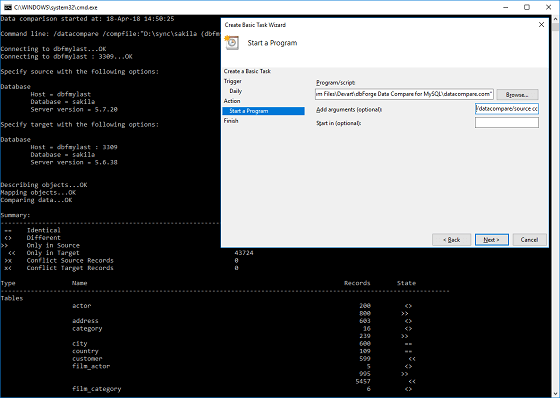
Command line interface of dbForge Data Compare for MySQL and Windows Task Scheduler can help you automate routine data comparison and synchronization tasks. You can create a *.bat file and schedule executing it in Windows Task Scheduler to keep data in your databases always in sync.