How to Install MySQL Server on Debian 10, 11, and 12
MySQL is a popular open-source database management system for storing and managing data. Debian, a widely used Linux distribution, offers seamless compatibility with MySQL installation across its various versions. In this guide, you will find the steps required to install MySQL on Debian 10 (Buster), Debian 11 (Bullseye), and Debian 12 (Bookworm) to set up a robust database system for your applications or projects.
There are a few important factors that make Linux better than Windows: it is more stable, secure, and cost-effective. Of course, Linux may be somewhat more complicated in terms of setup and configuration, but all in all, it is definitely a good choice. A Linux distribution, also called a distro, is an operating system that includes the Linux kernel, a package management system, GNU tools, libraries, and more. One of the most widely used Linux distributions is Debian — an open-source Linux-based operating system created by the Debian community.
Pros of Debian
A strong and vast community
A wide range of software repositories
Security and stability
Regular updates
Debian is highly valued by software and hardware developers for its versatility and ability to run on a wide range of architectures and devices. Its public bug tracker and extensive collection of development
tools make it one of the most advantageous Linux distributions for programming. This makes Debian an ideal choice for developers.
Given the crucial role that data and information play in modern applications, software development often requires the use of database software.
What is the most popular database management system for Linux?
Without a doubt, it's MySQL. It is widely used for web applications and open-source software projects, due to its stability, robustness, and ease of use. Additionally, its compatibility with Linux operating systems
and its open-source nature make it a popular choice for many organizations. Some developers even claim that MySQL works better on Linux than on Windows.
How to install MySQL on Debian 10/11/12
In this article, we present a concise, step-by-step guide on installing MySQL on Debian. We will also look into uninstallation issues and demonstrate to you how to manage MySQL on Linux using one of the best GUI tools for MySQL – dbForge Studio for MySQL.
1 - Preparing to install the latest version of MySQL Server
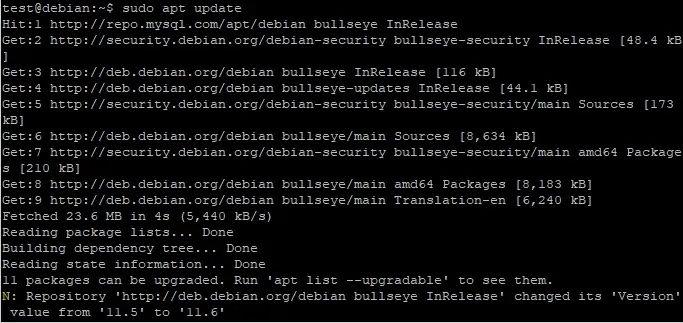
To begin the installation of MySQL on Debian, you need to update the local package index by running the following command. Provide a password when asked for it.
sudo apt update
Then, to upgrade the system, run:
sudo apt upgrade
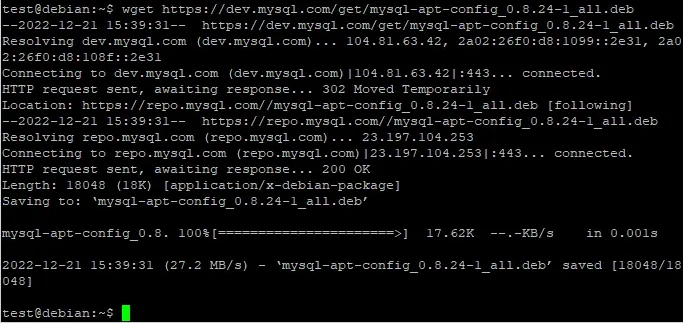
Your next steps will involve downloading and installing the MySQL .deb package using wget.
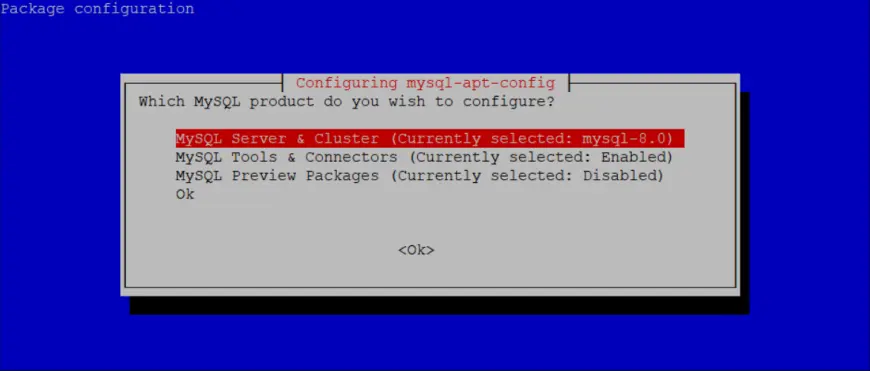
Next, in the Package configuration window, first, select OK and then select MySQL Server & Cluster. Click Enter to proceed.
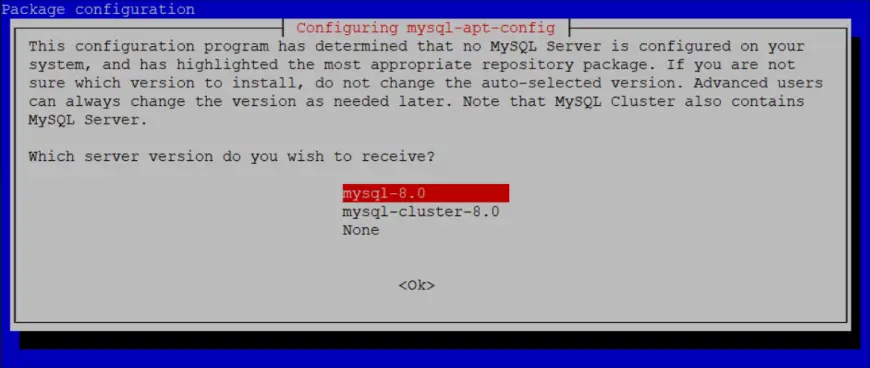
In the next window, select mysql-8.0 and click Enter.
And finally, update the APT repository again.
sudo apt update
2 - Install MySQL 8
Now you are all set to install the MySQL server 8.0. Run the following command:
sudo apt install mysql-server
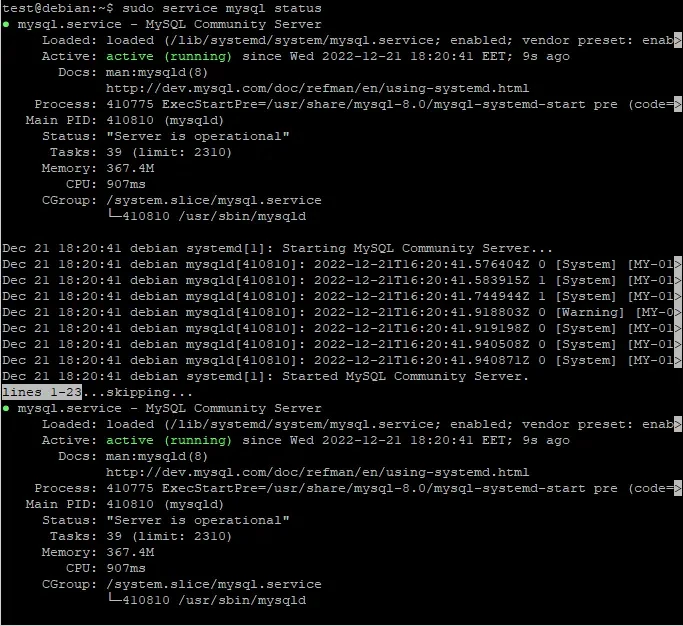
This command also installs the MySQL client on Debian. Once the installation is completed, the MySQL service should start automatically. However, let us verify that the MySQL server is active:
sudo service mysql status
3 - Secure MySQL Server
The mysql_secure_installation command helps improve the security of your MySQL server installation. First, run:
sudo mysql_secure_installation
You will be then asked to configure the VALIDATE PASSWORD PLUGIN, which is used to check the strength of the MySQL passwords.
Press Y/y if you want to set up the validate password plugin. Afterward, you will be asked to specify the level of password strength: low, medium, or strong. Enter 2 to select the strong password validation policy.
Next, set and confirm a password for the MySQL root user.
Then you'll be prompted to remove the anonymous user, restrict root user access to the local machine, remove the test database, and reload privilege tables. We recommend answering Y/y to all questions.
4 - Log in to MySQL
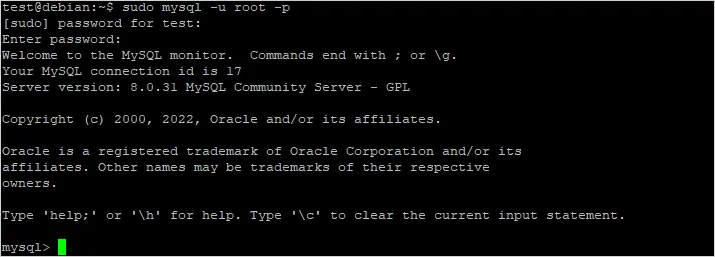
Okay, let's try to log in to the MySQL server. The syntax is quite simple:
mysql -u root –p
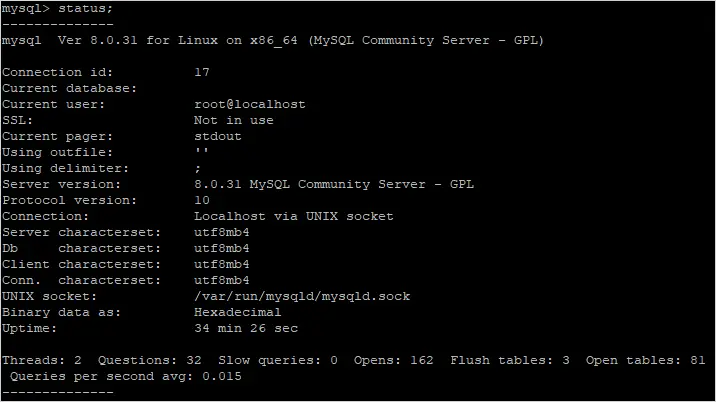
To check the current status of your MySQL instance, you can run the following command:
STATUS;
How to update MySQL on Debian
Suppose we want to upgrade the MySQL server on Debian from 5.7 to 8.0.
To begin with, check the current MySQL server version:
mysql –version
Before launching the upgrade, we recommend you take a full backup of all databases that reside on the server using the following command:
On the screens that appear, select MySQL version 8.0 and click OK.
Then, update the server and install the latest version of MySQL using the below commands.
How to allow remote connections to MySQL Server on Debian
One of the most common problems that MySQL users on Debian face is that their MySQL instance is only configured to listen for local connections. Let's look at how to allow remote connections to the MySQL server on Debian.
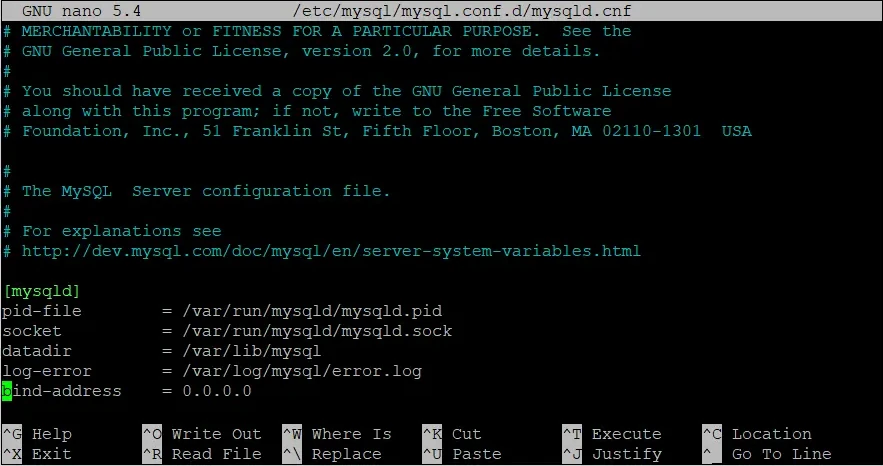
To begin with, you need to add your external IP to the list of IPs that the server listens to. To do this, run the following command to open the configuration file:
sudo nano /etc/mysql/mysql.conf.d/mysqld.cnf
Then, navigate to the line that begins with the bind-address directive and set it to your actual IP address, a wildcard *, or 0.0.0.0.
If you don't have the bind-address directive in the configuration file, you can add it.
Now, you need to create a MySQL user with access from a specific IP address or from any host ('username'@'%').
And finally, grant privileges to the newly created user.
GRANTALL PRIVILEGES ON*.*TO'username'@'%';
To finish with, execute the following command.
FLUSH PRIVILEGES;
How to uninstall MySQL on Debian 10/11/12
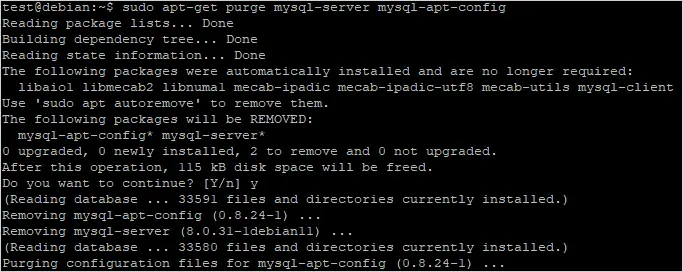
The first step is to remove the MySQL server from your Debian system. To do this, run the following command and enter the Debian password when prompted.
sudo apt-get purge mysql-server mysql-apt-config
If you want to remove the MySQL server completely, including all its dependencies, run the following command:
sudo apt autoremove
How to manage MySQL on Debian using the dbForge Studio GUI tool
Debian is a Linux distro that comes without a GUI installed by default. You might object that a Graphical User Interface is only a supplemental component of a Linux system, and is not essential. However, there is a bunch of tasks that are much easier to perform from a GUI, such as web browsing, watching videos, and, of course, managing databases.
dbForge Studio for MySQL is an advanced, all-in-one IDE for managing MySQL databases with intelligent coding assistance, instant formatting and syntax checker for MySQL, and powerful built-in developer tools.
You can easily connect to your MySQL server installed on Debian and work with databases in a neat and comprehensive interface. Just imagine – no need to memorize and type complex commands – almost any MySQL-related task can be performed visually. Moreover, dbForge Studio for MySQL can be installed in a Linux environment via a specialized application called CrossOver, which provides a compatibility layer that allows Windows applications to run on Linux and macOS. Let us briefly show you how to perform basic database tasks with the Studio.
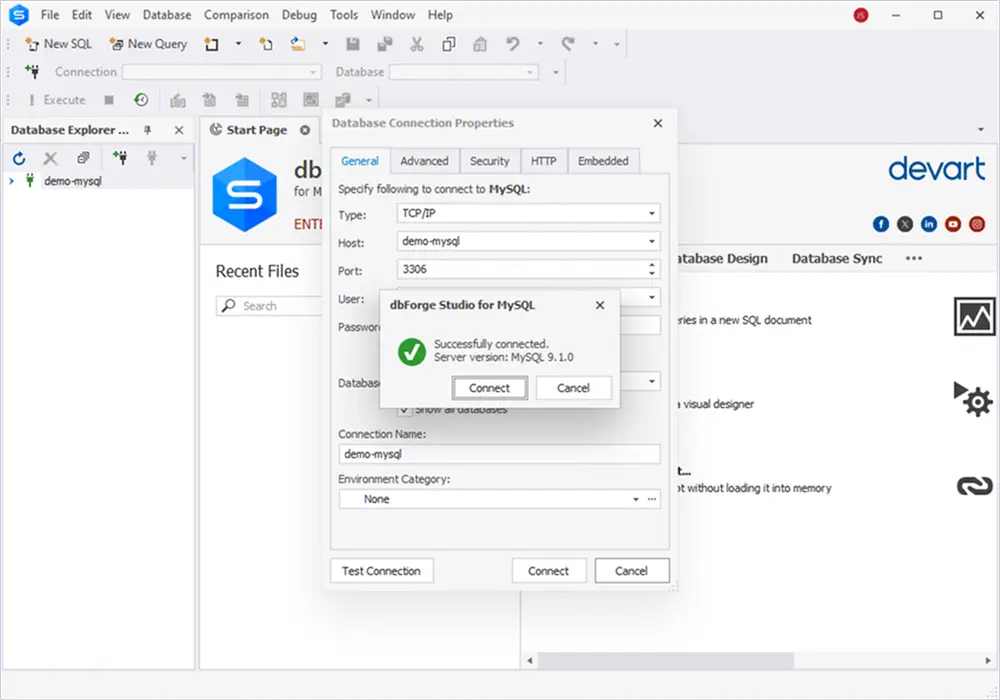
On the General tab, specify the connection details:
Type: Select the connection type from the drop-down list.
Host: Enter the host name.
Port: Type the port number.
User and Password: Enter the user credential details respectively. By default, the password is saved automatically. If you don't want to save the password, clear Allow saving password.
Database: Enter the name of a MySQL database you want to connect to or select it from the drop-down list.
Connection Name: Optionally, the connection name is generated automatically from the host name. If you want to create a distinctive name for the connection, type a new name.
Click Test Connection to verify the connection details. Then, click Connect to connect to the MySQL server.
Create a MySQL user
Now that you have connected to your MySQL server on Debian using dbForge Studio for MySQL, you can perform all your database-related tasks visually or run MySQL queries in an advanced Text Editor with extensive code-completion and syntax check capabilities.
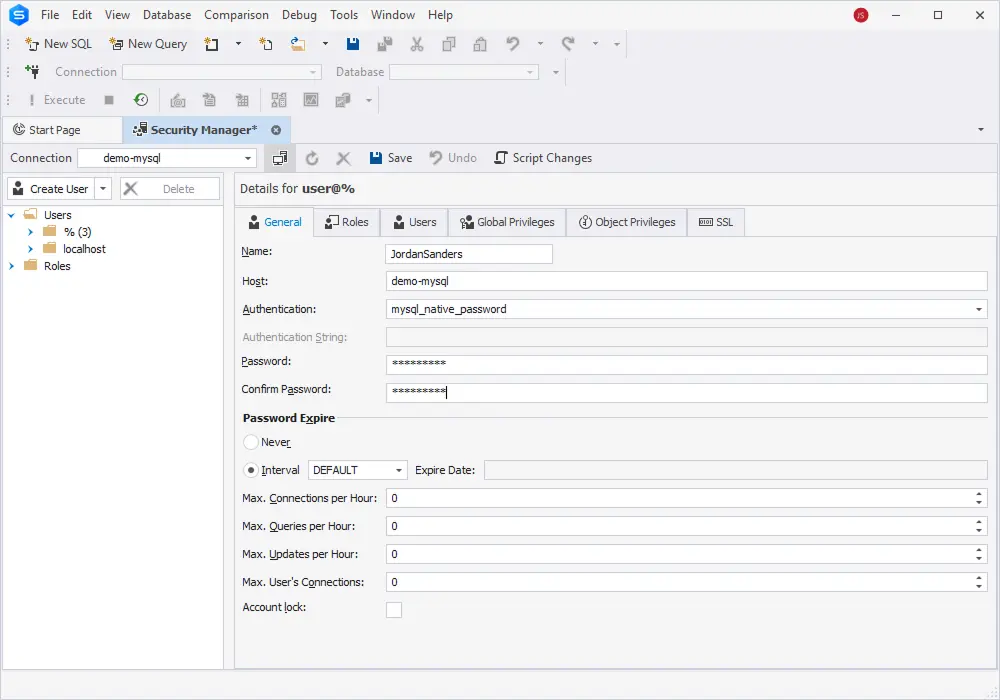
Click Create User above the User List or right-click a user node and select New User on the shortcut menu.
Fill in Name, Host, Password, and Confirm Password.
Grant necessary privileges to the user.
Click Save on the Security Manager toolbar.
Create a MySQL database
To create a new database on your MySQL server is installed on Debian, you do not need to enter commands from the command line – just connect to the server from dbForge Studio for MySQL and create the database within a few clicks.
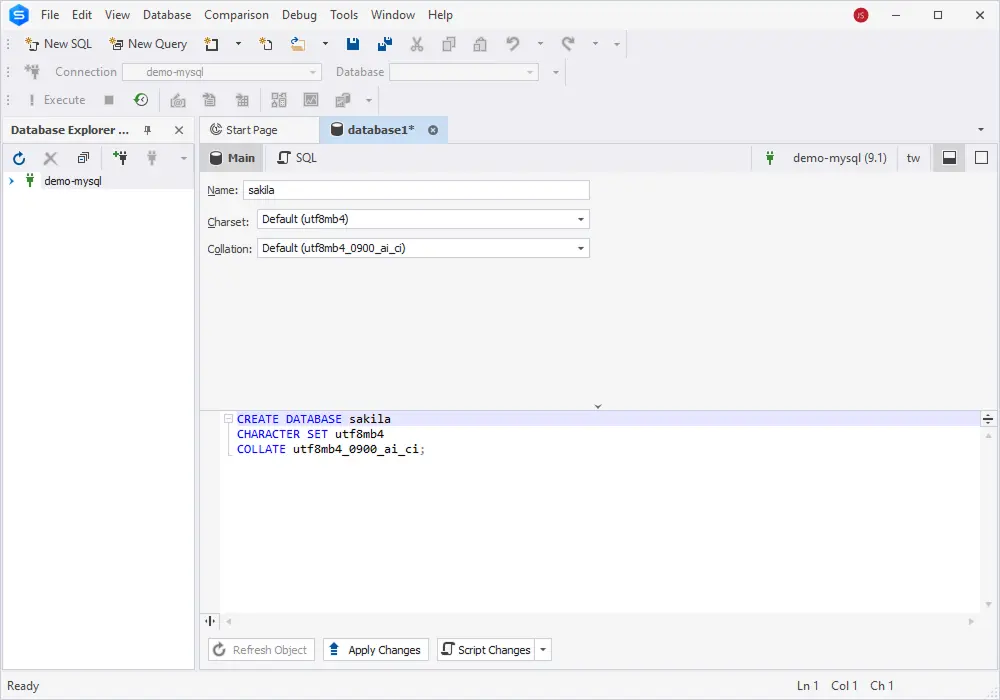
In Database Explorer, right-click a connection node and select New Database. Alternatively, select Database > New Database.
Enter the database name.
Select values for Charset and Collation.
Click Apply Changes. If specified name is unique, the database will appear in Database Explorer.
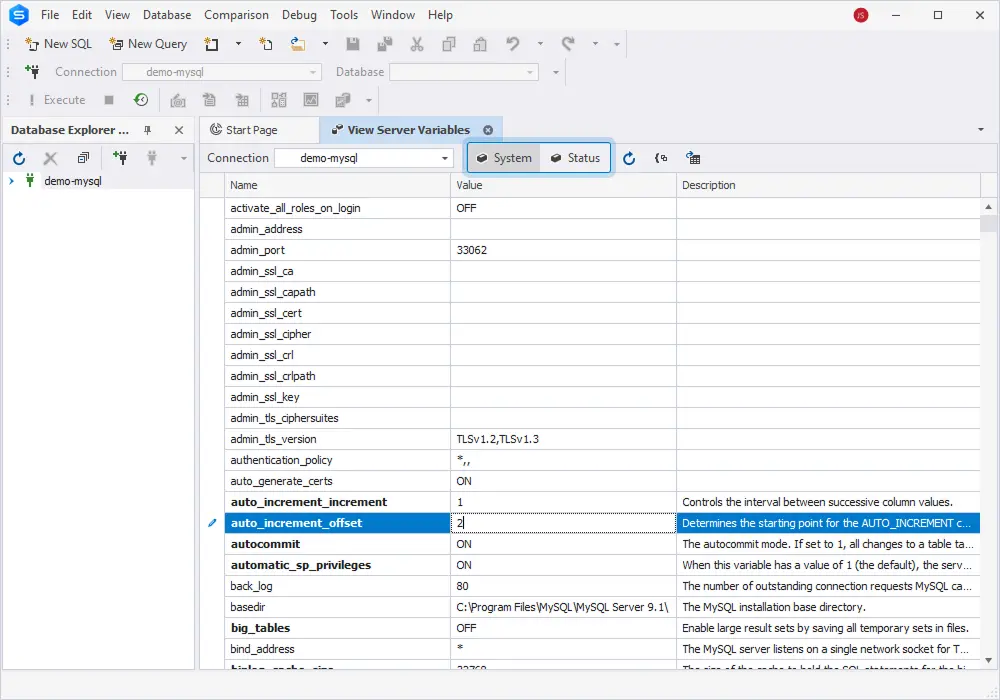
View and change server variables
dbForge Studio for MySQL allows you to quickly and easily view and modify MySQL system and status variables using the Server Variables window. To open the window, select Database > Server Variables.
To switch between system and status variables, click System or Status on the Server Variables window toolbar. To change the variable value, click the desired variable in the Value column and edit it. Press Enter to apply changes or Esc to discard them.
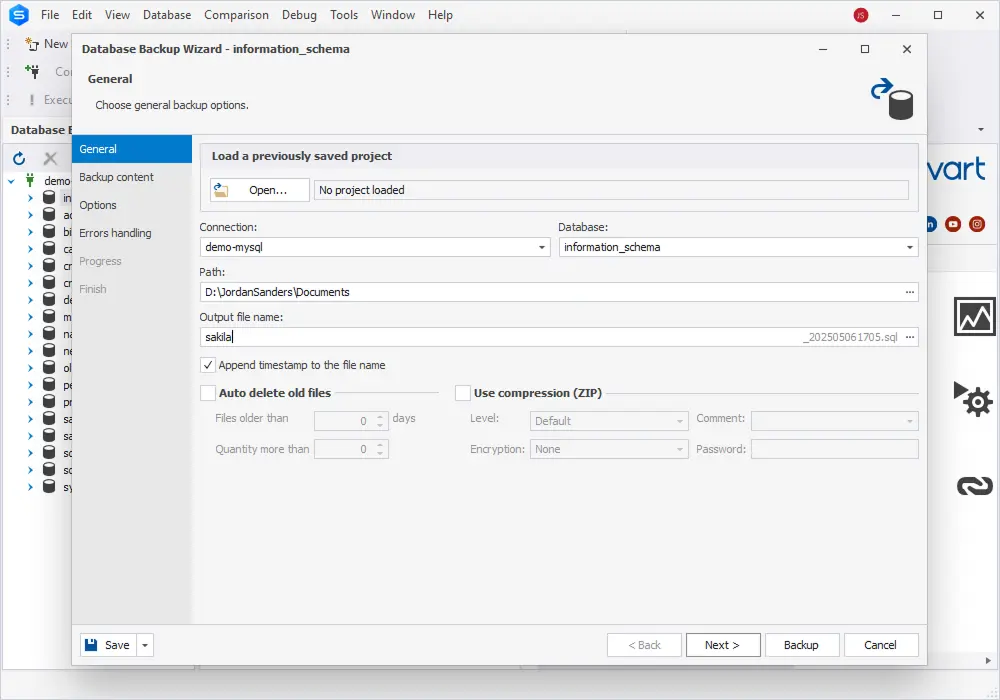
Back up a database
The ultimate MySQL backup tool in dbForge Studio for MySQL helps database administrators and developers quickly and easily back up and restore MySQL databases. With dbForge Studio, you can perform the following backup tasks:
Back up database structure, data, or both.
Select database objects to include in the backup.
Automate and schedule database backup and restoration.
Back up and restore databases using the command line.
Need a reliable solution to manage your MySQL databases?
Get the most advanced IDE on the market - dbForge Studio for MySQL
Working with MySQL on Debian has its obvious advantages. The Debian operating system is freely available to everyone with no need to pay for software updates or install any third-party software products. Whether you're just setting up your environment or looking to start the MySQL server on Debian, the platform offers a reliable and flexible solution. Nowadays MySQL running on Debian is the choice of many high-level developers and analysts.
Download a 30 days free trial of dbForge Studio for MySQL and test-drive its impressive functionality, including designing and visualizing databases, synchronizing MySQL databases, exporting and importing MySQL data, data reporting, and much more.