Export MySQL Data to CSV: Comprehensive Tutorial & Best Practices
CSV is one of the most versatile data formats that is widely used to exchange structured data between different applications. The convenience of CSV lies in simplicity. CSV files contain plain text that can be opened by any text editing app, such as Notepad. They can fit well into Excel spreadsheets, and, of course, they can be easily imported and exported from databases. And it's the latter case that we'll explore below.
What is CSV?
But before we do, let's take a closer look at this format. CSV stands for comma-separated values, which basically explains how data is organized in these files. To make it clear right from the start, the content of a CSV file roughly looks as follows:
Product, Size, Color, Price
T-Shirt, S, Yellow, $13
Jeans, M, Blue, $27
Jacket, XL, Brown, $35
Skirt, S, Red, $20
Shirt, L, White, $29
Although commas remain the most common separators (a.k.a. delimiters), they are not the one and only option. You might as well use other characters, such as semicolons, colons, or spaces.
Now, let us show you how to export data from a MySQL table into a CSV file, and we'll use three different approaches to it. The first one is a mysqldump command. The second one is based on the OUTFILE statement. The third one involves a wizard with flexible settings. Which one is the best? Well, it's up to you to choose.
Dump MySQL data to CSV via mysqldump
Let's start with probably the simplest, but not necessarily the best option, called mysqldump. It is a stock utility installed alongside MySQL Server to help quickly export tables, databases, or even entire servers from the command line. It's a rather viable option for backup-and-recovery operations.
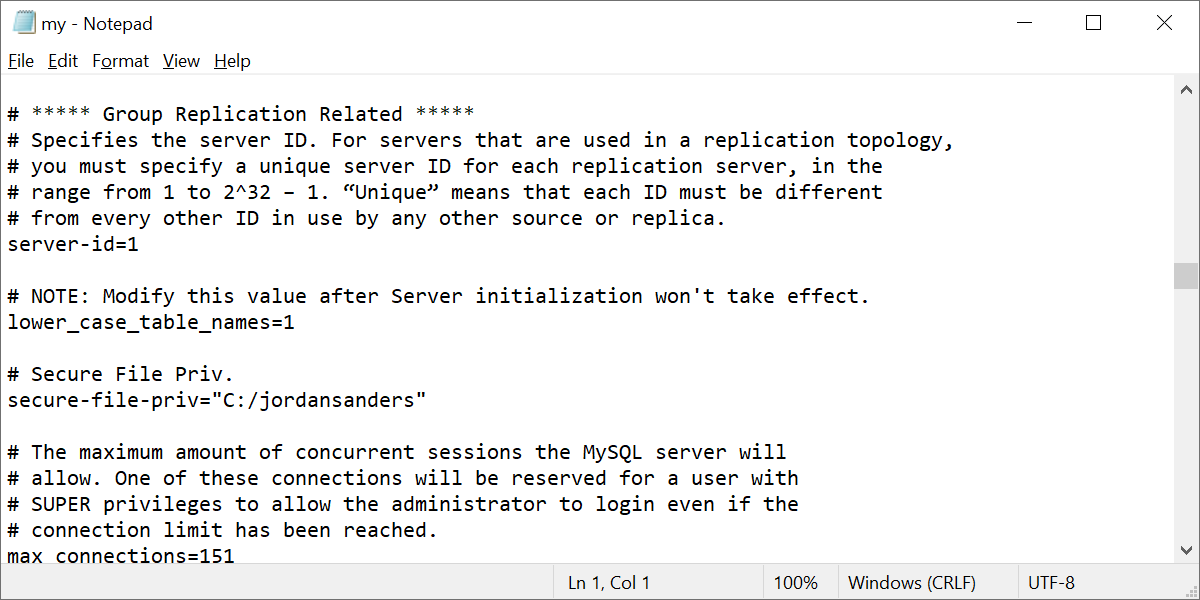
1. Once you make sure mysqldump is installed on your machine, it's time to do some tweaking in the my.ini file. There, you need to specify a folder where the exported file will be saved. To do that, find the Secure File Priv line and enter the path to the said folder right under it. In our case, it will look as follows:
2. Afterwards, restart your MySQL Server to make sure that your newly configured my.ini settings have been applied.
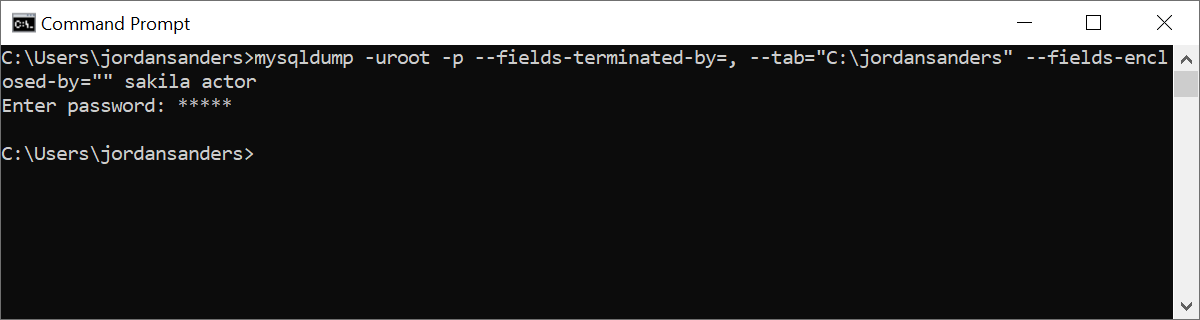
3. Now you can open the command prompt and run a dump command with the following syntax:
mysqldump -u[username] -p --fields-terminated-by=[string] --tab="[path]" --fields-enclosed-by=[char] [database] [table]Where:
- -u and -p are the username and password to connect to your MySQL server; note that you will be prompted to enter the password after you run the command
- --fields-terminated-by specifies a string of one or more characters used in the text file to terminate each field
- --tab indicates the path to the directory that the output file will be saved to; it's the same path you have previously specified in the my.ini file
- --fields-enclosed-by specifies the character that will be used in the text file to enclose values
- database is the name of the source database
- table is the name of the table to be exported
Let's see how it works by exporting a table from the sakila sample database. We run the command and enter the password...
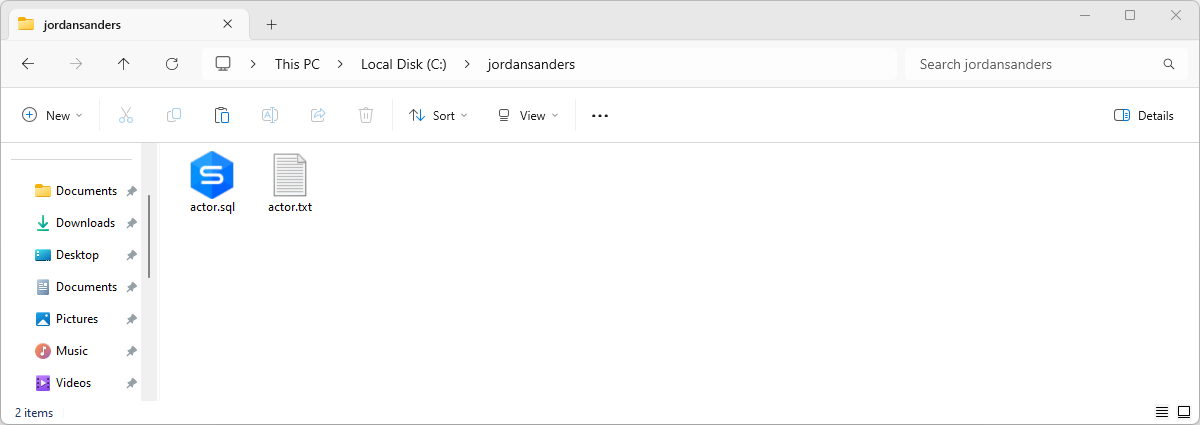
...and we've got an output of two files. Note that the TXT file is the one you need, as it contains the exported data.
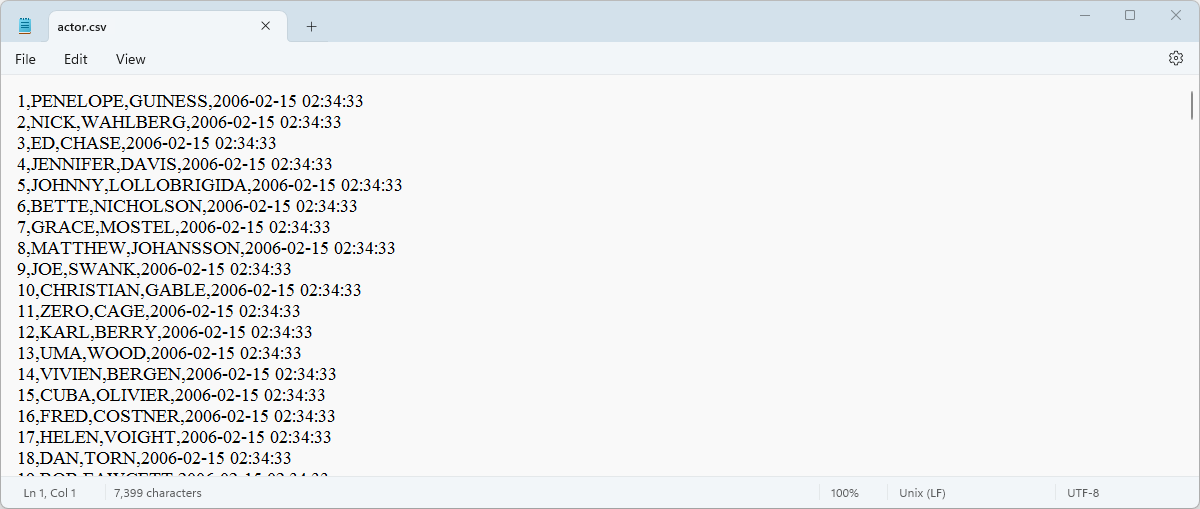
Finally, we can simply change the extension of our file to CSV. Let's do it and open the file to make sure that everything is intact.
Use the OUTFILE statement to export MySQL data to CSV
The next way to export data to a CSV file is to run a command with the OUTFILE statement. This time we'll do it using MySQL Shell.
1. Your first two steps will simply repeat the previous case. Open the my.ini file, find the Secure File Priv line, and enter the path to the required destination folder right under it. In our example, we'll use the same jordansanders folder.
2. Restart your MySQL Server to make sure that your newly configured settings have been applied.
3. Download MySQL Shell and install it on your machine.
4. Open MySQL Shell. Log in to your MySQL Server using the following syntax. Enter the correct username, hostname, and port.
5. Run the command and enter the password when prompted.
6. Enter ∕sql to switch to the SQL mode.
7. Finally, you can proceed to the OUTFILE command. It has the following syntax:
SELECT * INTO OUTFILE '[file.csv]' FIELDS TERMINATED BY '[string]' ENCLOSED BY '[char]' FROM [table]Just like in the previous case, you need to specify the required table, the path, and the name of the exported CSV file, as well as a string to terminate each field and a character that will be used to enclose values.
This is what the entire process in MySQL Shell looks like.
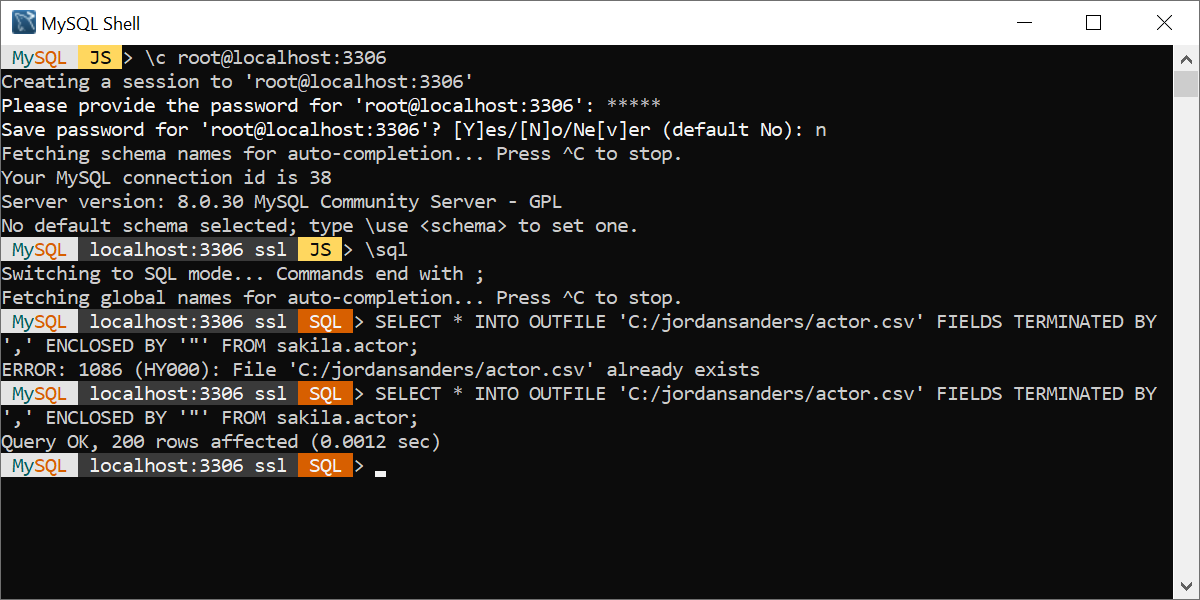
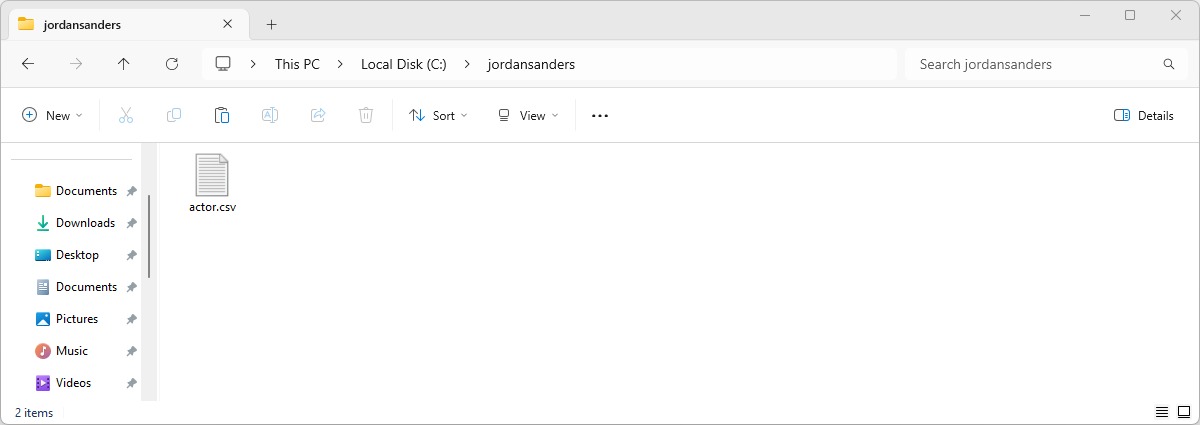
After we run the command, we find the exported file in the specified folder.
Note: After the previous case, our destination folder contained an identically named file actor.csv. And if we try to export another file with this name to the same destination, we'll get an error. To avoid this, it is necessary to either replace/rename the first file beforehand, or specify another name for the new file in the SELECT statement. In our case, we have simply deleted it.
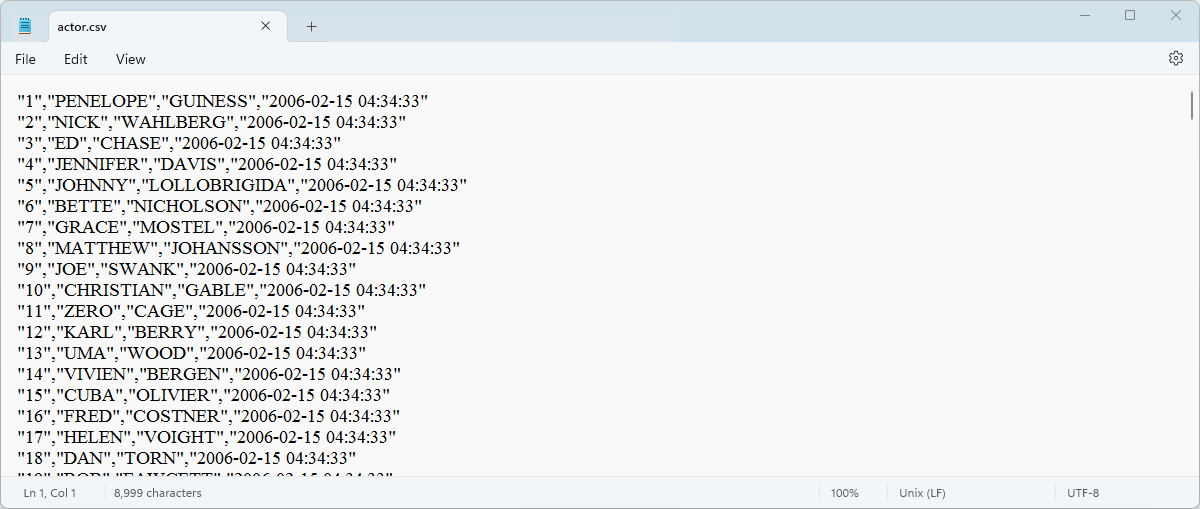
Let's take a look at the new file. Everything is correct.
Convert MySQL table data to CSV using a GUI tool
Now, let's take a look at the most advanced way to export and import your MySQL data to multiple formats with the help of a wizard and a multitude of flexible settings by your side. The GUI tool in question is dbForge Studio for MySQL, our all-in-one integrated environment for effective development, management, and administration of MySQL and MariaDB databases.
First, you need to download it for a 30-day trial and install it on your machine. Once it's done, open it and connect to the required database. Now you're all set to go.
1. In Database Explorer, find the required table, right-click it, and select Export Data from the shortcut menu.
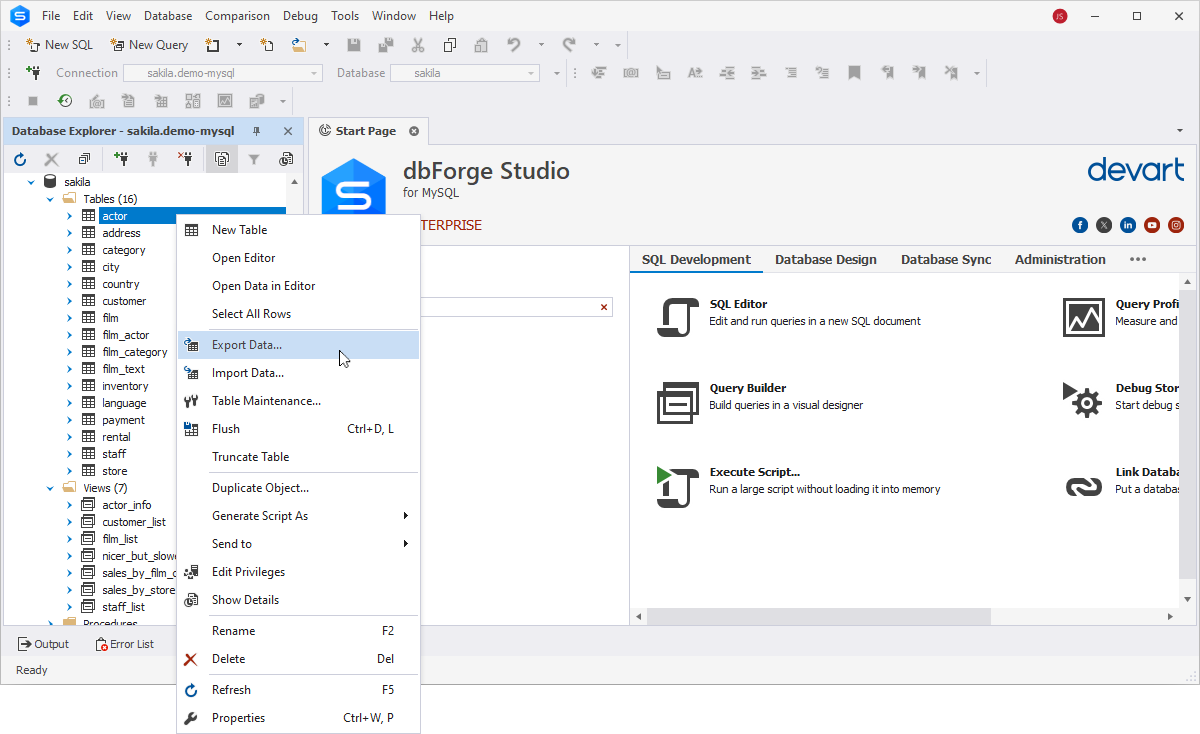
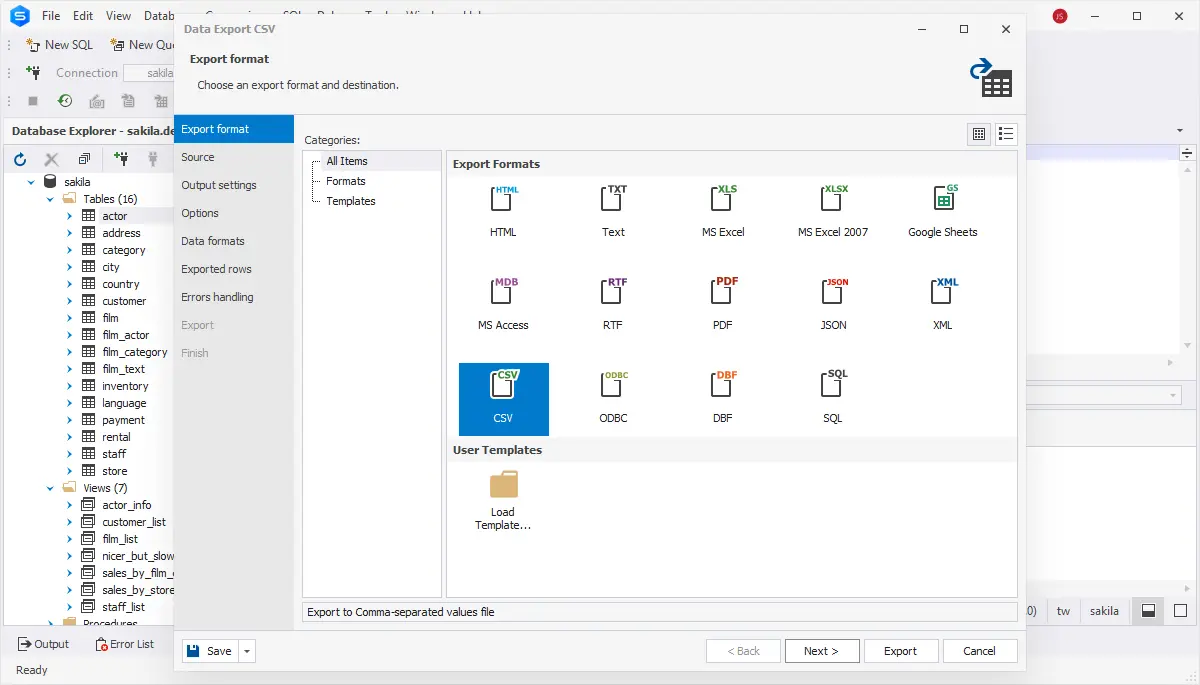
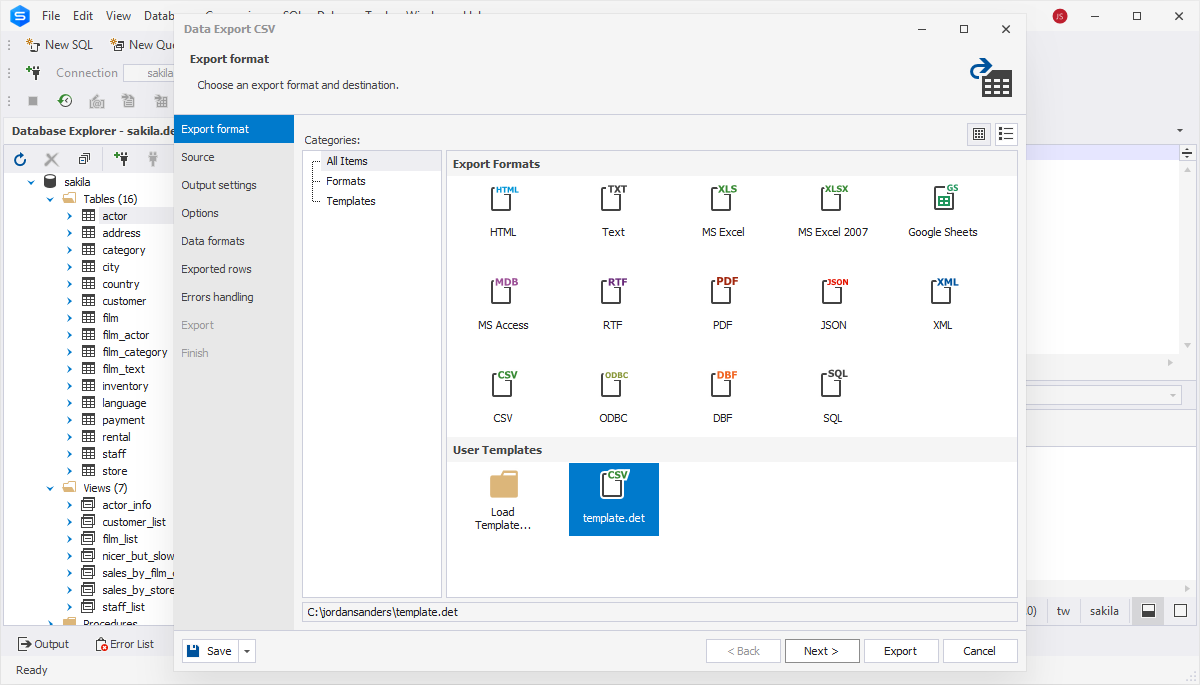
2. You will be greeted with the Data Export Wizard, namely, the Export format page. Select CSV and click Next.
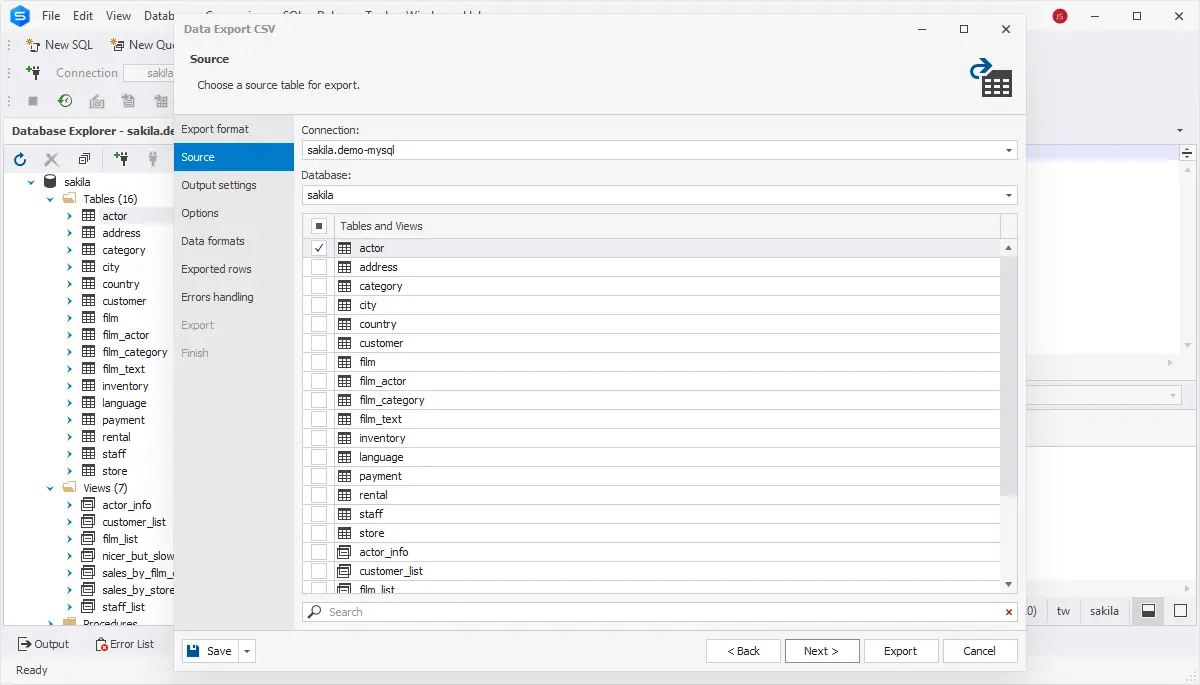
3. On the Source page, check and/or modify the server connection, the required database and its schema, table(s) and view(s) that you want to export, and click Next.
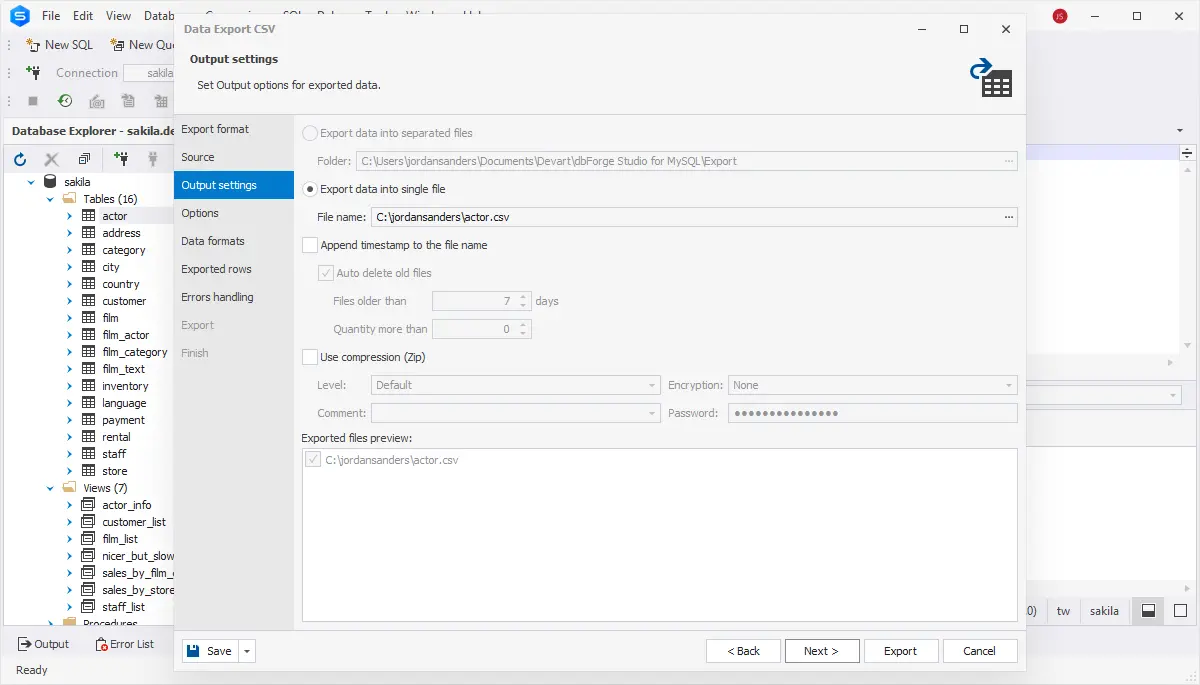
4. On the Output settings page, you have two main options:
- Export data into separated files, where you specify the path to the folder that they will be saved to
- Export data into single file, where you specify the path and the file name
You will find the list of files to be exported in the Exported files preview box. You can also enable three additional options:
- Append timestamp to the file name
- Auto delete old files to auto-delete exported files that are older than a specified number of days
- Use compression to create an archive with your exported files
If the destination folder does not exist, the application will prompt you to create it. Once you are ready, click Next to proceed.
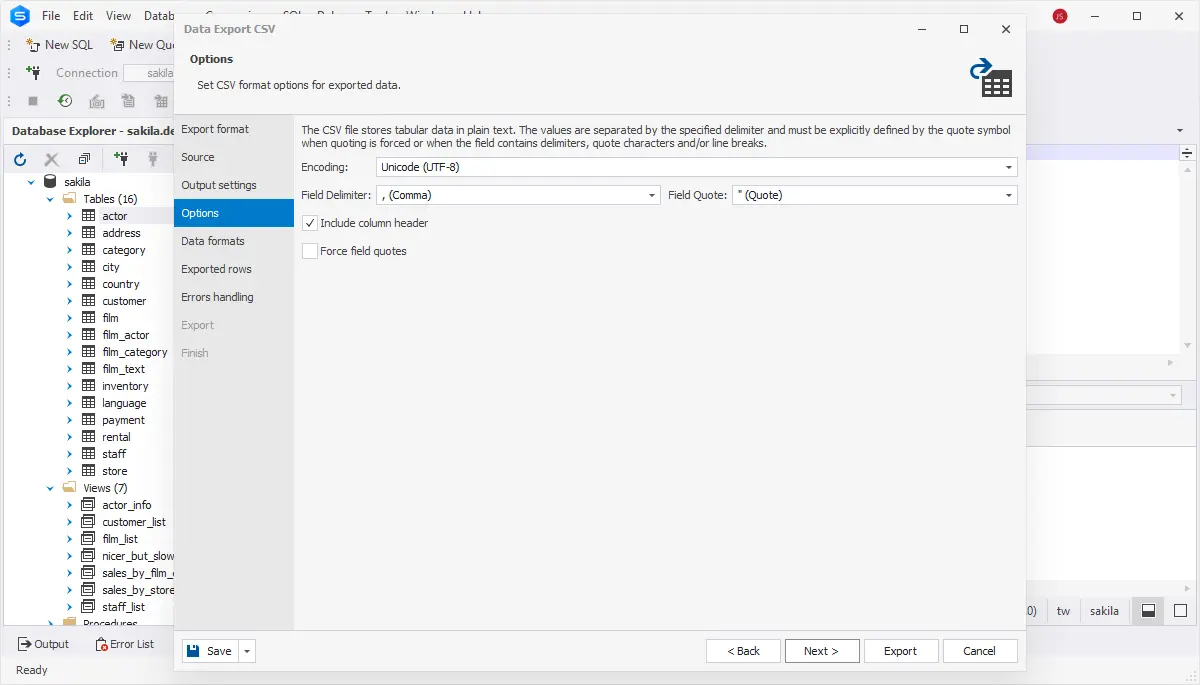
5. On the Options page, you can select whether to Use Unicode, Show a table header, and Force quote strings (as well as specify a character for quoting). Finally, you select the required Field separator (tab, space, comma, or a custom character). Afterwards, click Next.
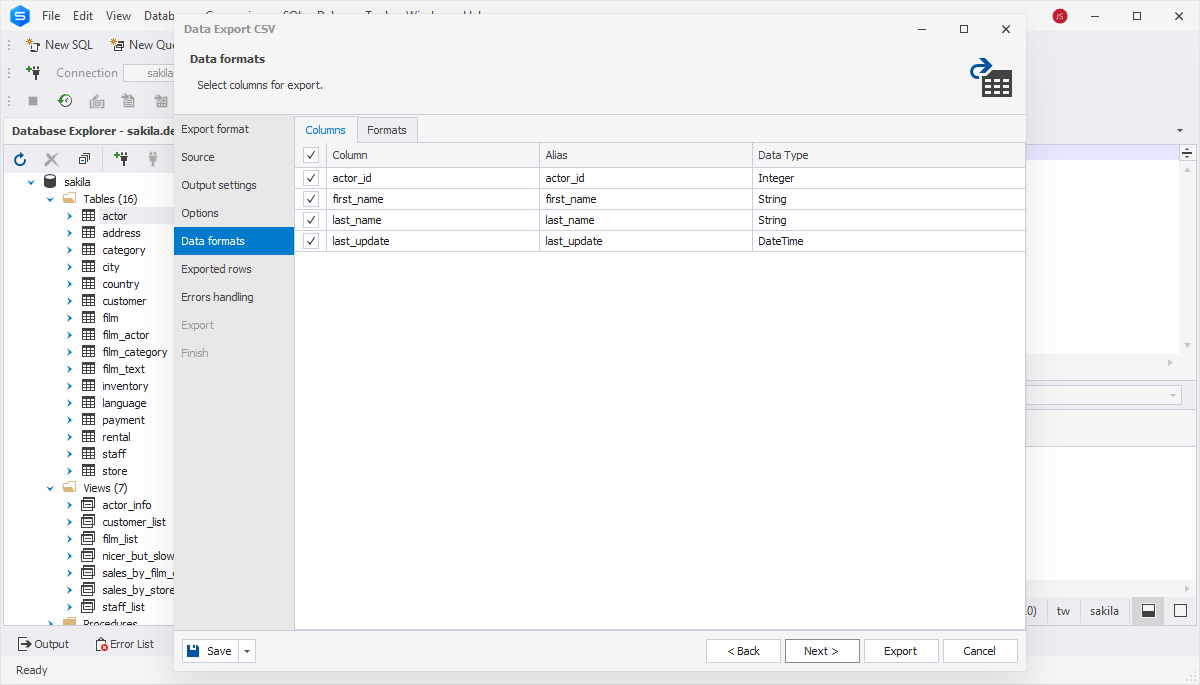
6. On the Data formats page, you have two auxiliary tabs. The first one is Columns, where you can select columns for export and check their aliases and data types. Once you make sure everything is the way you want, click Next to proceed.
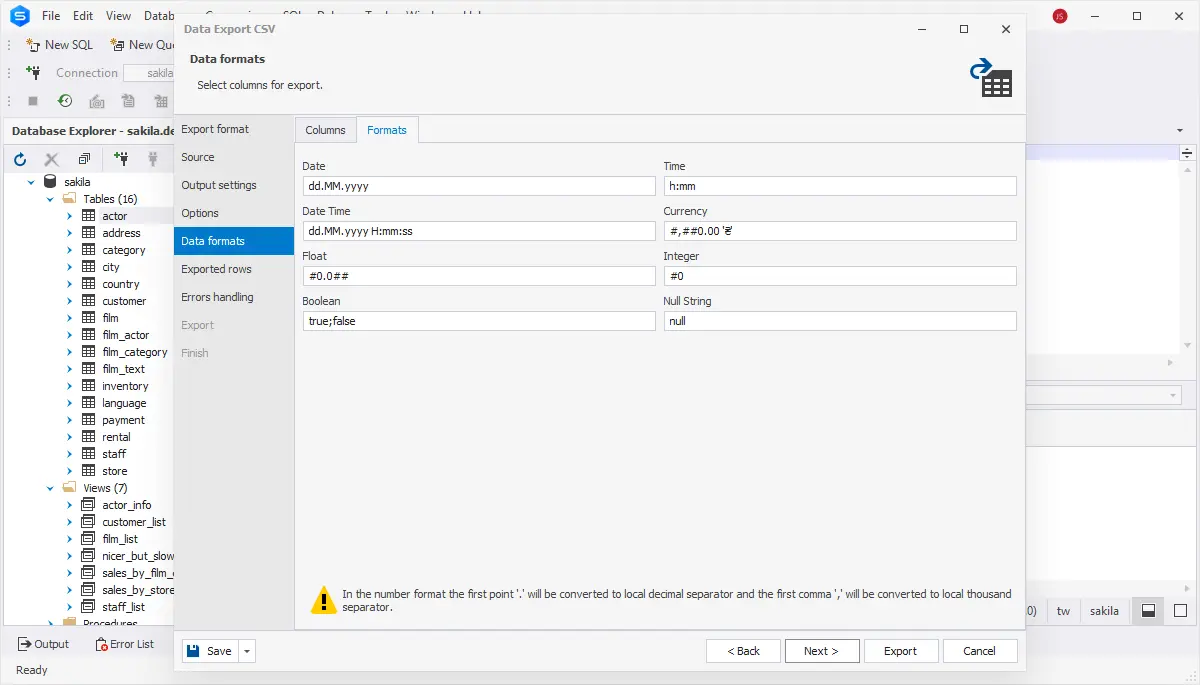
The second tab is Formats, where you can change the default format settings for Date, Time, Date Time, Currency, Float, Integer, Boolean, and Null String, as well as select the required binary encoding from the dropdown list. Once you make sure everything is the way you want it, click Next.
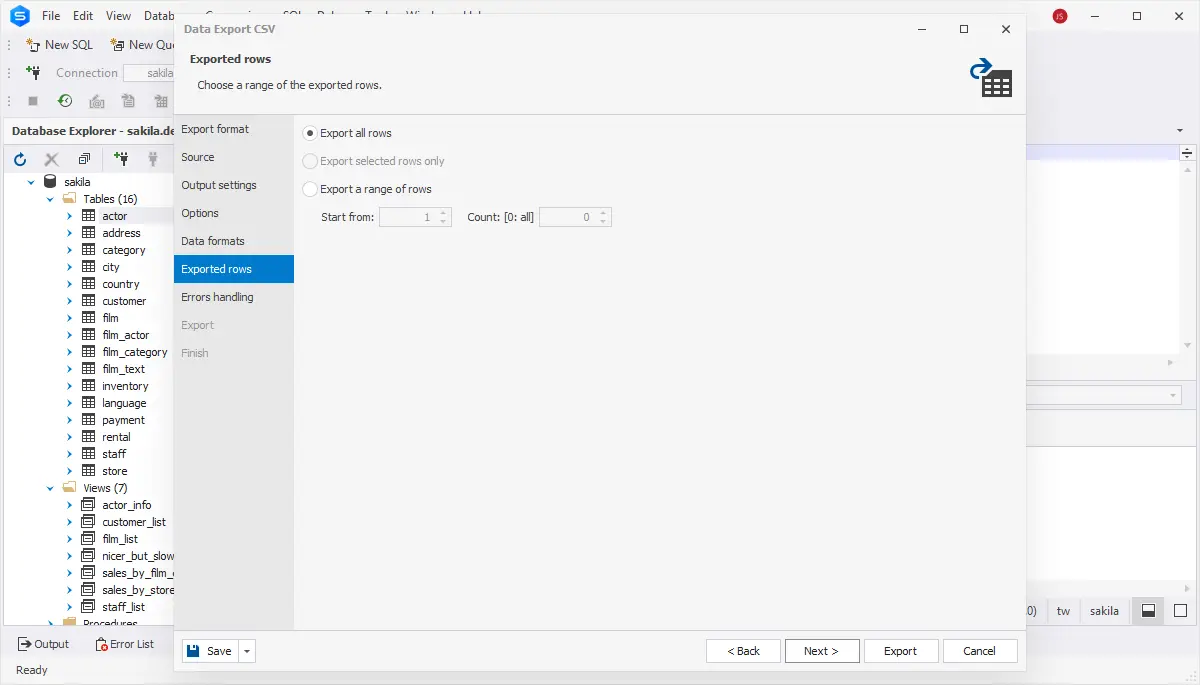
7. On the Exported rows page, you can select to export all rows, export the rows selected on the Data formats page, or export a specified range of rows. Once it's done, click Next.
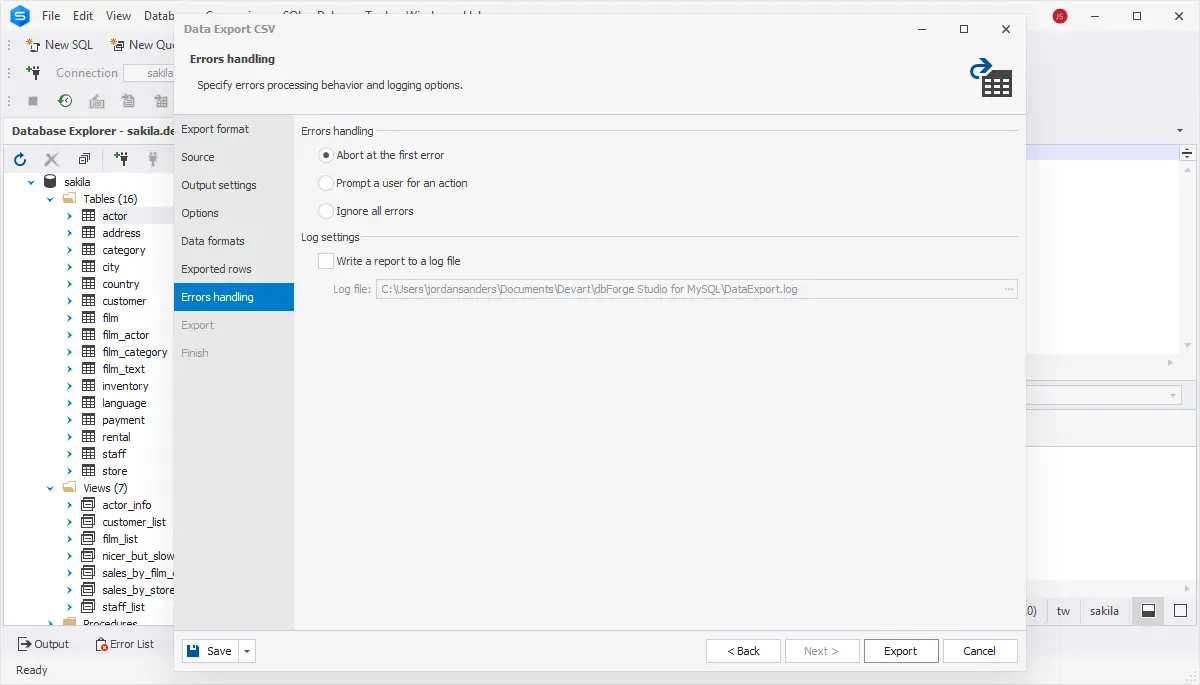
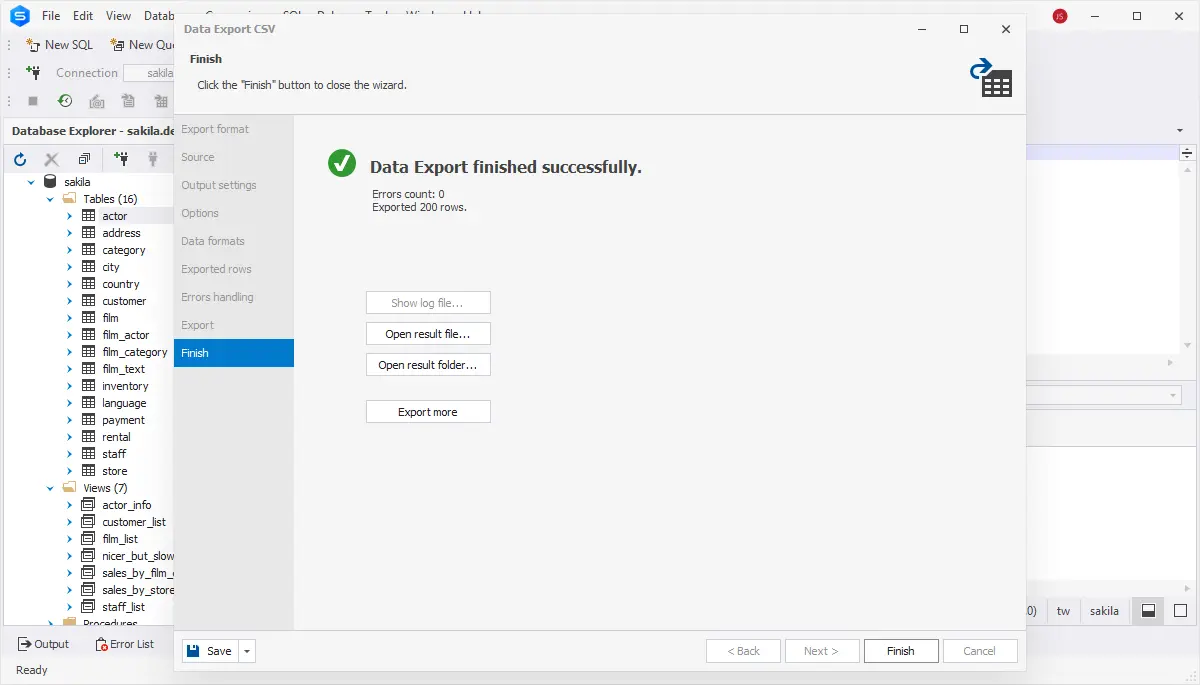
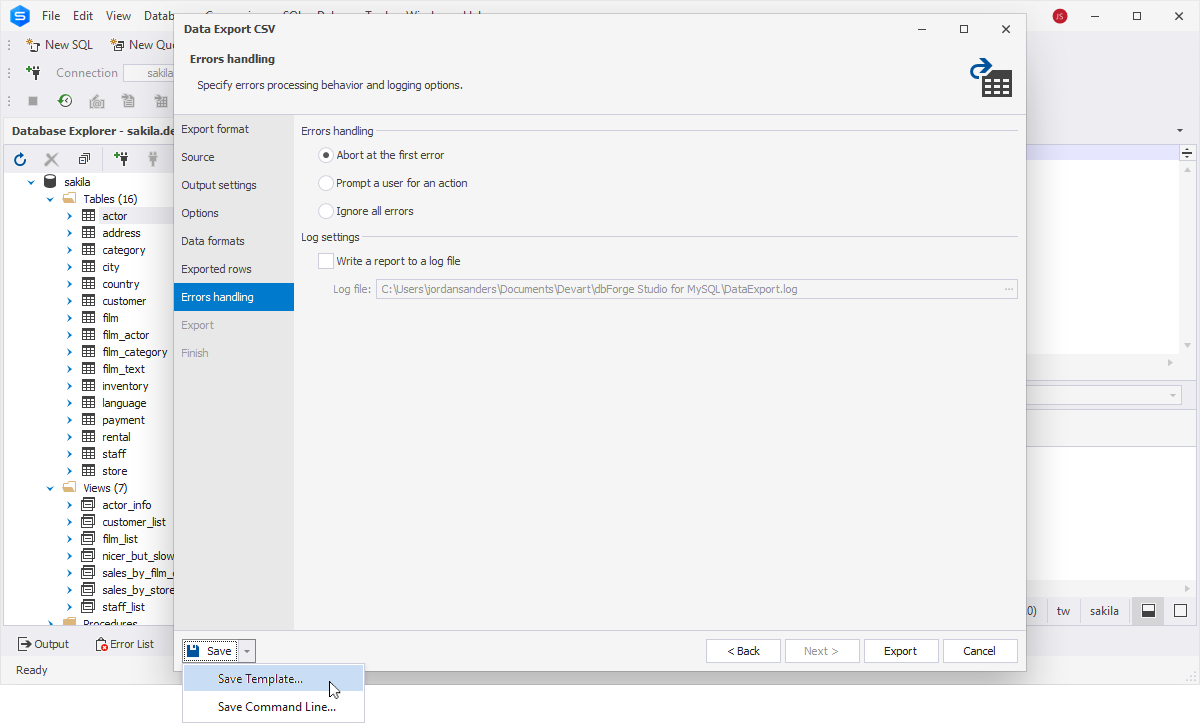
8. Finally, you've got the Errors handling page, where you can specify the error processing behavior (using one of the three available options: Prompt the user for an action, Ignore all errors, or Abort at the first error) and opt to write reports to a log file with a specified path. This is the final page of the wizard, so once you're all right with your settings, click Export.
9. When your data export is completed, you have several options: you can open the exported file or folder, perform another export operation, view the log file, or simply click Finish.
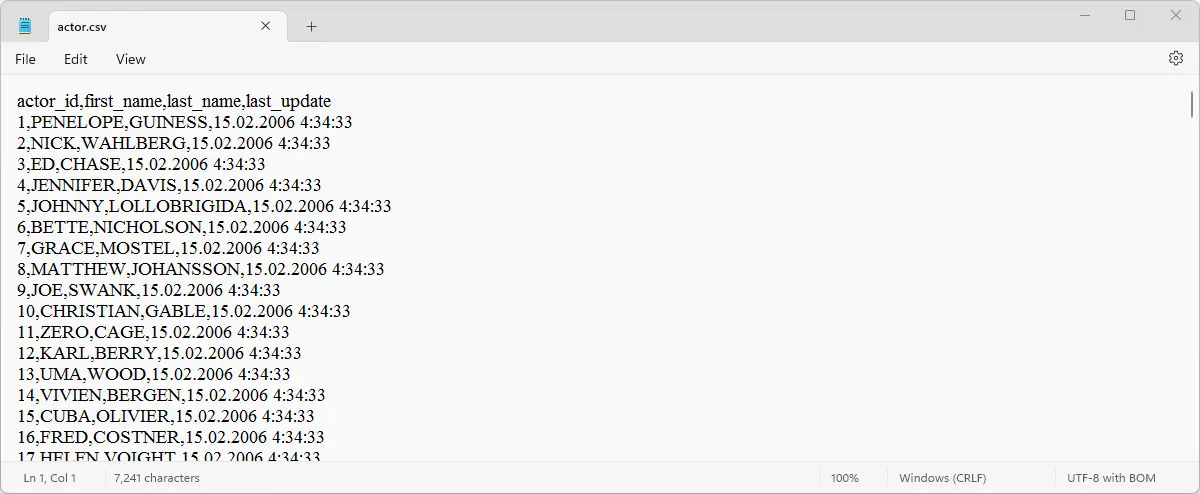
But we'll go to the destination folder...

...and make sure the data has been exported correctly. Indeed, it has!
Note that if you want to save your configured export settings as templates, go to Save > Save Template in the lower left corner of the wizard. You can do it at any moment.
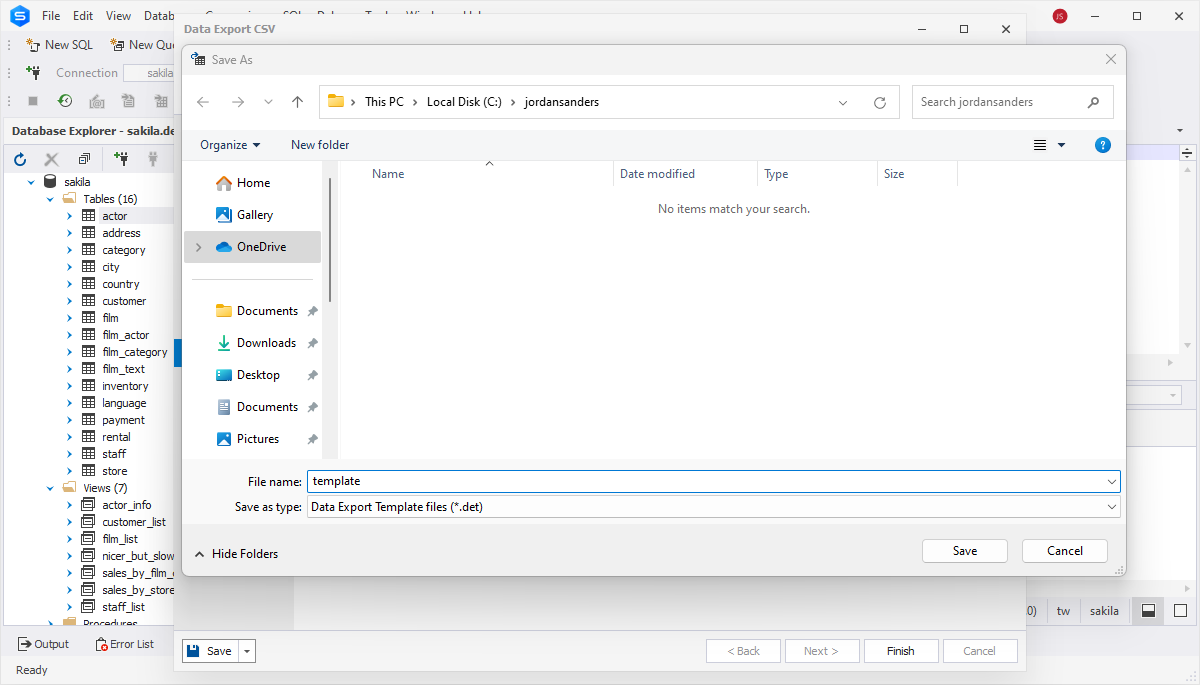
Now save the template file.
After that, you'll be able to load export options from your template file, like we mentioned previously. To do that, simply select the template under User templates on the Export format page.
Now you can just click Export, and the operation will commence according to the settings configured in the template. Simple as that!
dbForge Studio for MySQL: Supported data export formats
As you could notice, the export capabilities of the Studio go beyond the CSV format. Actually, you have 14 formats for export at hand: HTML, TXT, XLS, XLSX, Google Sheets, MDB, RTF, PDF, JSON, XML, CSV, ODBC, DBF, and SQL. Similarly, you can perform data import using the same wizard workflow. The available settings vary between formats, making your experience and capabilities complete.