Hiding columns and filtering data
In SQL Server, hiding columns and filtering data in the grid is a common practice. Displaying only the relevant data significantly improves readability and helps users focus on the essential information,
streamlining data analysis and decision-making processes. This approach also minimizes errors, which is especially important for users not fully versed in the database schema, by limiting their exposure to less
relevant or more complex data. Such practices are not only fundamental for effective database management but also enhance overall user experience and data integrity.
This guide will demonstrate how you can leverage these techniques in dbForge Query Builder for SQL Server - a robust tool that simplifies the creation and management of complex queries through a user-friendly
graphical interface. With it, users can visually design queries, effortlessly manipulate and join tables, and, of course, also write queries in a conventional SQL Editor.
Hiding columns
In Query Builder, there are several ways to hide columns:
Remove columns by editing your SELECT statement directly
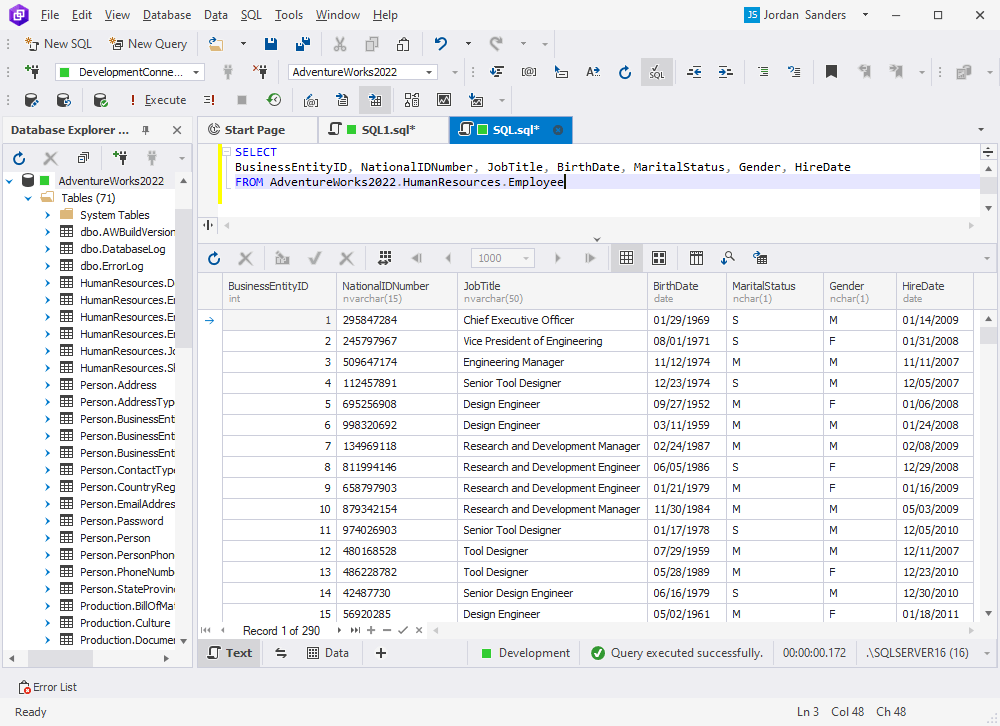
To hide specific columns in your query using Query Builder, you can directly modify the SELECT statement. For example, consider the original query:
SELECT
  BusinessEntityID
  ,NationalIDNumber
  ,LoginID
  ,OrganizationNode
  ,OrganizationLevel
  ,JobTitle
  ,BirthDate
  ,MaritalStatus
  ,Gender
  ,HireDate
FROM AdventureWorks2019.HumanResources.Employee
To remove the columns LoginID, OrganizationNode, and OrganizationLevel, you simply exclude them from the SELECT clause. The revised query will look like this:
SELECT
  BusinessEntityID
  ,NationalIDNumber
  ,JobTitle
  ,BirthDate
  ,MaritalStatus
  ,Gender
  ,HireDate
FROM AdventureWorks2019.HumanResources.Employee
This approach effectively hides the unwanted columns from your query results.
Hide specific columns via the Visible Columns dialog
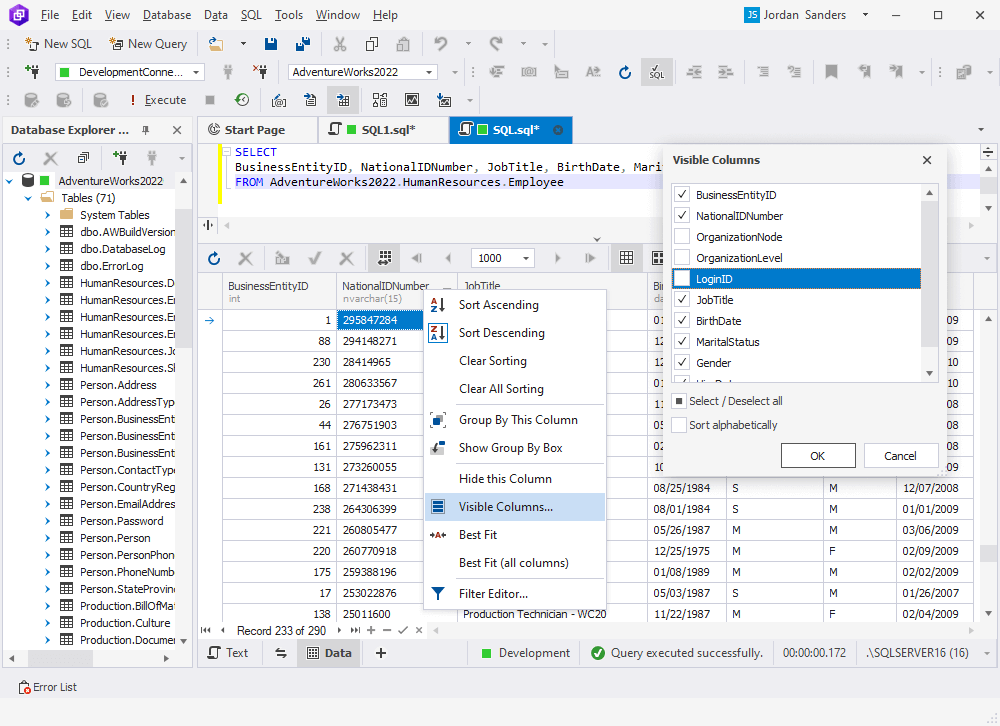
To hide columns from the grid in Query Builder, you can use the Visible Columns dialog. Simply right-click a column header and choose Visible Columns from the shortcut menu.
This will open the Visible Columns dialog. From there, clear the checkboxes next to the columns you wish to hide and then click OK.
This will effectively remove those columns from your current grid view.
Use the Remove from output button on the Selection tab
To hide columns in Query Builder, you can utilize the Remove from output button located on the Selection tab.
Simply click it, and it will effectively exclude the selected columns from your query output.
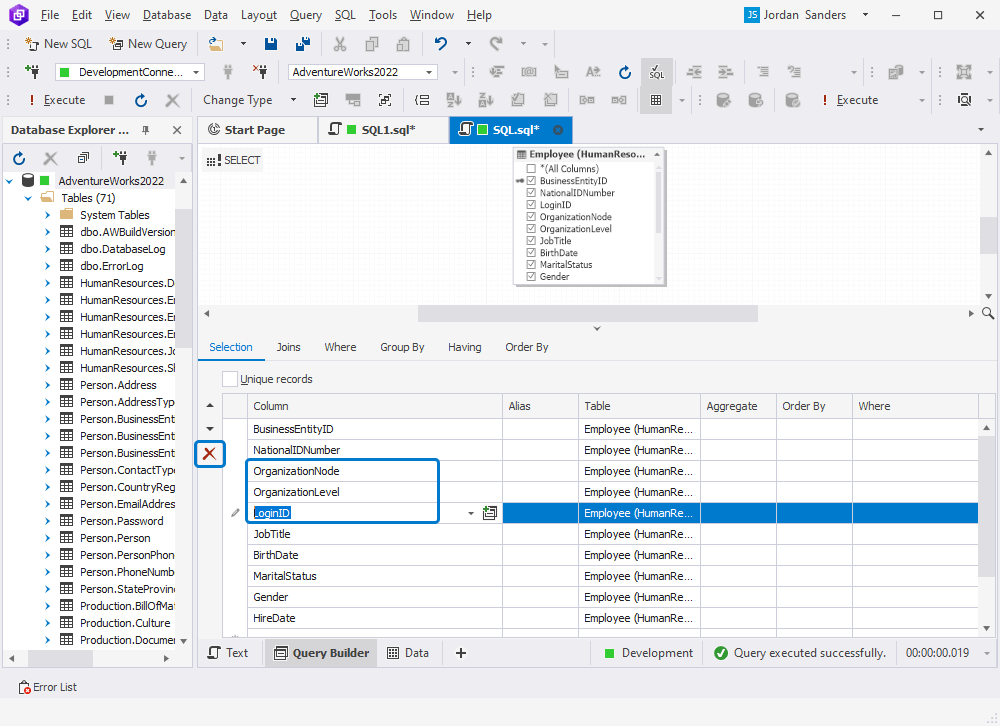
Clear the corresponding checkboxes on the Query Builder diagram
To hide columns in the Query Builder, you can also clear the checkboxes next to the required columns directly on the Query Builder diagram.

Note: The methods mentioned above for hiding columns in Query Builder can be used in combination.
Filtering data
Query Builder offers several ways of filtering data:
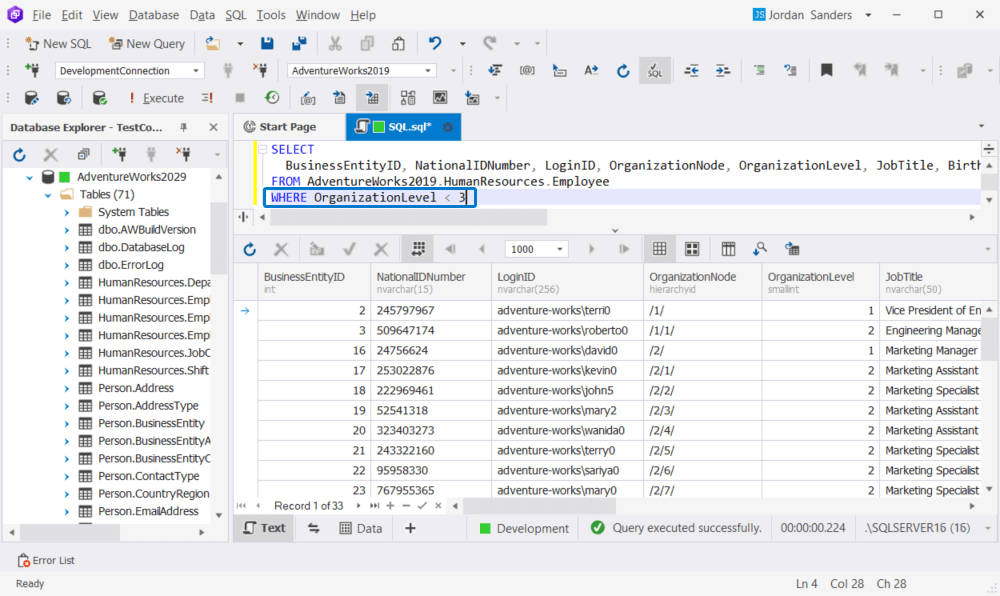
Add a WHERE condition to the query
To filter data in your query, you can add a WHERE condition. For example, consider the following query:
SELECT
  BusinessEntityID
  ,NationalIDNumber
  ,LoginID
  ,OrganizationNode
  ,OrganizationLevel
  ,JobTitle
  ,BirthDate
  ,MaritalStatus
  ,Gender
  ,HireDate
 FROM AdventureWorks2019.HumanResources.Employee
 WHERE OrganizationLevel < 3
When you execute this query, it will return results that only include rows where the OrganizationLevel is less than 3. This effectively filters out all records that don't meet this specific condition, allowing for more focused data retrieval.
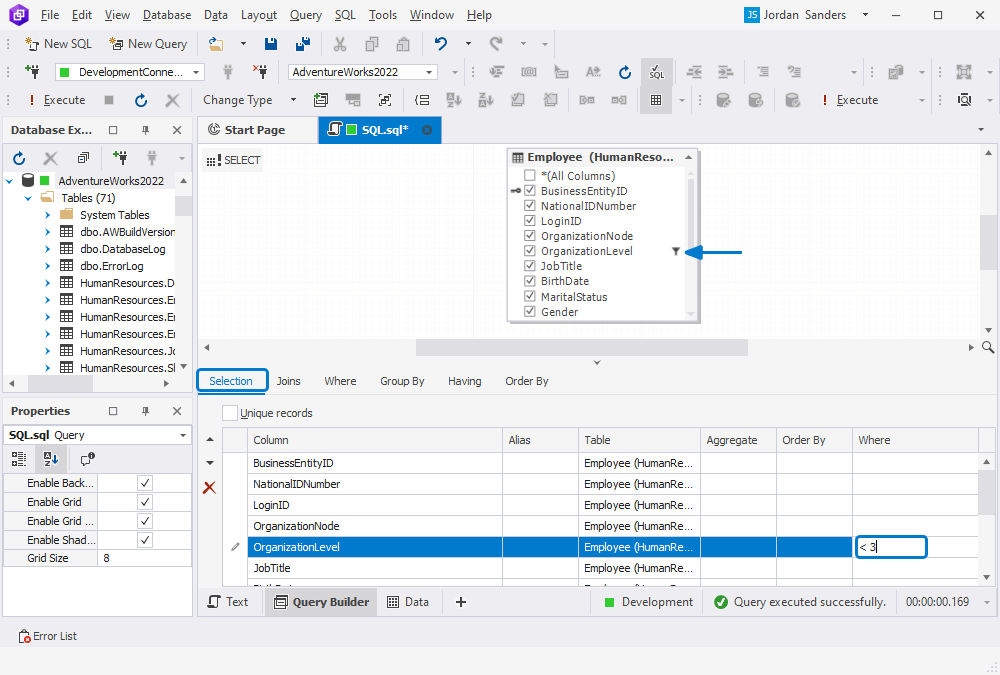
Specify a filter condition for the column on the Selection tab
On the Selection tab in Query Builder, you can enter the filter condition for the required column in the Where field. When you apply this row-level filtering, a
corresponding icon will appear on the diagram to indicate that a filter has been set for that particular column. This visual cue helps you easily keep track of which columns have active filters.
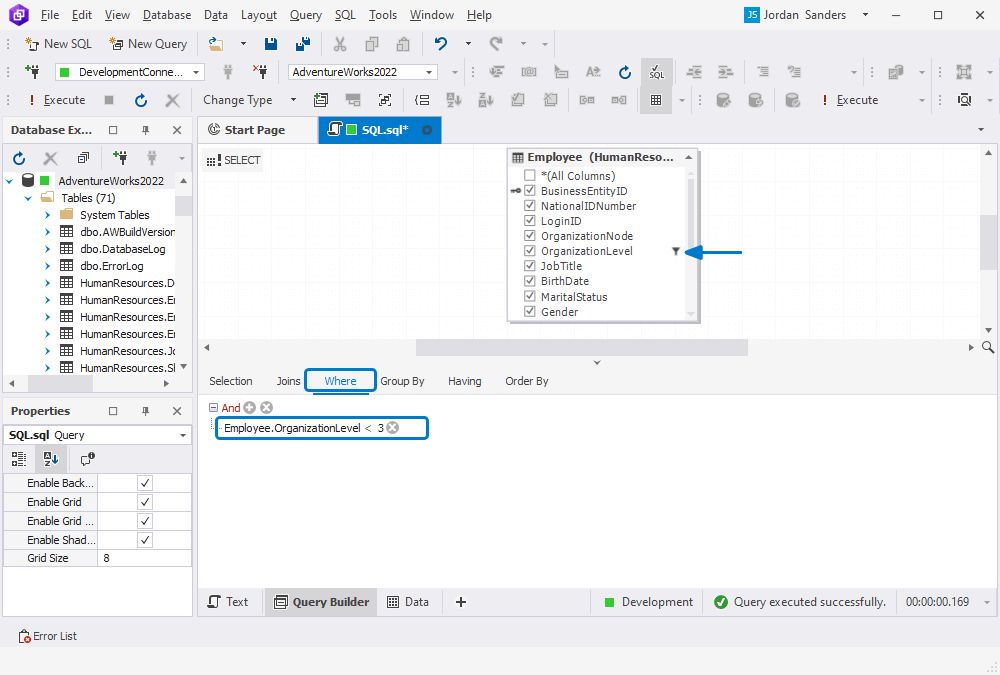
Specify a filter condition for the column on the Where tab
Alternatively, you can enter the filter condition on the Where tab in Query Builder. Just like with the Selection tab, when you apply a filter condition here,
a corresponding filter icon will appear on the diagram.
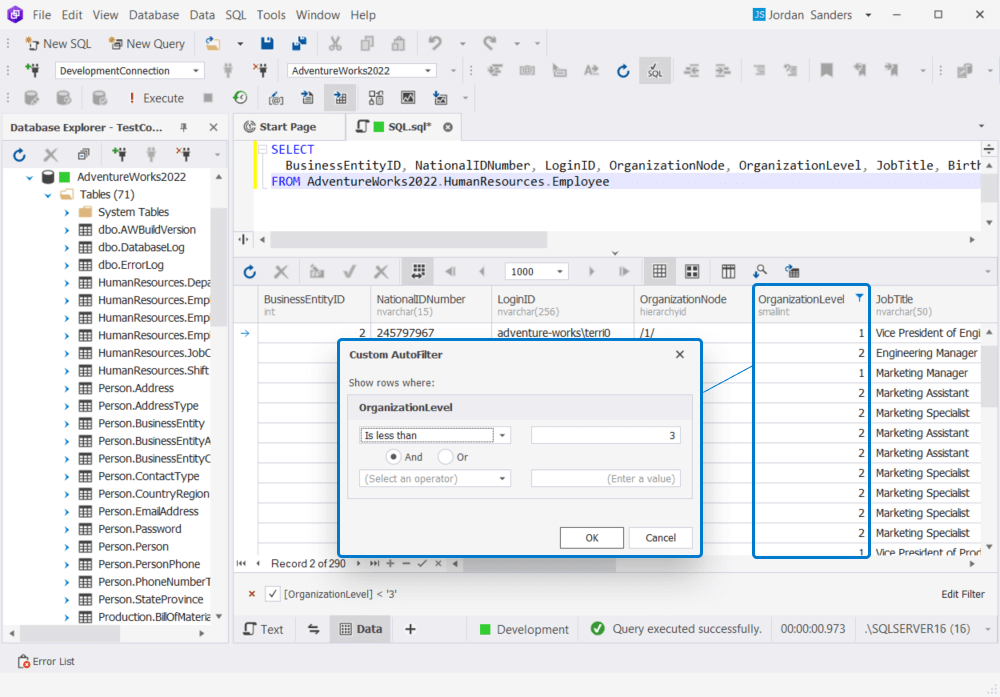
Use the Filter button in the column header
To apply a filter, you can simply click the Filter button located in the upper right corner of the header of the column you want to filter. This activates the filter feature for that specific column,
allowing you to specify your filtering criteria directly from the column header.
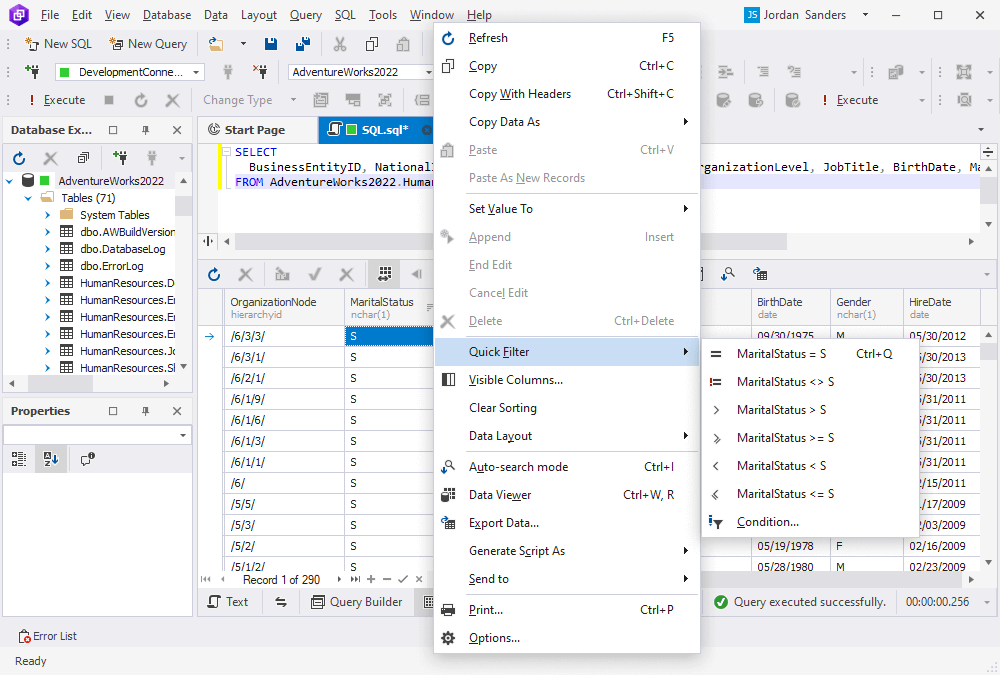
Use the Quick Filter feature
To apply a Quick Filter in Query Builder, right-click the column header and select Quick Filter from the shortcut menu. This provides you with predefined filtering options for quick selection.
If you need a customized filter, you can select Condition from the same menu, which opens the Filter Editor. Here, you can tailor your filter condition to meet specific requirements.
Note: Data sorting and filtering in Query Builder can be executed either on the client side or on the server side, each having its own advantages and use cases.
To learn more about it, refer to Server-side and client-side sorting and filtering.