
You can install the driver by using the Windows installer.
After you receive the license key, add it to your connection strings to connect to the data source.
Amazon RDS for MySQL is one of the most popular options for those who want to combine the capacities of MySQL with the scalability, efficiency, and performance of cloud environments. This service is an excellent fit for developers seeking a reliable database backend without the hassle of manual maintenance, backups, or server management.
This article provides a comprehensive tutorial on connecting .NET applications to MySQL databases hosted on Amazon RDS. It will cover the full cycle of database interactions, from establishing the connection to reading and modifying data using C# and ADO.NET, as well as dotConnect for MySQL.

Fully supports EF Core, Dapper, NHibernate, LinqConnect, and other technologies for efficient data management.

Conforms to the latest ADO.NET standards and innovations for seamless integration with .NET applications.

Offers many MySQL-specific features and fully supports all unique data types for accurate and complete data representation.

Provides robust security with support for SSL/SSH connections, connecting via proxy servers, embedded servers, and HTTP tunneling.

Features native integration with Visual Studio and complete design-time support for accelerated development.

Includes priority support, detailed documentation, and regular updates for continuous improvement.
You can start using dotConnect for MySQL immediately with a 30-day free trial. Choose one of the following installation options:
You can install the driver by using the Windows installer.
After you receive the license key, add it to your connection strings to connect to the data source.
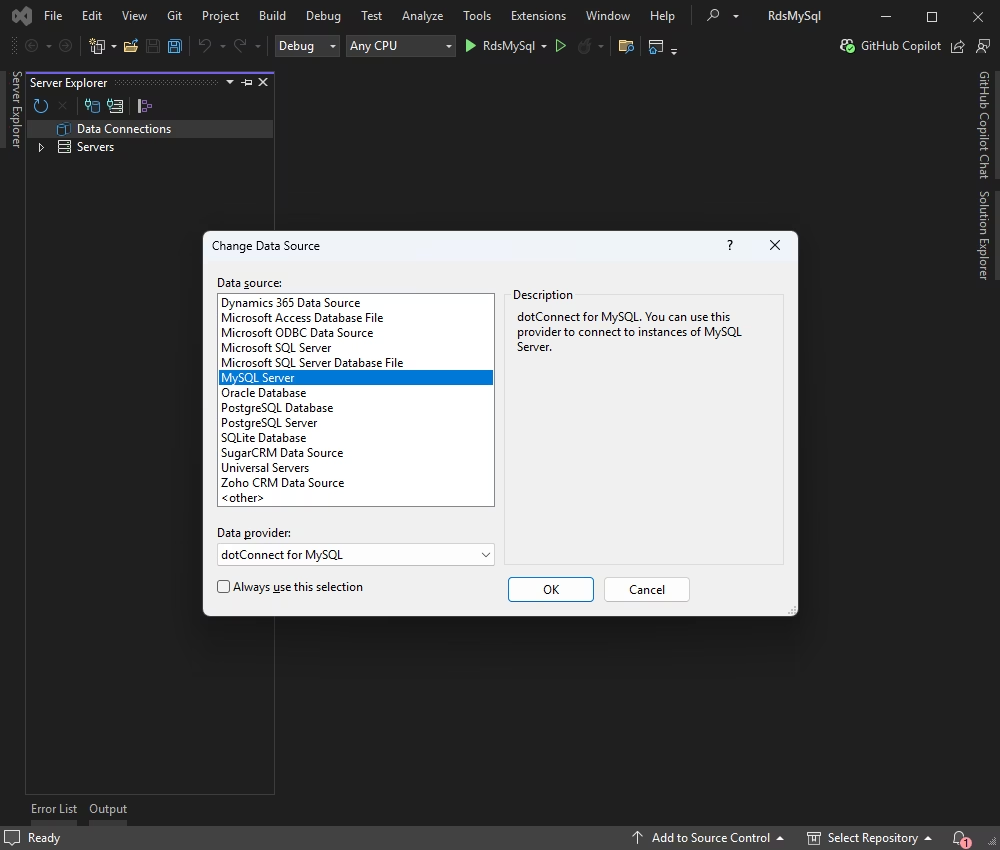
Let us connect to Amazon RDS for MySQL with the help of the built-in Data Explorer. Click Tools, then select Connect to Database, and choose MySQL as the data source.
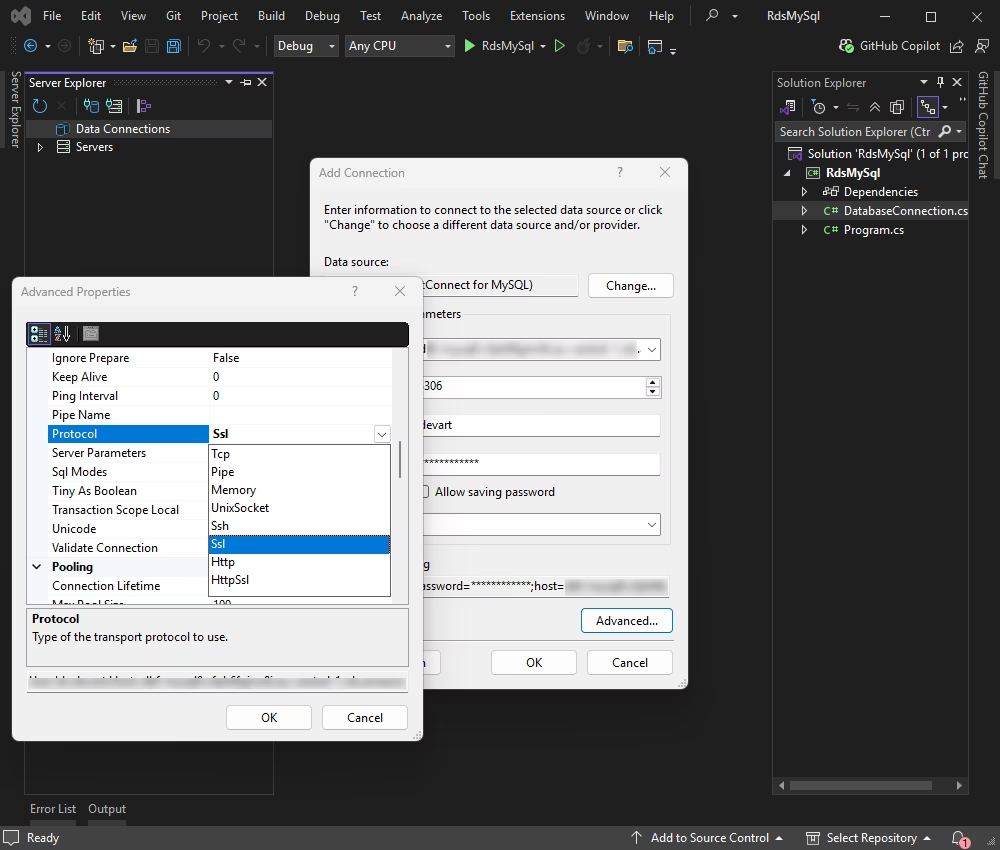
By default, Amazon RDS for MySQL requires an SSL connection. To enable it, click Advanced in the Add connection configuration window and specify that the app must use the SSL protocol.
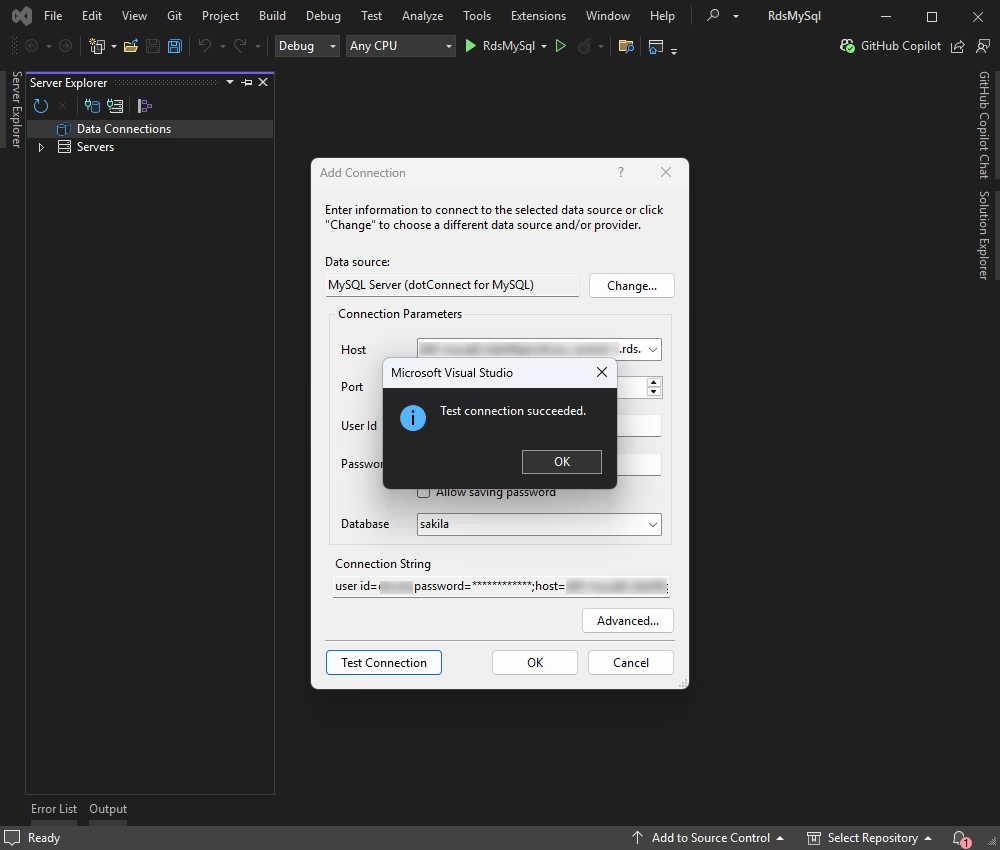
Enter your server details and credentials. Click Connect.
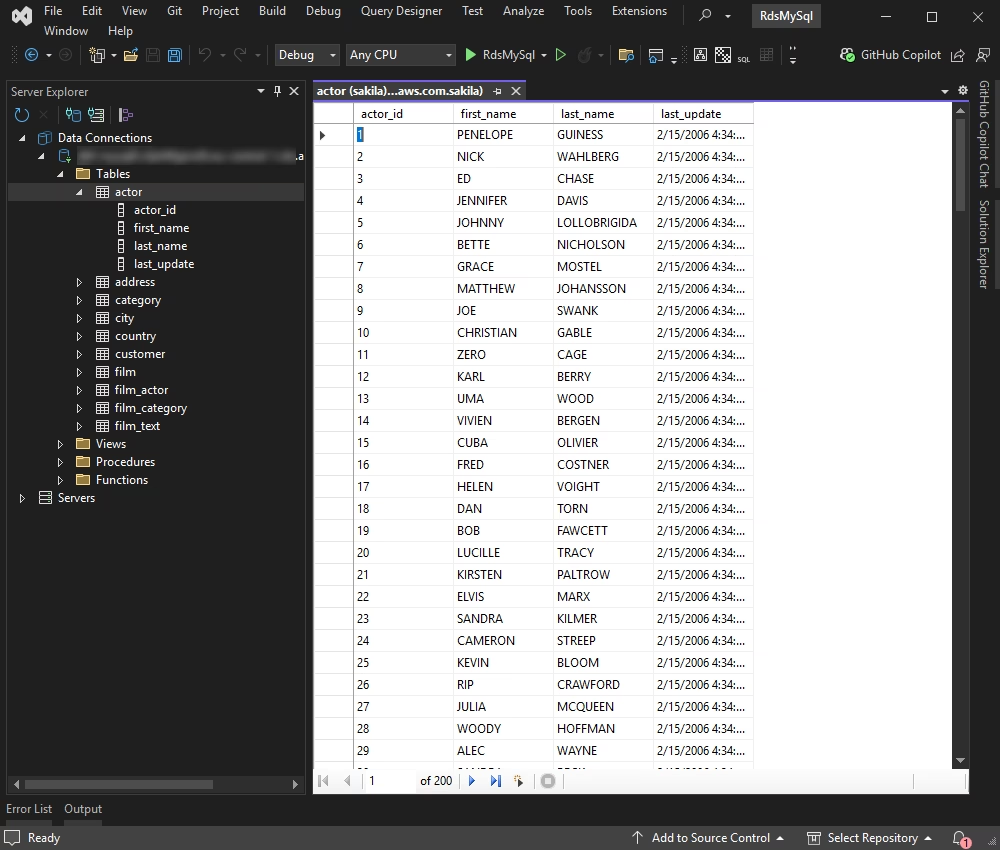
Once connected, you can browse tables, execute queries, and manage data directly within the Data Explorer.
In this section, we'll demonstrate how to connect to the data source and then run a simple query to pull records from the Actor table.
The DatabaseConnection.cs class keeps connection details separate for better maintainability.
using Devart.Data.MySql;

public static class DatabaseConnection
{
    public static MySqlConnection CreateConnection()
    {
        string connectionString = "" +
          "Server=dbf-mysql0.********.eu-central-1.rds.amazonaws.com;" +
          "User Id=********;" +
          "Password=*********;" +
          "Database=sakila;" +
          "License key=*************";

        return new MySqlConnection(connectionString);
    }
}
Replace the placeholders with your actual credentials. If you own a paid license of dotConnect for MySQL, include the license key in the connection code.
| Property | Meaning |
|---|---|
| Host or Server | Hostname or IP address of the MySQL server |
| Port | Port number on which the MySQL server is listening |
| User Id | User ID used to authenticate with MySQL |
| Password | Password for the user ID |
| Database | Default database to be used after connecting |
| License key | Your license key (only required when using .NET Standard compatible assemblies) |
Add the code below to your Program.cs file.
using Devart.Data.MySql;

public sealed class Program
{
    public static void Main(string[] args)
    {
        try
        {
            using (MySqlConnection connection = DatabaseConnection.CreateConnection())
            {
                connection.Open();
                Console.WriteLine("Connection successful!");

                string sql = "SELECT actor_id, first_name, last_name FROM actor ORDER BY actor_id LIMIT 10";
                using (MySqlCommand command = new MySqlCommand(sql, connection))
                using (MySqlDataReader reader = command.ExecuteReader())
                {
                    Console.WriteLine("+---------+----------------+----------------+");
                    Console.WriteLine("| ActorId | First Name     | Last Name      |");
                    Console.WriteLine("+---------+----------------+----------------+");
                    while (reader.Read())
                    {
                        int actorId = reader.GetInt32(0);
                        string firstName = reader.GetString(1);
                        string lastName = reader.GetString(2);
                        Console.WriteLine(String.Format("| {0,-7} | {1,-14} | {2,-14} |", actorId, firstName, lastName));
                    }
                    Console.WriteLine("+---------+----------------+----------------+");
                }
            }
        }
        catch (Exception ex)
        {
            Console.WriteLine("An error occurred: " + ex.Message);
        }
    }
}Build and run your application: select Start from the menu or click F5. It displays the data retrieved from the database.
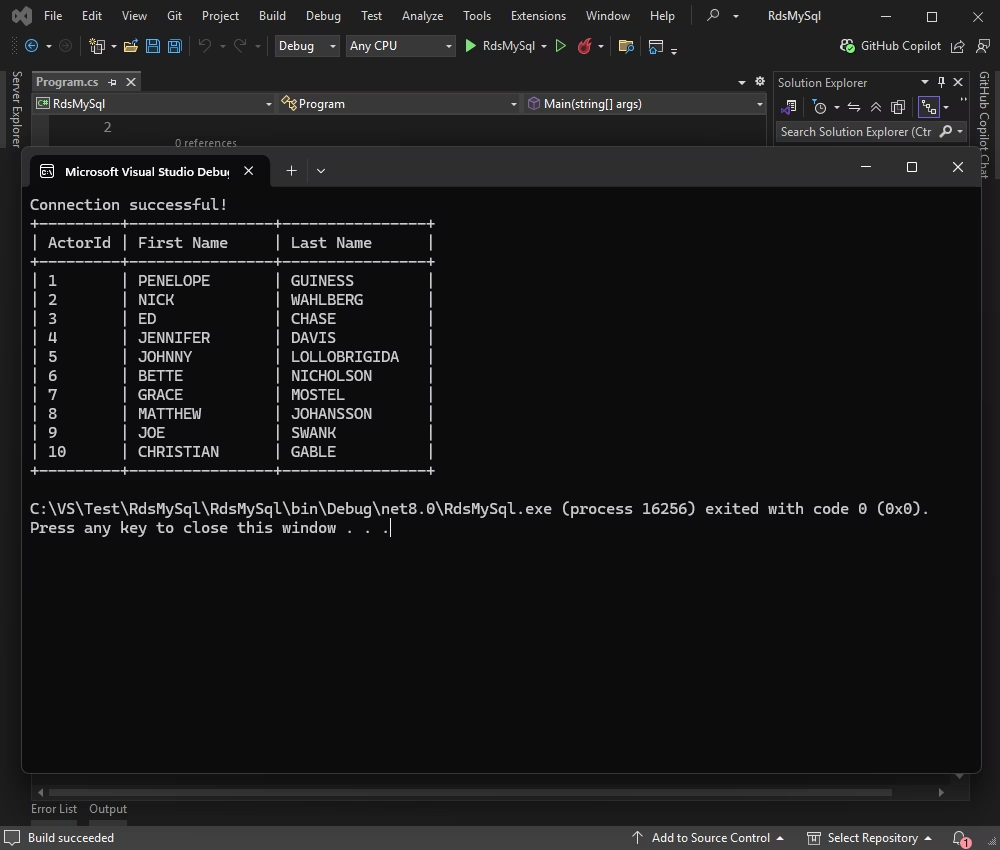
Let's add a new row to the Actor table. For that, we need to compose and execute an INSERT command and use a parameterized query. The code is below.
using Devart.Data.MySql;

public sealed class Program
{
    public static void Main(string[] args)
    {
        try
        {
            using (MySqlConnection connection = DatabaseConnection.CreateConnection())
            {
                connection.Open();
                Console.WriteLine("Connection successful!");

                string insertSql = "INSERT INTO actor(first_name, last_name) VALUES(@first, @last)";
                using (MySqlCommand insertCmd = new MySqlCommand(insertSql, connection))
                {
                    insertCmd.Parameters.AddWithValue("@first", "TestFirst");
                    insertCmd.Parameters.AddWithValue("@last", "TestLast");
                    insertCmd.ExecuteNonQuery();
                }

                long newActorId = 0;
                using (MySqlCommand idCmd = new MySqlCommand("SELECT LAST_INSERT_ID()", connection))
                {
                    object result = idCmd.ExecuteScalar();
                    if (result != null && result != DBNull.Value)
                    {
                        newActorId = Convert.ToInt64(result);
                    }
                }

                Console.WriteLine("Inserted test actor (actor_id: " + newActorId + "): TestFirst TestLast");
            }
        }
        catch (Exception ex)
        {
            Console.WriteLine("An error occurred: " + ex.Message);
        }
    }
}
See the results in the application:
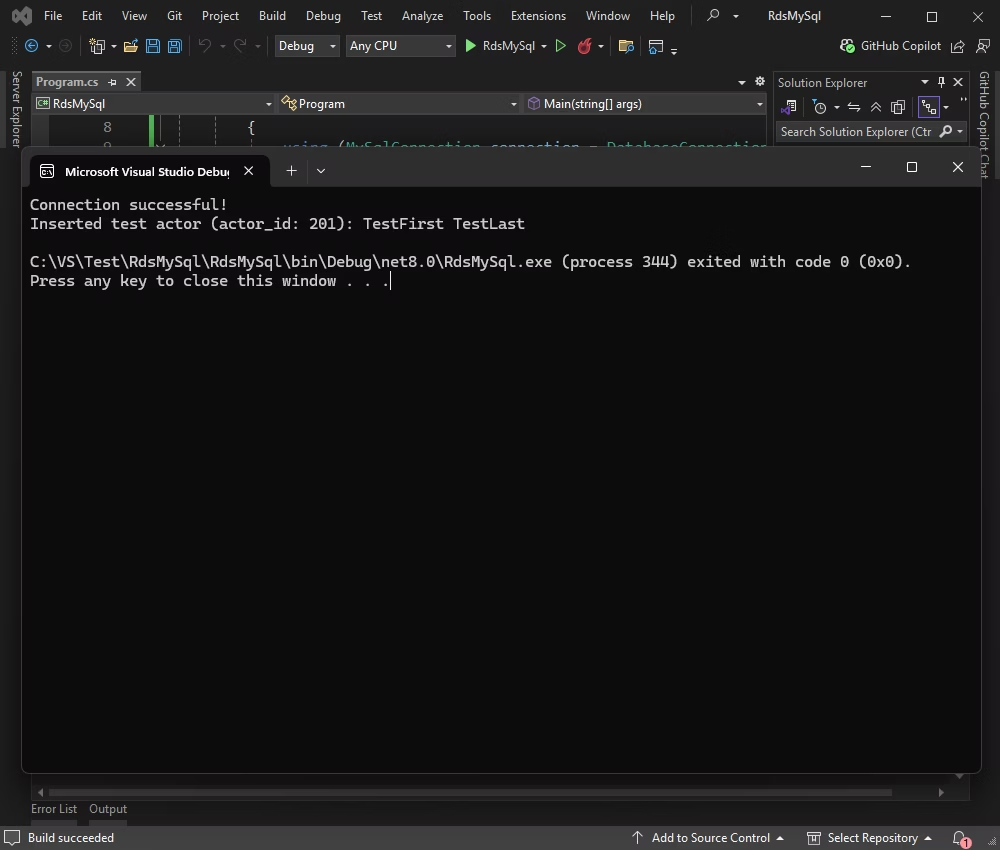
Next, we want to update an existing record by changing the actor's first and last name. The following code shows how to build and run an UPDATE command from within your C# code.
using Devart.Data.MySql;

public sealed class Program
{
    public static void Main(string[] args)
    {
        try
        {
            using (MySqlConnection connection = DatabaseConnection.CreateConnection())
            {
                connection.Open();
                Console.WriteLine("Connection successful!");

                string updateSql = "UPDATE actor SET first_name = @first, last_name = @last WHERE actor_id = @id";
                using (MySqlCommand updateCmd = new MySqlCommand(updateSql, connection))
                {
                    updateCmd.Parameters.AddWithValue("@first", "Michael");
                    updateCmd.Parameters.AddWithValue("@last", "Anderson");
                    updateCmd.Parameters.AddWithValue("@id", 201);
                    int rowsAffected = updateCmd.ExecuteNonQuery();

                    if (rowsAffected > 0)
                    {
                        Console.WriteLine("Updated actor: Michael Anderson");

                        // Retrieve and display the updated row
                        string selectSql = "SELECT actor_id, first_name, last_name FROM actor WHERE actor_id = @id";
                        using (MySqlCommand selectCmd = new MySqlCommand(selectSql, connection))
                        {
                            selectCmd.Parameters.AddWithValue("@id", 201);
                            using (MySqlDataReader reader = selectCmd.ExecuteReader())
                            {
                                if (reader.Read())
                                {
                                    Console.WriteLine($"actor_id: {reader["actor_id"]}, first_name: {reader["first_name"]}, last_name: {reader["last_name"]}");
                                }
                            }
                        }
                    }
                    else
                    {
                        Console.WriteLine("No actor found with actor_id: 201");
                    }
                }
            }
        }
        catch (Exception ex)
        {
            Console.WriteLine("An error occurred: " + ex.Message);
        }
    }
}
The result is as follows:
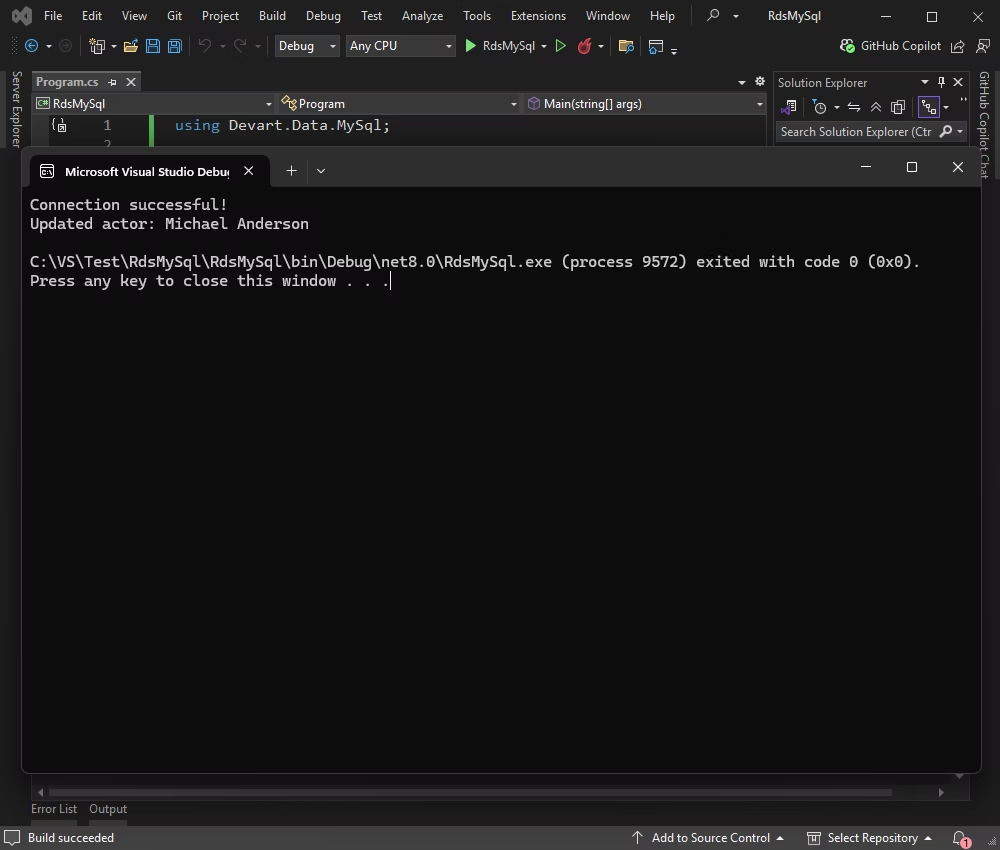
Finally, let us see how to delete the record. We are going to remove the actor we have just added to the database using the DELETE command.
using Devart.Data.MySql;

public sealed class Program
{
    public static void Main(string[] args)
    {
        try
        {
            using (MySqlConnection connection = DatabaseConnection.CreateConnection())
            {
                connection.Open();
                Console.WriteLine("Connection successful!");

                string deleteSql = "DELETE FROM actor WHERE actor_id = @id";
                using (MySqlCommand deleteCmd = new MySqlCommand(deleteSql, connection))
                {
                    deleteCmd.Parameters.AddWithValue("@id", 201);
                    int rowsAffected = deleteCmd.ExecuteNonQuery();

                    if (rowsAffected > 0)
                    {
                        Console.WriteLine("Deleted actor with actor_id: 201");
                    }
                    else
                    {
                        Console.WriteLine("No actor found with actor_id: 201");
                    }
                }
            }
        }
        catch (Exception ex)
        {
            Console.WriteLine("An error occurred: " + ex.Message);
        }
    }
}
We can see that the operation is successful.
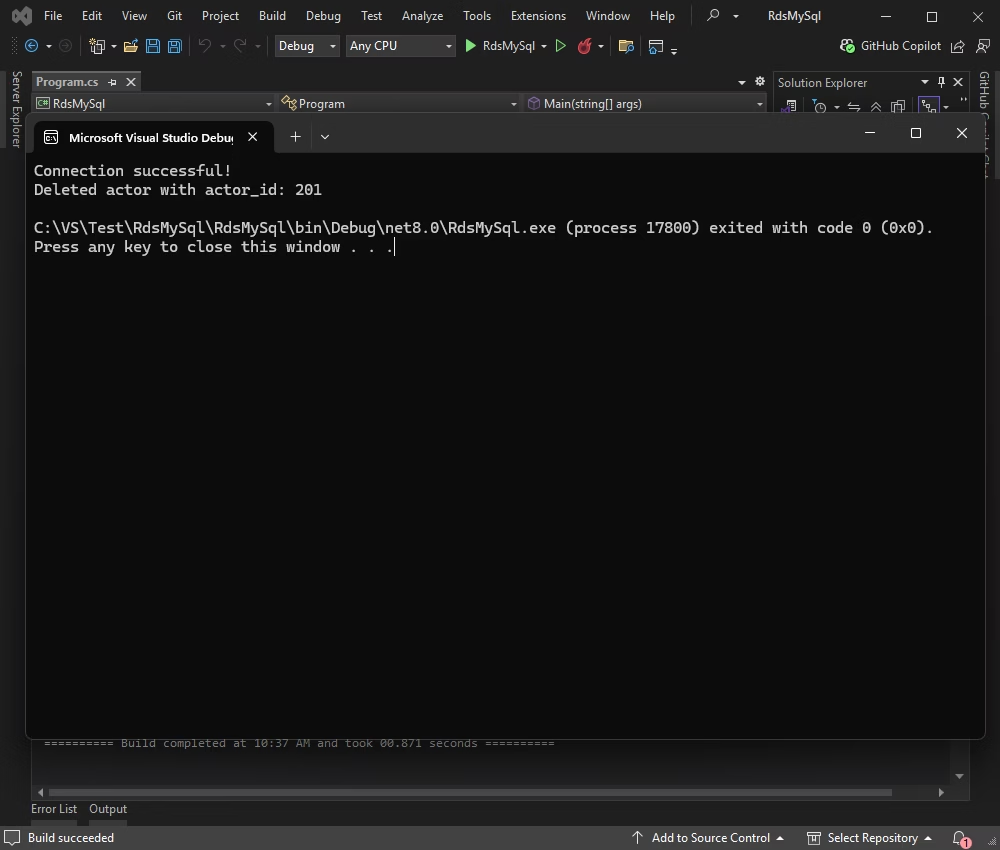
Now you have a solid foundation for integrating Amazon RDS for MySQL into your .NET applications. Now you can move forward and master more advanced techniques to scale your app using the reliable AWS infrastructure. Meanwhile, dotConnect for MySQL simplifies your workflow by providing direct access to MySQL and MariaDB databases hosted in the AWS cloud.
License key parameter for a working connection.
License key value, then create a MySqlConnection instance with this string and call Open() for it inside a try-catch block to test and handle connection errors.
Protocol=SSL and specify the SSL CA Cert, SSL Cert, and SSL Key file paths in the connection string, then open the MySqlConnection connection to establish an encrypted SSL/TLS connection.
Scaffold-DbContext with a dotConnect connection string (including the License key) to generate the DbContext and entity classes.

I'm a technical content writer who loves turning complex topics — think SQL, connectors, and backend chaos–into content that actually makes sense (and maybe even makes you smile). I write for devs, data folks, and curious minds who want less fluff and more clarity. When I'm not wrangling words, you'll find me dancing salsa, or hopping between cities.

