This tutorial provides a deep dive into connecting a .NET application to an Oracle database.
We're going to use Oracle Database, a powerful and feature-rich relational database management system renowned for its scalability, performance, and robust security features.
As a leading choice for enterprise-level applications, Oracle Database is ideal for critical business solutions as it supports high transaction volumes and large datasets.
Its advanced capabilities, such as Real Application Clusters (RAC) and comprehensive data management tools, ensure high availability and reliability.
Why dotConnect for Oracle?
Advanced ORM support
Fully supports EF Core, Dapper, NHibernate, LinqConnect, and other technologies for efficient data management.
Full ADO.NET compliance
Conforms to the latest ADO.NET standards and innovations for seamless integration with .NET applications.
Oracle-specific data types
Offers many Oracle-specific features and fully supports all unique data types for accurate and complete data representation.
Secure connection options
Provides robust security with support for SSL/SSH connections, connecting via proxy servers, embedded servers, and HTTP tunneling.
IDE integration
Features native integration with Visual Studio and complete design-time support for accelerated development.
Priority support & frequent updates
Includes priority support, detailed documentation, and regular updates for continuous improvement.
Download and activate dotConnect for Oracle
You can start using dotConnect for Oracle immediately with a 30-day free trial. Choose one of the following installation options:
This example demonstrates a basic connection to an Oracle database. Depending on your requirements, you may need to add more functionality, such as executing queries or handling various types of exceptions.
You can also connect to a database using Visual Studio's built-in Data Explorer:
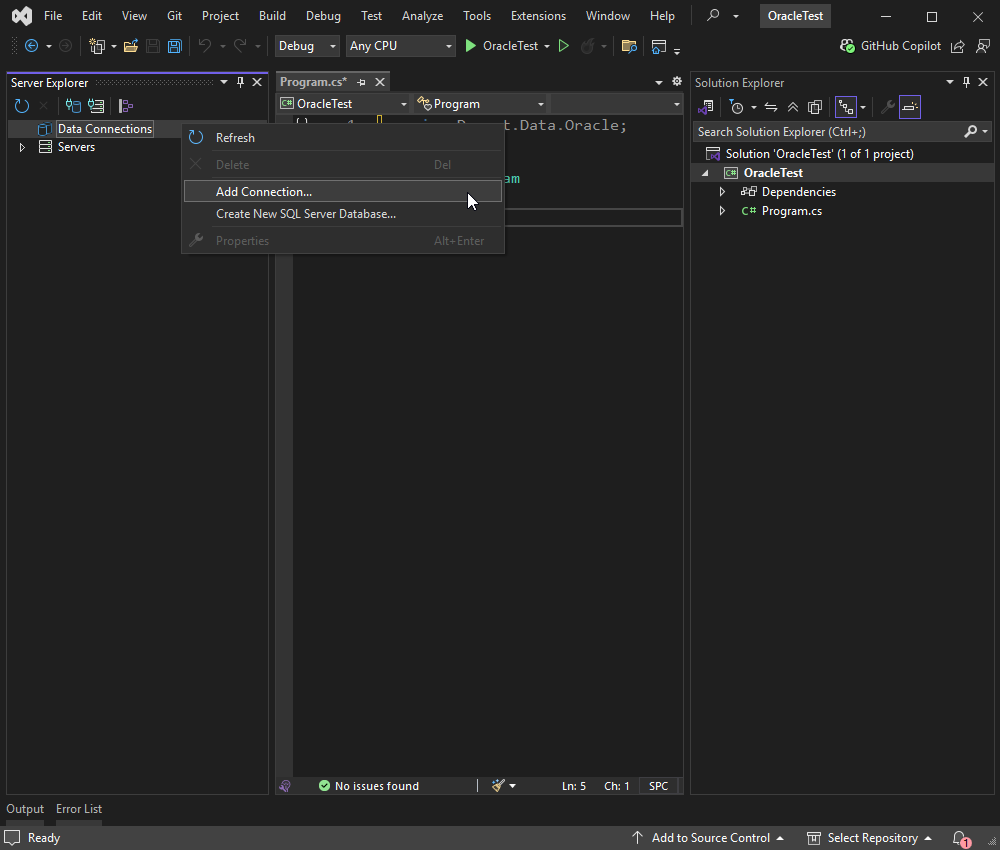
1. Go to the Server Explorerwindow, right-click Data Connections, and then select Add Connection.
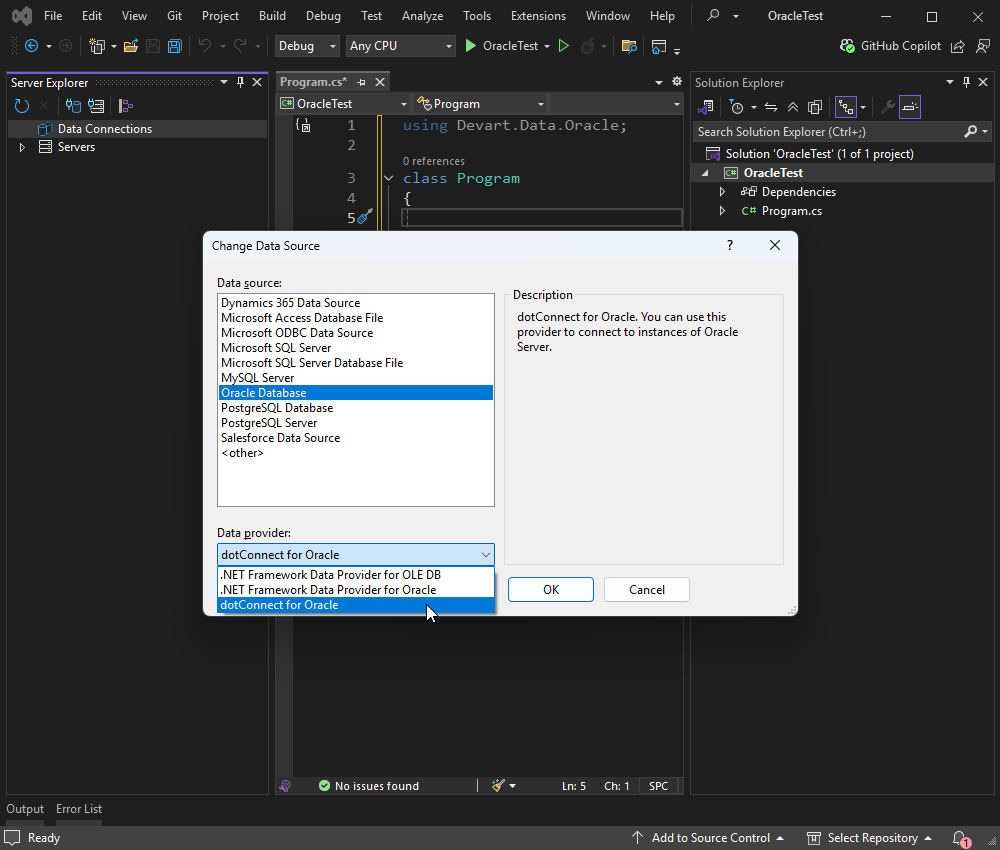
2. In the Add Connection dialog, click Change to specify the data source.
3. In the Change Data Source dialog, select dotConnect for Oracle from the list from the list of installed data providers and click OK.
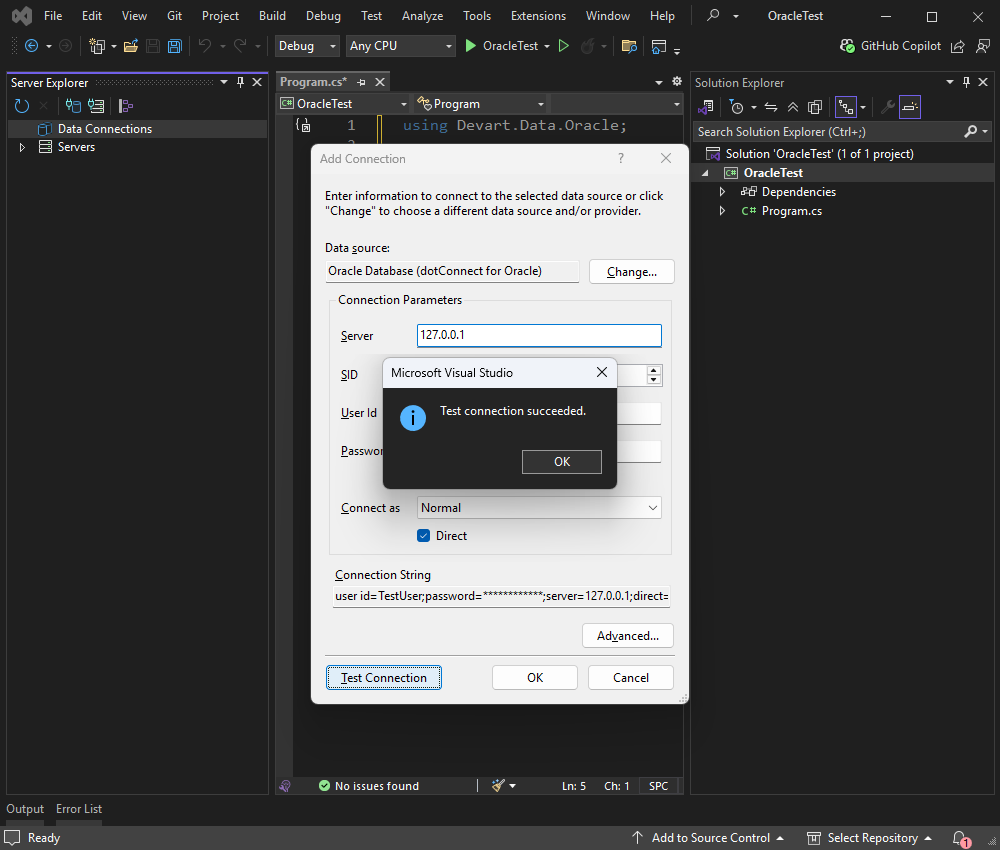
4. In the Add Connection dialog, select Oracle as the data source and provide your server credentials.
5. To verify the connection, click Test Connection.
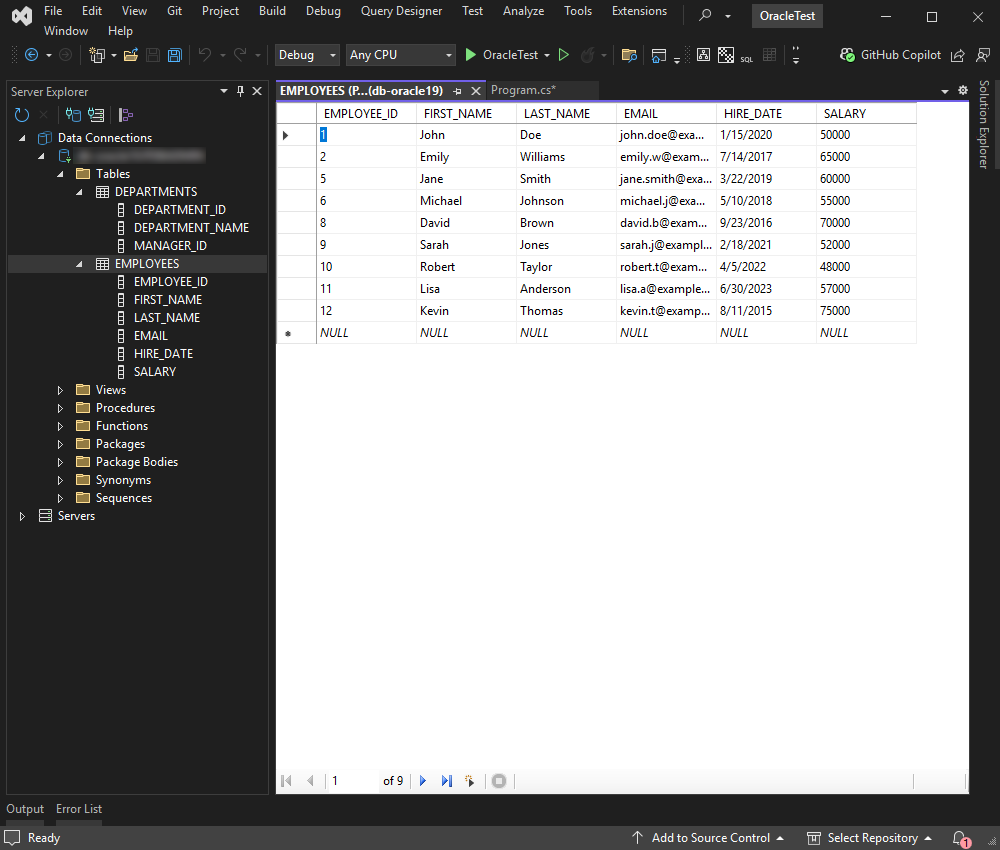
Once you are connected, you can browse tables, run queries, and manage data directly in Visual Studio.
Connect with EF Core using Entity Developer
Entity Developer allows you to visually design and generate EF Core models, making database application development faster, easier, and more efficient. If you don't have it already installed, close your Visual Studio instance, download Entity Developer, and install it following the on-screen instructions.
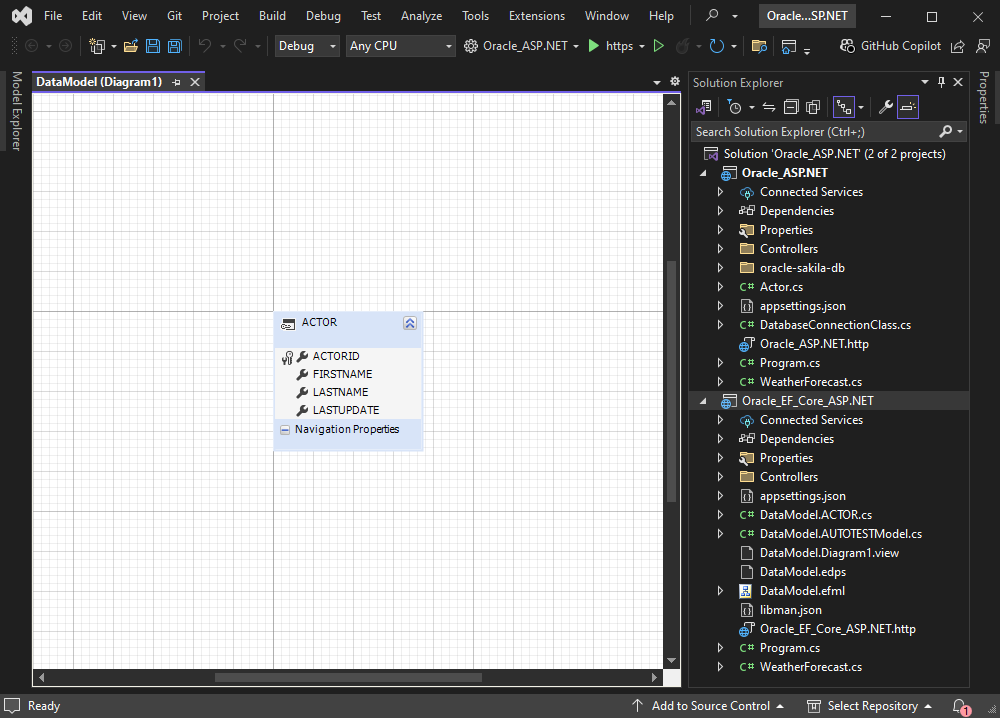
Follow the detailed illustrated guide to create your database model using Entity Developer. When this process is complete, the model you created opens.
Connect with EF Core using Scaffold-DbContext
To connect to an Oracle database using Entity Framework Core (EF Core) and scaffold its context, follow the below instructions to generate the required EF Core model classes and a DbContext based on the existing Oracle database schema.
Install the required NuGet packages
In Solution Explorer, right-click the project and select Manage NuGet Packages. Then, you need to open the Package Manager Console. To do this, go to Tools > NuGet Package Manager > Package Manager Console.
Scaffold DbContext
In Package Manager Console, run the following command to scaffold DbContext and entity classes from the Oracle database. Replace the connection string with your relevant connection details.
-OutputDir Models specifies the output directory where the generated model classes will be placed.
After running the scaffold command, EF Core generates the DbContext class and entity classes in the specified output directory (e.g., Models). Review the generated code to make sure it matches your database schema.
Video tutorial: How to connect .NET console application to an Oracle database
Conclusion
This tutorial provides detailed guides on connecting a .NET application to Oracle databases in various ways. It explores multiple connection methods, including Direct Mode, SSH, secure SSL/TLS, and using Entity Framework Core with Scaffold-DbContext and Entity Developer.
These are just a few of the things dotConnect can do for you. To experience a seamless, high-performance data connectivity solution tailored for .NET developers, download dotConnect for Oracle.
FAQ
How do you install and activate dotConnect for Oracle in a .NET project?
Install dotConnect for Oracle via the EXE installer or by adding the Devart.Data.Oracle NuGet package to your project, then obtain your personal activation key from your Devart Customer Portal and include it in the connection string via the License Key parameter for a working connection.
How do you create a connection to Oracle using dotConnect in C#?
Define a connection string that includes host, user ID, password, database, and the License Key value, then create an OracleConnection instance with this string and call Open() for it inside a try-catch block to test and handle connection errors.
How do you enable encryption for secure Oracle connections with dotConnect?
Use Oracle Native Network Encryption by configuring encryption in the sqlnet.ora file on both client and server sides. No special parameters are required in the connection string.
Can you connect to Oracle using Entity Framework Core and dotConnect?
Yes, you can either use Entity Developer to visually create an EF Core model from the database or run Scaffold-DbContext with a dotConnect connection string (including License Key) to generate the DbContext and entity classes.
Is it possible to connect to Oracle using Visual Studio Server Explorer with dotConnect?
Yes, it is possible. All you need to do is navigate to Visual Studio Server Explorer, add a new Data Connection, choose dotConnect for Oracle as the data provider, enter your credentials, test the connection, and then browse Oracle data directly in Visual Studio.
I'm a technical content writer who loves turning complex topics — think SQL, connectors, and backend chaos–into content that actually makes sense (and maybe even makes you smile). I write for devs, data folks, and curious minds who want less fluff and more clarity. When I'm not wrangling words, you'll find me dancing salsa, or hopping between cities.