Salesforce is one of the most popular cloud-based customer relationship management (CRM) platforms that helps businesses manage customer relationships. It is often used as a data source in various web applications, particularly those built with Blazor.
Blazor is a front-end web framework based on HTML and C# that allows developers to build web applications quickly. The development process can be further improved by incorporating ADO.NET technologies for database-like interactions, especially with dotConnect for Salesforce by Devart.
In this article, we'll explore how to connect .NET Blazor applications to Salesforce using dotConnect for Salesforce.
Create a connection
To create the Salesforce connection instance using dotConnect within a .NET Blazor project, apply the below code.
Make sure to replace the placeholders with your valid Salesforce credentials: the host, the UserID, the password, and the security token.
public SalesforceService()
    {
        _connectionString = "Authentication Type=AccessRefreshTokenInteractive;" +
                            "License Key=**********";
    }

    public async Task<bool> TestConnectionAsync()
    {
        try
        {
            using (var connection = new SalesforceConnection(_connectionString))
            {
                await connection.OpenAsync();
                return true;
            }
        }
        catch
        {
            return false;
        }
    }
Note
If you're using a purchased dotConnect for a Salesforce license, include the license key in the code. If you're using the trial version, remove the License Key line.
Connection strings
| Name |
Description |
| Authentication type |
The authentication method for connecting to Salesforce, such as UserNamePassword, AccessRefreshToken, AccessRefreshTokenInteractive, SessionId, etc. |
| Host |
The Salesforce.com or Database.com login URL, such as login.salesforce.com, login.database.com, test.salesforce.com, etc. |
| User ID -or- User |
The Salesforce login account. |
| Password |
The password for the account. |
| Refresh token |
The Salesforce OAuth 2.0 refresh token used for the OAuth Refresh Token authentication. |
| Security token |
User ID used to authenticate with MySQL. |
| License key |
The license key. |
To illustrate the work of our data provider dotConnect for Salesforce, we have created the class called SalesforceService.cs class. It will be used to set up the Salesforce connection, read Salesforce data, update, and delete it.
In this article, we provide examples of codes for you to use as references.
Read Salesforce data
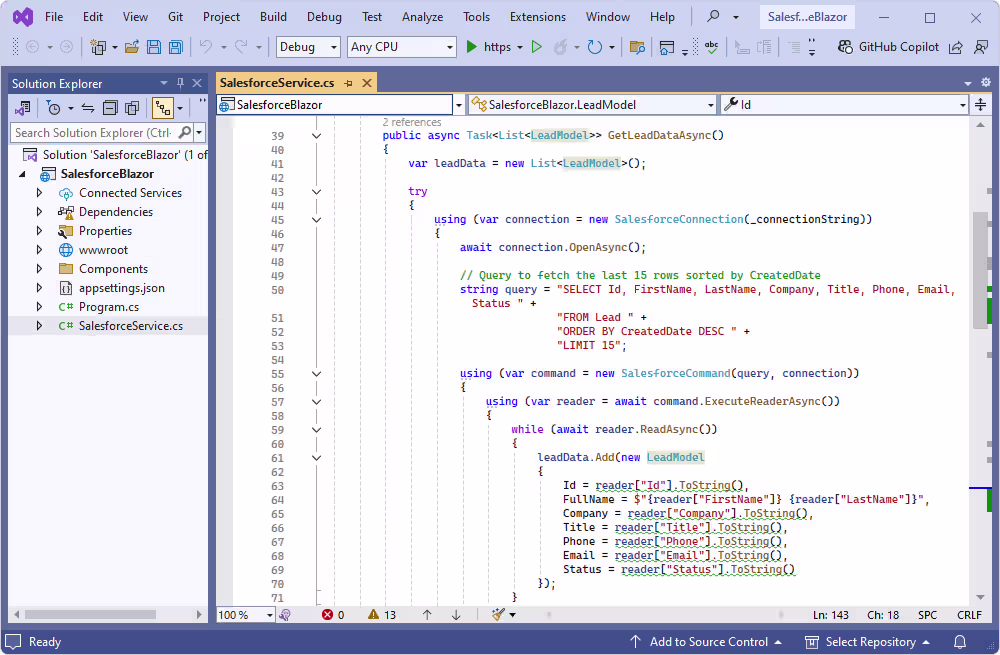
To read and display data from Salesforce tables in a Blazor app, use the below code in the SalesforceService.cs class.
This code uses the following ADO.NET classes:
- SalesforceConnection opens the connection to Salesforce.
- SalesforceCommand executes the query to fetch the last 15 rows from the Lead table.
- SalesforceDataReader reads the results row by row, and each row is processed into a LeadModel object.
public async Task<List<LeadModel>> GetLeadDataAsync()
{
var leadData = new List<LeadModel>();
try
{
using (var connection = new SalesforceConnection(_connectionString))
{
await connection.OpenAsync();
string query = "SELECT Id, FirstName, LastName, Company, Title, Phone, Email, Status " +
"FROM Lead " +
"ORDER BY CreatedDate DESC " +
"LIMIT 15";
using (var command = new SalesforceCommand(query, connection))
{
using (var reader = await command.ExecuteReaderAsync())
{
while (await reader.ReadAsync())
{
leadData.Add(new LeadModel
{
Id = reader["Id"].ToString(),
FullName = $"{reader["FirstName"]} {reader["LastName"]}",
Company = reader["Company"].ToString(),
Title = reader["Title"].ToString(),
Phone = reader["Phone"].ToString(),
Email = reader["Email"].ToString(),
Status = reader["Status"].ToString()
});
}
}
}
}
}
catch
{
}
return leadData;
}
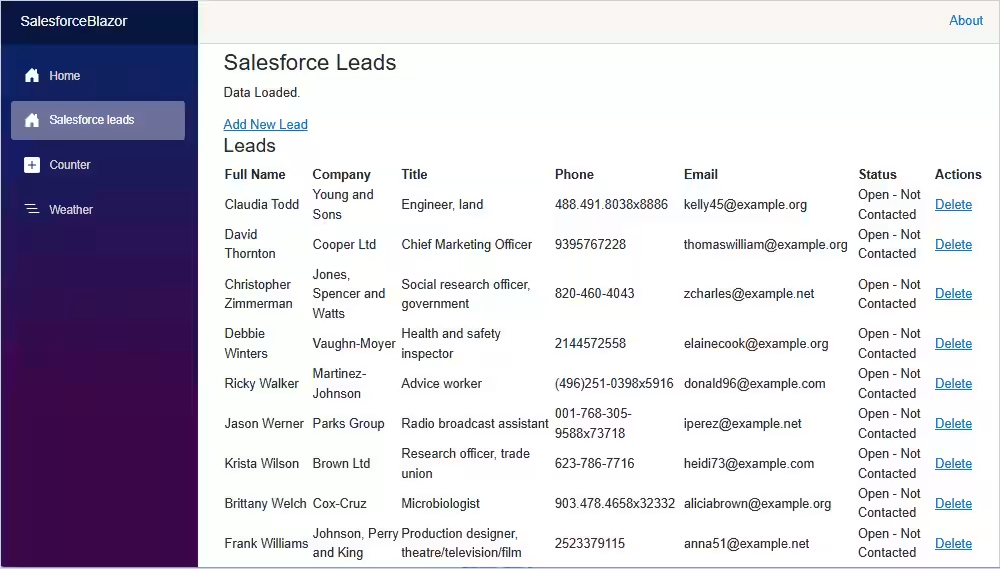
The results will be displayed in a table with the below code:
<h4>Leads</h4>
<table>
    <thead>
        <tr>
            <th>Full Name</th>
            <th>Company</th>
            <th>Title</th>
            <th>Phone</th>
            <th>Email</th>
            <th>Status</th>
            <th>Actions</th>
        </tr>
    </thead>
    <tbody>
        @@foreach (var lead in Leads)
        {
            <tr>
                <td>@@lead.FullName</td>
                <td>@@lead.Company</td>
                <td>@@lead.Title</td>
                <td>@@lead.Phone</td>
                <td>@@lead.Email</td>
                <td>@@lead.Status</td>
                <td>
                    <a href="/salesforceleads?id=@@lead.Id">Delete</a>
                </td>
            </tr>
        }
    </tbody>
</table>
Click Run to view the data in your Blazor project.
Add data to Salesforce
To add data to Salesforce tables in a Blazor app, use the below code in the SalesforceService.cs class.
The ADO.NET classes used in this code are:
- SalesforceConnection opens a connection to Salesforce.
- SalesforceLoader handles the row insertion operation using methods like SetValue, NextRow, Open, and Close.
public async Task AddLeadAsync(string firstName, string lastName, string company, string title, string phone, string email)
{
using (var connection = new SalesforceConnection(_connectionString))
{
await connection.OpenAsync();
var loader = new SalesforceLoader
{
Connection = connection,
TableName = "Lead"
};
loader.CreateColumns();
loader.Open();
loader.SetValue("FirstName", firstName ?? string.Empty);
loader.SetValue("LastName", lastName ?? string.Empty);
loader.SetValue("Company", company ?? string.Empty);
loader.SetValue("Title", title ?? string.Empty);
loader.SetValue("Phone", phone ?? string.Empty);
loader.SetValue("Email", email ?? string.Empty);
loader.SetValue("Status", "Open - Not Contacted");
loader.NextRow();
loader.Close();
}
}
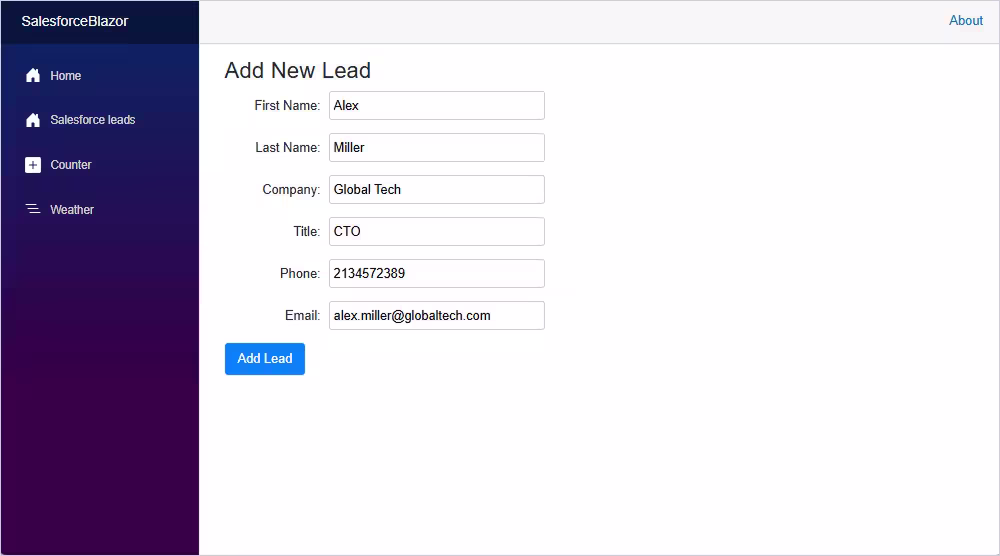
It produces the table:
<h3>Add New Lead</h3>

<form>
            <div>
            <label>First Name:</label>
            <input @@bind="FirstName" placeholder="First Name" required="required" />
    </div>
            <div>
            <label>Last Name:</label>
            <input @@bind="LastName" placeholder="Last Name" required="required" />
    </div>
            <div>
            <label>Company:</label>
            <input @@bind="Company" placeholder="Company" required="required" />
    </div>
            <div>
            <label>Title:</label>
            <input @@bind="Title" placeholder="Title" />
    </div>
            <div>
            <label>Phone:</label>
            <input @@bind="Phone" placeholder="Phone" />
    </div>
            <div>
            <label>Email:</label>
            <input @@bind="Email" placeholder="Email" type="email" />
    </div>
            <button type="button" @@onclick="SubmitLead">Add Lead</button>
</form>

@@code {
    private string FirstName, LastName, Company, Title, Phone, Email;

    private async Task SubmitLead()
    {
        await SalesforceService.AddLeadAsync(FirstName, LastName, Company, Title, Phone, Email);
        NavigationManager.NavigateTo("/salesforceleads", true);
    }
}
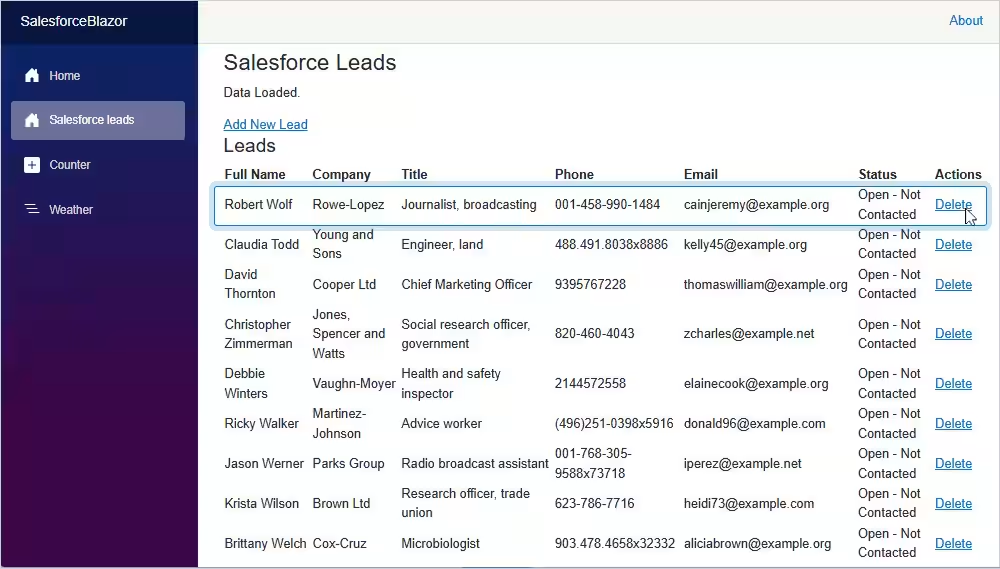
Delete Salesforce records
The below code uses the ADO.NET classes to delete records from Salesforce tables in your Blazor application.
- SalesforceCommand prepares and executes the DELETE SQL command.
- SalesforceParameter ensures secure parameterized queries.
public async Task<bool> DeleteLeadAsync(string id)
    {
        try
        {
            using (var connection = new SalesforceConnection(_connectionString))
            {
                await connection.OpenAsync();

                string query = "DELETE FROM Lead WHERE Id = @Id";
                using (var command = new SalesforceCommand(query, connection))
                {
                    command.Parameters.AddWithValue("Id", id);
                    await command.ExecuteNonQueryAsync();
                }
            }
            return true;
        }
        catch
        {
            return false;
        }
    }
}
To view the results, you will use the below code:
<a href="/[email protected]">Delete</a>
@code {
protected override async Task OnInitializedAsync()
{
var uri = new Uri(NavigationManager.Uri);
var query = System.Web.HttpUtility.ParseQueryString(uri.Query);
var id = query.Get("id");
if (!string.IsNullOrEmpty(id))
{
await DeleteLead(id);
}
}
private async Task DeleteLead(string id)
{
var success = await SalesforceService.DeleteLeadAsync(id);
if (success)
{
connectionStatus = $"Lead with ID {id} deleted successfully.";
Leads = await SalesforceService.GetLeadDataAsync();
}
else
{
connectionStatus = $"Failed to delete lead with ID {id}.";
}
NavigationManager.NavigateTo("/salesforceleads", true);
}
}
Conclusion
The popularity of Salesforce has made it a data source for many commercial applications. To ensure a reliable connection to Salesforce and data management, developers need efficient and user-friendly solutions. dotConnect for Salesforce provides exactly that—a fast, hassle-free way to integrate Salesforce with applications.
When Blazor is your choice for application development, dotConnect for Salesforce provides a direct, secure, and efficient connection to Salesforce data from the Blazor application and easy data retrieval, updates, and deletions—without requiring additional client libraries or expertise in complex technologies.
You can experience the full capabilities of dotConnect for Salesforce with a 30-day free trial. Simply download and install it to start building applications powered by Salesforce, with a reliable and streamlined data connection.
FAQ
How do you install and activate dotConnect for Salesforce in a .NET project?
Install dotConnect for Salesforce via the
EXE installer or by adding the
Devart.Data.Salesforce NuGet package to your project. Then, obtain your personal activation key from your
Devart Customer Portal and include it in the connection string via the
License Key parameter.
How do you generate a secure token using Interactive OAuth in dotConnect for Salesforce?
To use Interactive OAuth, set the connection string parameter:
Authentication Type=AccessRefreshTokenInteractive
When you call
Open() on the
SalesforceConnection, a browser window automatically opens for Salesforce login and consent. After successful authentication, dotConnect retrieves and manages the access and refresh tokens automatically, so no manual token handling is required.
Does dotConnect for Salesforce support SOQL?
Yes, dotConnect fully supports SOQL (Salesforce Object Query Language). You can execute SOQL queries using SalesforceCommand just like standard SQL commands, allowing you to retrieve Salesforce objects such as Accounts, Contacts, and Opportunities.
Can you connect to Salesforce using Entity Framework Core and dotConnect?
Yes, you can use Entity Developer to visually create an EF Core model based on Salesforce objects, or run Scaffold-DbContext with the Devart.Data.Salesforce.EFCore package and a dotConnect connection string (including License Key) to generate your DbContext and entity classes.
Is it possible to connect to Salesforce using Visual Studio Server Explorer with dotConnect?
Yes, it is possible. All you need to do is navigate to the Visual Studio Server Explorer, add a new Data Connection, select dotConnect for Salesforce as the provider, configure OAuth or credentials, test the connection, and browse Salesforce objects directly from the IDE.