Importing CSV files into Oracle
Importing CSV files into Oracle databases may be required in organizations aiming to extract maximum value from their diverse datasets.
Consider a scenario where a multinational company collects sales data from regional offices, each maintaining its records in CSV format. Importing these CSV files into an Oracle database becomes an important task to effectively consolidate this information and gain meaningful insights. This integration transforms various datasets into a cohesive and structured repository, enabling powerful analytics and informed decision-making.
In this article, we'll explore the most straightforward way to import a .csv file into the Oracle table using dbForge Studio for Oracle.
Prerequisites
Before initiating the data import process, download and install dbForge Studio for Oracle. This powerful IDE helps easily import data from .csv files into Oracle databases. The Studio provides versatile tools and capabilities to increase PL/SQL coding speed, improve database development, deployment, testing, and administration, and manipulate data.
In addition, you need to prepare a .csv file containing the source data you want to import into the Oracle database. The file should have a well-organized structure where the column headers precisely correspond to the respective data fields.
Importing a CSV file using dbForge Studio for Oracle
A .csv file is a comma-separated values file, which allows saving data as a table.
To import data from a .csv file into the Oracle database:
1. Open the Data Import wizard using one of the following ways:
- On the ribbon, select Database > Import Data.
- In Database Explorer, right-click the table you want to import and select Import Data.
2. On the Source file page, select a CSV file format, specify the path to the source file in the File name field, and click Next. If you saved the template file previously, click Load templates to import options from a template file.

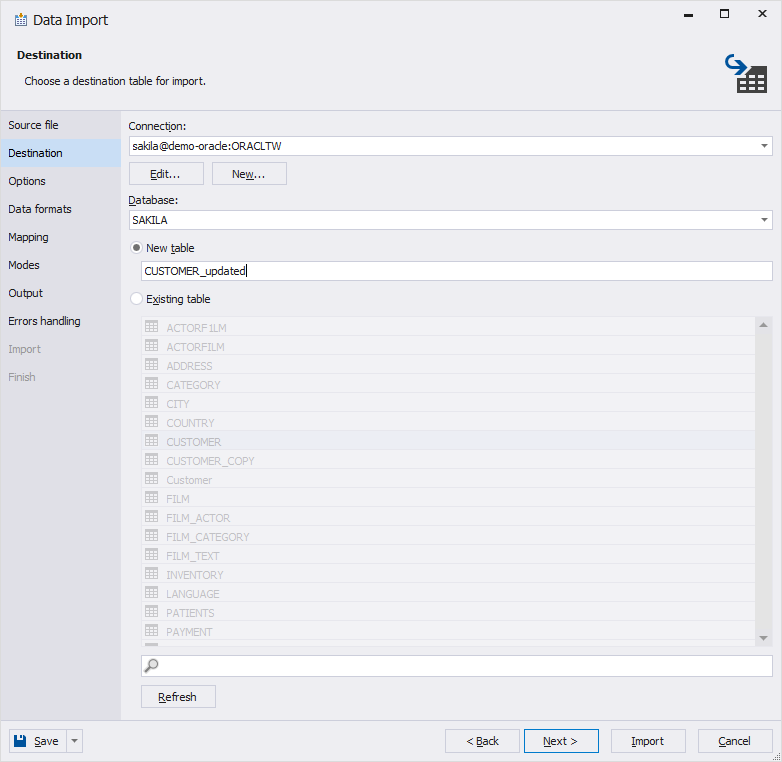
3. On the Destination page, specify the Oracle connection, select the database, and the table to import the data to. To proceed, click Next.
Note that if you open the Data Import wizard from Database Explorer, the Destination page will display the preselected connection parameters of the selected table.
To add a new connection or edit the Oracle connection, use the corresponding options.
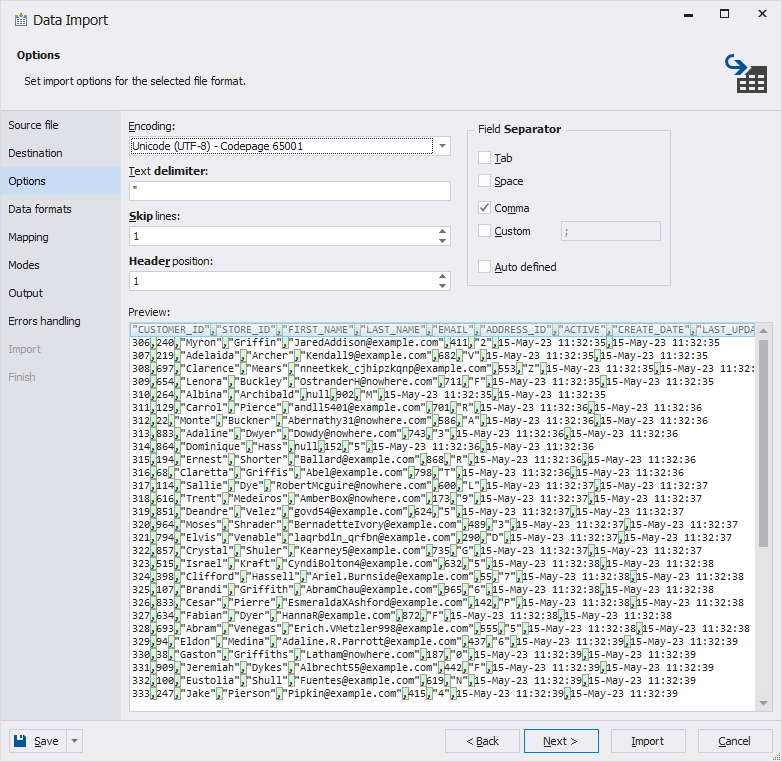
4. On the Options page, set import options for the selected format, including:
- Set a number of lines to skip during the import. Lines are counted from the top.
- Select the line number where the table header is located. It will be highlighted in blue in the Preview section. If you don't specify the header position, the imported columns will get default names - column1, column2, etc.
- Specify text and field delimiter.
To proceed, click Next.
5. On the Data formats page, specify data formats for the source data and click Next.
- Common Formats: Specify the formats for null strings, thousand and decimal separators, boolean variables, date and time. The Autodetect Date and Time format option is selected by default.
- Column Settings: Configure the format settings for individual columns. These settings include Null String, Left Quote, Right Quote, and Date and Time. Note that if a format mask is not set, the application will identify date/time values automatically.
6. On the Mapping page, map the source columns to the target ones.
To cancel the mapping of all the columns, click Clear Mappings on the toolbar. To restore the mapping of columns, click Fill Mapping.
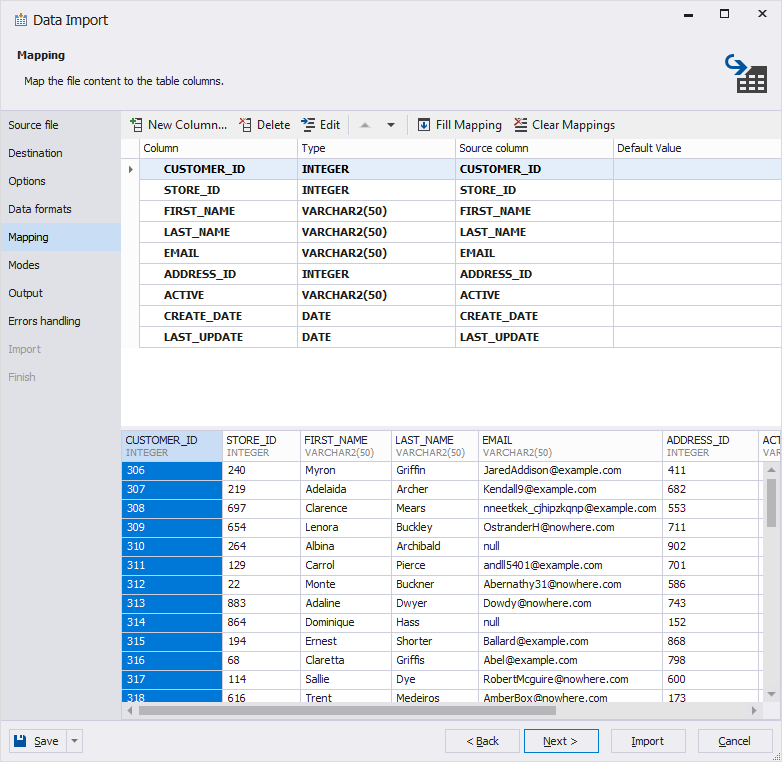
If you are importing data to a new table, you can edit the Target column properties by double-clicking them in the top grid. To proceed, click Next.
7. On the Modes page, choose an import mode for the data and click Next.

8. On the Output page, select one of the following import options to manage the data import script:
- Open the data import script in the internal editor.
- Save the data import script to a file. To use this option, specify the path and the file name. Additionally, you can select the checkboxes to Add timestamp to the file name and Open in the internal editor.
- Import data directly to the database.

9. On the Errors handling page, select how to manage errors during import and specify whether you want to get a log file with details about the import session.
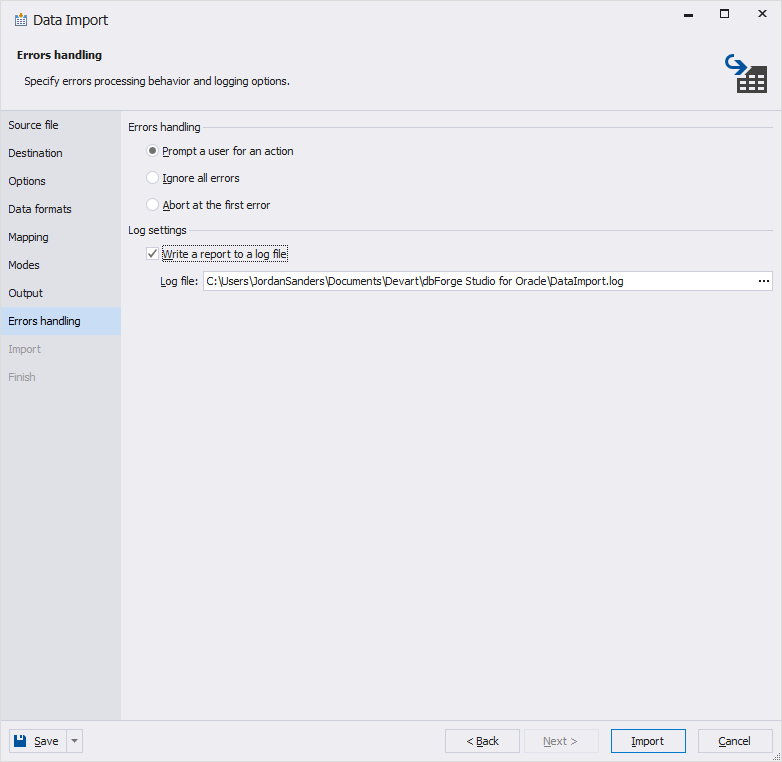
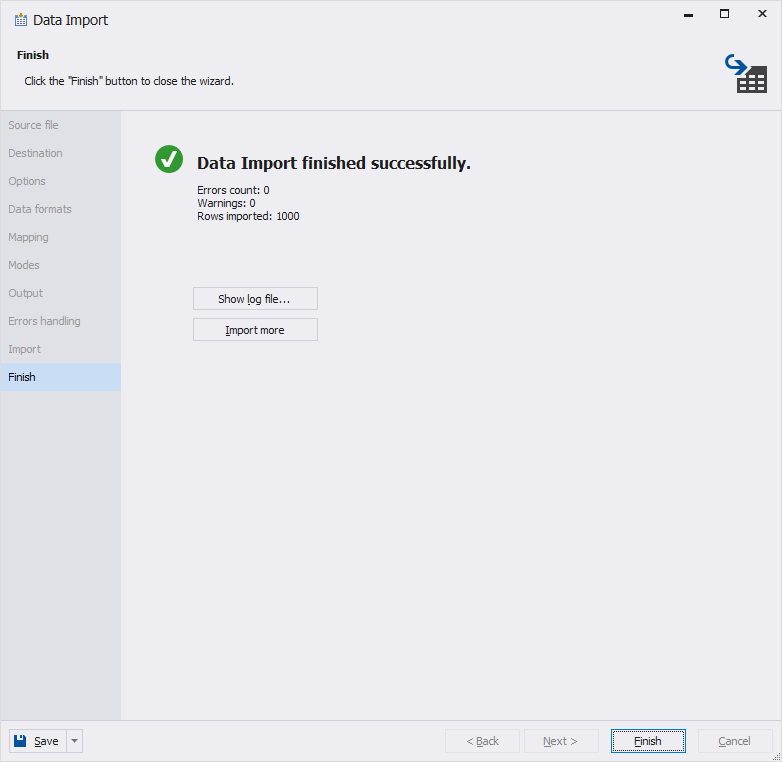
10. To start importing, click Import and view the import progress. dbForge Studio will promptly notify you of the result, indicating whether the import was successful or if any issues were encountered. When the data import process is completed, you can view the log file for detailed information, initiate another data import process, or click Finish to close the wizard.
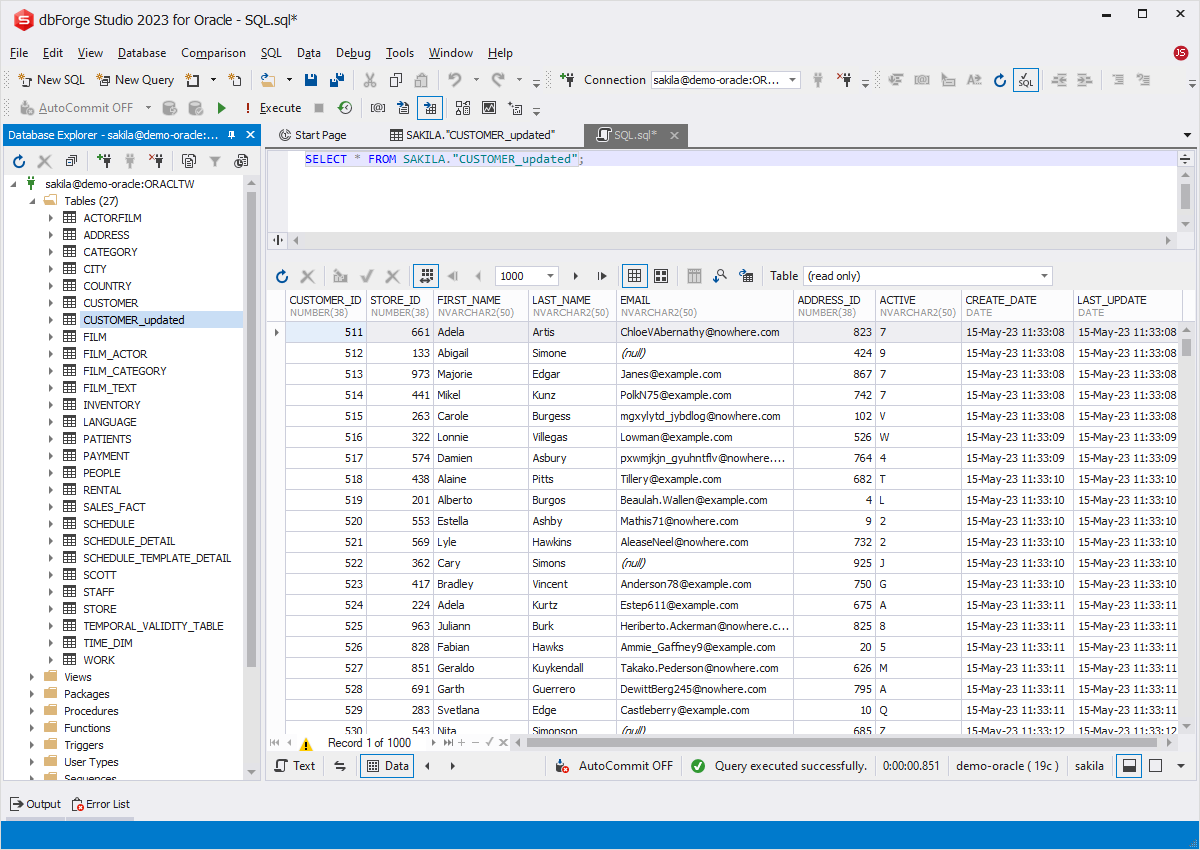
Now, in Database Explorer, right-click the imported table to see the result.
Notes and tips
For recurring data import scenarios, you can save import settings as templates:
For more information, see the Saving and Using Templates documentation topic.
Also, it is recommended to select at least one column with a primary key. Otherwise, some import modes on the Modes page will be unavailable. You can do this on the Mapping page of the wizard by selecting the corresponding checkbox in the Key column.
It is important to note that when importing the data into a new table, dbForge Studio for Oracle automatically creates and maps all the columns. However, in the case of importing data into an existing table, only columns with the same names will be mapped. The columns with different names need to be mapped manually.
If there are no columns with the same names, the mapping process occurs sequentially. The tool maps the first column in the source to the first column in the target, and so forth. The target columns are displayed on the top, while the source columns - at the bottom of the wizard page. To map columns manually, click the source column fields and select the required columns from the dropdown list.
Conclusion
The Data Export wizard available in dbForge Studio for Oracle ensures smooth data migration in a user-friendly interface that allows you to export data to multiple data formats easily with a few clicks. In the wizard, you can customize the export process per your needs and automate the process from the command line by saving the template with export settings for future use.