Getting Started With the ODBC Driver for Microsoft Access
ODBC is a standard API designed by Microsoft that allows applications to access data from various database management systems (DBMS) through a unified set of functions.
In an ODBC architecture, applications communicate with a centralized ODBC Driver Manager, which then interacts with the appropriate ODBC driver to retrieve or modify data. The Driver acts as a bridge between the application and the database, so the application can work with the data source through a standard interface without database-specific configuration.
This guide explains how to install, configure, and set up a connection to a Microsoft Access database using the Devart ODBC Driver for Microsoft Access. The driver provides a fast, secure, and reliable way to connect Microsoft Access databases to ODBC-compliant applications, including BI, analytics, reporting, and ETL tools on Windows, macOS, and Linux.
Advantages of the ODBC Driver for Microsoft Access

Native data connectivity
The Devart ODBC Driver for Microsoft Access fully supports standard ODBC API functions and data types, enabling seamless access to Microsoft Access databases without requiring additional client libraries.

Real-time data access
The Driver allows applications to access live data in real time, ensuring up-to-date information for reporting, analytics, and processing tasks.

Integration
The Driver also integrates with a wide range of third-party tools, including Microsoft Excel, Visual Studio, and other analytics and development environments.

Cross-platform compatibility
It supports both 32-bit and 64-bit applications on Windows, macOS, and Linux systems, allowing flexibility across environments.
High performance
The Devart ODBC Driver for Microsoft Access provides advanced features such as connection pooling and local data caching to improve performance and optimize data operations.

Unicode support
The Driver is fully Unicode-compliant, enabling proper handling of multilingual data across different character sets.
Installation process
Installing the Devart ODBC Driver for Microsoft Access is straightforward. All you need to do is download the appropriate installation package and follow the setup instructions.
Windows
1. Download the installation executable file (EXE or MSI) from the Devart website.
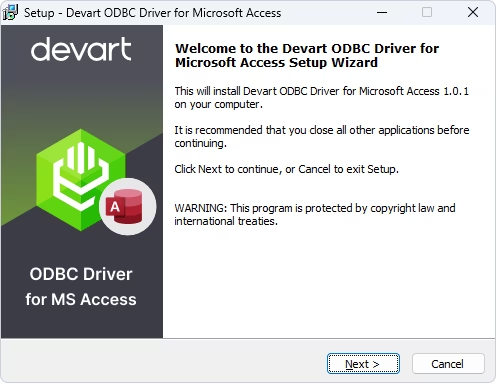
2. Run the installer and follow the wizard's instructions.
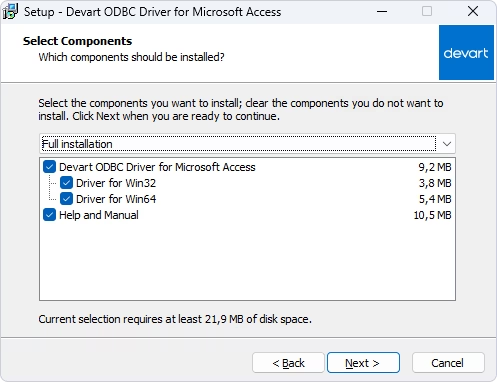
3. On the Select Components page, choose the required Driver version and click Next. Optionally, you can select the corresponding checkbox to install Help and Manual alongside.
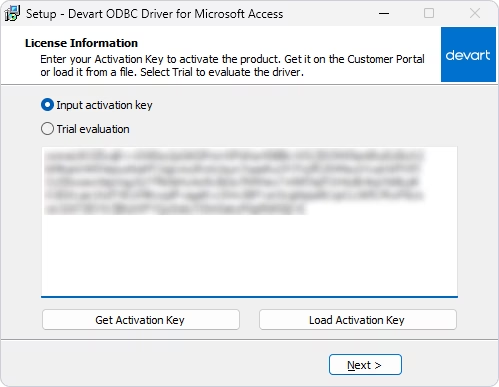
4. On the License Information page, select one of the following:
- Input activation key
- Trial evaluation
Paste your activation key into the window or choose Trial evaluation to start a 30-day trial.
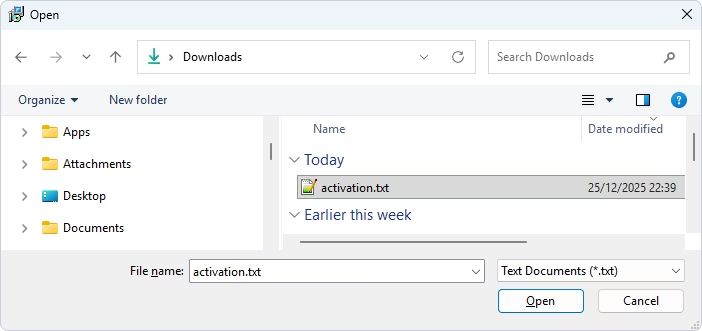
5. If the activation key is saved on your computer, click Load Activation Key and select the corresponding file.
6. Click Next, then click Finish to complete the installation.
Linux
You can download and install the Devart ODBC Driver for Microsoft Access on your Linux system through the DEB- and RPM-based distributions. Let's break this down.
Install the Driver on Ubuntu
GUI installation
1. Download the DEB package from the Devart website.
2. Navigate to the downloaded file (e.g., /home/user/Downloads).
3. Right-click the package and select Open With > App Center.
4. Click Install.
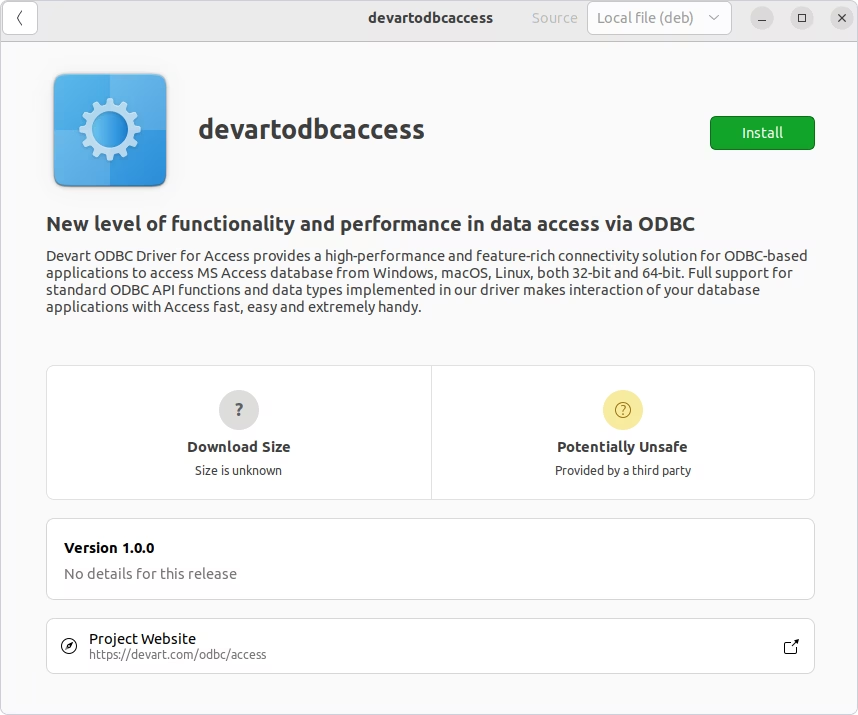
Command-line installation
1. Open Terminal.
2. Install the dependencies:
For Ubuntu 22 and earlier, use the following command:3. Navigate to the download directory:

4. Install the package:
For 32-bit:

For 64-bit:

The Driver is installed successfully.
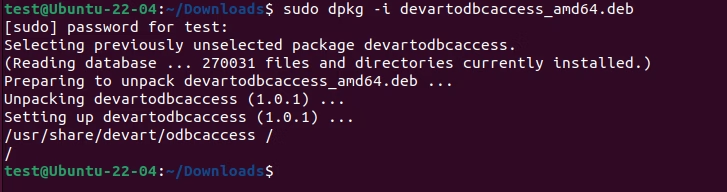
5. Verify the installation:

Install the Driver on CentOS
1. Download the RPM package.
2. Open Terminal.
3. Navigate to the Downloads folder:

4. Install the package:
For 32-bit:

For 64-bit:
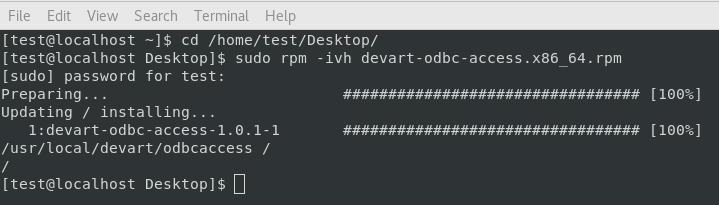
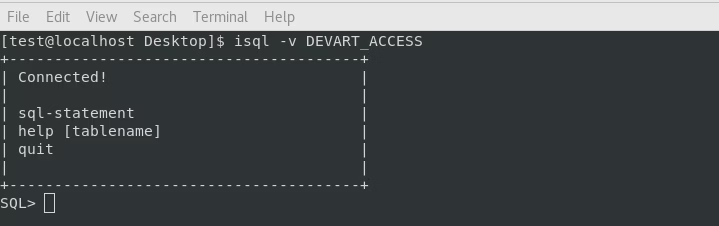
The Driver is installed successfully. To verify the installation, run the following command to connect to the data source:
macOS
Follow the steps below to download and install the Devart ODBC Driver for Microsoft Access on your macOS system.
1. Go to Privacy & Security tab in the System Settings.
2. Enable the App Store & Known Developers option in the Allow applications from section.
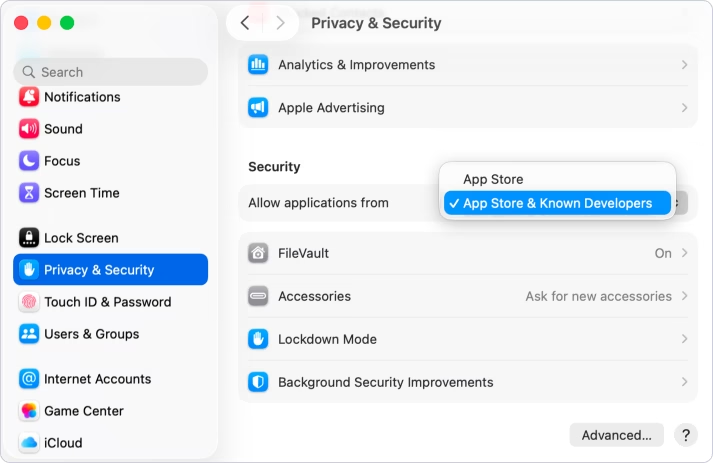
3. Download the .pkg file from the Devart website.
4. Run the installer and click Continue.
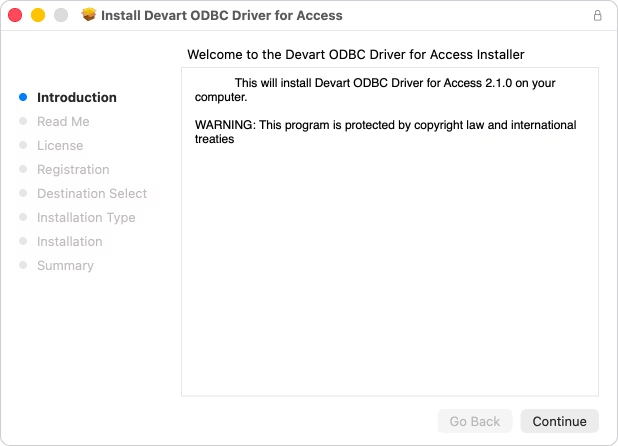
5. On the Registration page of the wizard, enter or paste your activation key into the window. You can find your activation key in the registration email or your Customer Portal account. To open the Customer Portal, click Get Activation Key.
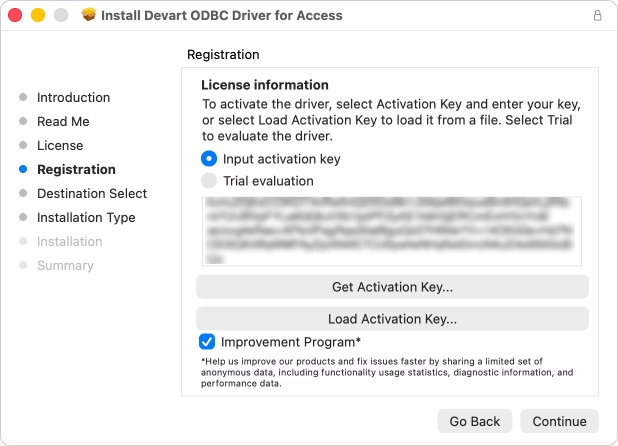
6. If you have saved the key on your computer, click Load Activation Key and browse to the location of the activation file.
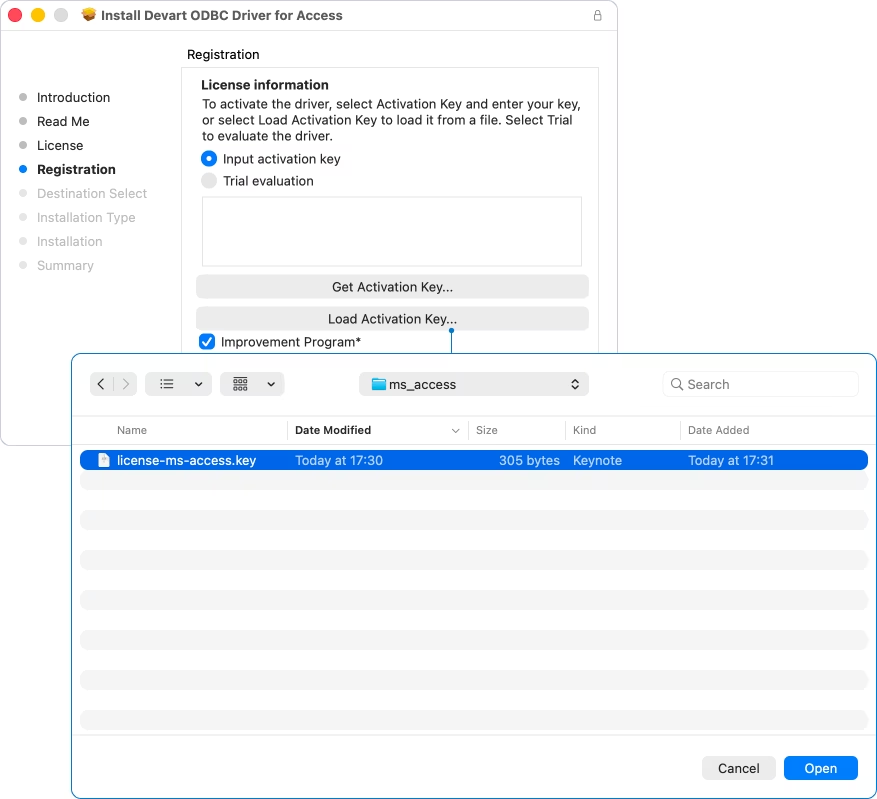
7. On the Installation Type page, click Install to choose the standard installation or Customize to choose a different installation type.
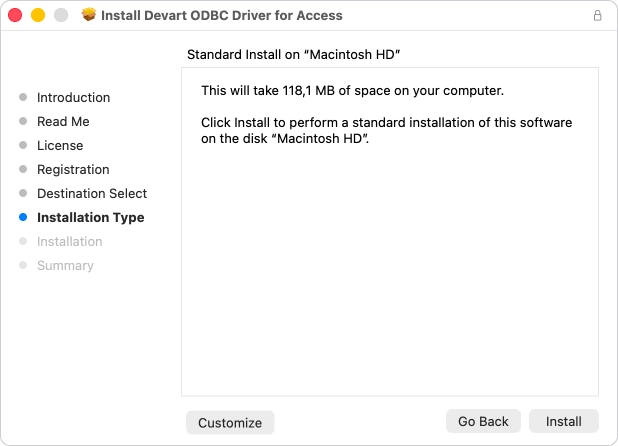
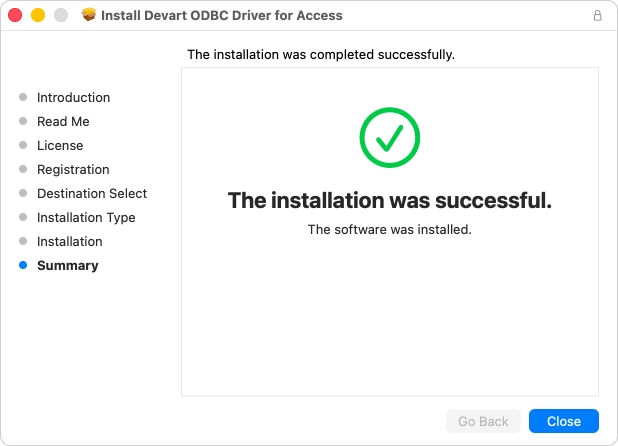
8. The Driver is installed successfully.
Configuring an ODBC data source
After installing the Driver, the next step is to create a Data Source Name (DSN) for your ODBC connection and test whether it succeeds. Let's break down how to do this on different operating systems.
Windows
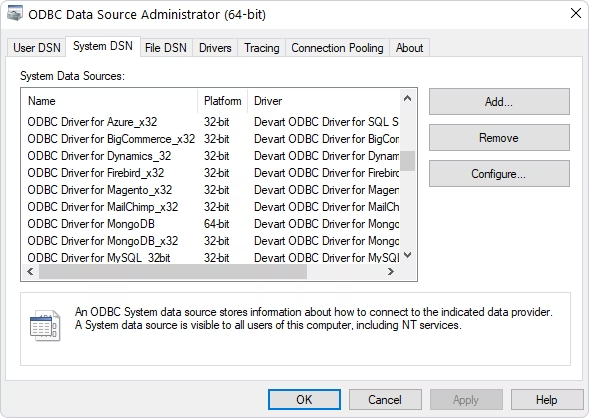
1. Open ODBC Data Source Administrator.
2. Select User DSN or System DSN and click Add.
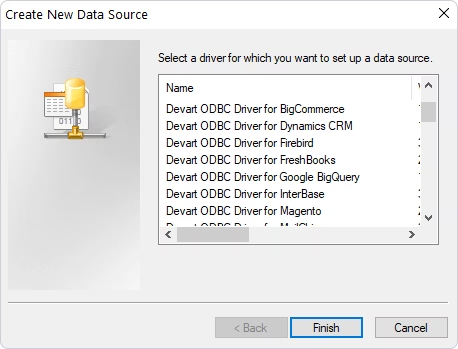
3. Select Devart ODBC Driver for Microsoft Access and click Finish.
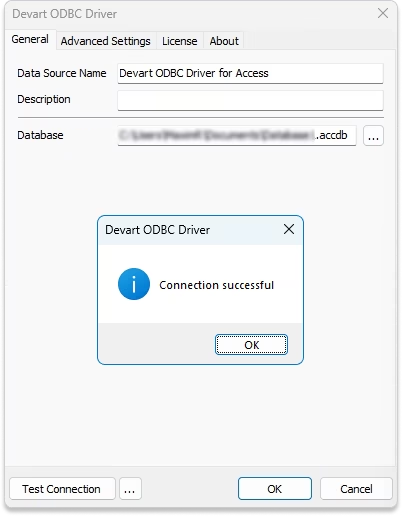
4. Enter connection details (database file path, etc.). Click Test Connection to verify that the Driver can connect to the selected database. Click OK to save the DSN settings.
Linux
1. Open the odbcinst.ini file located in the /etc folder:
2. Insert the following details to register the Driver:
[Devart ODBC Driver for Microsoft Access]
Description = Devart ODBC Driver for Microsoft Access
Driver = /usr/share/devart/odbcaccess/libdevartodbcaccess.2.1.0.so
Setup = /usr/share/devart/odbcaccess/libdevartodbcaccesssetup.2.1.0.so
UsageStatistics = True
3. Open the odbc.ini file:
4. Navigate to the DEVART_ACCESS section and specify the required connection settings:
[ODBC Data Sources]
DEVART_ACCESS=Devart ODBC Driver for Microsoft Access

[DEVART_ACCESS]
Driver      = Devart ODBC Driver for Microsoft Access
Database = /path/to/database.accdbFor password-protected databases, add Pwd = [your_password] to the configuration settings. For read-only access, add ReadOnly = True.
5. To verify the Driver registration, run:
To verify the DSN configuration, run:
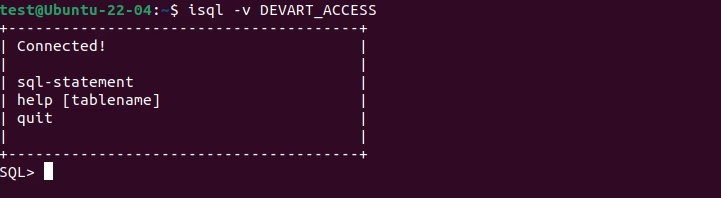
To verify the connection to Microsoft Access, run:
macOS
There are two ways to configure an ODBC data source for the Devart ODBC Driver for Microsoft Access on macOS. They include the built-in iODBC driver manager with its standard administrator and the Devart ODBC Administrator, which provides an advanced graphical interface and supports extended configuration options. Let's go through each method.
GUI configuration via Devart ODBC Administrator
1. Open Devart ODBC Administrator (root) and enter the password for your root user. Select System DSN (recommended).
2. Click Add.
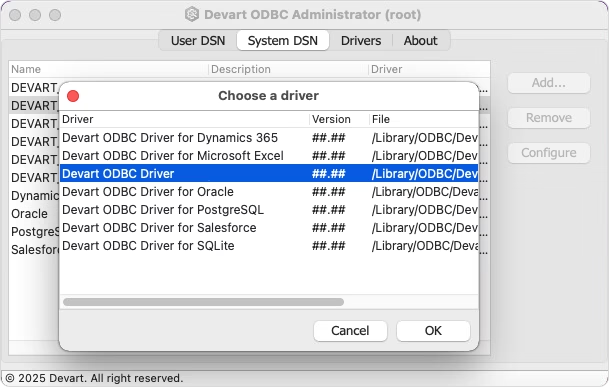
3. In the Choose a driver dialog box, select Devart ODBC Driver for Microsoft Access, then click OK.
4. Enter your connection parameters.
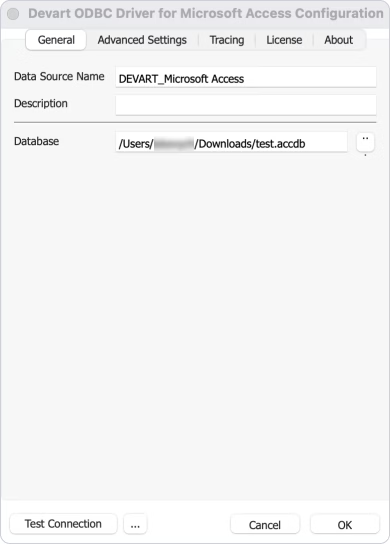
5. Select Test Connection to verify that the connection details are valid.
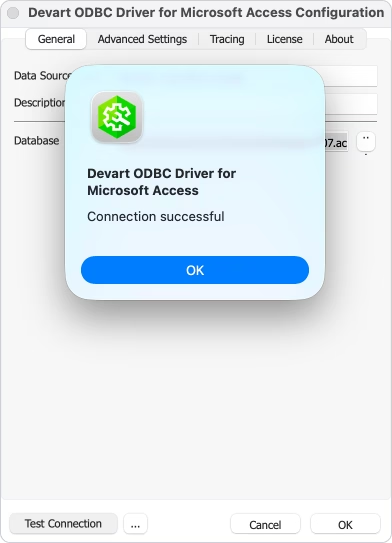
6. Click OK to save your DSN settings and close the dialog.
GUI configuration via iODBC
To configure the ODBC data source for the Devart ODBC Driver for Microsoft Access on macOS via the intuitive user interface, follow the steps below.
1. Open iODBC Administrator.
2. Select the DSN and click Configure.
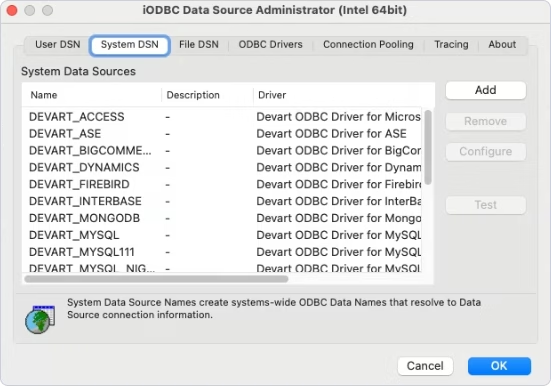
3. Enter the connection parameters and click OK.
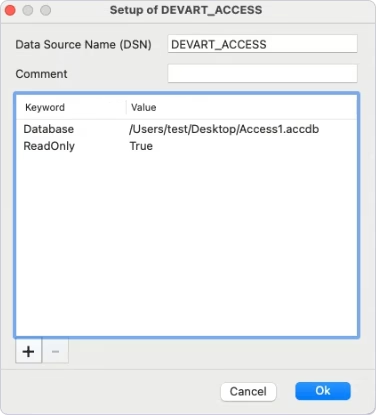
4. To verify the connection, select DEVART_ACCESS in the list of DSNs and click Test.
Conclusion
The Devart ODBC Driver for Microsoft Access provides a reliable and high-performance way to connect Access databases to modern applications. It enables direct connectivity, cross-platform support, and seamless integration with analytics and development tools.
Download the Driver, configure your DSN, and start working with Microsoft Access data in your preferred environment. For more advanced configuration and usage scenarios, refer to the official Devart documentation.
Start your free trial today and simplify your Microsoft Access data connectivity.