Getting Started With ODBC Driver for Salesforce
ODBC is a widely used Application Programming Interface (API) that allows any application on the client computer to access any data source on the server using SQL.
In an ODBC architecture, applications connect to an ODBC driver manager, which in turn uses a specific ODBC driver to connect to a data source. The client part of the driver that works directly with the application must strictly comply with the ODBC standard. The application doesn't care what database management system (DBMS) is installed on the server. The server part of the driver is adapted to a specific database. Due to this architecture, there is no need to configure the application for a specific DBMS.
Advantages of ODBC Driver for Salesforce
Native data connectivity
The Salesforce ODBC Driver fully supports standard ODBC API functions and data types and provides easy access to
live Salesforce data from anywhere. Also, the Driver is compatible with the Salesforce API itself.
Real-time data access
The Driver allows accessing data directly from the ODBC-compliant application in real time, which provides a dynamic workspace that adapts and changes as quickly as your data.
Integration
The driver enables direct connectivity between Salesforce and your existing tools, including SQL Server, MongoDB, Snowflake, and Microsoft Dynamics. This allows you to view and edit live CRM data within your preferred BI, ETL, or IDE environment, streamlining data synchronization and cross-platform reporting without complex API coding.
Platforms variety
You can use Devart ODBC Driver for Salesforce with your 32-bit or 64-bit application on both x32 and x64 Windows, Linux, and macOS. No additional driver or application configurations are required.
Secure connection
The Driver enables different ODBC-supporting applications to connect to Salesforce directly through HTTPS. If there is no direct access, a connection can be established through the proxy server.
Step 1. Installation process
To start the installation, all you need is to download Devart ODBC Driver for Salesforce on your computer and follow the installation wizard instructions below.
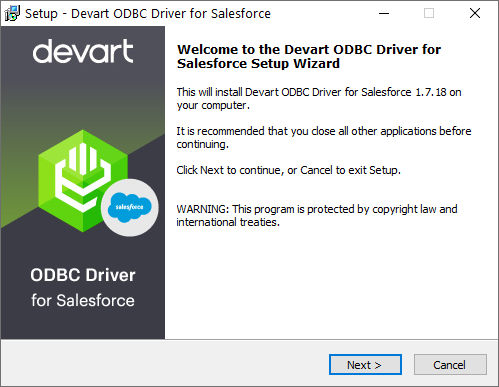
Windows
Download the installation executive file of ODBC Driver for Salesforce, open it, and follow the installation wizard instructions step-by-step.
Linux
You can install ODBC Driver for Salesforce on Linux using two installer packages, depending on the distribution you are using.
If you want to install ODBC Driver for Salesforce on Ubuntu, which is a popular open-source Linux distribution based on Debian, then you need to install a .deb package corresponding to the bitness of your operating system. There are also two ways to install the Driver either manually or via the command line.
GUI installation
- Download the .deb package of the required bitness from the Devart website.
- Navigate to the folder with the downloaded package and double-click it.
- In the dialog that opens, click Install.
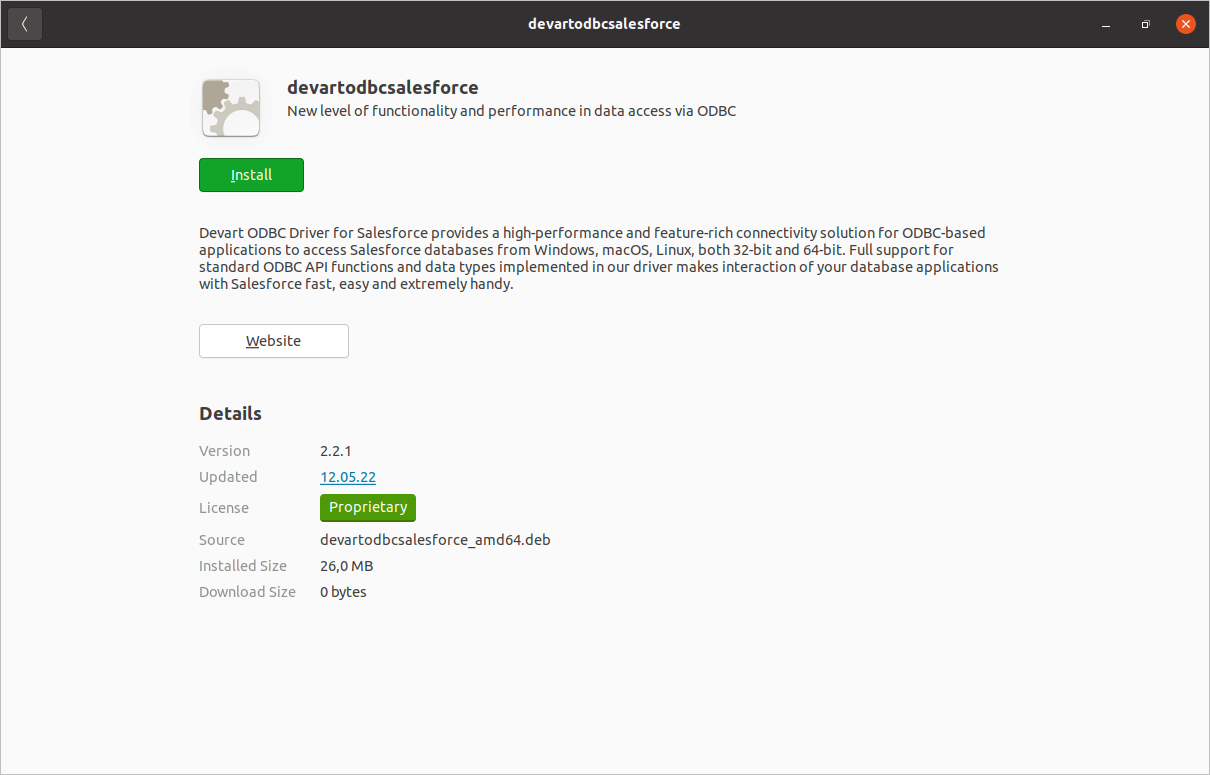
- If the installation is successfully completed, the Install button changes into Remove.
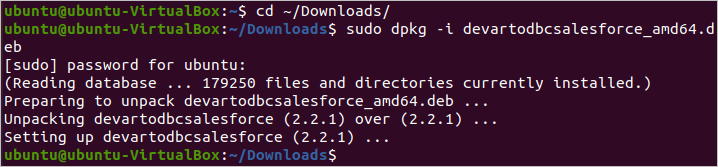
Command-line installation
- After the Driver is installed, run the Terminal program.
- Navigate to the folder with the downloaded package cd ~/Downloads (if you downloaded the package into another folder, specify the path to this folder as the cd command parameter):
- To install the devartodbcsalesforce_amd64.deb on a 64-bit system, use the following command:
sudo dpkg -i devartodbcsalesforce_amd64.deb
- If the Driver is installed successfully, you will receive the following message:
If you use a CentOS distributive, then you should download the .rpm package and install it via the command line.
- Download the RPM package from the Devart website (The package will be downloaded into the ~/Downloads folder by default).
- Run the Konsole program.
- Navigate to the folder with the downloaded package cd ~/Downloads (If it is another folder, specify the path to it as the cd command parameter):
- To install devart-odbc-salesforce.x86_64.rpm on a 64-bit system, use the following command:
sudo rpm -ivh devart-odbc-salesforce.x86_64.rpm
- If the Driver is installed successfully, you will receive the following message:

macOS
- Download the PKG file from the Devart website.
- Run the downloaded file and follow the instructions in the wizard.
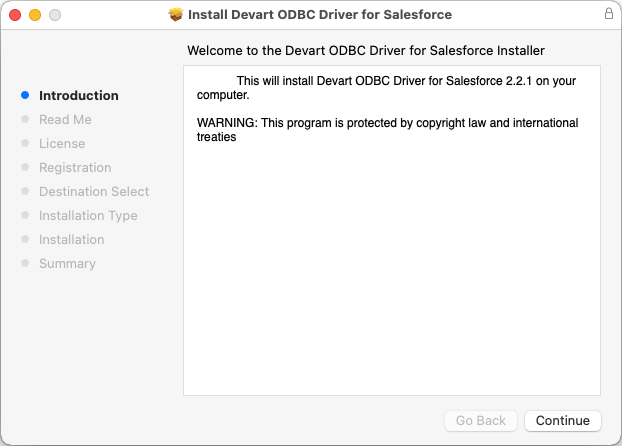
- After reading the license agreement, click Agree to proceed with the installation.
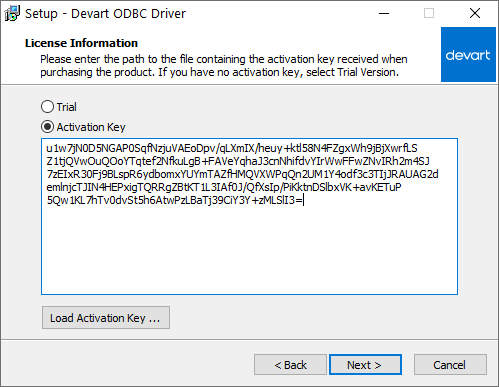
- In the License Information dialog, you should select the license type and activate the product. If you have no activation key, you can select Trial and use the Driver for evaluation purposes. If you have an activation key, select the Activation Key option. Copy the activation key from the registration email or your Customer Portal account and paste it into the Activation Key edit box.
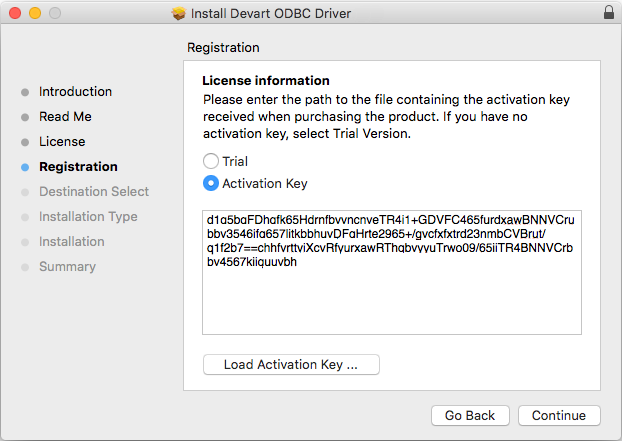
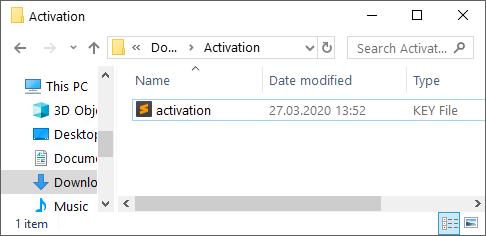
- If you have the activation key file, click the Load Activation Key button and browse to it.
- Then click Continue > Install.
Configuring ODBC Data Source Name
After Devart ODBC Driver for Salesforce is installed, you should create a Data Source Name (DSN) for your ODBC connection and test whether it succeeds.
Windows
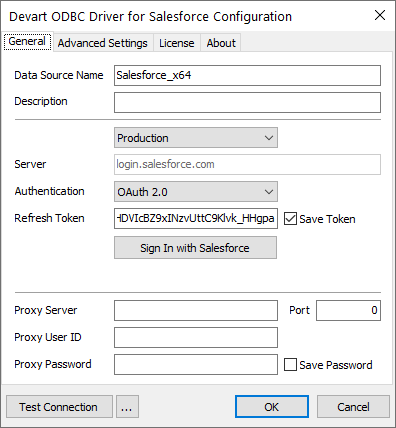
Open ODBC Data Source Administrator and select the User DSN or System DSN tab. Most applications work with both types, but some require a specific one. Click Add. In the dialog that appears, select ODBC Driver for Salesforce and click Finish. In the Driver setup dialog that opens, enter the connection information in the appropriate fields.
There are two types of authentication here: basic and token-based.
Basic authentication
Basic authentication can be performed through a client app only. To learn more, refer to Use custom OAuth 2.0 authentication.
Token-based authentication
Here you should sign in with Salesforce and enter your credentials to log in and generate a refresh token.
Linux
To configure ODBC Driver for Salesforce on Linux, open the odbc.ini file located in the /etc folder. Find the DEVART_SALESFORCE section and specify the required connection settings:
Driver=Devart ODBC Driver for Salesforce
Data Source=https://login.salesforce.com
UserID=your_salesforce_user_id
Password=your_salesforce_password
SecurityToken=your_security_token
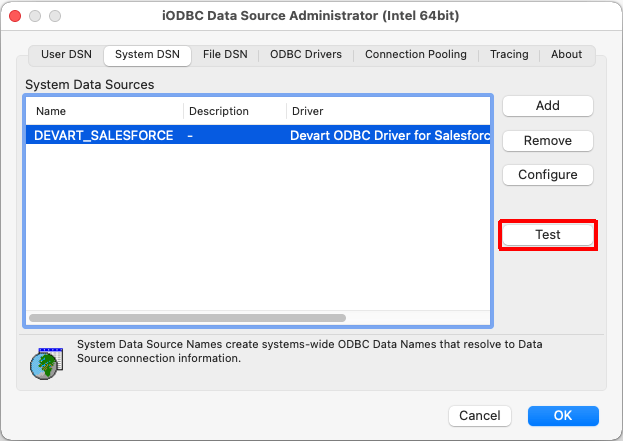
macOS
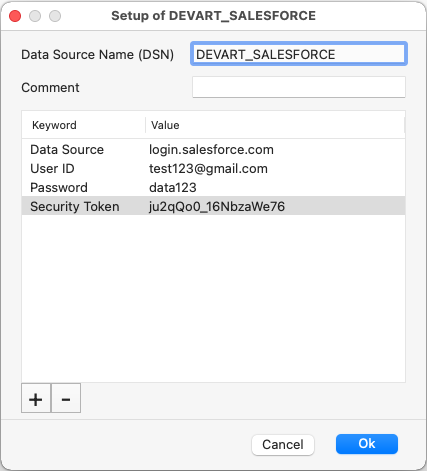
To configure ODBC Driver for Salesforce on macOS, run the iODBC utility of the required bitness. Find the DEVART_SALESFORCE section and click the Configure button:
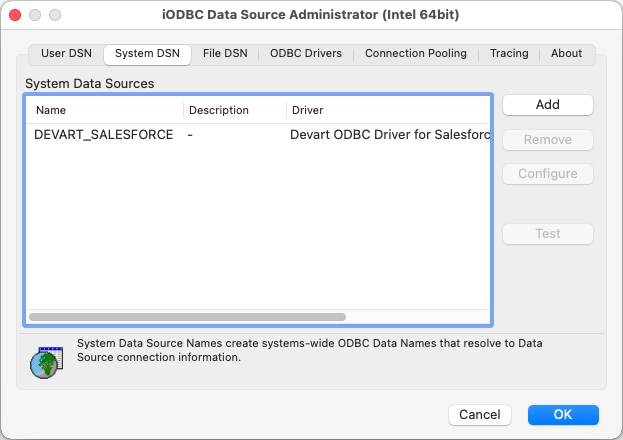
In the appeared dialog, specify the required connection settings and click OK.
Step 2. Test the ODBC connection
Windows
To test an ODBC connection on Windows, you need just click the Test Connection button in the Configuration dialog. A successful connection message should appear.
Linux
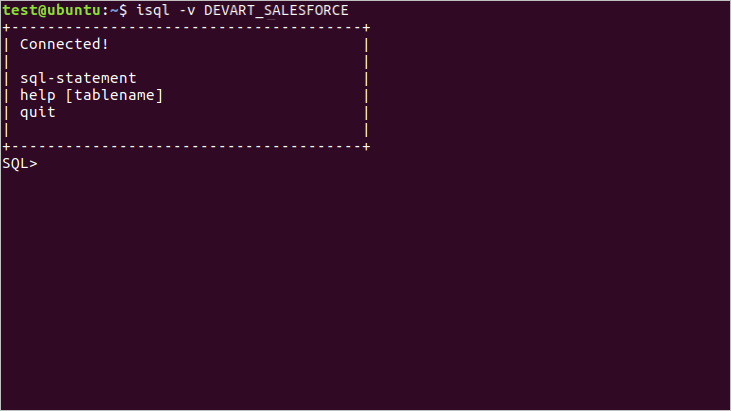
To test the connection with the Salesforce server, run the UnixODBC Test Command utility and test a connection using the following command:.
isql -v DEVART_SALESFORCE
If the connection is successful, you will receive the following message:
macOS
Click the Test button to establish a test connection to your data source.