How to Import CSV Data Into a MySQL/MariaDB Database
CSV, a popular data format, is favored for its simplicity and efficiency. The lightweight files are easily manageable and can be analyzed effortlessly by both humans and machines, making them the standard format for data transfer, especially data import from applications like Zoho, QuickBooks, etc. into databases.
However, importing data from CSV files can become a complex endeavor, particularly when utilizing a Command-Line Interface (CLI). On the other hand, modern GUI tools, such as dbForge Studio for MySQL, provide a much more user-friendly solution for such tasks. The Studio empowers users to import CSV data directly into MySQL and MariaDB databases in a straightforward way.
The benefits of using GUI tools to import data from CSV to MySQL
CLI enthusiasts typically utilize the LOAD DATA INFILE command, which requires specifying the precise location of the CSV file, the target table name, and specific file attributes such as delimiters, line breaks, etc. This method involves typing numerous details into the command, a time-consuming process that demands accuracy and command memorization.
In contrast, dbForge Studio for MySQL offers a user-friendly alternative, eliminating the need for extensive typing. Users can easily configure data import tasks with just a few clicks and also benefit from the rest of the features:
- Intuitive and user-friendly Data Import Wizard
- Precise visual task configuration
- Customizable error-handling behavior
- Managed data import process
- Saving the data import task settings as templates
- Automating regular data import tasks via CLI
Let's take a closer look at setting up the data import task.
Importing data from CSV into a new MySQL table
The Data Import wizard within dbForge Studio for MySQL offers the flexibility to import data into either a new or an existing database table. In this section, we will delve into the task configuration for importing data into a new database table.
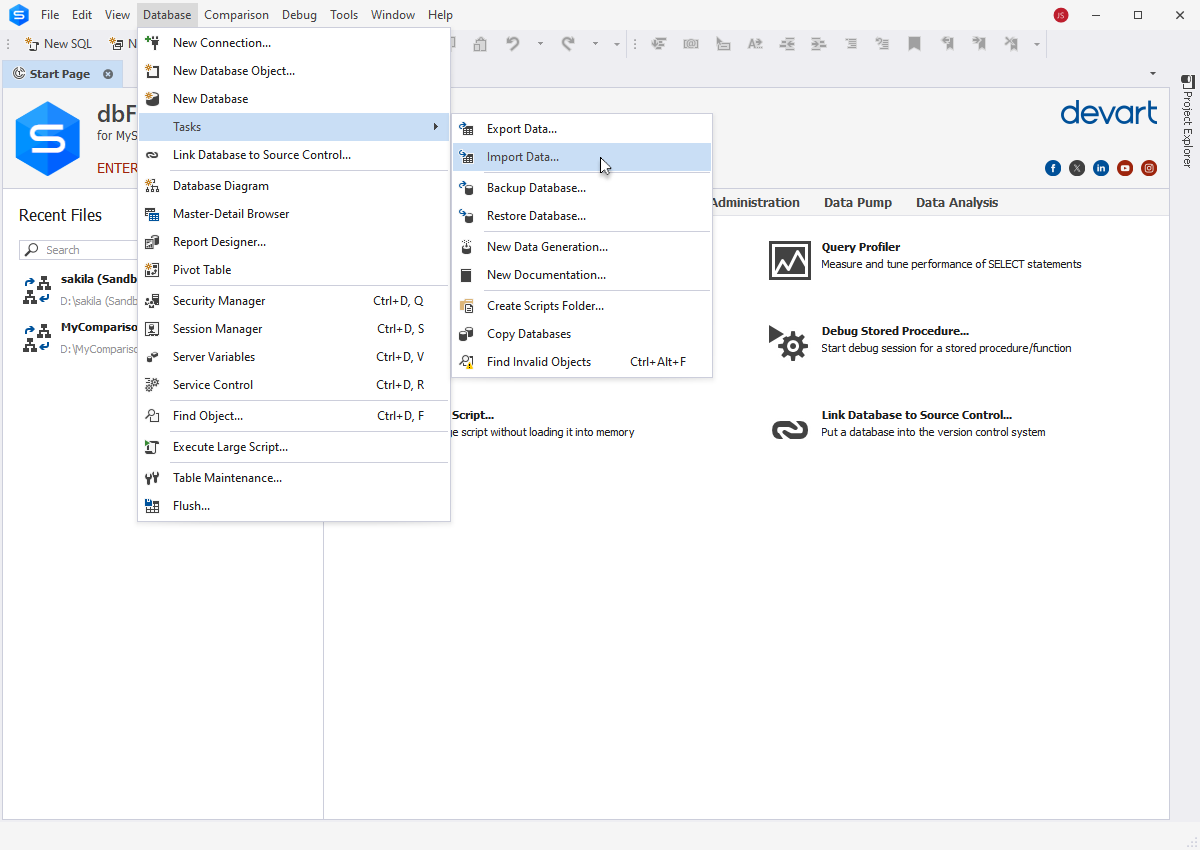
Launch the Data Import wizard: in the Database menu, select Tasks > Import Data. The wizard will appear to start configuring the task.
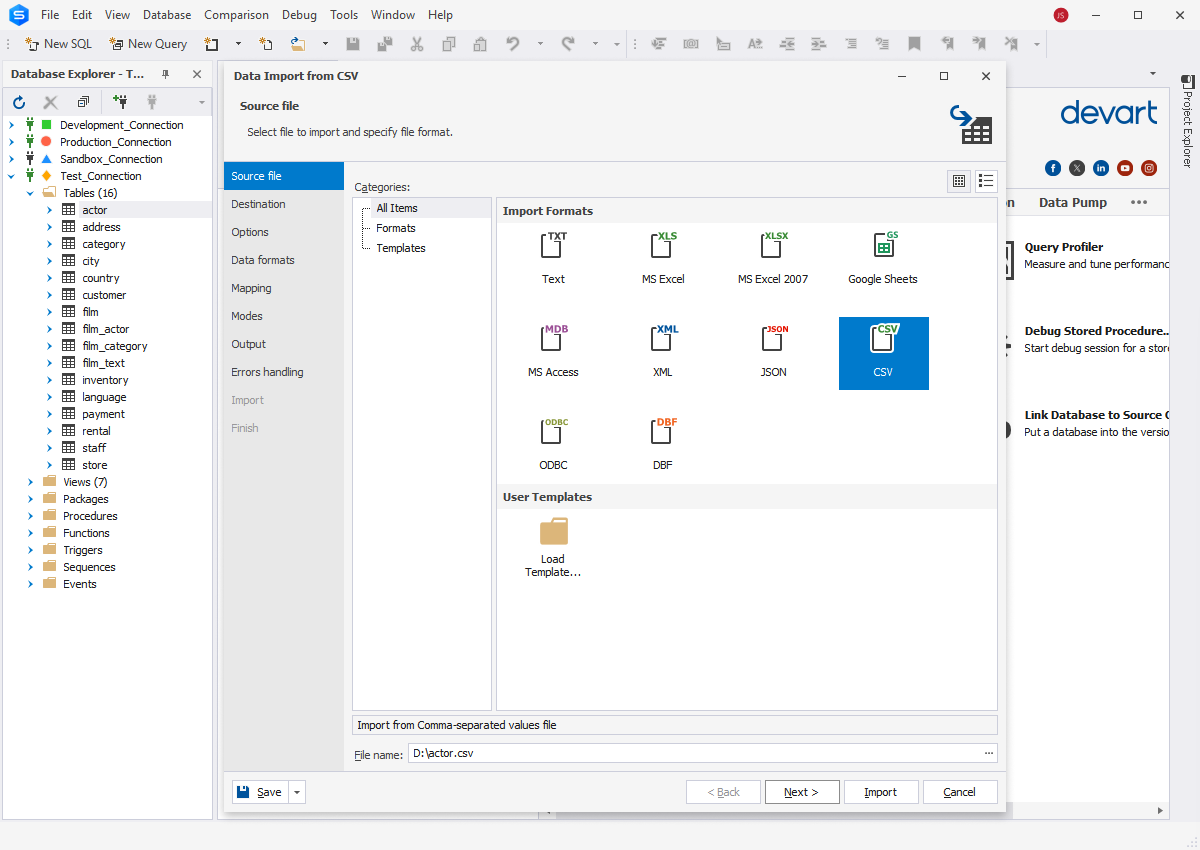
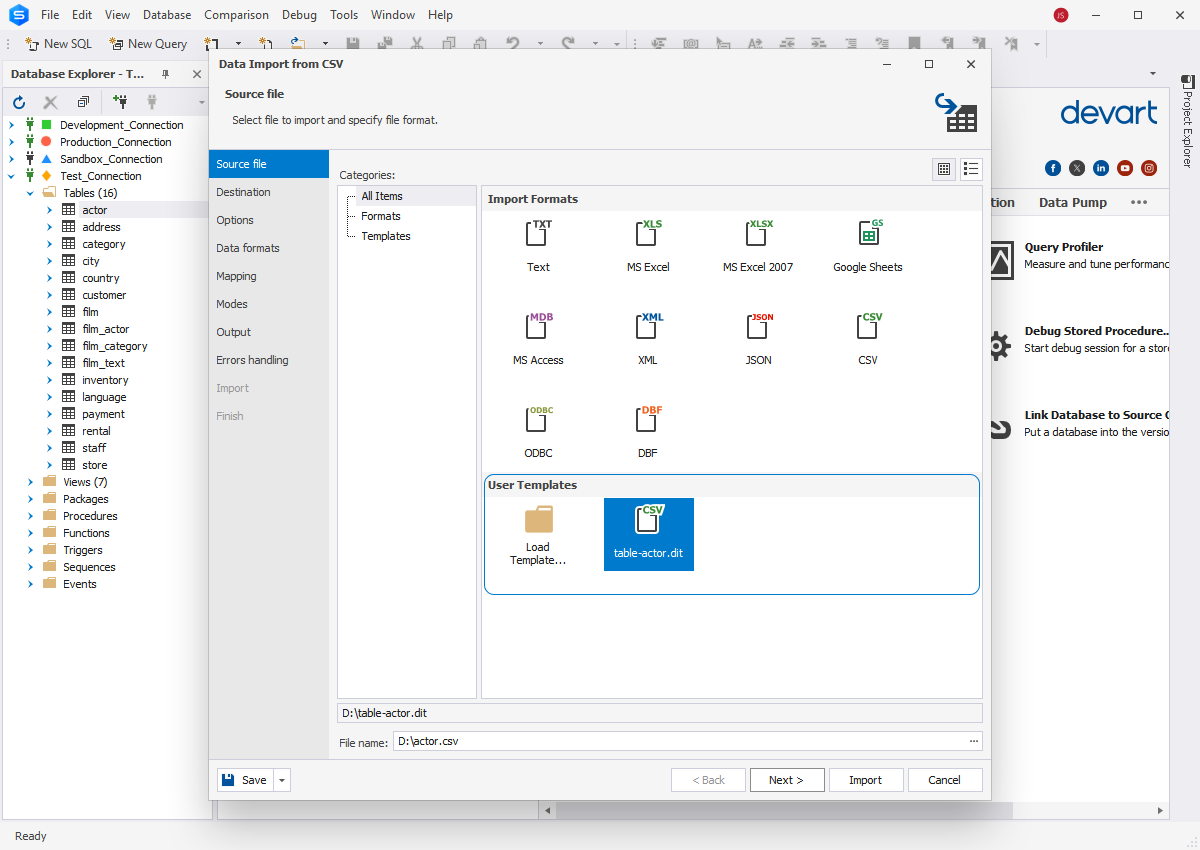
On the Source file tab, select CSV as the data format and browse to the source data file. Click Next.
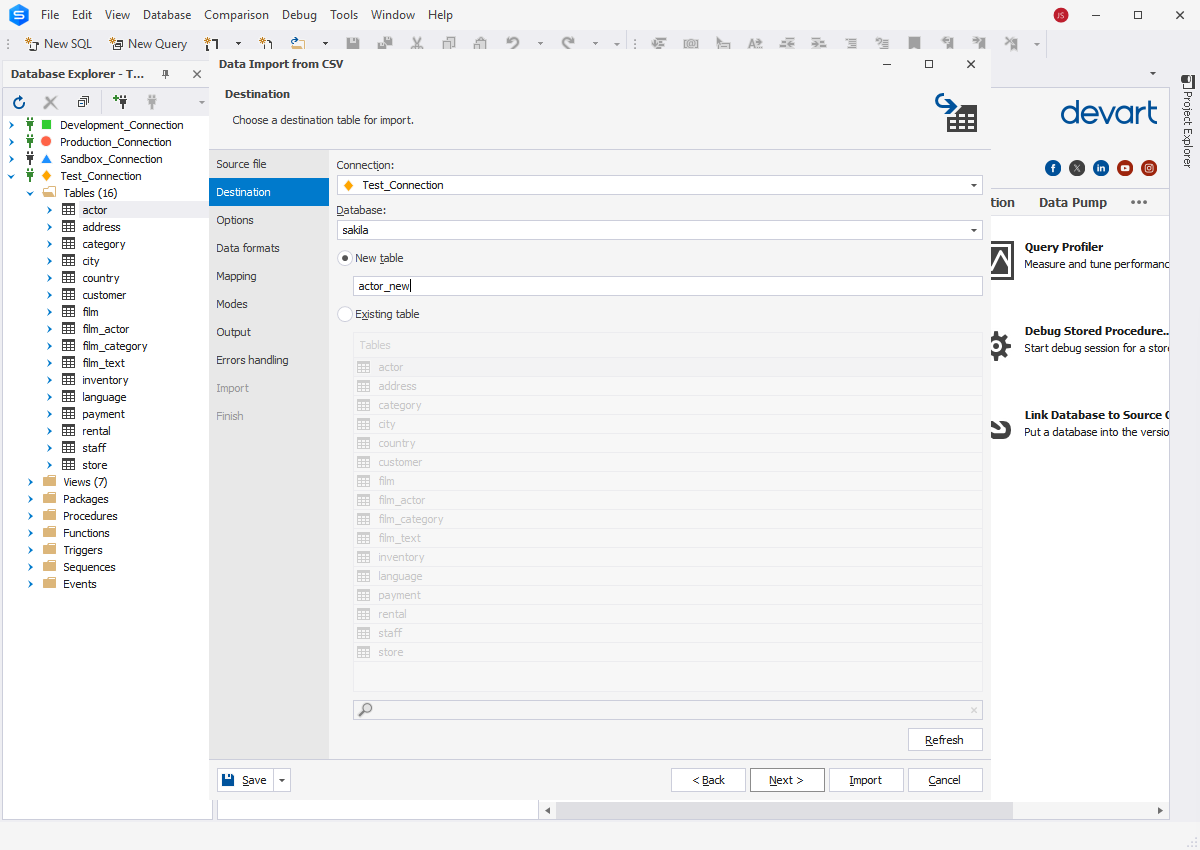
On the Destination tab, specify the target database and the table in that database. In our scenario, we are going to import data into a new table. Provide the name of that table and click Next.
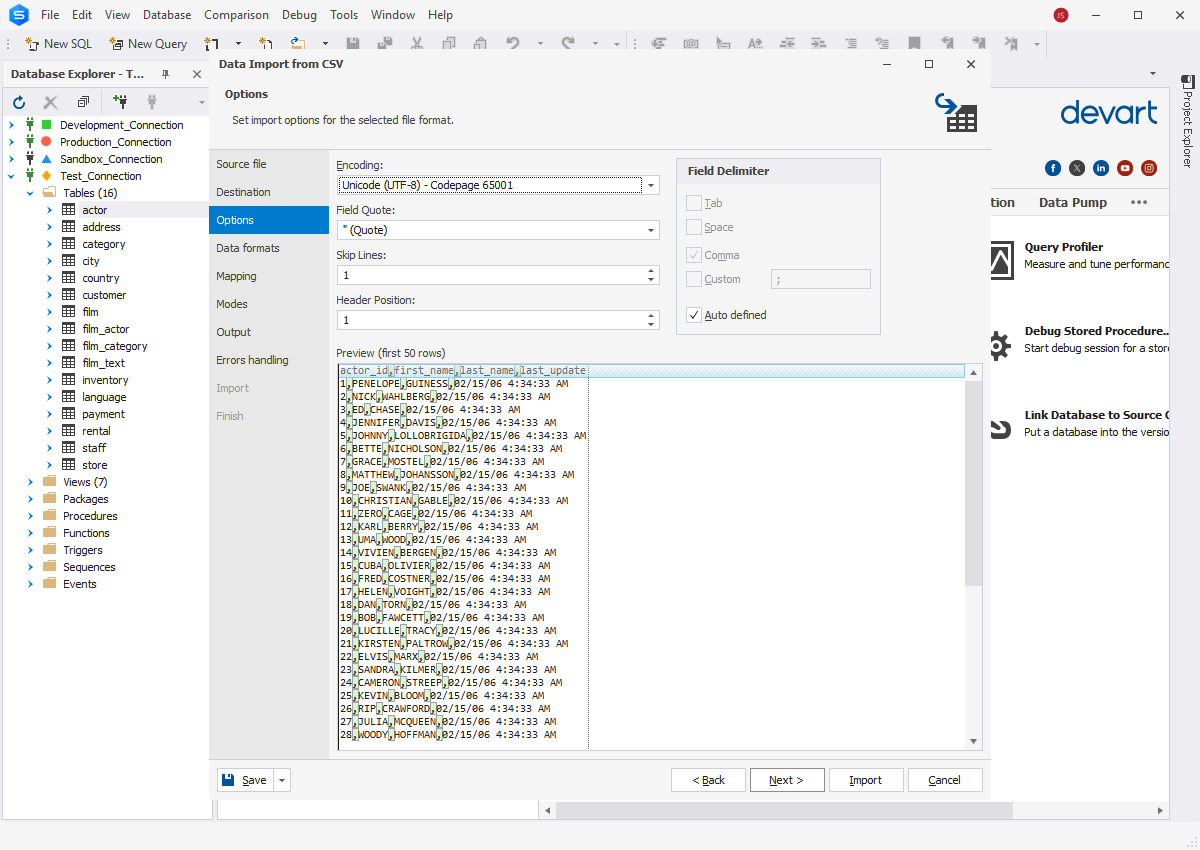
- Check the encoding and ensure it is correct.
- Set the number of lines to be skipped during the process (lines are counted from the top).
- Specify the line with the header position. Otherwise, the wizard will import the columns under the default names: column1, column2, etc.
- Specify the field separator. Note that you can select the Auto defined option to let the Studio recognize the field separator itself.
After verifying all settings, click Next.
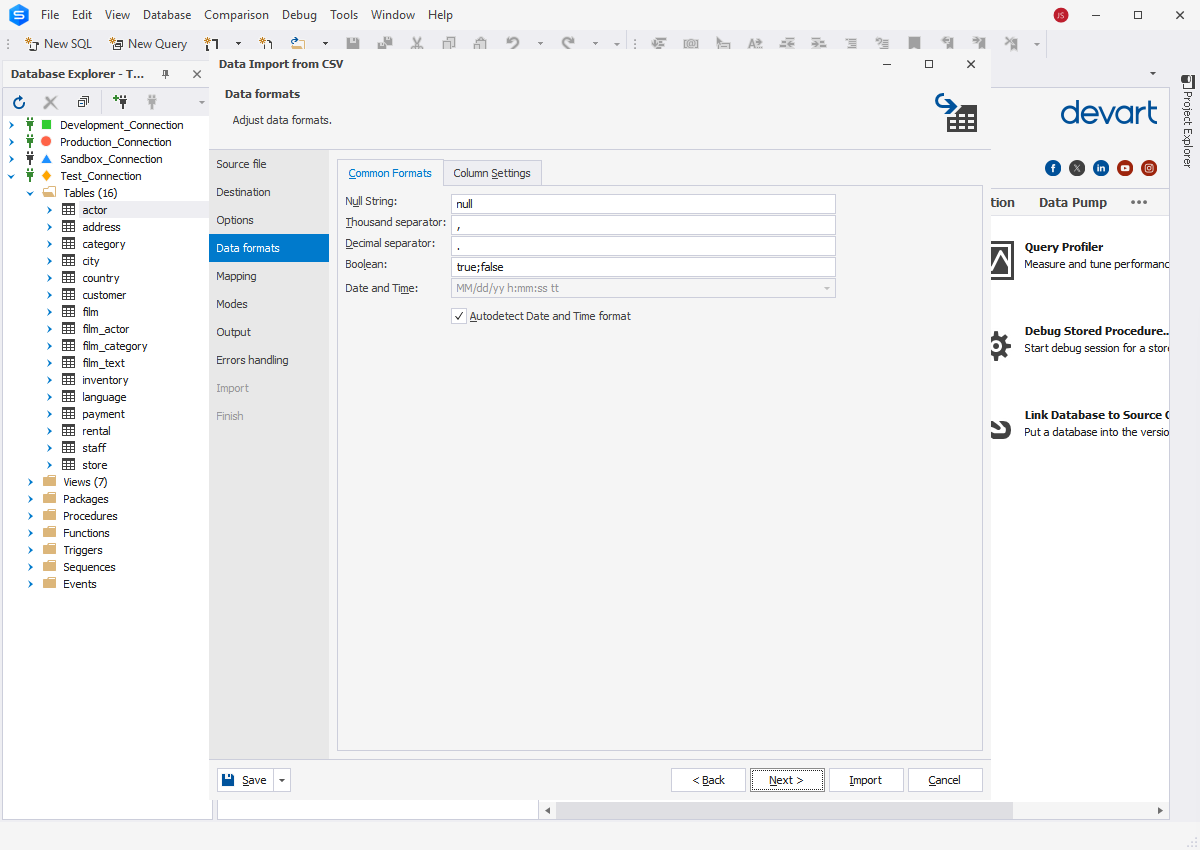
On the Data formats tab, check the Common Formats and Column Settings parameters. Click Next.
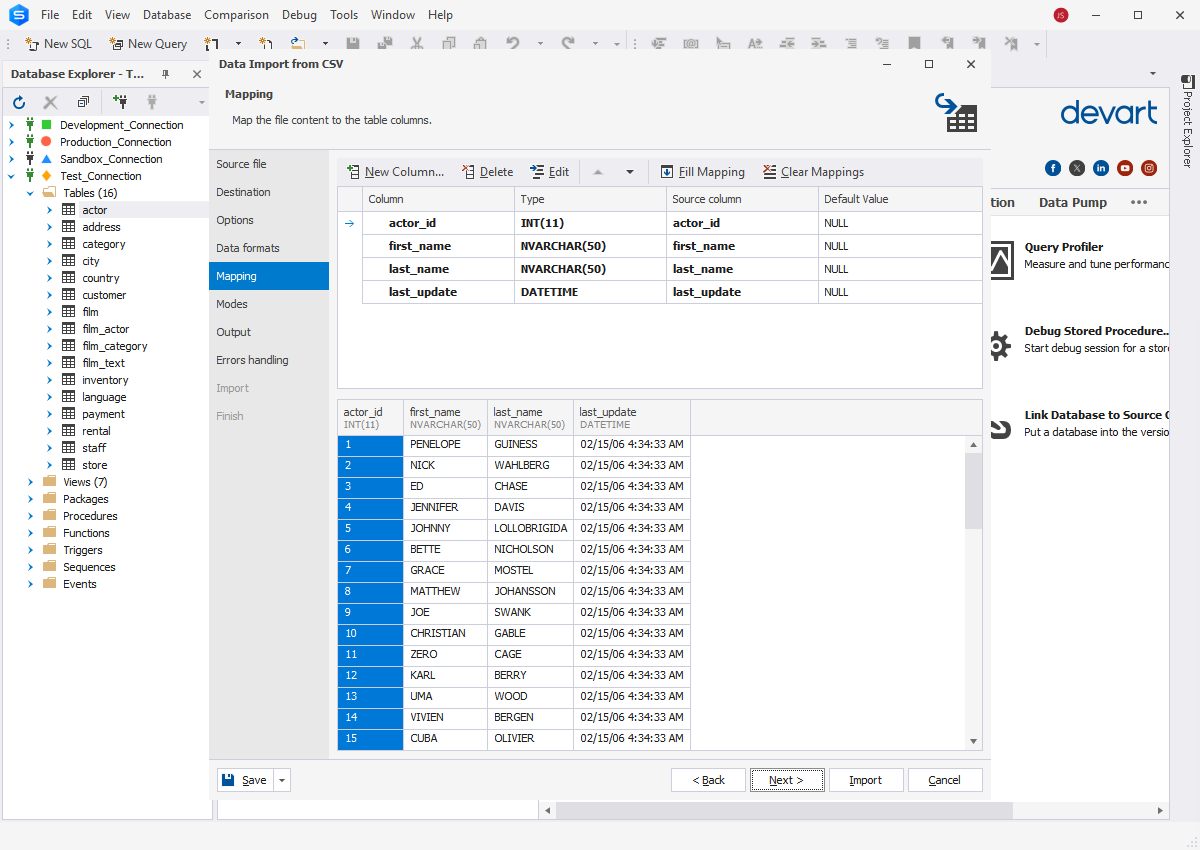
On the Mapping tab, you need to map the Source columns to the Target ones. If you are importing the data into a new table, the Studio will automatically create and map all columns. Also, note that you can edit the Target column properties by right-clicking on it and selecting Edit from the menu or simply double-clicking the necessary column in the top grid.
Verify the mapping settings and click Next.
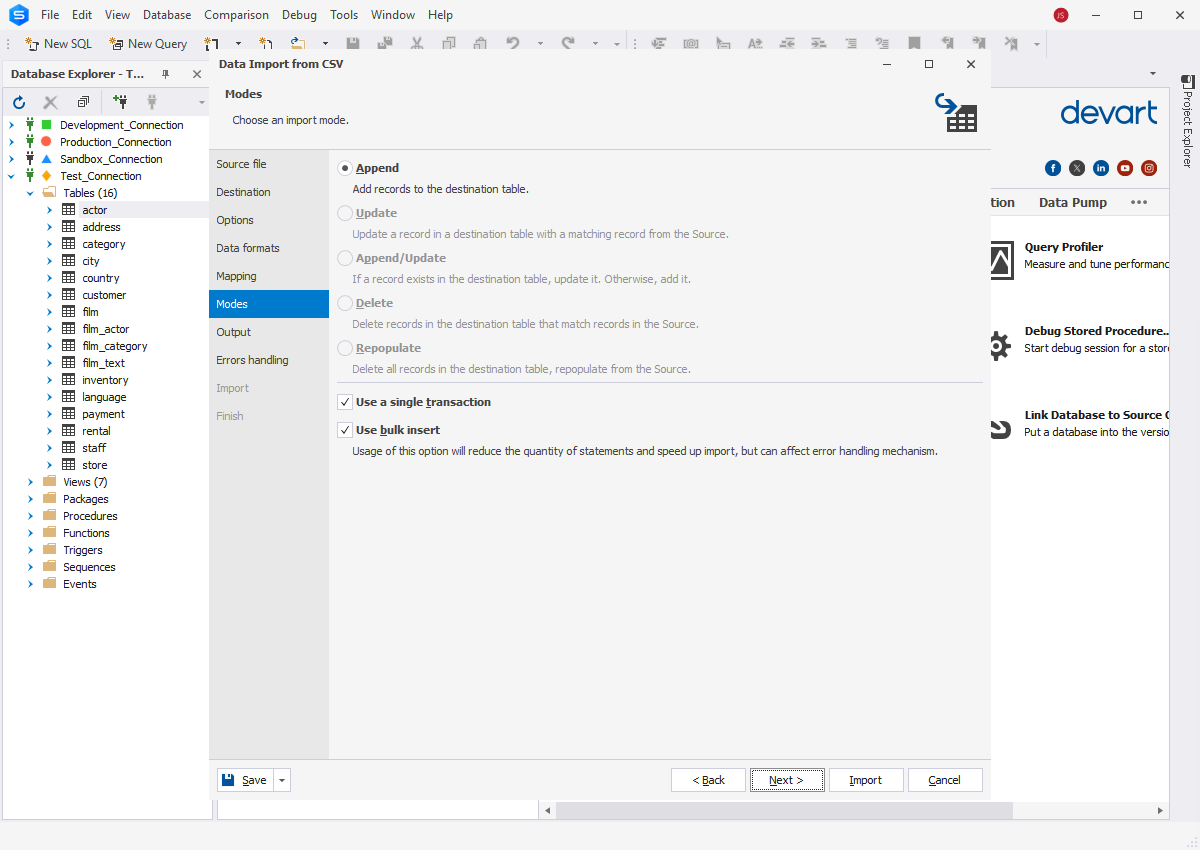
On the Modes tab, specify the preferred import mode. The modes available are: appending data by adding new records, updating existing data with new inputs, deleting data in the destination table that matches the source file data, and repopulating the destination table. Click Next.
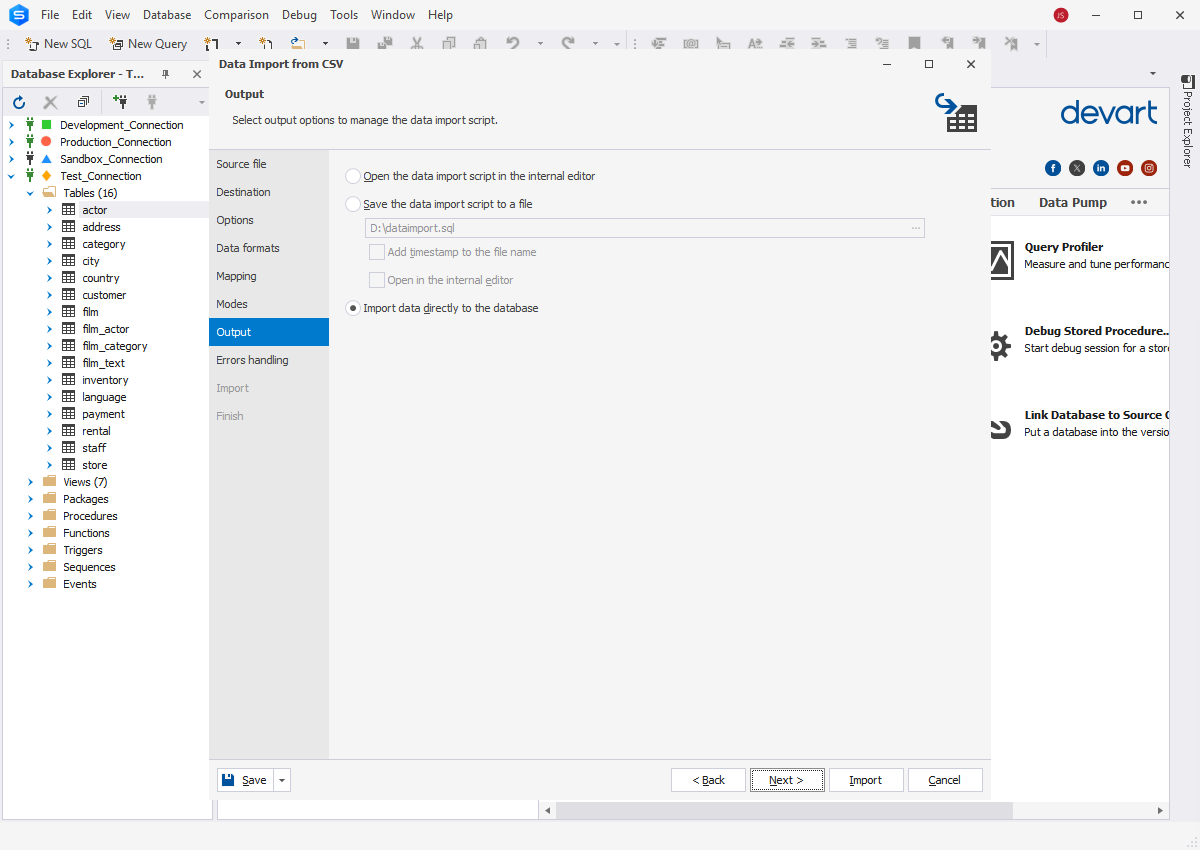
On the Output tab, define the necessary data import mode. By default, the Studio for MySQL enables direct data import into the database. Other options include generating the data import script, which you can edit and save for future reuse.
On the Errors handling tab, define the desired program behavior. Click Import.

dbForge Studio will notify you whether the import was completed successfully or failed. All the information about the process will be written into the log file, so you can click Show log file to view the details.
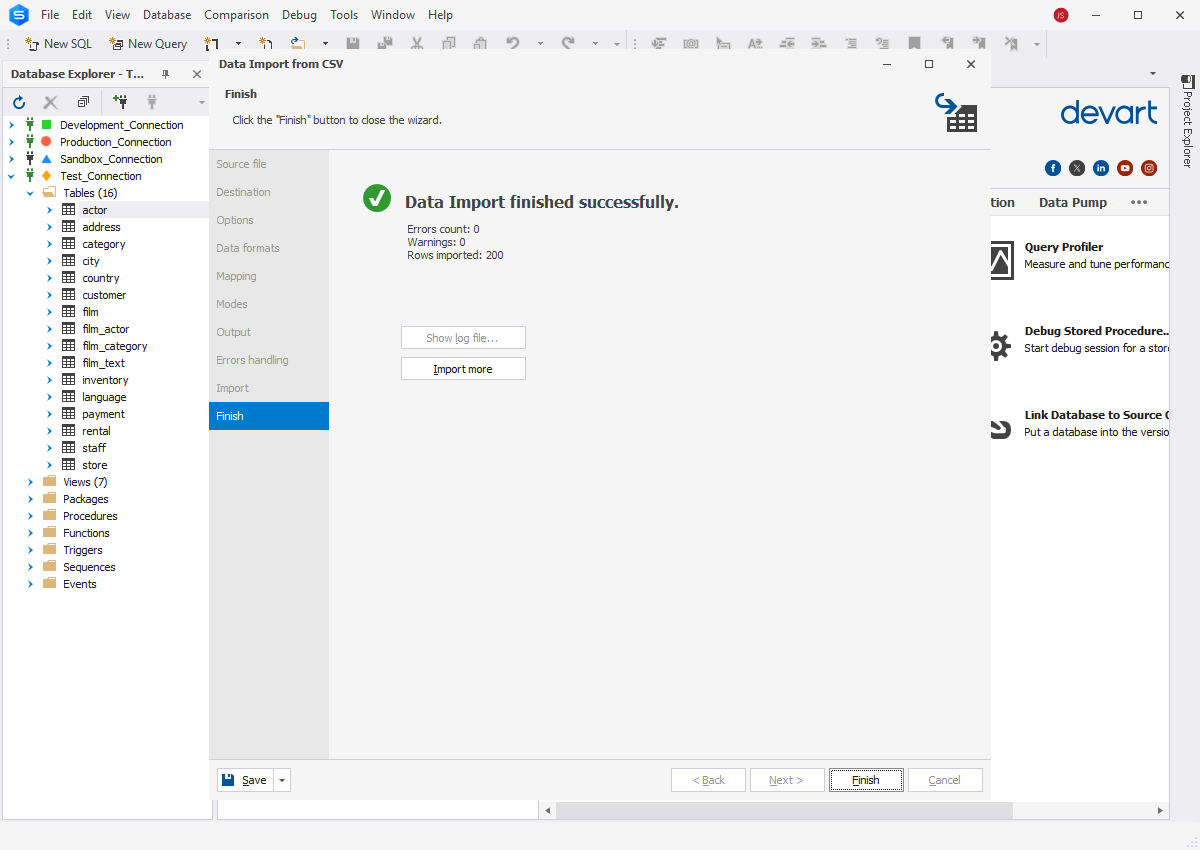
Click Finish to close the wizard.
Importing data from CSV into an existing MySQL table
In case you want to import data from the CSV file into an existing table in the MySQL or MariaDB database, you can specify that table immediately when you open the Data Import wizard. It is the most straightforward option.
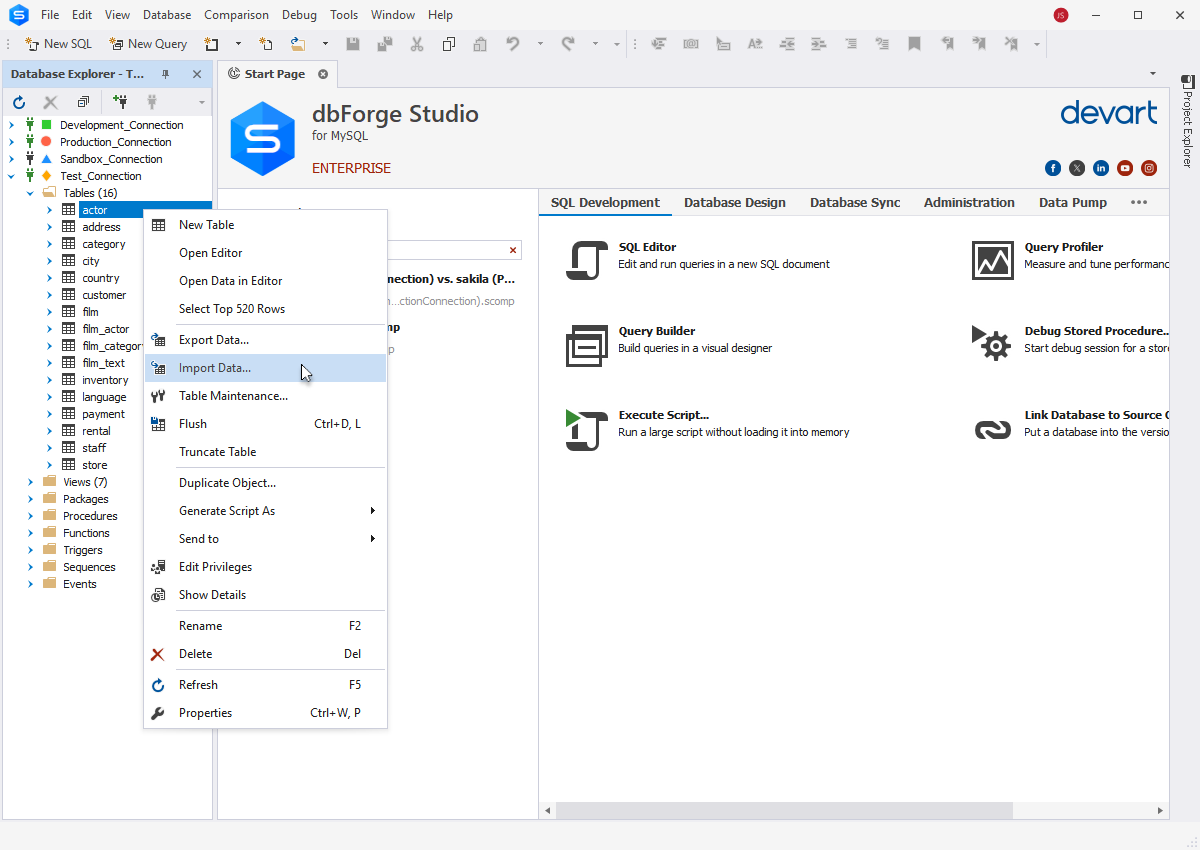
Select the database and the table where you want to import the data and right-click on it. Select Import Data.
Proceed to specify the data format (CSV) and browse to the necessary file as shown above. On the Destination tab, dbForge Studio for MySQL will fill the Connection, Database, and Table information automatically. Or, you can select the Existing table option and define the necessary table manually.

Proceed in the same way as for importing the data into a new table.
Pay attention to the configuration options on the Mapping tab. The Studio will map only columns with the same names automatically, other columns should be mapped manually. If no columns with the same name are found, they are mapped in succession: the 1st column in Source with the 1st column in Target, etc.
If you need to cancel the mapping of all columns, click Clear Mappings on the toolbar. To restore it, click Fill Mapping.
Note also that you should select at least one column with a primary key, otherwise, some of the import modes on the Modes wizard page will be disabled. Select the Key check box for a column with a primary key and click Next.

The rest of the process is the same as for importing data into a new table.
Saving data import settings as templates
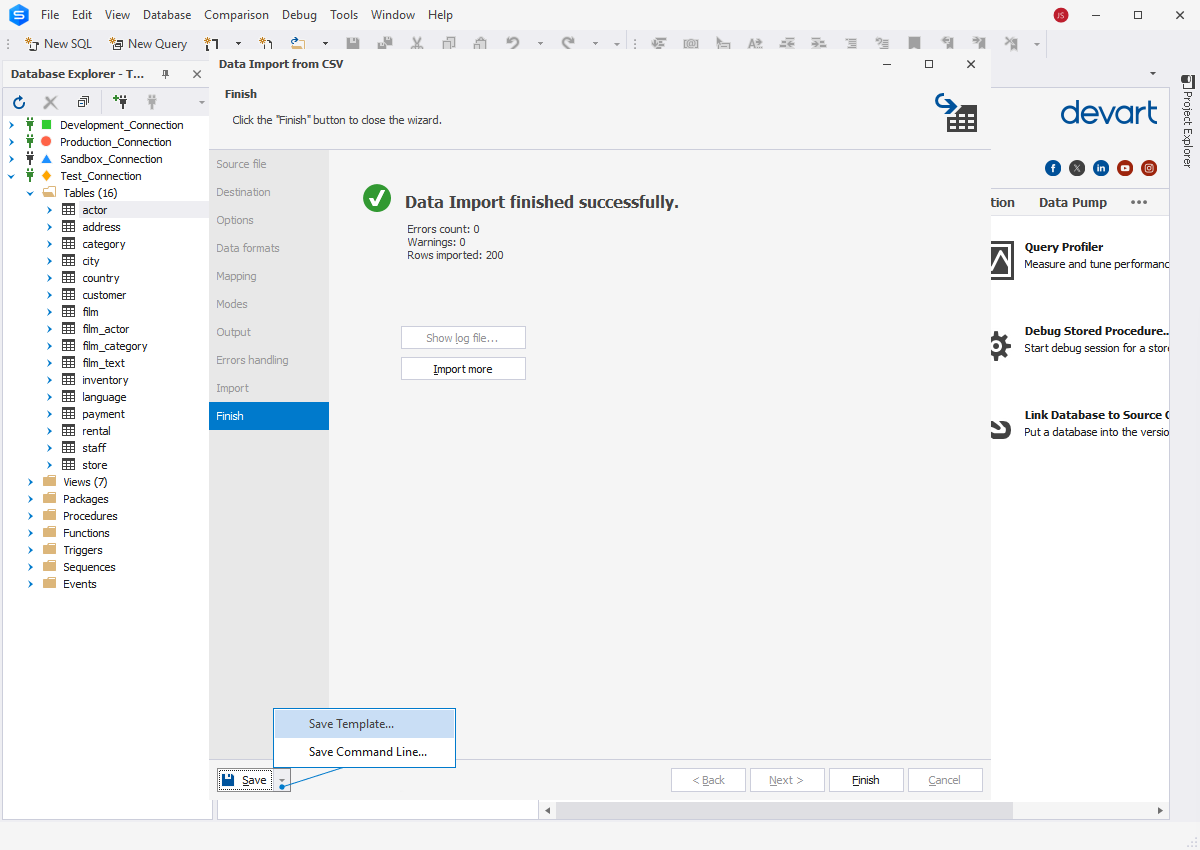
The Studio offers the possibility to save the particular task import settings as a template for reusing in the future. To utilize this option, click Save when the task configuration is completed and verified and select Save Template. The button is available on every tab of the import wizard.
Next time you want to perform the data import, just select the previously saved template and specify the location of the source data file. All the task import settings will be applied automatically.
Resolving common issues with CSV import
While importing data from CSV files into databases is a common task, occasional errors still occur. The Data Import wizard not only allows for precise task configuration but also provides a straightforward way to address any errors.
Here are some common issues that may arise, along with ways to resolve them using the dbForge Studio for MySQL GUI:
| Issue | Solution |
|---|---|
| Incorrectly defined delimiters | If delimiters are specified incorrectly during task configuration, the tool may struggle to parse the data and import it into the table's columns and rows. Correct the field delimiter type on the Options tab of the wizard. |
| Mishandling of special characters | Incorrect handling of special characters often results from an incorrect encoding set for the source file. Specify the required encoding on the Options tab of the wizard. |
| Mismatched column data types | Incorrectly defined data types for columns can cause data import failures. Navigate to the Mapping tab and review and validate the data types. |
| Missing or extra columns | This issue typically arises due to incorrectly specified field delimiters, leading to improper column separation. First, inspect the source file to ensure that entries meant for different columns are correctly separated by the appropriate delimiters. Next, verify the field delimiters in the data import settings. Finally, cross-check the source and target columns on the Mapping tab. |
By following these steps, you can enhance the accuracy and efficiency of your data import process.
Import other formats into MySQL