How to compare schemas of two databases in SQL Server
Learn how easy it is to compare two SQL Server databases and synchronize them using dbForge Schema Compare for SQL Server.
Getting started
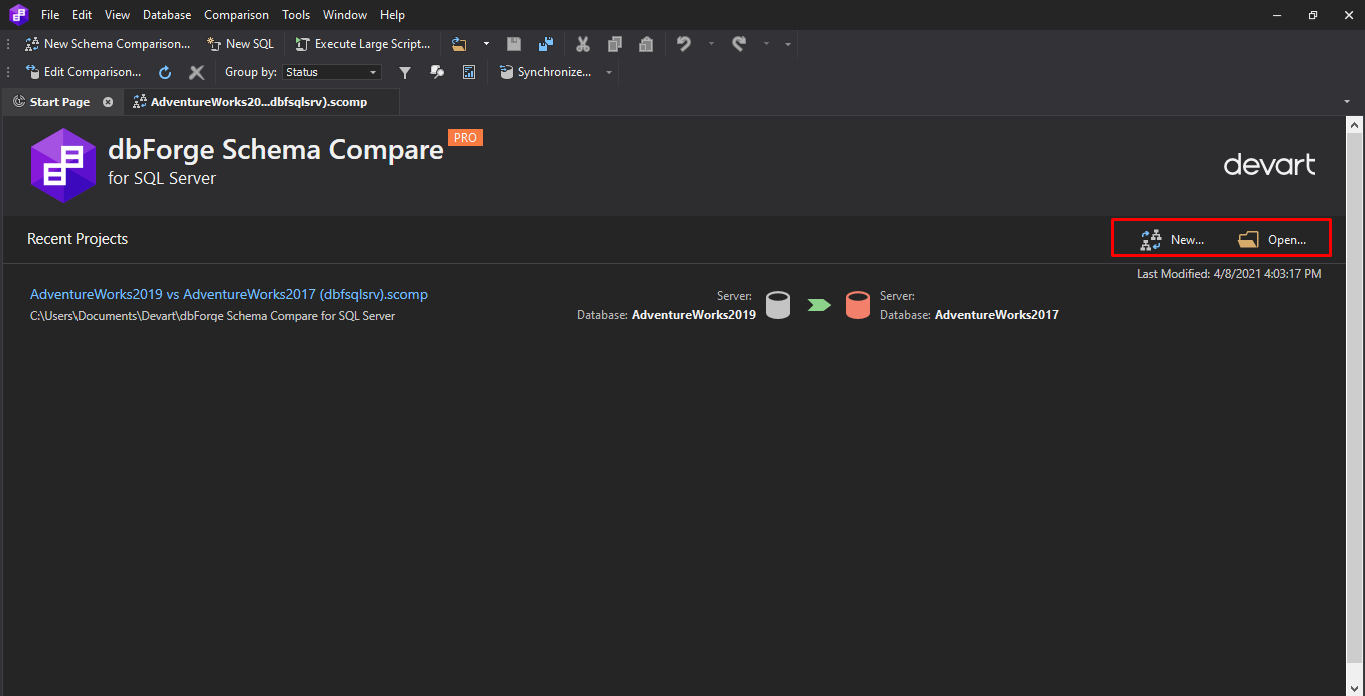
When you run dbForge Schema Compare for SQL Server, the tool automatically opens the Start page with a list of your recent comparison projects with a .scomp extension which you can open with a click. On the Start page, you can do the following:
- Launch a new schema comparison by clicking New Schema Comparison in the upper-right corner.
- Import the previously created data comparison project by clicking Open Schema Comparison Project in the upper-right corner.
Setting up connection
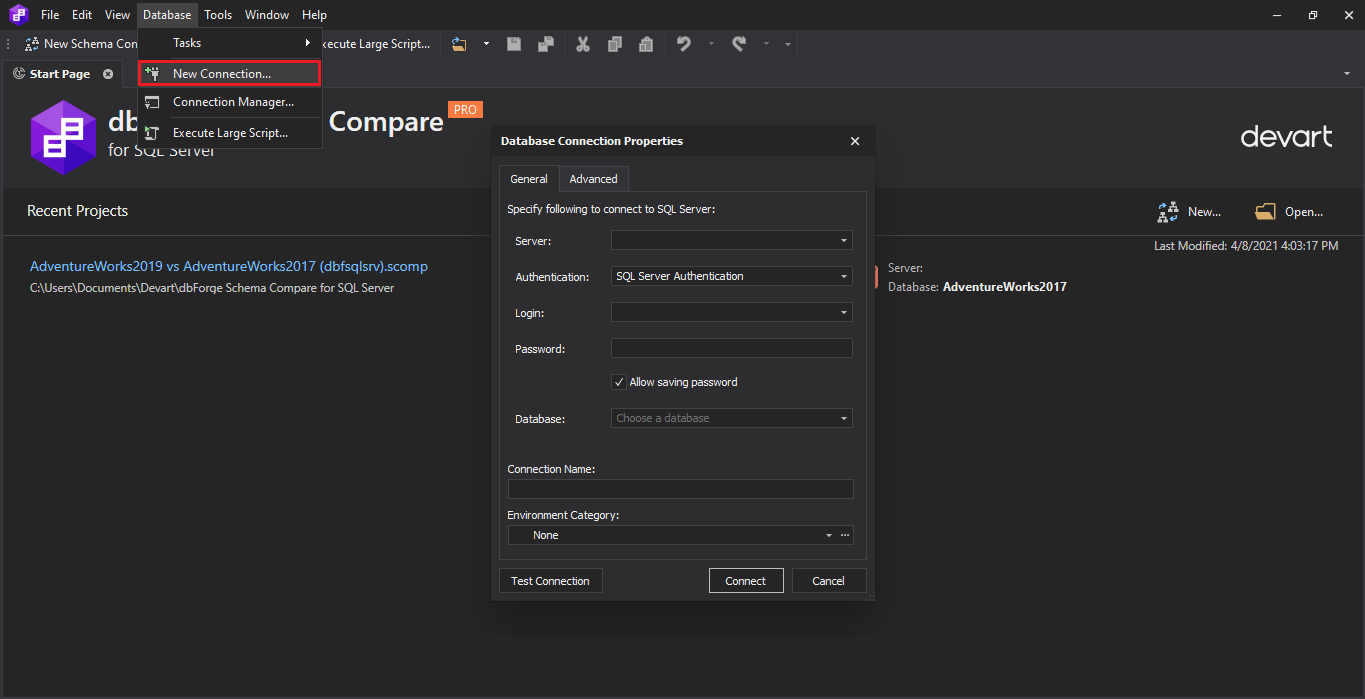
Before launching a new schema comparison, you need to establish a new database connection. To set up a SQL Server connection:
- On the Database menu, click New Connection.
- In the Database Connection Properties window that opens, specify the connection properties you want to add and click Connect.
Setting data sources for comparison
After we have established the SQL Server database connection, we can start a new comparison project and specify two data sources to compare.
Target is the database that is updated (synchronized) with the results of schema comparison to make it the same as Source. In dbForge Schema Compare for SQL Server, you can compare the following Source and Target types: Database, Backup, Scripts Folder, Source control, and Snapshot.
To select the source and target databases for comparison, do the following:
- On the Start page, click New Schema Comparison.
-
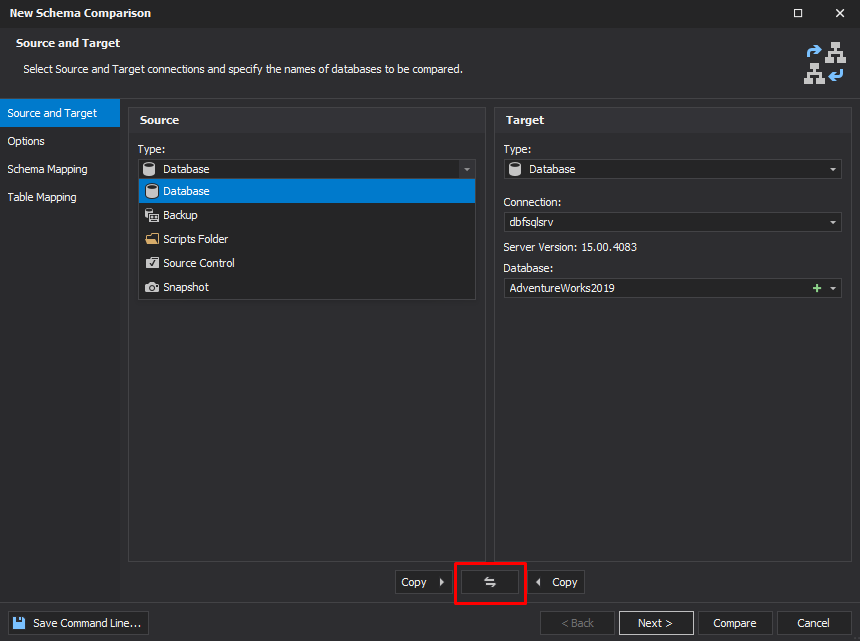
In the New Schema Comparison wizard that opens, specify the source and target comparison details on the Source and Target page:
- Select Database as a type
- Choose the connection from the Connection dropdown list
- Select the databases you want to compare
- Click Next to select options for schema comparison.
If you want to swap the source and target, click Swap Source and Target settings.
Comparing databases
Since dbForge Schema Compare for SQL Server can be integrated into Microsoft SQL Server Management Studio (SSMS), you can compare databases in a familiar interface. To compare databases, do the following:
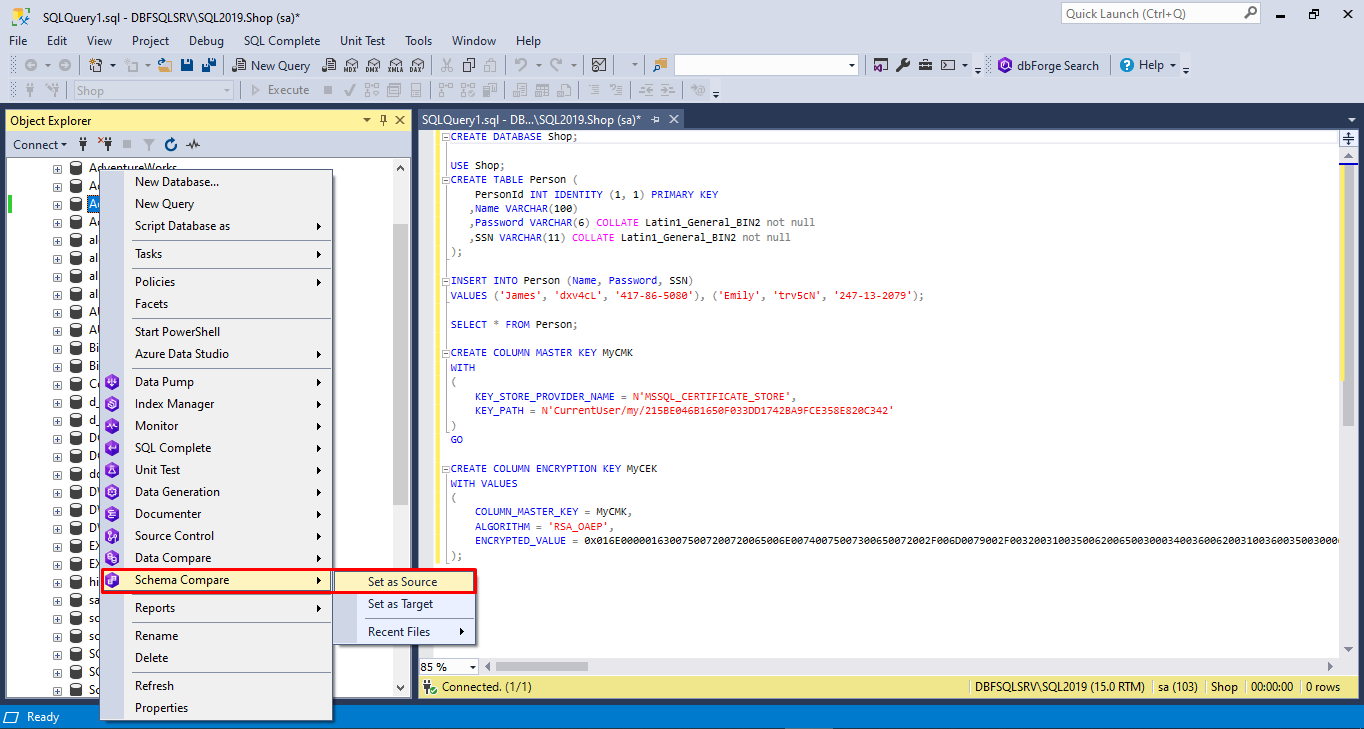
1. Open SSMS and in Object Explorer, right-click the database you want to compare and select Schema Compare > Set as Source.
Note: Select Recent Files to restore a previously saved comparison project file with the .scomp extension. The .scomp file contains all the schema comparison and deployment settings configured earlier.
The dbForge Schema Compare Manager opens displaying the database you selected as the source in the left pane.
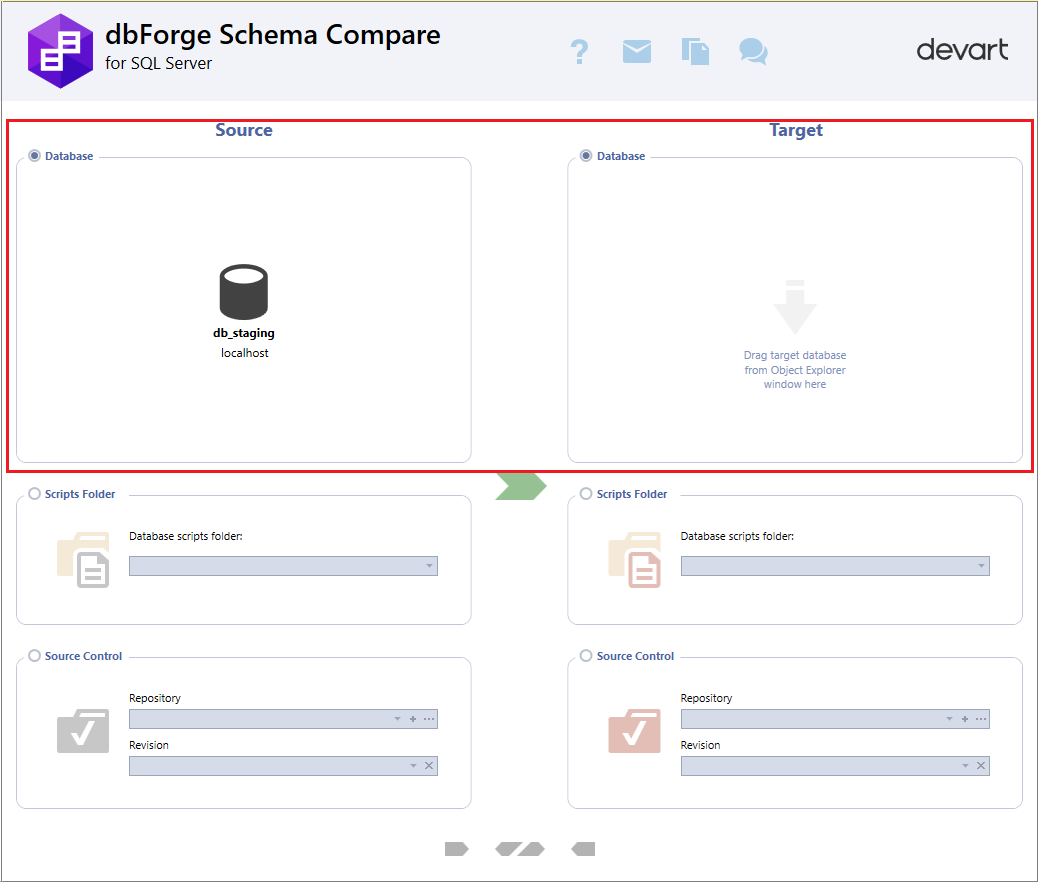
2. Select the target database by using one of the following options:
- In Object Explorer, right-click the database and select Schema Compare > Set as Target.
- Drag the database from Object Explorer and drop it to the Target Database section.
If you want to swap the source and target databases, click Swap Source and Target settings.
3. When the databases are chosen, you can start the comparison by clicking Start comparison. This will open the New Schema Comparison wizard where you can set up schema comparison for your project:
- Configure comparison options.
- Optional: Set schema and table mapping. For more information about how to map schemas and tables, see Map schemas and Map tables and columns in the dbForge Schema Compare documentation.
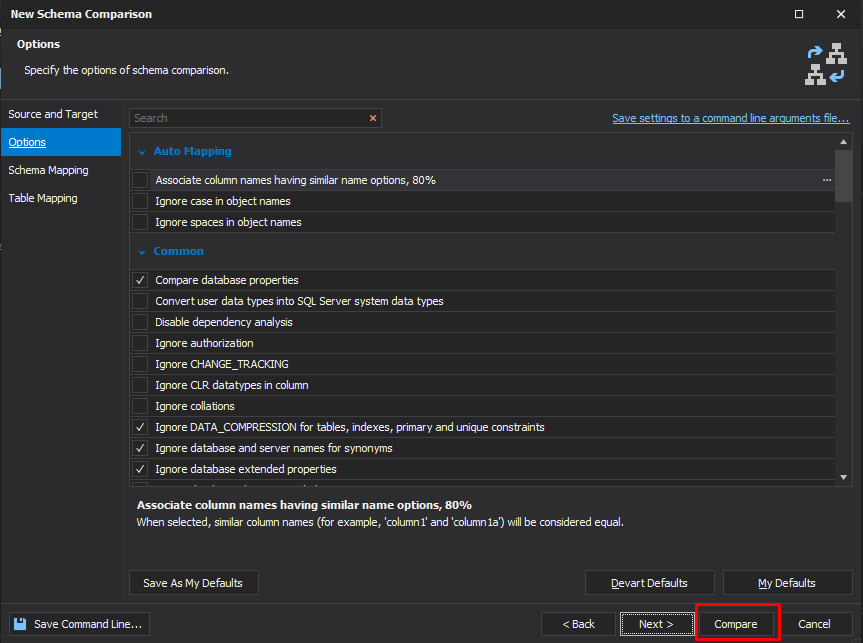
4. When schema comparison has been configured, click Compare to start comparison.
Comparing source control revisions
The Schema Compare SQL Server Management Studio add-in allows you to compare and synchronize source control revisions of databases. To set a revision from source control as the Source or Target, perform the following steps:
1. In the dbForge Schema Compare Manager, select Source Control as a type of a source or a target for database comparison.

2. Under Source Control, do the following:
- In the Repository box, select a database linked to Source Control or click Manage to specify a repository URL.
- In the Revision box, select a specific revision from the source control history or select the latest revision.
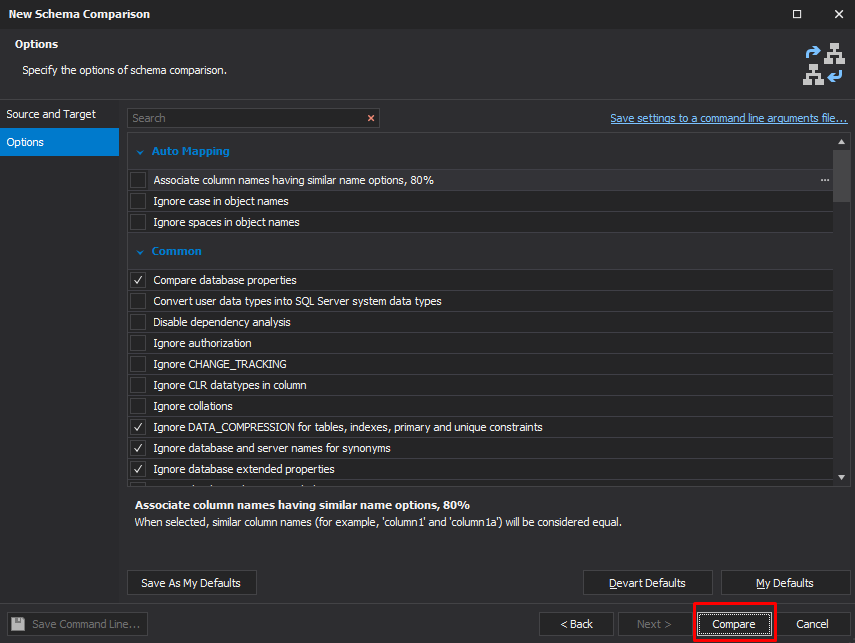
3. To start the comparison, click Start comparison. In the New Schema Comparison window that opens, configure the comparison options and then click Compare.
For more information about how to adjust settings for schema comparison, see Configuring comparison options.
Configuring comparison options
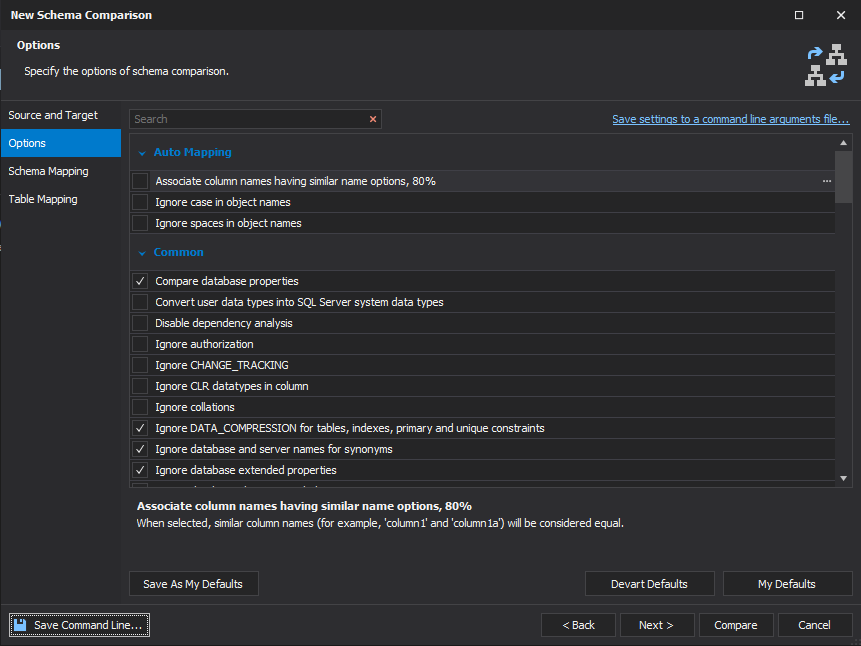
After the source and target connections and databases were set, you can customize the default comparison behavior, for example, ignore some objects or properties. On the Options wizard page, select the comparison options and then click Next. For more information about the options in the New Schema Comparison wizard, see Setting comparison options.
If you want to save the comparison settings to a command-line arguments file, click the Save settings to a command-line arguments file link in the upper-right corner. Later you can use this file for automatic comparison and synchronization through the command line.
To save the current selection of the options as your defaults, click Save As My Defaults.
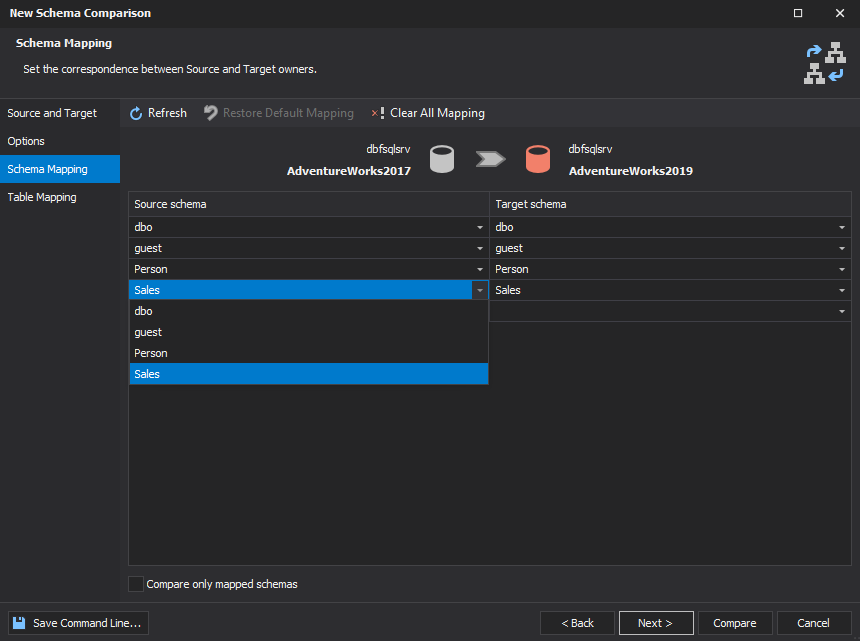
Mapping custom schemas
If you need to map schemas (with different names, one-to-many or many-to-one relationships), switch to the Schema Mapping wizard page. Select the source and target schemas, and click Compare – dbForge Schema Compare will automatically map the schema objects.
Analyzing comparison results
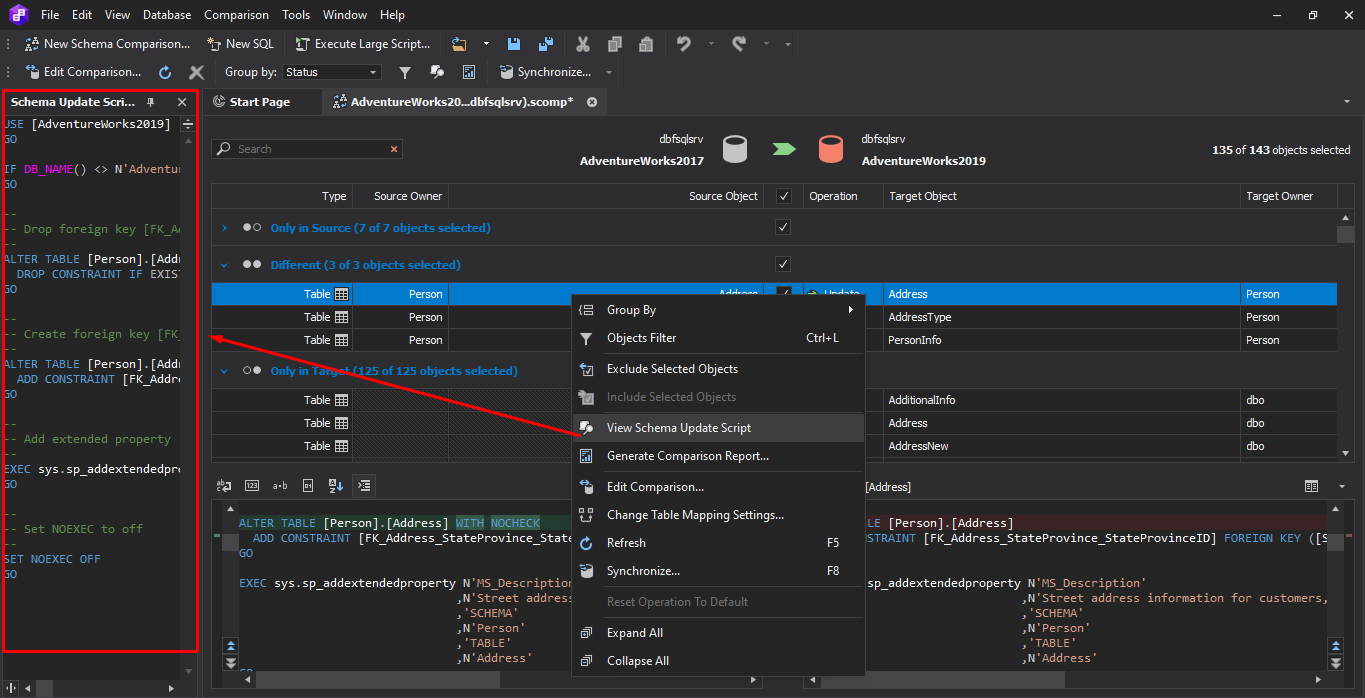
The Schema Comparison window displays the .scomp file as a grid with detailed information about the objects grouped by status (Only in Source, Only in Target, Different, Identical). You can also group objects by object type and operation.
To see the differences in the structure between Target and Source, select the object in the Different group of the grid.
For synchronization, you can exclude differences that you do not want to synchronize by clearing the checkbox next to the corresponding object. The number of objects to be deployed is shown in the upper-right corner.
In addition, you can preview the synchronization script for the selected object to make sure that you get the desired synchronization result. To do that, right-click the selected object and then select View Schema Update script.
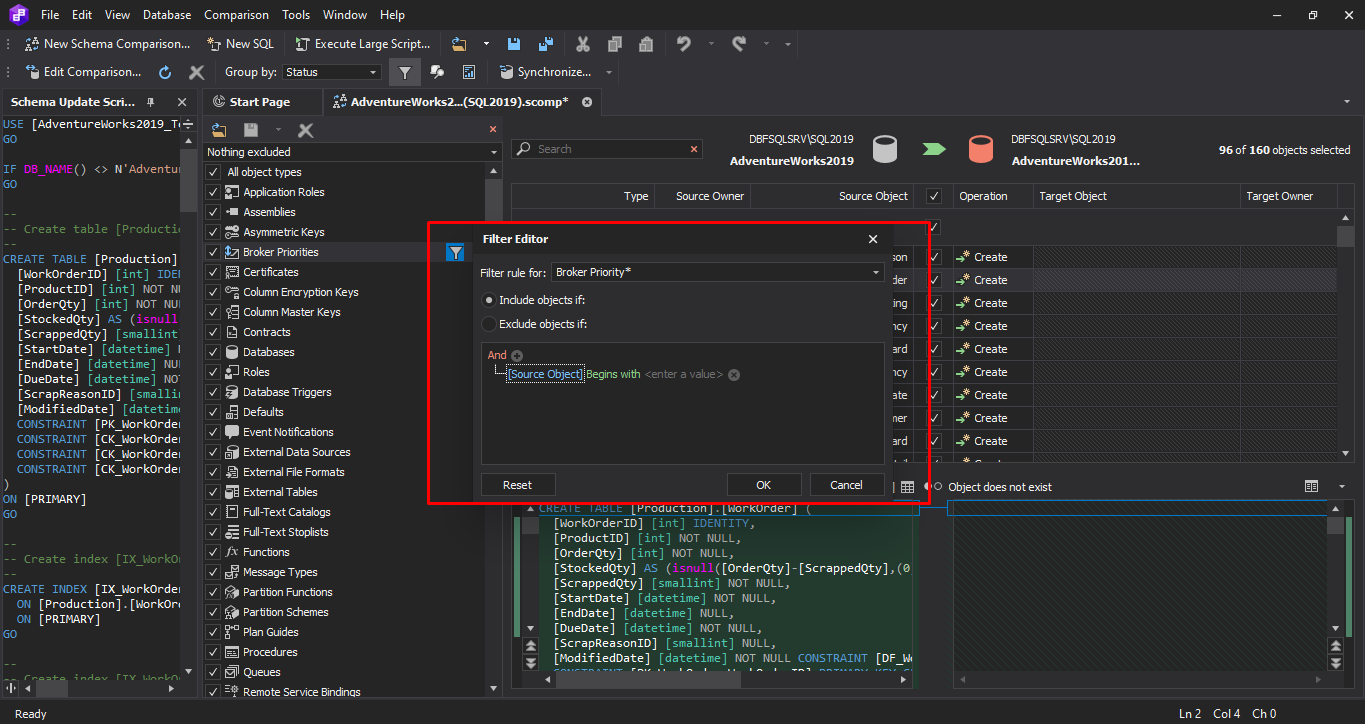
Using the Object Filter
The Object Filter feature allows filtering objects in the comparison document (.scomp file). You can use a wide range of default filters or create custom ones. To open the Object Filter pane, do one of the following:
- Right-click the comparison document and select Objects Filter or press Ctrl+L.
- On the Schema Comparison toolbar, click Apply a custom filter to the results.
In the Object Filter pane, you can import the previously created filter, modify the default filter, or remove it if needed. In the Filter Editor, you can specify filter rules and conditions.
Synchronizing database structures
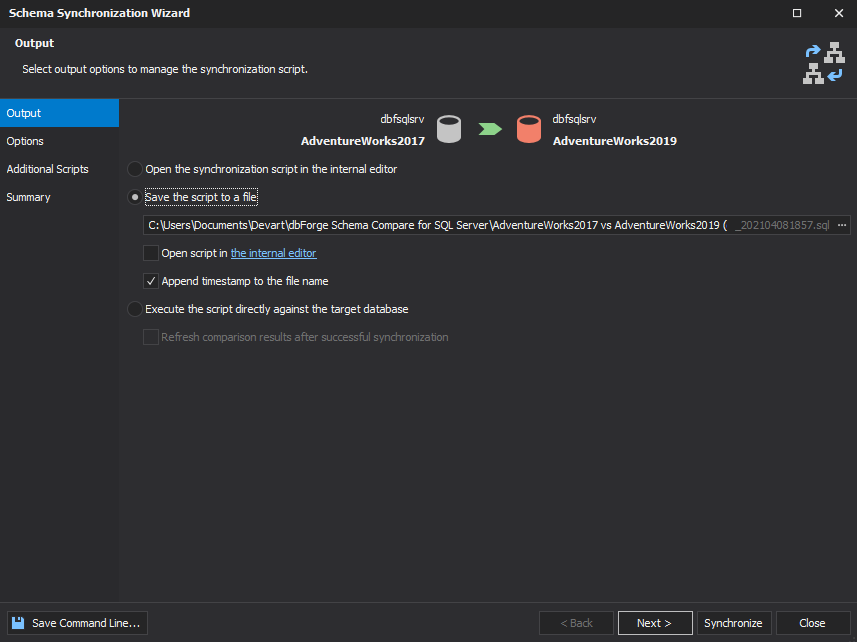
After you selected the different objects for synchronization to create a deployment script in the Analyzing comparison results step, click Synchronize objects to the target database on the Schema Comparison page. In the Schema Synchronization Wizard that opens, you can generate a synchronization script and tune the synchronization results based on your needs. If you want to generate the synchronization script with the default settings, click Synchronize.
To customize synchronization, do the following:
- On the Output page, select the output options to manage the script and then click Next.
- On the Options page, set the synchronization options and then click Next. For more information about the options, see Setting synchronization options.
- On the Additional Scripts page, insert the script you want to execute after or before schema synchronization and then click Next. This step is optional.
- On the Summary page, view the synchronization warnings and actions that will be taken and then click Synchronize.
Managing SQL scripts
As you can see, the accurate and easy-to-read synchronization script was successfully generated. You can review and execute the script, or run it against the target database.

Comparing scripts folders
Schema Compare allows you to compare and synchronize scripts folders. To set a scripts folder as the Source or Target:
In the dbForge Schema Compare Manager, select Scripts Folder as a type of a source or a target for database comparison.
In the Database scripts folder field, click Browse to specify a path to the scripts folder you want to add to the comparison. To start the comparison, click Start comparison. Schema Compare opens the New Schema Comparison window where you can set up schema comparison for your project. For more information about how to adjust settings for schema comparison, see Configuring comparison options.
Brief video guide to dbForge Schema Compare
Finally, you can get acquainted with everything you need to know about comparing and syncing two SQL Server databases using dbForge Schema Compare in this brief yet informative video guide.
Conclusion
dbForge Schema Compare for SQL Server is an advanced tool that helps compare two SQL Server databases in the most efficient way. As a data source, you can compare the database, backup, scripts folder, source control, and snapshot and set different options and filtering conditions to customize the default behavior of schema comparison and synchronization. Refer to our documentation center to learn more about how to compare table schemas between two databases using Schema Compare in detail.