Dynamics 365 is a powerful CRM
and ERP solution from Microsoft, widely used for business applications. Integrating it with your .NET
applications using Entity Framework Core (EF Core) allows developers to work with Dynamics 365 data using
familiar ORM paradigms and LINQ queries.
In this tutorial, you will learn how to set up a connection between a C# application and Dynamics 365
using dotConnect for Dynamics 365 along with Entity Developer to generate EF Core models. This enables smooth and efficient data access in your .NET applications.
Why dotConnect for Dynamics 365?
Easy integration with Dynamics 365
dotConnect efficiently resolves the connectivity challenges, allowing .NET applications to work with Dynamics 365 entities directly.
Interactive OAuth token generation
Support for Interactive OAuth authentication allows you to generate access and refresh tokens via a browser-based login flow.
User-friendly ADO.NET classes
Using familiar ADO.NET classes enables developers to work with Dynamics 365 data according to standard .NET patterns.
Advanced ORM support
The provider is fully compatible with EF Core, Dapper, NHibernate, and other ORM technologies for flexible data access in .NET applications.
Full ADO.NET compliance
The latest ADO.NET specifications ensure reliable integration with .NET frameworks and consistent behavior in enterprise applications.
Support & frequent updates
Priority technical support, full documentation, and product updates grant reliability and compatibility with Dynamics 365 and .NET.
Download and activate dotConnect for Dynamics 365
You can start using dotConnect for Dynamics 365 immediately with a 30-day free trial. Choose one of the following installation options:
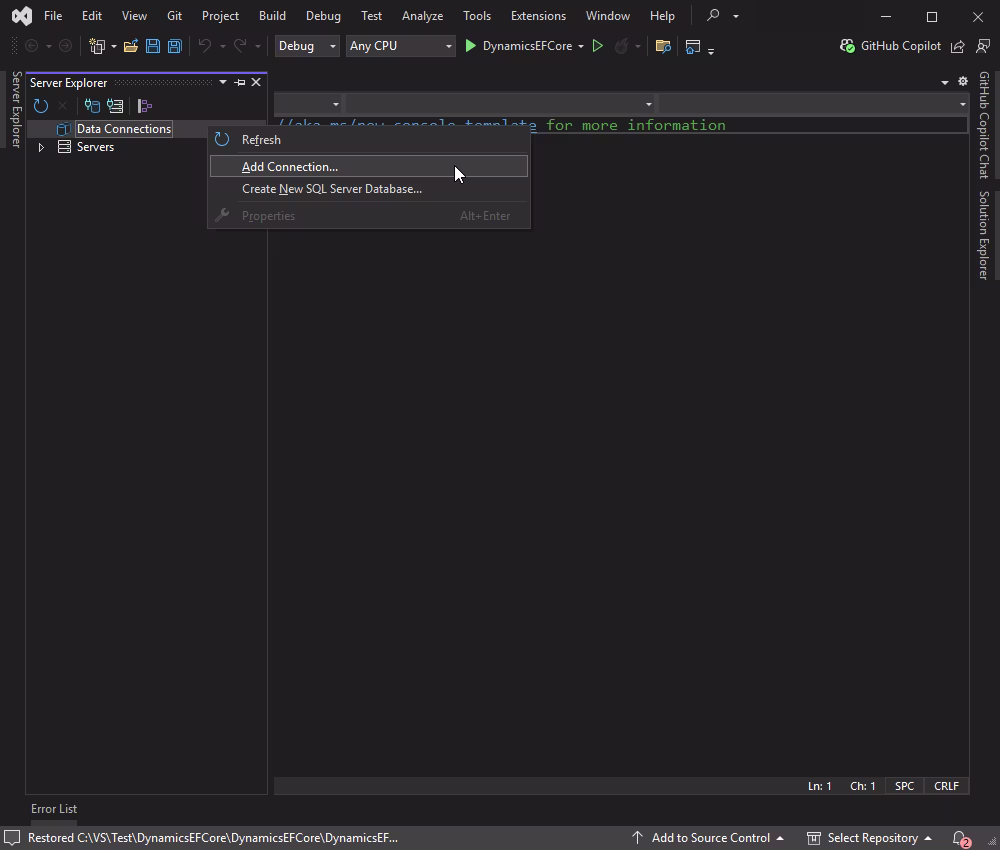
To connect to Dynamics 365 using the built-in Data Explorer, right-click Data Connections and
choose Add Connection.
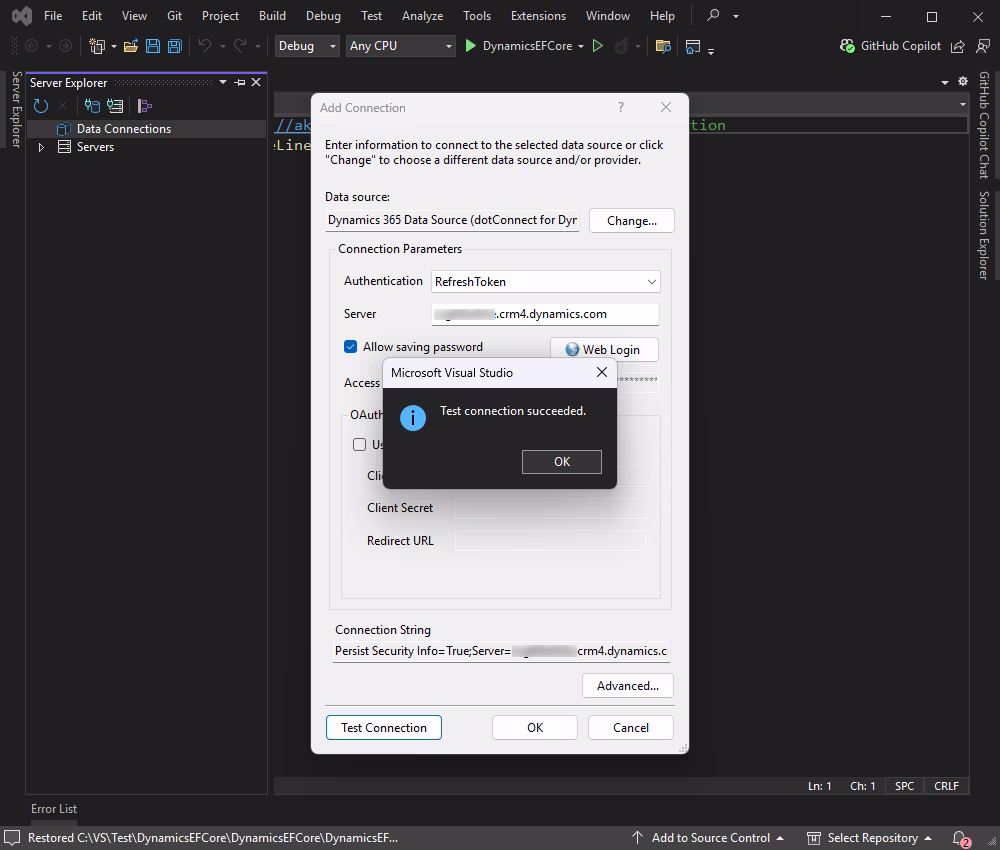
Select Dynamics 365 as the data source, choose Web Login to get
credentials, and click Test Connection.
If the test connection is successful, click OK.
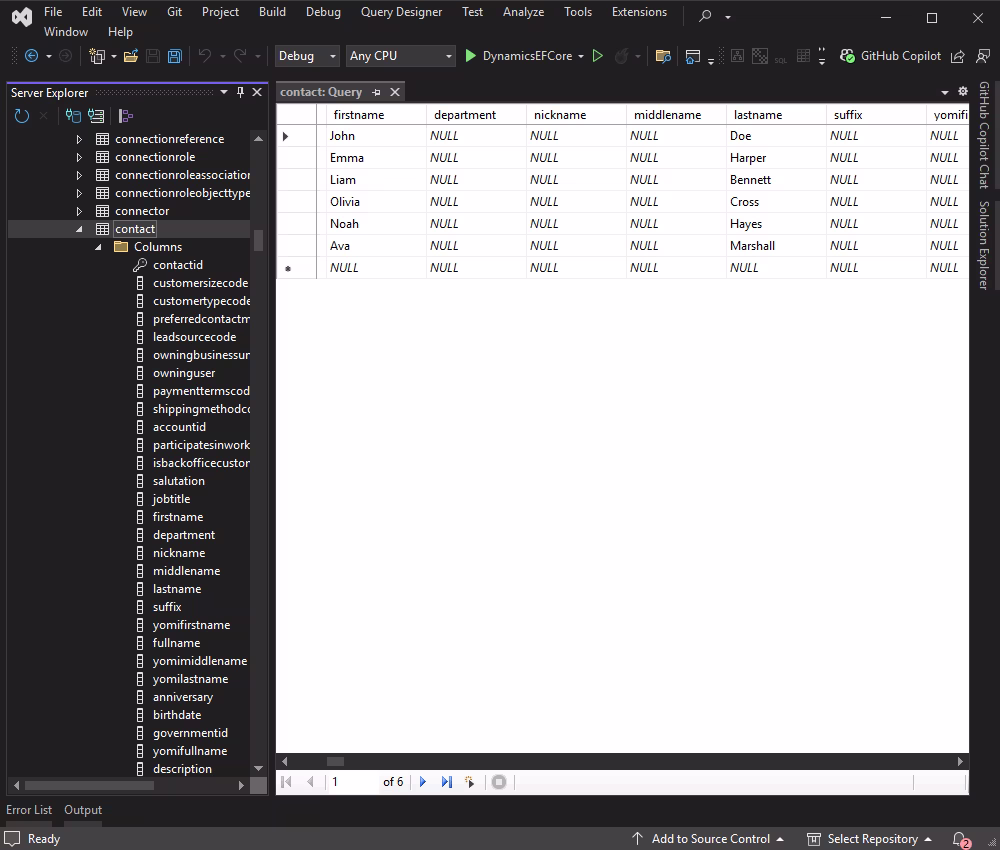
Once connected, you can browse tables, execute queries, and manage data directly within Data
Explorer.
Build Dynamics 365 EF Core model
The Professional and Developer editions of dotConnect for Dynamics 365 come equipped with Entity Developer - a robust ORM model designer and code generator that supports both Entity Framework and EF Core. This tool simplifies the process of generating a model from a data source or creating a data source from an existing model.
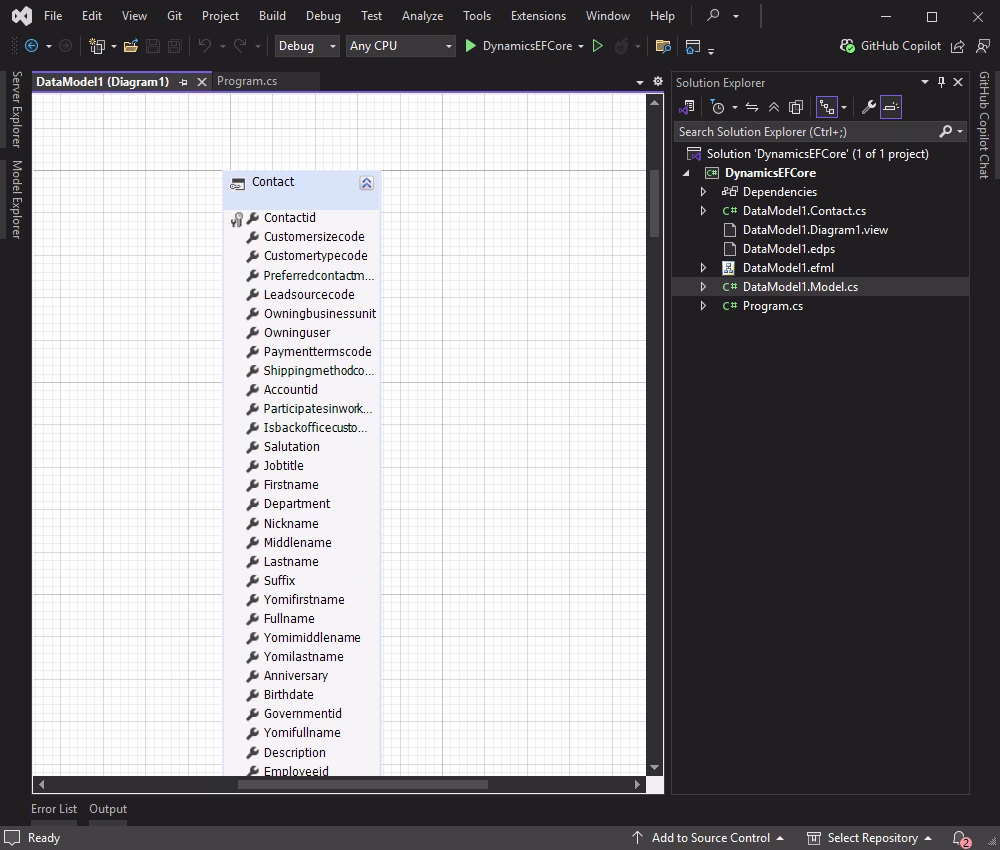
Follow the detailed illustrated guide to create your database model using Entity Developer. When this process is complete, the model you created opens, ready for use.
Entity Developer generates classes for the selected tables, representing data entities. It also creates a Model class descendant, which manages the connection to the Dynamics 365 CRM database and handles data flow. This class contains properties and methods corresponding to your Dynamics 365 CRM objects, allowing you to retrieve and modify data easily.
DataModel1.Model.cs - Custom partial classes and methods that you can add here to extend the functionality.
With the model set up, you can interact with Dynamics 365 data using Entity Framework Core in your .NET application.
Note
If you're using a purchased dotConnect for Dynamics 365 license, include the license key in the connection strings. In our case, we will keep it in the DbContext class:
The authentication method to use. The supported types are RefreshToken, RefreshTokenInteractive, and UsernamePassword. For more information, refer to Authentication Type.
Server
The login URL to Dynamics 365 service.
User Id
The Dynamics 365 login account that is required for the UserNamePassword authentication.
Password
The password for the UserNamePassword authentication.
Client Id
One part of the OAuth 2.0 credentials pair obtained when the OAuth 2.0 application is registered in the Azure AD tenant.
Client Secret
The second part of the OAuth 2.0 credentials pair obtained when the OAuth 2.0 application is registered in the Azure AD tenant.
Refresh Token
OAuth 2.0 refresh token for the RefreshToken authentication.
License Key
The license key that should be specified in the connection string.
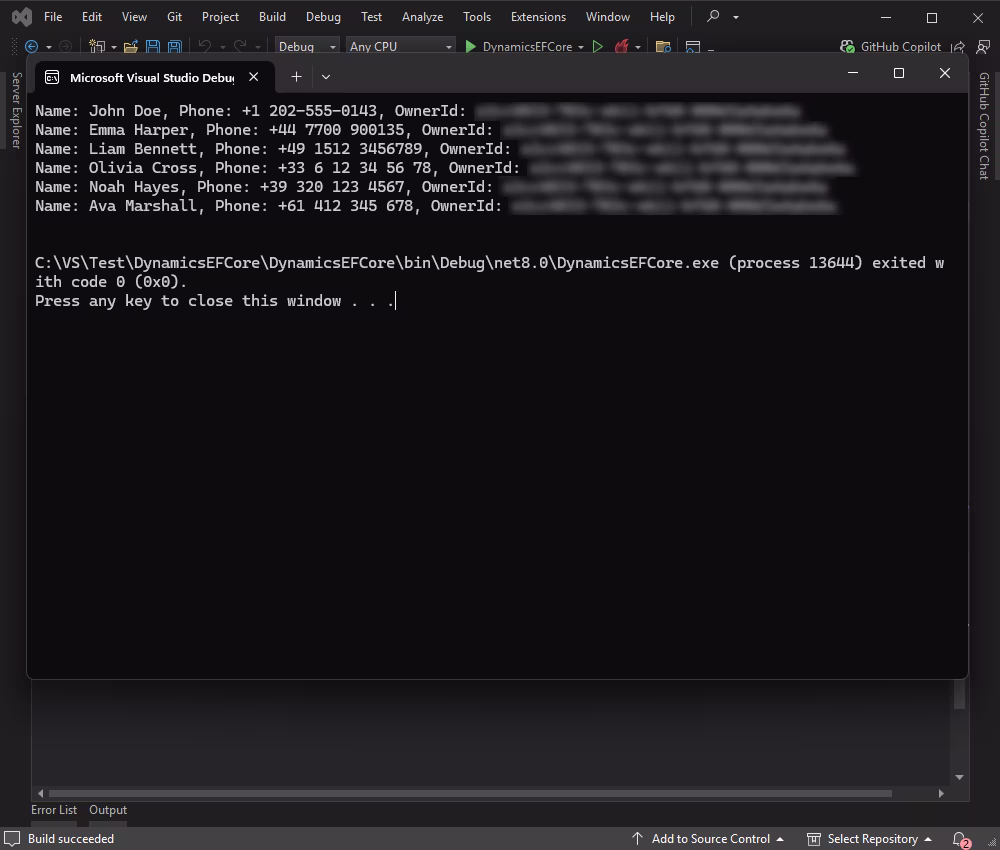
Read data from Dynamics 365
In the Program.cs file, write the code to retrieve and display information from the Contacts table.
using System;
using System.Linq;
namespaceDynamicsEFCore
{
classProgram
{
staticvoidMain(string[] args)
{
using (var context = new Model())
{
// Create a new Contact objectvar newContact = new Contact
{
Firstname = "TestName",
Lastname = "TestLastName",
Mobilephone = "+12345678910",
Ownerid = Guid.Parse("**********")
};
// Add the new Contact to the context
context.Contacts.Add(newContact);
// Save changes to the database
context.SaveChanges();
// Retrieve and display the added contactvar addedContact = context.Contacts
.OrderByDescending(c => c.Createdon)
.FirstOrDefault();
if (addedContact != null)
{
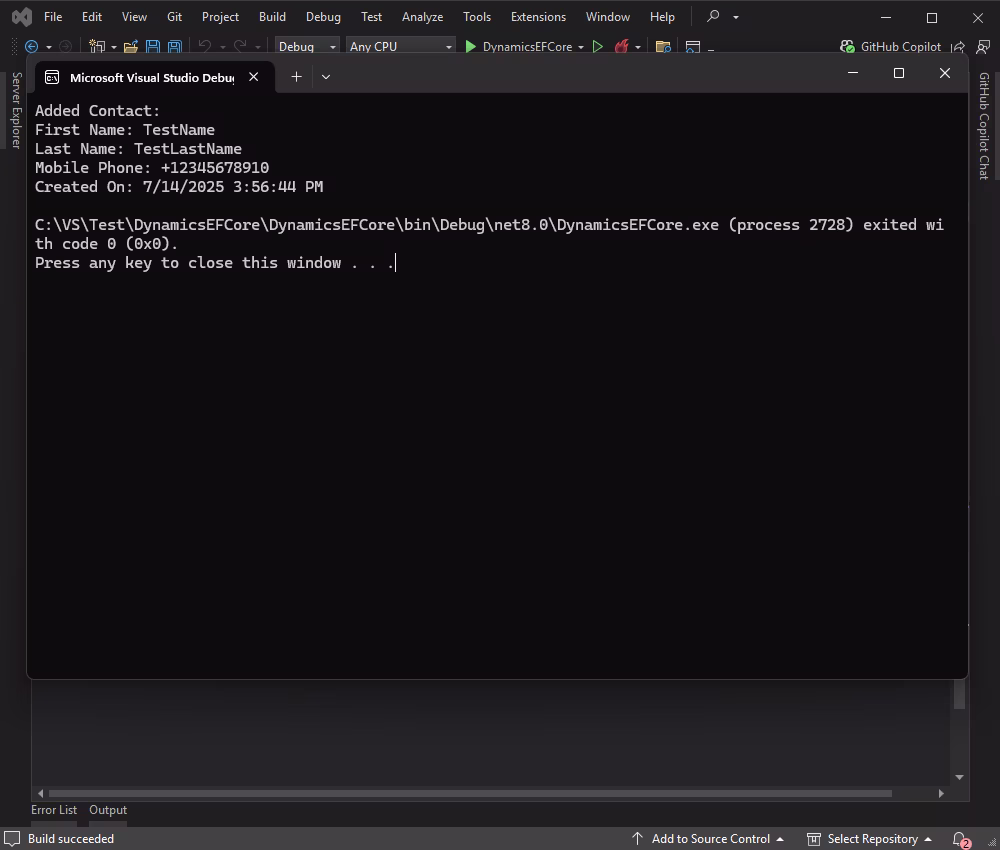
Console.WriteLine("Added Contact:");
Console.WriteLine($"First Name: {addedContact.Firstname}");
Console.WriteLine($"Last Name: {addedContact.Lastname}");
Console.WriteLine($"Mobile Phone: {addedContact.Mobilephone}");
Console.WriteLine($"Created On: {addedContact.Createdon}");
}
else
{
Console.WriteLine("Failed to add the contact.");
}
}
}
}
}
Build and run your application.
Update Dynamics 365 data
Now, let's update the phone number for an account with the name "John Doe" in Dynamics 365. This example assumes that the full name is unique or that you have a way to uniquely identify the account you want to update.
We retrieve the account named "John Doe" from the database and update the Mobilephone property with the new phone number.
Here's how you can implement this in your Program class:
using System;
using System.Linq;
namespaceDynamicsEFCore
{
classProgram
{
staticvoidMain(string[] args)
{
using (var context = new Model())
{
// Find the contact with Firstname "John" and Lastname "Doe"var contact = context.Contacts
.FirstOrDefault(c => c.Firstname == "John" && c.Lastname == "Doe");
if (contact != null)
{
// Update the mobile phone with a random valuevar random = new Random();
contact.Mobilephone = $"+1{random.Next(1000000000, 1999999999)}";
context.SaveChanges();
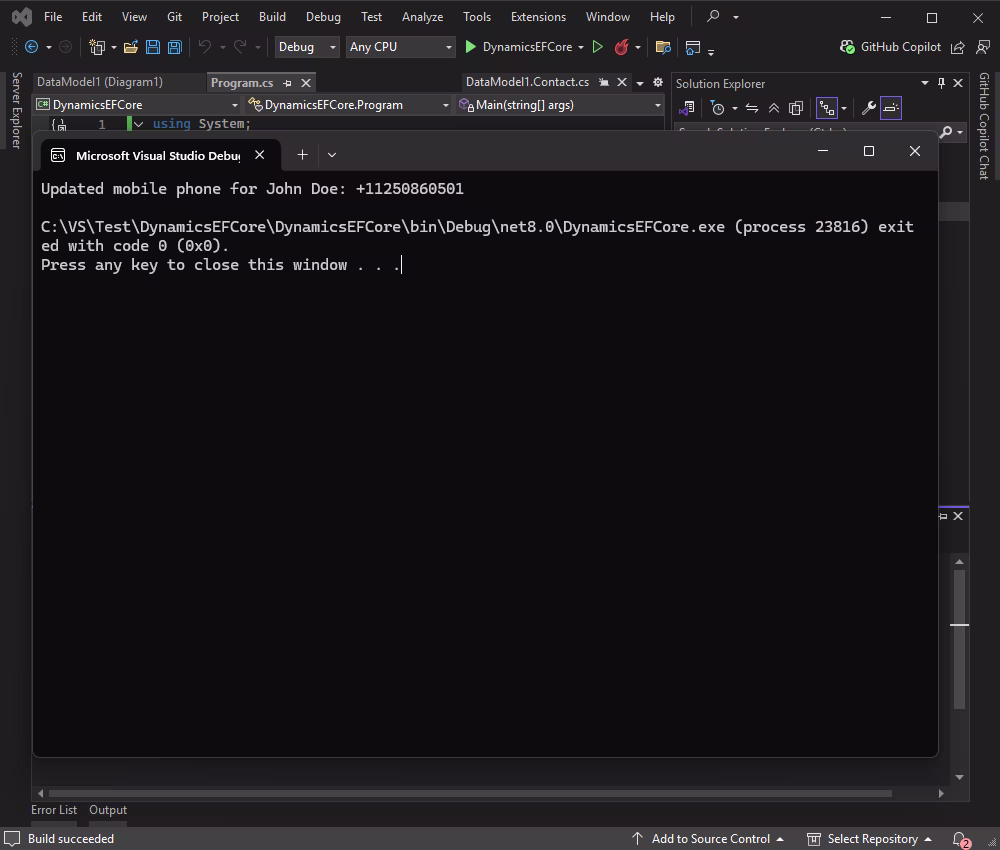
Console.WriteLine($"Updated mobile phone for John Doe: {contact.Mobilephone}");
}
else
{
Console.WriteLine("Contact John Doe not found.");
}
}
}
}
}
When this code is executed successfully, the mobile phone for the selected account is updated.
Delete data from Dynamics 365
This example demonstrates how to fetch the account by name and then delete it from the database.
First, retrieve the contact with the name "TestName TestLastName" from the database.
Once you have retrieved the account, remove it from the DbContext and save the changes.
Here's how you can implement this in your Program class:
using System;
using System.Linq;
namespaceDynamicsEFCore
{
classProgram
{
staticvoidMain(string[] args)
{
using (var context = new Model())
{
var contact = context.Contacts
.FirstOrDefault(c => c.Firstname == "TestName" && c.Lastname == "TestLastName");
if (contact != null)
{
context.Contacts.Remove(contact);
context.SaveChanges();
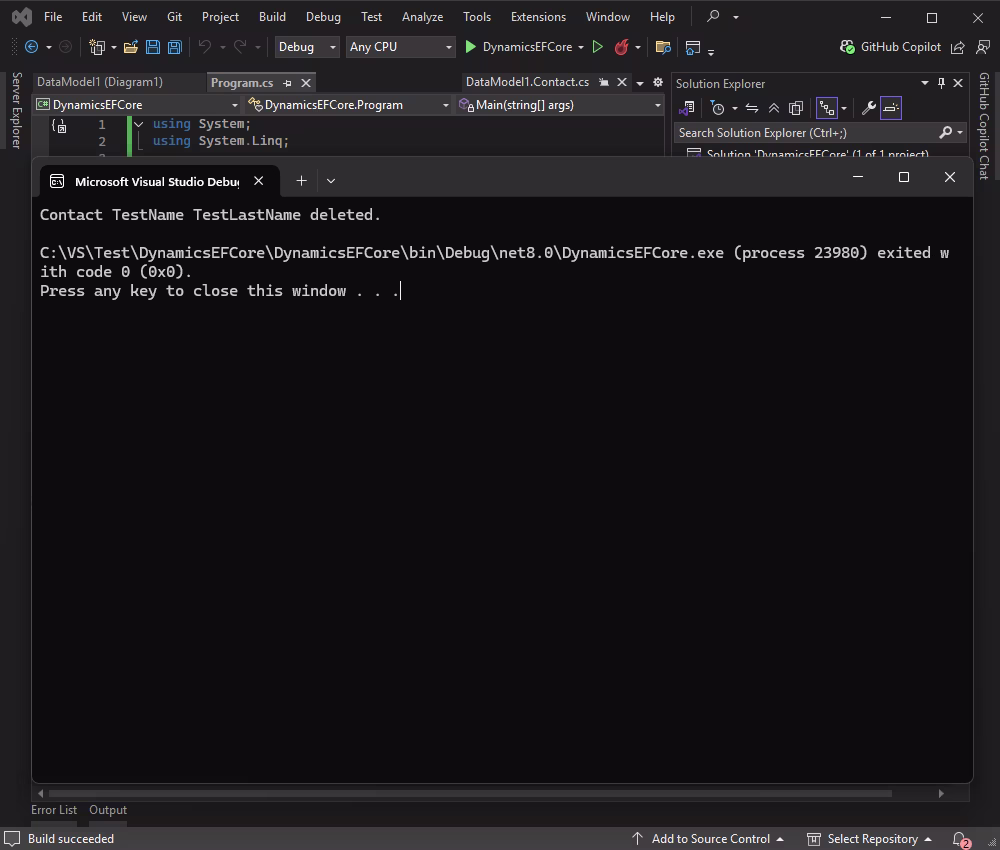
Console.WriteLine("Contact TestName TestLastName deleted.");
}
else
{
Console.WriteLine("Contact TestName TestLastName not found.");
}
}
}
}
}
As a result, the selected contact is deleted from the database.
Conclusion
Using dotConnect for Dynamics 365 with Entity Framework Core and Entity Developer offers a robust, efficient, and developer-friendly way to work with Dynamics 365 data in C#. This approach abstracts the complexities of the Dynamics 365 API, providing seamless integration and full ORM benefits.
With the provided steps, you can quickly set up your project, generate EF Core models, and perform CRUD operations on Dynamics 365 entities, accelerating your application development.
FAQ
How do you install and activate dotConnect for Dynamics 365 in a .NET project?
Install dotConnect for Dynamics 365 using the EXE installer or by adding the Devart.Data.Dynamics NuGet package to your project. Then obtain your Activation Key from your Devart Customer Portal and include it in the connection string via the License Key parameter.
How do you authenticate to Dynamics 365 using Interactive OAuth in dotConnect?
To authenticate using Interactive OAuth, set the connection string parameter: Authentication Type=AccessRefreshTokenInteractive. When the DynamicsConnection opens, a browser window appears where you sign in to your Dynamics 365 account. After authentication, dotConnect automatically retrieves and manages the access and refresh tokens.
How do you create a connection to Dynamics 365 using dotConnect in C#?
Define a connection string that includes the Url of your Dynamics 365 organization and the License Key, along with the authentication parameters. Then create a DynamicsConnection instance and call Open() inside a try-catch block to establish and validate the connection.
Can you access Dynamics 365 data using standard SQL queries with dotConnect?
Yes, dotConnect allows you to query Dynamics 365 entities using standard SQL syntax, eliminating the need to work directly with the Dynamics Web API. This makes retrieving and manipulating data more convenient for .NET developers.
Can you connect to Dynamics 365 using Entity Framework Core and dotConnect?
Yes, you can use Entity Developer to visually create an EF Core model based on Dynamics 365 entities, or run Scaffold-DbContext with the Devart.Data.Dynamics.EFCore package and a dotConnect connection string (including License Key) to generate the DbContext and entity classes.
Is it possible to explore Dynamics 365 data using Visual Studio Server Explorer with dotConnect?
Yes, in Visual Studio Server Explorer you can add a new Data Connection, choose dotConnect for Dynamics 365 as the provider, configure authentication, test the connection, and browse Dynamics 365 entities directly from the IDE.
I'm a technical content writer who loves turning complex topics — think SQL, connectors, and backend chaos–into content that actually makes sense (and maybe even makes you smile). I write for devs, data folks, and curious minds who want less fluff and more clarity. When I'm not wrangling words, you'll find me dancing salsa, or hopping between cities.