The integration of QuickBooks Online into your .NET Blazor application allows you to easily access financial data, enhancing the efficient management of customer information, invoices, and more.
This tutorial demonstrates how to connect a Blazor Server App to QuickBooks Online using dotConnect for QuickBooks Online, with a particular focus on performing CRUD operations within the Customer table.
Why dotConnect for QuickBooks?
Easy integration with QuickBooks Online
Ensures effortless connection to QuickBooks Online, allowing .NET applications to access accounting data such as customers, invoices, and payments without dealing with the complexity of the API.
Interactive OAuth token generation
Streamlines authentication via Interactive OAuth, where users sign in through a browser-based login flow. After authorization, dotConnect automatically gets and manages access and refresh tokens.
User-friendly ADO.NET classes
Uses well-known ADO.NET classes, enabling an easy start and creating a convenient working environment.
Advanced ORM support
Fully supports EF Core, Dapper, NHibernate, LinqConnect, and other technologies for efficient QuickBooks Online data management.
Full ADO.NET compliance
Conforms to the latest ADO.NET standards and innovations for seamless integration with .NET applications.
Priority support & frequent updates
Includes priority support, detailed documentation, and regular updates for continuous improvement.
Download and activate dotConnect for QuickBooks
You can start using dotConnect for QuickBooks immediately with a 30-day free trial. Choose one of the following installation options:
Below, you will find the instructions on how to check your QuickBooks data source using the built-in Data Explorer in Visual Studio.
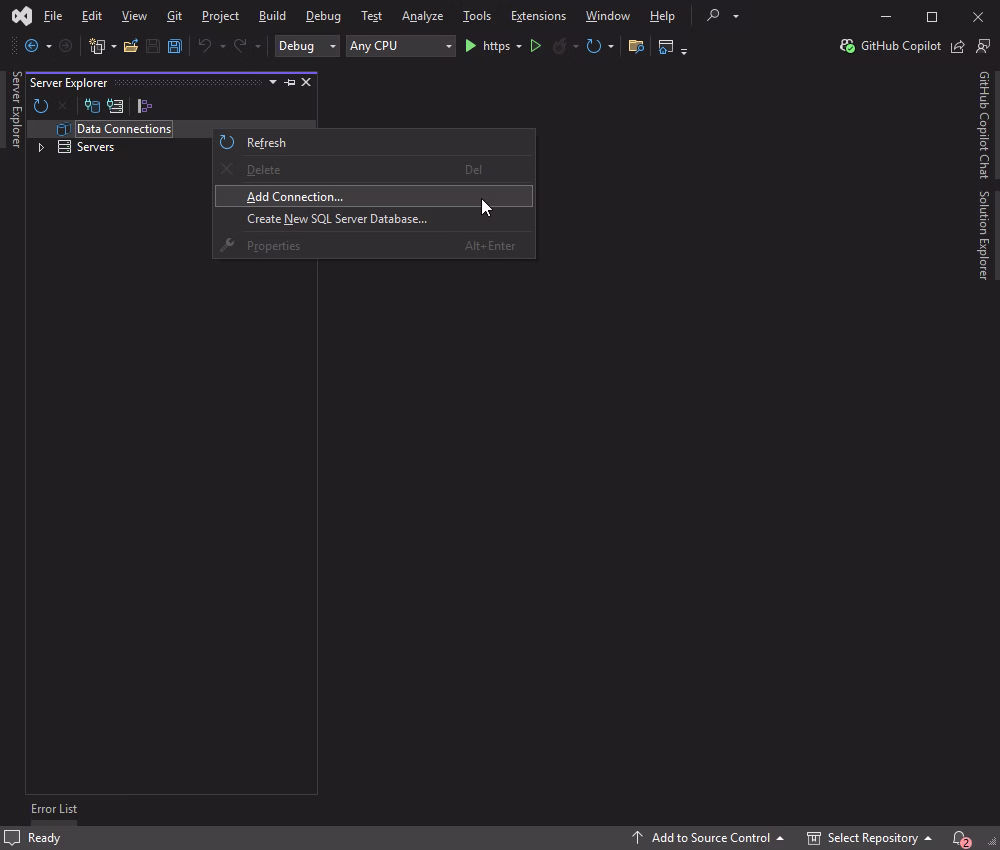
1. To connect to QuickBooks through the Data Explorer, right-click Data Connections and choose Add Connection.
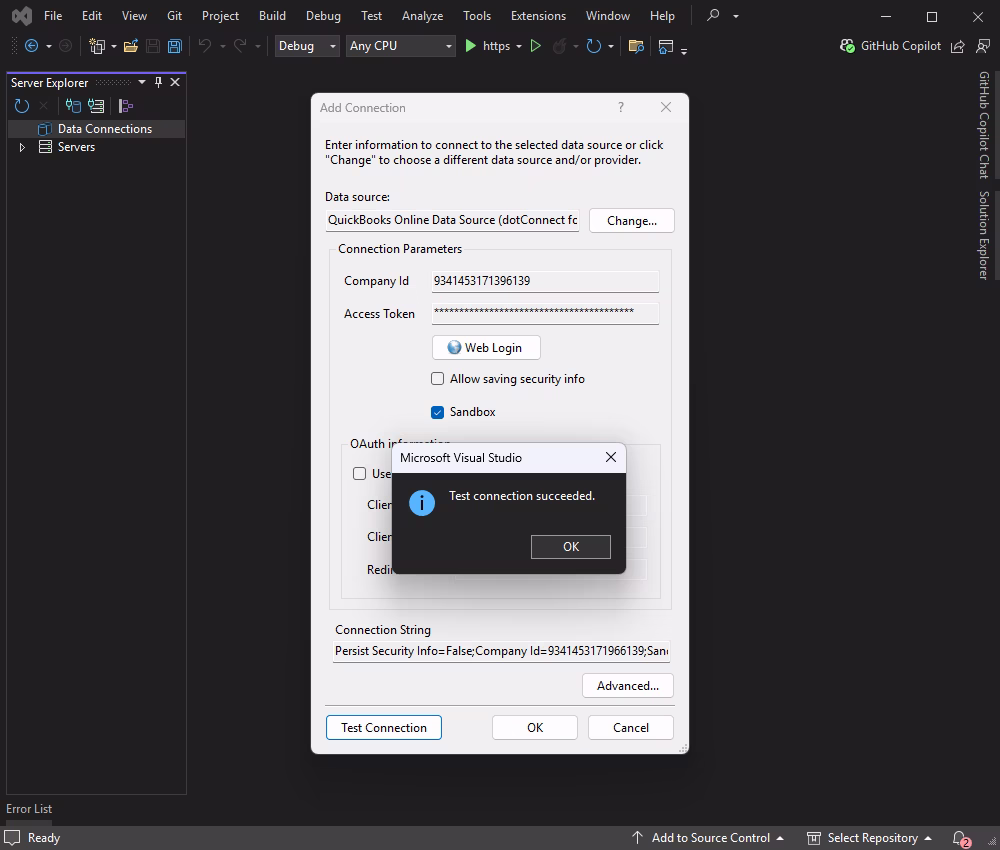
2. In the Add Connection dialog, select QuickBooks Online Data Source as the data source, and click the Web Login button to get the credentials.
3. To verify the connectivity, click Test Connection.
4. In case the connection is successful, click OK to save it.
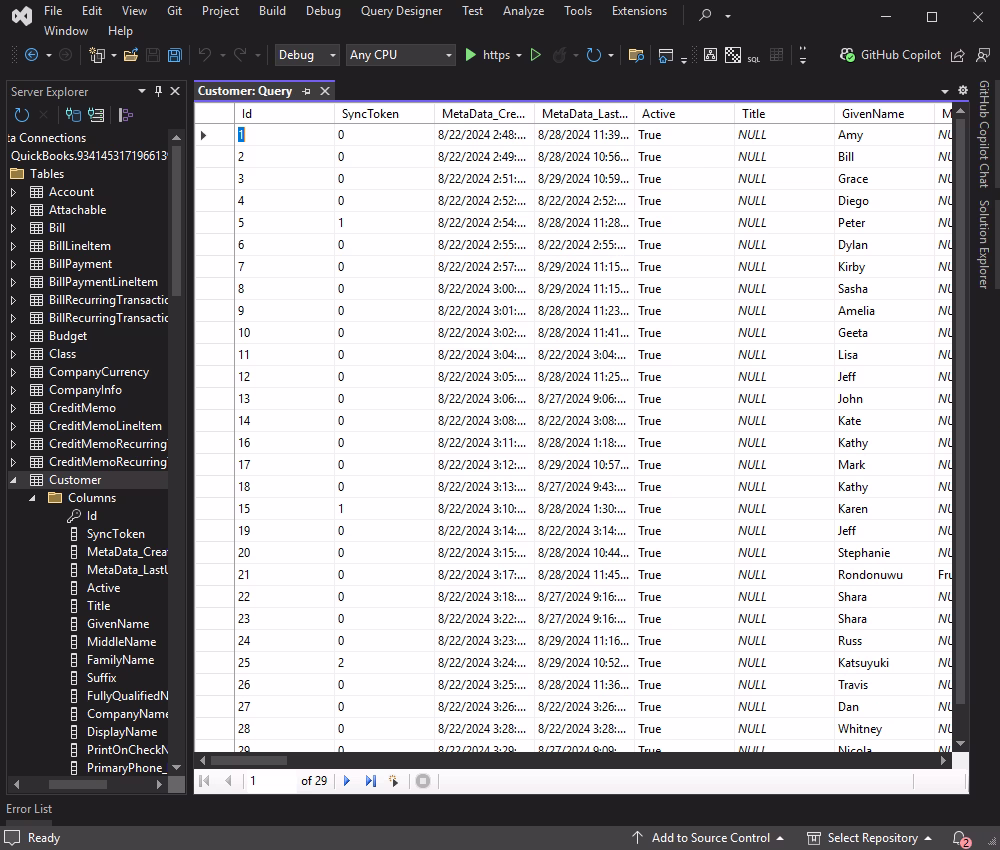
Once connected, you can browse QuickBooks tables, execute queries, and manage data directly in Data Explorer.
Create a connection
After you have completed the previous steps, you will have all the necessary components to establish a connection. In this section, you'll find the sample code that will help you connect to QuickBooks Online using the OAuthInteractive authentication method. This method handles the OAuth flow automatically. Meaning, when the connection is opened for the first time, a browser window will launch to complete the authorization. Once authorized, the session is maintained without requiring manual credentials such as Client Id, Client Secret, or Refresh Token. The only credential you need to provide is your License Key.
Update appsettings.json
Store your QuickBooks Online credentials securely in the appsettings.json file for use in your Blazor application.
Create a class to map the QuickBooks settings from the appsettings.json file. This class enables your application to read and use the stored license key.
With the OAuthInteractive authentication type, the OAuth flow is handled automatically — no manual tokens or client credentials are required in the configuration.
Create a service to connect to QuickBooks
Add a new class QuickBooksService.cs for QuickBooks data access.
using System;
using System.Collections.Generic;
using System.Data;
using Devart.Data.QuickBooks;
using Microsoft.Extensions.Configuration;
namespaceQBOBlazor.Services
{
publicclassQuickBooksService
{
privatereadonly QuickBooksSettings _settings;
publicQuickBooksService(IConfiguration configuration)
{
_settings = configuration.GetSection("QuickBooks").Get()
?? new QuickBooksSettings();
}
privatestringBuildConnectionString() =>
"Authentication Type=OAuthInteractive;" +
$"License Key={_settings.LicenseKey}";
publicboolCheckConnection()
{
try
{
using QuickBooksConnection conn = new(BuildConnectionString());
conn.Open();
returntrue;
}
catch (Exception ex)
{
Console.WriteLine(ex.Message);
returnfalse;
}
}
public Liststring, object>> GetCustomers()
{
var customers = new Liststring, object>>();
using QuickBooksConnection conn = new(BuildConnectionString());
conn.Open();
using QuickBooksCommand cmd = new(
"SELECT Id, DisplayName, PrimaryPhone_FreeFormNumber, " +
"PrimaryEmailAddr_Address, BillAddr_City FROM Customer", conn);
using QuickBooksDataReader reader = cmd.ExecuteReader();
while (reader.Read())
{
customers.Add(new Dictionary<string, object>
{
{ "Id", reader["Id"] },
{ "DisplayName", reader["DisplayName"] },
{ "PrimaryPhone", reader["PrimaryPhone_FreeFormNumber"] },
{ "PrimaryEmail", reader["PrimaryEmailAddr_Address"] },
{ "BillAddrCity", reader["BillAddr_City"] }
});
}
return customers;
}
}
}
The BuildConnectionString method
A private helper that assembles the connection string from the appsettings.json license key and the OAuthInteractive authentication type. Centralizing it ensures both CheckConnection and GetCustomers always use a consistent connection string.
The CheckConnection method
This method attempts to open a connection using the interactive OAuth flow, returning true on success and false on failure. On the first run, a browser window will open automatically to complete the OAuth authorization.
The GetCustomers method
This approach executes a SQL query to fetch customers and returns the results as List>. The connection is opened using the same OAuthInteractive flow—once authorized, the session token is reused automatically.
Register the service in Program.cs
You will register QuickBooksService as a singleton service in the Program.cs file, which configures the services and middleware for the application. To achieve this, execute the code that follows.
Here, we will show you how to add a NavLink to the NavMenu.razor component, which creates a link to the Customers page. However, you need to update the NavMenu.razor component to include a link to the Customers page. To achieve this, run the command below.
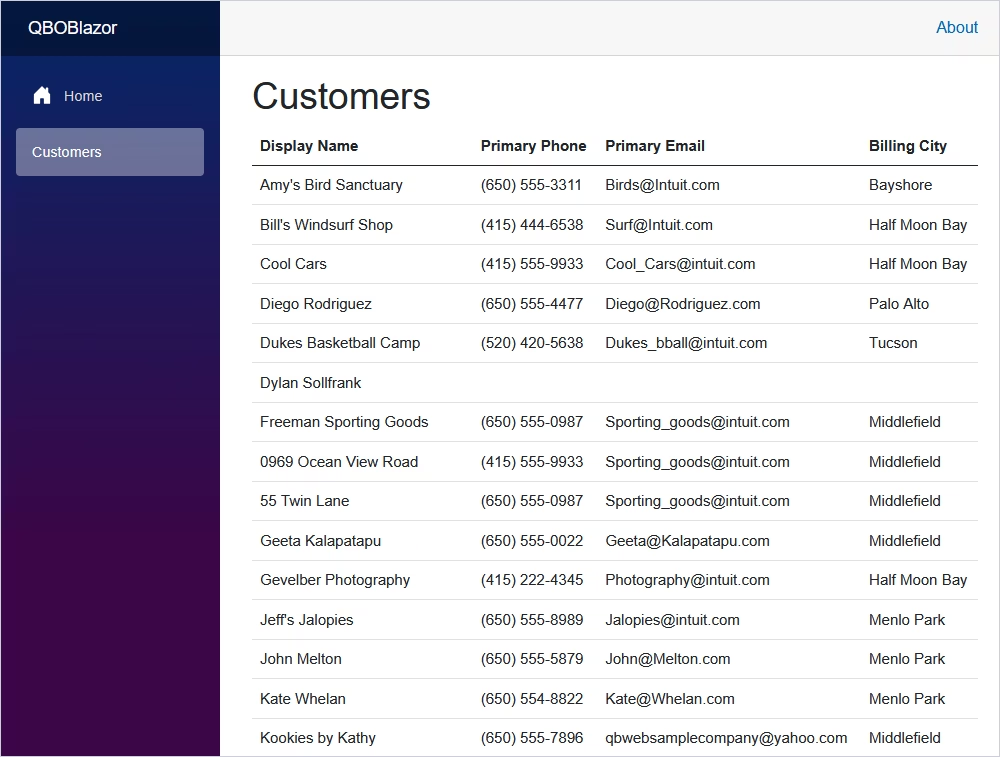
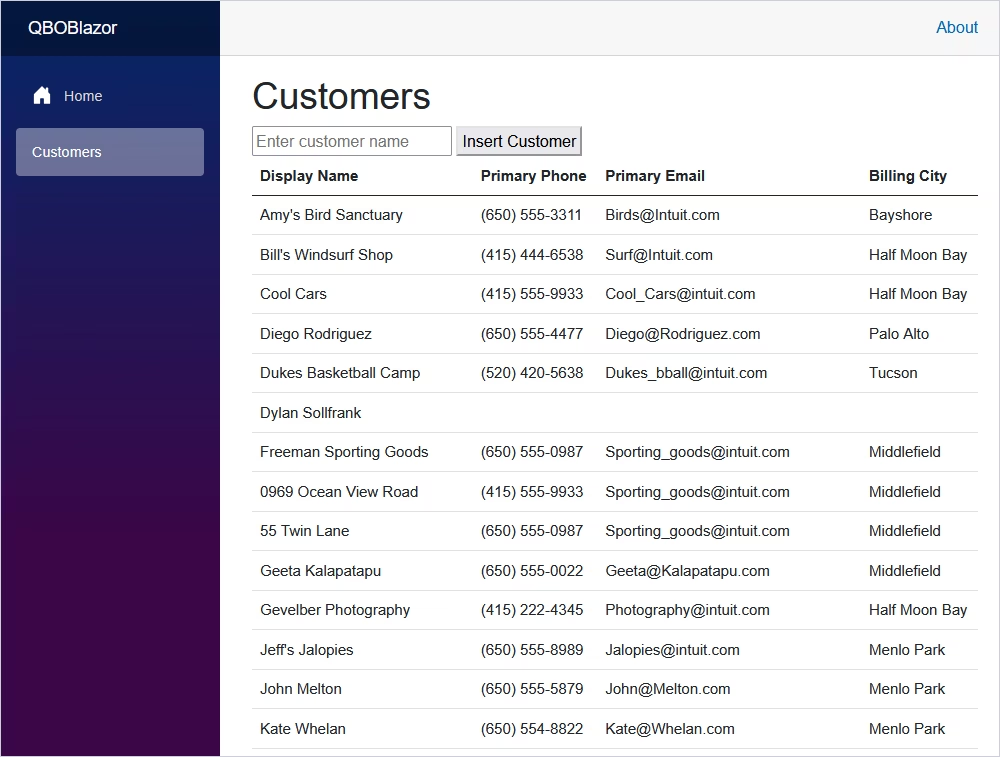
The following example provides a basic setup to connect to QuickBooks Online and fetch data from the Customers table in a Blazor Server application. Make sure to handle exceptions and errors appropriately in a production environment beforehand.
Insert data
To add a form that inserts a new customer into the QuickBooks Online database, you can create a method in the QuickBooksService class to handle the insertion. Then, you can add a form in the CustomerList.razor component to trigger this insertion.
Update QuickBooksService.cs
Add a method to insert a new customer into the QuickBooks Online database:
At this configuration stage, you can run the application.
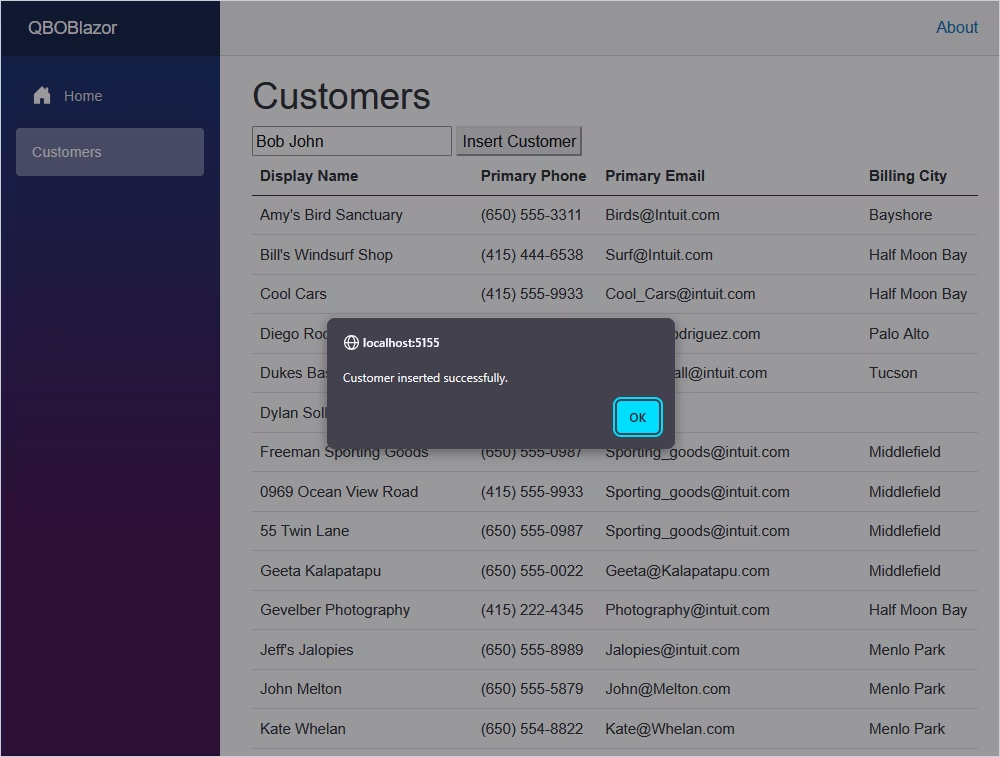
Now, add a new customer. To do this, enter a new customer name and click Insert Customer.
If successful, a corresponding message appears.
Remove data
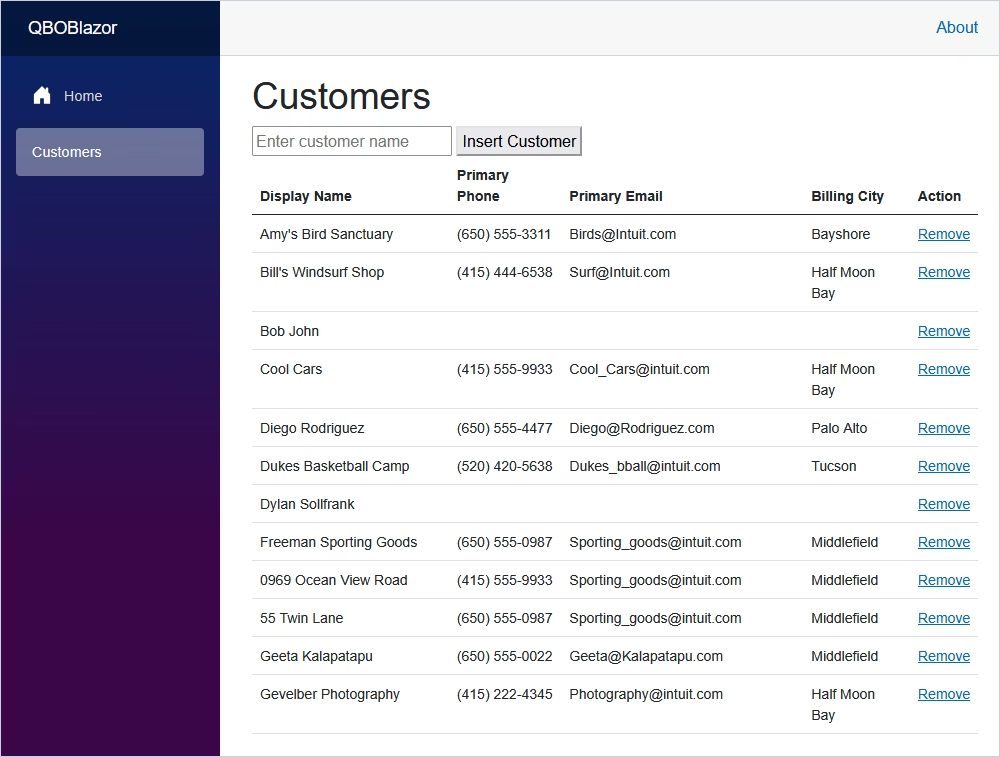
To add a remove method and a remove link to each row in the table, you'll need to modify the QuickBooksService class to include a method for deleting a customer by their ID. Then, you'll update the CustomerList.razor component to include a remove link for each row in the table.
This setup adds a remove method to the QuickBooksService class and a remove link to each row in the table. The JavaScript function deleteCustomer handles the removal by sending a DELETE request to the custom endpoint /customers/delete.
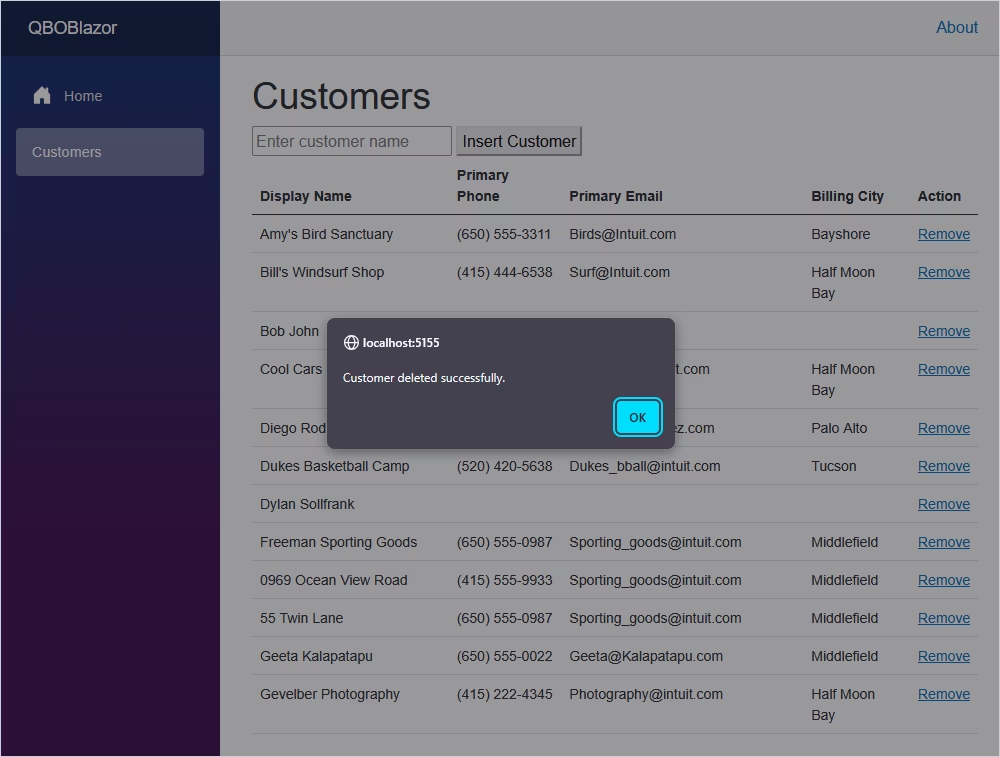
To proceed, let’s run the application.
Now, you can delete a customer from the table.
Conclusion
By following the steps outlined in this tutorial, you can integrate your .NET Blazor application with QuickBooks Online using dotConnect for QuickBooks Online.
Here, you’ve learned how to establish a secure connection, query customer data, add new records, and delete entries—all using standard ADO.NET interfaces with minimal overhead.
If you want to get some firsthand experience, feel free to download dotConnect for QuickBooks Online for a free 30-day trial and try it with your actual workload. To help you get started as quickly and efficiently as possible, we recommend referring to our documentation, which contains valuable tips and walkthroughs.
FAQ
How do you install and activate dotConnect for QuickBooks Online in a .NET project?
Install dotConnect for QuickBooks Online using the EXE installer or by adding the Devart.Data.QuickBooks NuGet package to your project. Then obtain your Activation Key from your Devart Customer Portal and include it in the connection string via the License Key parameter.
How do you authenticate to QuickBooks Online using Interactive OAuth in dotConnect?
To authenticate with QuickBooks Online, set the connection string parameter:
Authentication Type=OAuthInteractive
When the QuickBooksConnection opens, a browser window launches for you to sign in to your Intuit account and grant access. After authorization, dotConnect automatically retrieves and stores the access and refresh tokens.
How do you create a connection to QuickBooks Online using dotConnect in C#?
Define a connection string that includes CompanyId, authentication parameters, and the License Key. Then create a QuickBooksConnection instance with this string and call Open() inside a try-catch block to establish the connection and handle possible errors.
Can you query QuickBooks Online data using SQL with dotConnect?
Yes, dotConnect allows you to work with QuickBooks Online data using SQL queries. Developers can retrieve and manipulate objects such as Customers, Invoices, and Payments through familiar SQL commands.
Can you connect to QuickBooks Online using Entity Framework Core and dotConnect?
Yes, you can use Entity Developer to visually generate an EF Core model from QuickBooks Online entities, or run Scaffold-DbContext with the Devart.Data.QuickBooks.EFCore package and a dotConnect connection string (including License Key) to create the DbContext and entity classes.
Is it possible to access QuickBooks Online data in Visual Studio Server Explorer with dotConnect?
Yes, open Visual Studio Server Explorer, add a new Data Connection, choose dotConnect for QuickBooks Online as the provider, configure authentication and company details, test the connection, and explore QuickBooks Online objects directly in the IDE.
I'm a technical content writer who loves turning complex topics — think SQL, connectors, and backend chaos–into content that actually makes sense (and maybe even makes you smile). I write for devs, data folks, and curious minds who want less fluff and more clarity. When I'm not wrangling words, you'll find me dancing salsa, or hopping between cities.