
You can install the driver by using the Windows installer.
After you receive the license key, add it to your connection strings to connect to the data source.
This guide will show you how to connect a .NET MAUI application to Zoho CRM using dotConnect for Zoho CRM, a high-performance ADO.NET provider by Devart. You'll learn how to set up OAuth authentication, create a connection, and perform basic data operations like reading, inserting, and deleting Zoho CRM records—all using standard ADO.NET classes.
dotConnect enables straightforward connectivity between .NET applications and Zoho CRM, allowing developers to access CRM modules and records without working directly with Zoho's REST APIs.
Using familiar ADO.NET components, dotConnect for Zoho CRM allows developers to work with data through standard .NET data access patterns such as connections, commands, and data readers.
dotConnect works with EF Core, Dapper, NHibernate, and LinqConnect, enabling flexible object-relational mapping and efficient interaction with Zoho CRM data in .NET applications.
Access to Zoho CRM is authorized through a browser-based login flow. After successful authentication, dotConnect automatically retrieves and manages access and refresh tokens for secure connections.
Devart implements the standard ADO.NET provider model in dotConnect solutions, ensuring consistent behavior and compatibility with existing .NET frameworks and development tools.
Devart provides professional technical assistance, comprehensive documentation, and ongoing product enhancements, helping developers maintain stable and reliable integrations with Zoho CRM.
You can start using dotConnect for Zoho CRM immediately with a 30-day free trial. Choose one of the following installation options:
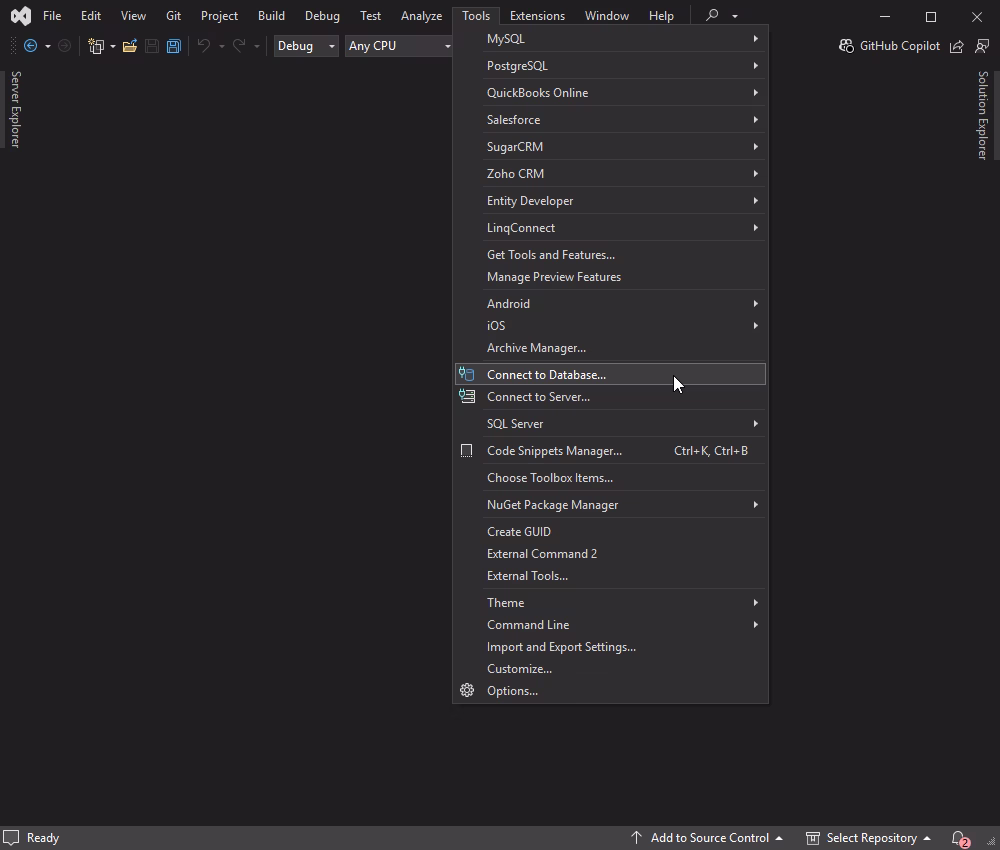
1. To connect to Zoho CRM using the built-in Data Explorer, navigate to Tools > Connect to Database.
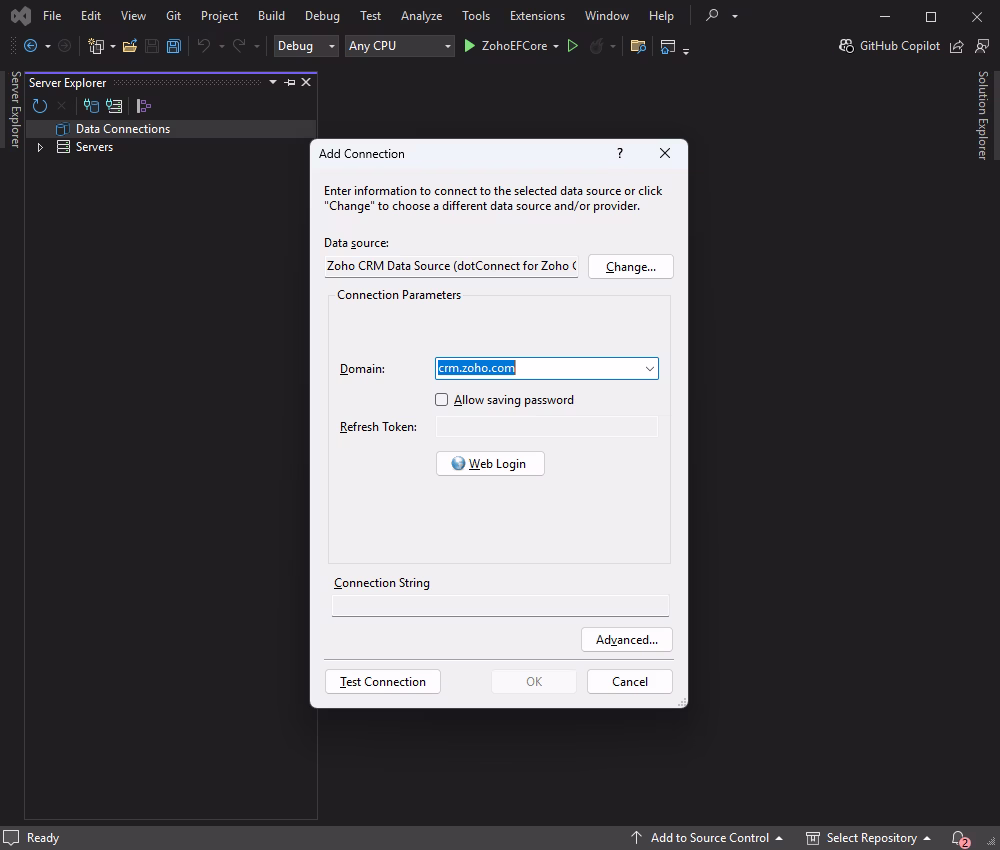
2. Then, select the Zoho CRM data source, enter a Zoho domain, and click Web Login.
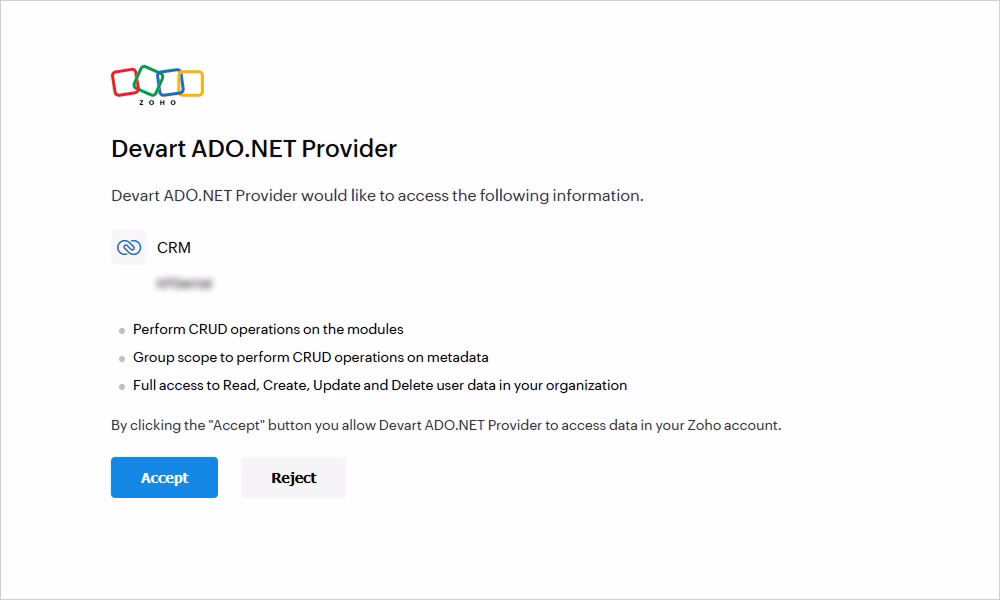
3. Log in to your Zoho account and grant access to your Zoho CRM organization.
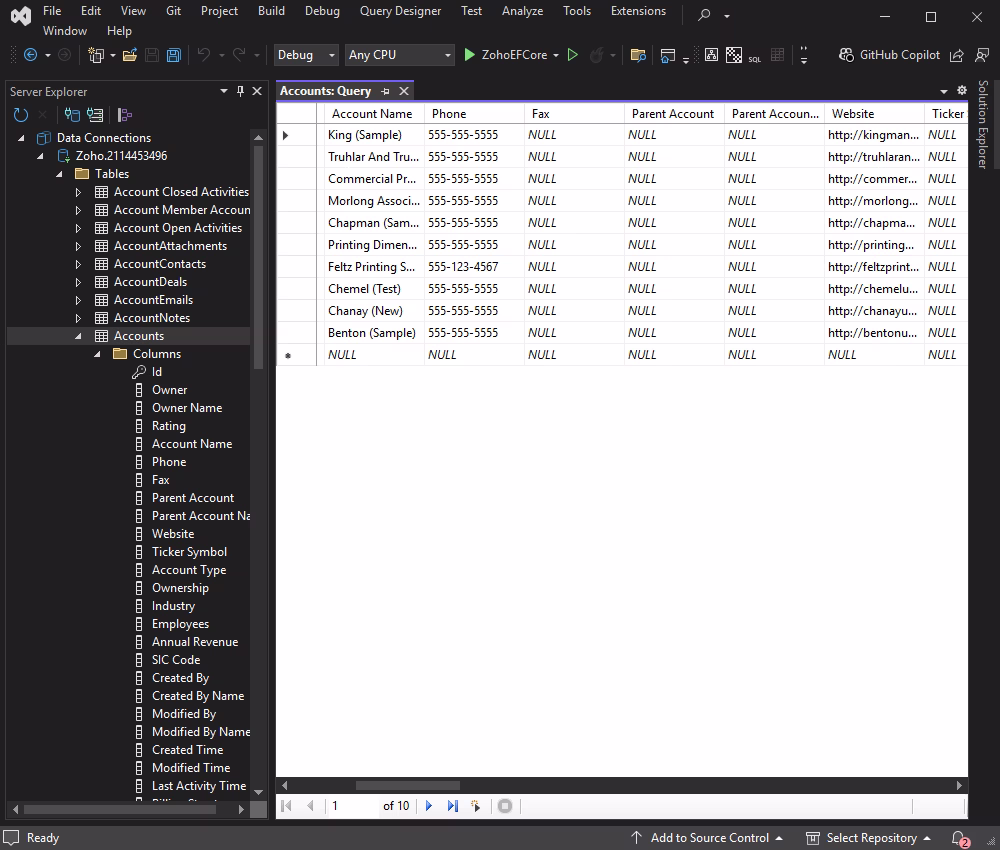
4. After that, select the tables and fields you want to work with and retrieve the data.
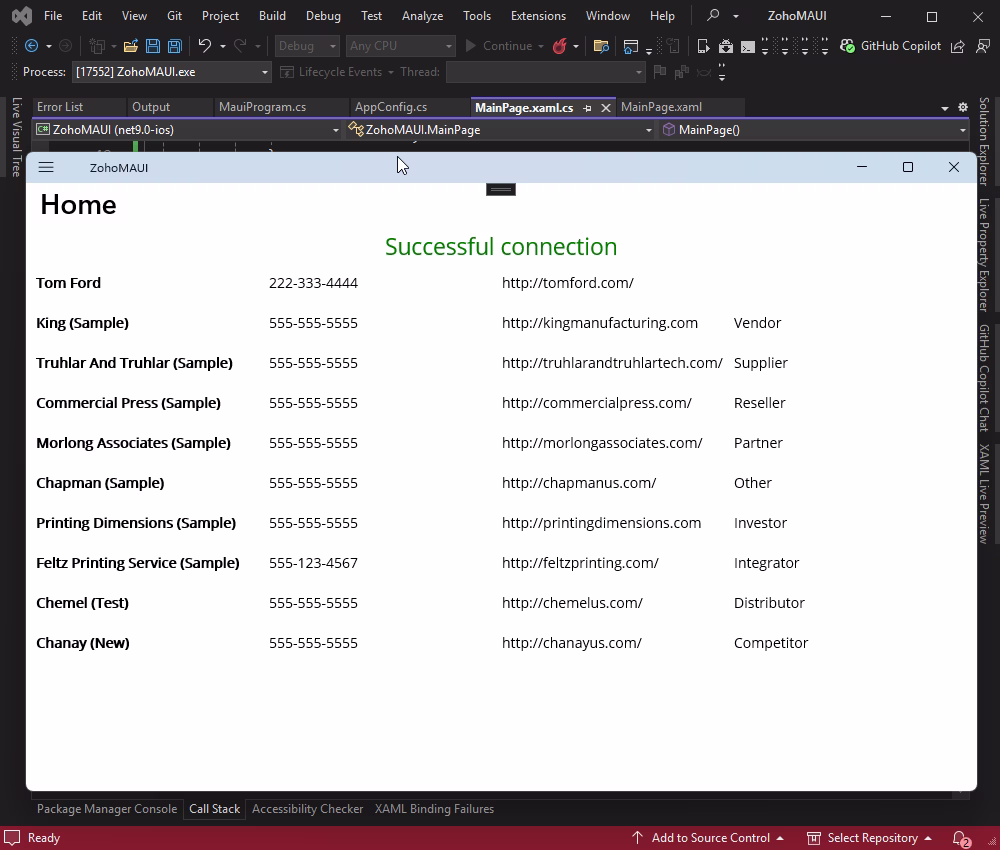
Now, let's see how to retrieve and display data from Zoho CRM.
Create a new class file named AppConfig.cs in your project and add the following code to it:
namespace ZohoMAUI
{
  public static class AppConfig
  {
    public static string LicenseKey { get; } = "**********";

    public static string ConnectionString =>
      $"Authentication Type=OAuthInteractive;License Key={LicenseKey}";
  }
}Open MainPage.xaml.cs and add this code to handle the button click event and load data from Zoho CRM.
using Devart.Data.Zoho;
using System.Collections.ObjectModel;

namespace ZohoMAUI {

 public partial class MainPage: ContentPage {
  public ObservableCollection<Account> Accounts
  {
   get;
   set;
  }

  public MainPage()
  {
   InitializeComponent();
   Accounts = new ObservableCollection<Account>();
   AccountsListView.ItemsSource = Accounts;
   InitializeDataAsync();
  }

  private async void InitializeDataAsync()
  {
   if (await CheckConnection())
   {
    LoadAccounts();
   }
  }

  private async Task<bool> CheckConnection()
  {
   try
  {
    using(var connection = new ZohoConnection(AppConfig.ConnectionString))
    {
     await Task.Run(() => connection.Open());
     ConnectionStatusLabel.Text = "Successful connection";
     return true;
    }
   } catch (Exception ex)
   {
    await DisplayAlert("Connection Error", $"Failed to connect: {ex.Message}", "OK");
    return false;
   }
  }

  private void LoadAccounts()
  {
   try
   {
    using(var connection = new ZohoConnection(AppConfig.ConnectionString))
    {
     connection.Open();
     var command = new ZohoCommand("SELECT \"Account Name\", Phone, Website, \"Account Type\" FROM Accounts", connection);
     var reader = command.ExecuteReader();

     while (reader.Read() && Accounts.Count < 10)
     {
      Accounts.Add(new Account
     {
       Account_Name = reader["Account Name"].ToString(),
        Phone = reader["Phone"].ToString(),
        Website = reader["Website"].ToString(),
        Account_Type = reader["Account Type"].ToString()
      });
     }
    }
   } catch (Exception ex) {
    DisplayAlert("Error", ex.Message, "OK");
   }
  }
 }

 public class Account {
  public string Account_Name {
   get;
   set;
  }
  public string Phone {
   get;
   set;
  }
  public string Website {
   get;
   set;
  }
  public string Account_Type {
   get;
   set;
  }
 }

}
The CheckConnection method checks whether a connection to Zoho CRM can be established and informs the user of the result. The LoadAccounts method retrieves account data from Zoho CRM and populates ObservableCollection < Account >.
To add the button that tests the connection and displays the data, open MainPage.xaml and paste the following code.
<ContentPage xmlns="http://schemas.microsoft.com/dotnet/2021/maui"
      xmlns:x="http://schemas.microsoft.com/winfx/2009/xaml"
      x:Class="ZohoMAUI.MainPage">
            <StackLayout>
            <Label x:Name="ConnectionStatusLabel" TextColor="Green" FontSize="Medium" HorizontalOptions="Center" />
            <ListView x:Name="AccountsListView">
            <ListView.ItemTemplate>
            <DataTemplate>
            <ViewCell>
            <Grid Padding="10">
            <Grid.ColumnDefinitions>
            <ColumnDefinition Width="*" />
            <ColumnDefinition Width="*" />
            <ColumnDefinition Width="*" />
            <ColumnDefinition Width="*" />
              </Grid.ColumnDefinitions>
            <Label Grid.Column="0" Text="{Binding Account_Name}" FontAttributes="Bold" />
            <Label Grid.Column="1" Text="{Binding Phone}" />
            <Label Grid.Column="2" Text="{Binding Website}" />
            <Label Grid.Column="3" Text="{Binding Account_Type}" />
            </Grid>
          </ViewCell>
        </DataTemplate>
      </ListView.ItemTemplate>
    </ListView>
  </StackLayout>
</ContentPage>
Grid Layout: Grid inside DataTemplate is configured with four columns. Each of them takes an equal share of the width. This creates a table-like layout with four columns.
Data Binding: Each Label in Grid is bound to a property of the Account class and displays the data in the respective columns.
Connection Status: ConnectionStatusLabel displays the connection status in green if the connection is successful.
Once you have connected your application to Zoho CRM, you can fetch and manage your data.
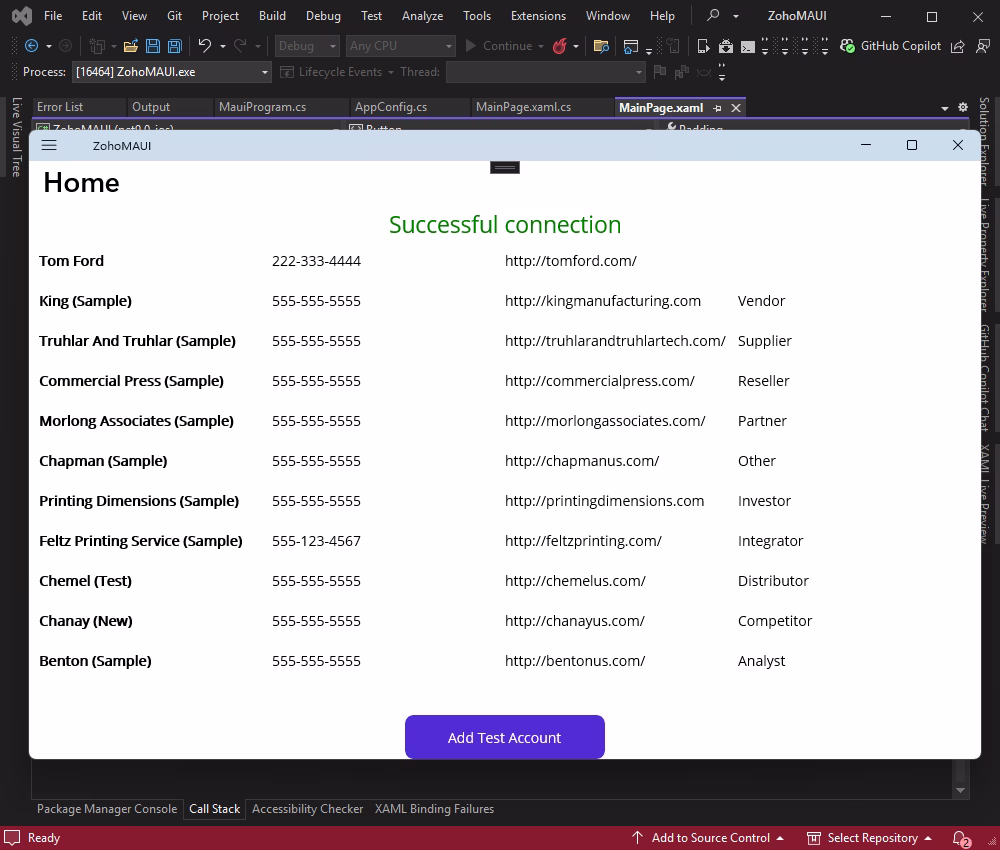
To add functionality for creating a new account and refreshing the table, add a button to your UI and implement the logic to insert a new account into the Zoho CRM database. After adding the account, display an alert to inform the user of the status, then refresh the data to update the table.
1. In MainPage.xaml, paste this code after ListView to include the button for adding a new account.
<Button Text="Add Test Account" Clicked="OnAddAccountClicked" WidthRequest="200" Padding="0,10" />2. In MainPage.xaml.cs, update the code-behind to include the logic for adding a new account and refreshing the data.
using Devart.Data.Zoho;
using System.Collections.ObjectModel;

namespace ZohoMAUI
{

  public partial class MainPage : ContentPage
  {
    public ObservableCollection<Account> Accounts
    {
      get;
      set;
    }

    public MainPage()
    {
      InitializeComponent();
      Accounts = new ObservableCollection<Account>();
      AccountsListView.ItemsSource = Accounts;
      InitializeDataAsync();
    }

    private async void InitializeDataAsync()
    {
      if (await CheckConnection())
      {
        LoadAccounts();
      }
    }

    private async Task<bool> CheckConnection()
    {
      try
      {
        using (var connection = new ZohoConnection(AppConfig.ConnectionString))
        {
          await Task.Run(() => connection.Open());
          ConnectionStatusLabel.Text = "Successful connection";
          return true;
        }
      }
      catch (Exception ex)
      {
        await DisplayAlert("Connection Error", $"Failed to connect: {ex.Message}", "OK");
        return false;
      }
    }

    private async void OnAddAccountClicked(object sender, EventArgs e)
    {
      try
      {
        using (var connection = new ZohoConnection(AppConfig.ConnectionString))
        {
          connection.Open();
          var command = new ZohoCommand(
           "INSERT INTO Accounts (\"Account Name\", Phone, Website, \"Account Type\") " +
           "VALUES (:Account_Name, :Phone, :Website, :Account_Type)", connection);

          // Add parameters for the test data
          command.Parameters.Add(new ZohoParameter { ParameterName = ":Account_Name", Value = "Test Account" });
          command.Parameters.Add(new ZohoParameter { ParameterName = ":Phone", Value = "123-456-7890" });
          command.Parameters.Add(new ZohoParameter { ParameterName = ":Website", Value = "http://testaccount.com" });
          command.Parameters.Add(new ZohoParameter { ParameterName = ":Account_Type", Value = "Test Type" });

          int rowsAffected = command.ExecuteNonQuery();
          if (rowsAffected > 0)
          {
            await DisplayAlert("Success", "Account added successfully!", "OK");
            await LoadAccounts();
          }
          else
          {
            await DisplayAlert("Error", "No rows were affected.", "OK");
          }
        }
      }
      catch (Exception ex)
      {
        await DisplayAlert("Error", $"Failed to add account: {ex.Message}", "OK");
      }
    }

private async Task LoadAccounts()
    {
      try
      {
        using (var connection = new ZohoConnection(AppConfig.ConnectionString))
        {
          connection.Open();
          var command = new ZohoCommand("SELECT \"Account Name\", Phone, Website, \"Account Type\" FROM Accounts", connection);
          var reader = command.ExecuteReader();

          await MainThread.InvokeOnMainThreadAsync(() => Accounts.Clear());
          while (reader.Read() && Accounts.Count < 10)
          {
            var account = new Account
            {
              Account_Name = reader["Account Name"].ToString(),
              Phone = reader["Phone"].ToString(),
              Website = reader["Website"].ToString(),
              Account_Type = reader["Account Type"].ToString()
            };
            await MainThread.InvokeOnMainThreadAsync(() => Accounts.Add(account));
          }
        }
      }
      catch (Exception ex)
      {
        await DisplayAlert("Error", ex.Message, "OK");
      }
    }

  }


  public class Account
  {
    public string Account_Name
    {
      get;
      set;
    }
    public string Phone
    {
      get;
      set;
    }
    public string Website
    {
      get;
      set;
    }
    public string Account_Type
    {
      get;
      set;
    }
  }

}
The OnAddAccountClicked method is called when the Add Test Account button is clicked. It inserts a new account into the Zoho CRM database using test data.
ZohoCommand is an SQL command for inserting a new account that utilizes parameters to specify the values. The parameter names correspond to the field names in the database.
Alert and Refresh: After adding the account, an alert is displayed to inform the user, and the LoadAccounts method is called to refresh the data in the table.
This setup allows users to add a new test account and see the updated table immediately.
To run the application, click Add Test Account.
You should see the following notification:
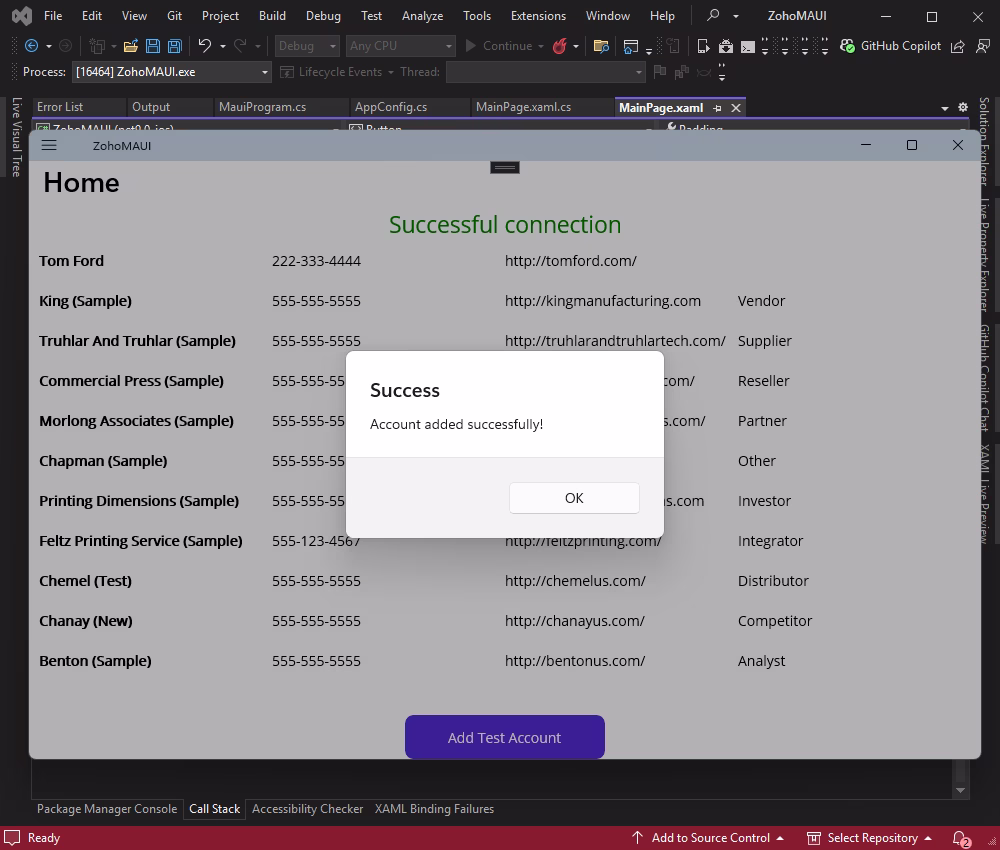
Click OK to reload the page and verify that the account has been added.

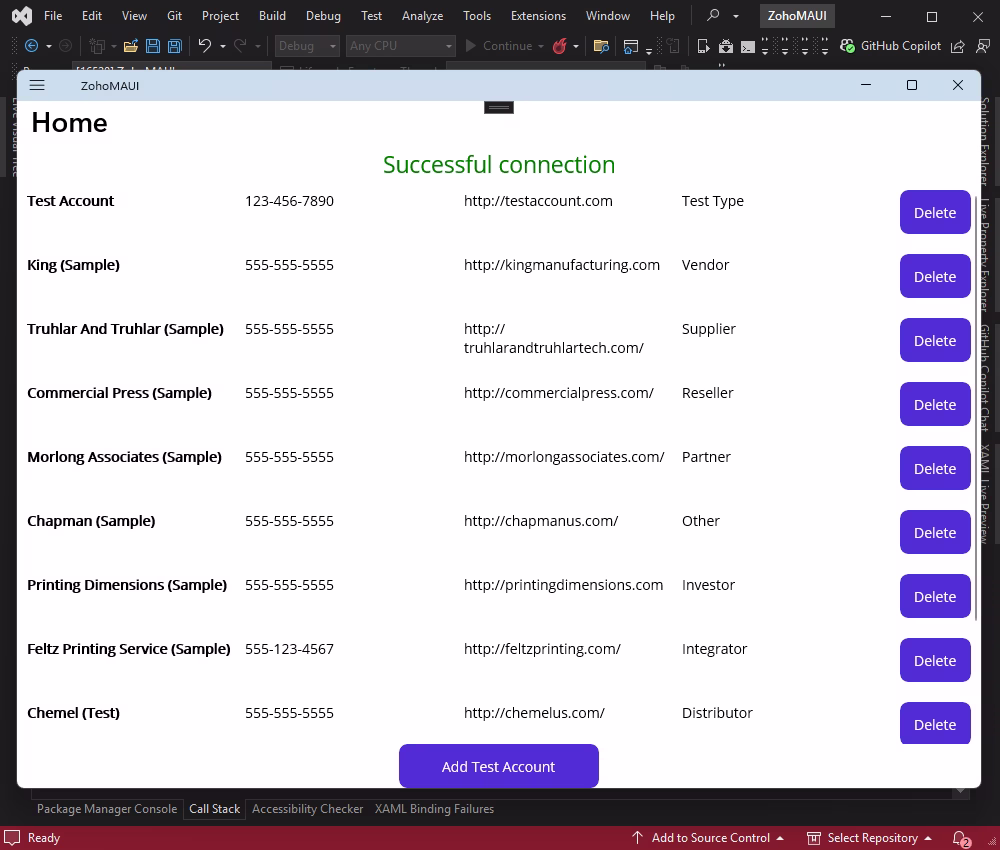
To add the button for deleting each row in the ListView, modify the DataTemplate and handle the button's click event to remove the corresponding account.
1. Update MainPage.xaml to include the button in each row of the ListView:
<ContentPage xmlns="http://schemas.microsoft.com/dotnet/2021/maui"
      xmlns:x="http://schemas.microsoft.com/winfx/2009/xaml"
      x:Class="ZohoMAUI.MainPage">
            <StackLayout>
            <Label x:Name="ConnectionStatusLabel" TextColor="Green" FontSize="Medium" HorizontalOptions="Center" />
            <ListView x:Name="AccountsListView">
            <ListView.ItemTemplate>
            <DataTemplate>
            <ViewCell>
            <Grid Padding="10">
            <Grid.ColumnDefinitions>
            <ColumnDefinition Width="*" />
            <ColumnDefinition Width="*" />
            <ColumnDefinition Width="*" />
            <ColumnDefinition Width="*" />
            <ColumnDefinition Width="Auto" />
              </Grid.ColumnDefinitions>
            <Label Grid.Column="0" Text="{Binding Account_Name}" FontAttributes="Bold" />
            <Label Grid.Column="1" Text="{Binding Phone}" />
            <Label Grid.Column="2" Text="{Binding Website}" />
            <Label Grid.Column="3" Text="{Binding Account_Type}" />
            <Button Grid.Column="4" Text="Delete" Clicked="OnDeleteAccountClicked" CommandParameter="{Binding .}" />
            </Grid>
          </ViewCell>
        </DataTemplate>
      </ListView.ItemTemplate>
    </ListView>
            <Button Text="Add Test Account" Clicked="OnAddAccountClicked" WidthRequest="200" Padding="0,10" />
  </StackLayout>
</ContentPage>
CommandParameter is set to the current account and allows the event handler to access the account data.
2. In MainPage.xaml.cs, modify the code to implement the logic for deleting accounts.
private async void OnDeleteAccountClicked(object sender, EventArgs e)
{
  var button = (Button)sender;
  var account = (Account)button.CommandParameter;

  try
  {
    using (var connection = new ZohoConnection(AppConfig.ConnectionString))
    {
      await Task.Run(() => connection.Open());
      var command = new ZohoCommand(
        "DELETE FROM Accounts WHERE \"Account Name\" = :Account_Name", connection);
      command.Parameters.Add(new ZohoParameter
      {
        ParameterName = ":Account_Name",
        Value = account.Account_Name
      });

      int rowsAffected = await Task.Run(() => command.ExecuteNonQuery());
      if (rowsAffected > 0)
      {
        await DisplayAlert("Success", "Account deleted successfully!", "OK");
        await LoadAccounts();
      }
      else
      {
        await DisplayAlert("Error", "No rows were affected.", "OK");
      }
    }
  }
  catch (Exception ex)
  {
    await DisplayAlert("Error", $"Failed to delete account: {ex.Message}", "OK");
  }
}
The OnDeleteAccountClicked method is called when the delete button is clicked. It retrieves the account associated with the button and executes an SQL command to delete the account from the database. After deletion, it refreshes the data to update the ListView.
Let's test the added logic. Click Delete next to Test Account.
You should see a notification that confirms the successful deletion.
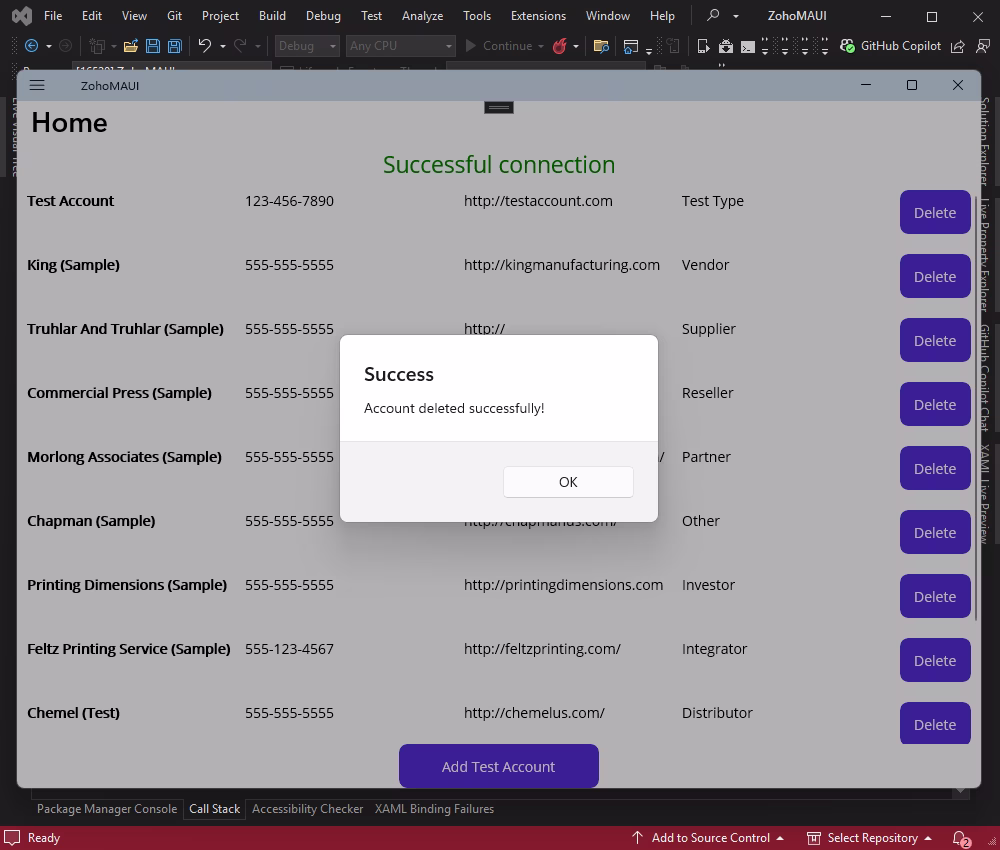
Click OK to verify the result.
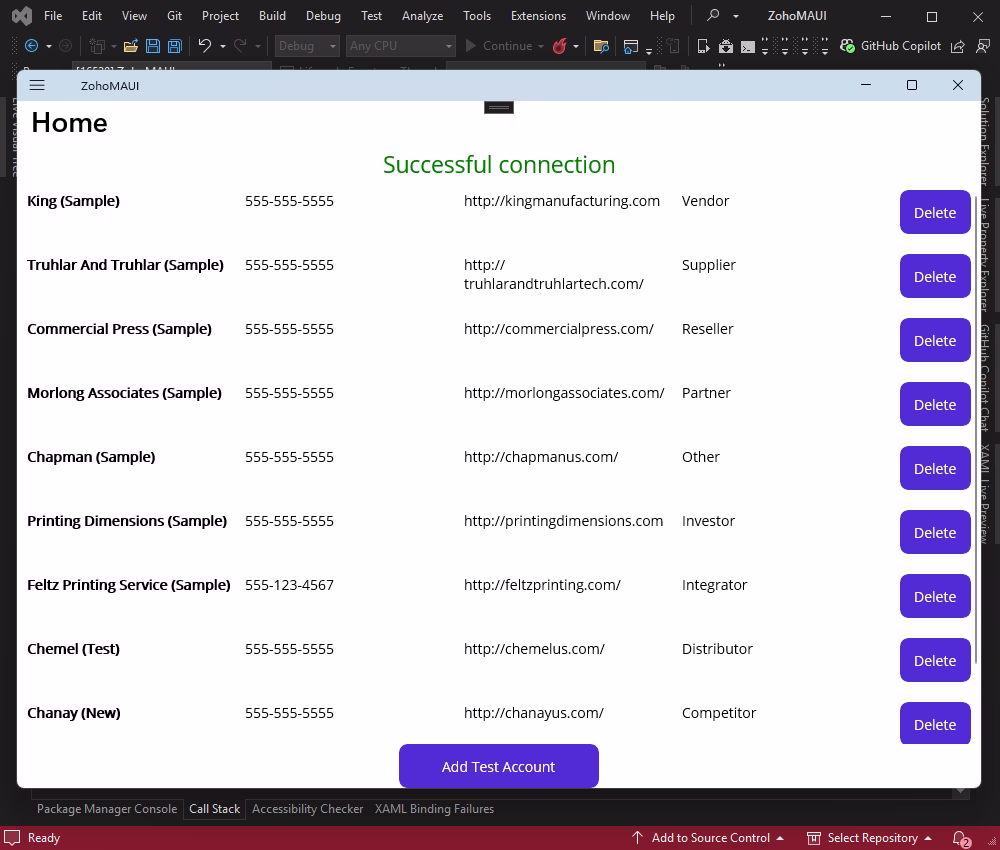
Integration of Zoho CRM into a .NET MAUI application is straightforward with dotConnect for Zoho CRM. With ADO.NET, you can authenticate securely with OAuth, access CRM modules using SQL, and perform real-time read, insert, and delete operations — without writing any HTTP request logic.
Authentication Type=OAuthInteractive. When ZohoConnection opens, a browser window appears for you to sign in to your Zoho account and grant access. After authorization, dotConnect automatically retrieves and manages the access and refresh tokens.

Dereck Mushingairi
I'm a technical content writer who loves turning complex topics—think SQL, connectors, and backend chaos—into content that actually makes sense (and maybe even makes you smile). I write for devs, data folks, and curious minds who want less fluff and more clarity. When I'm not wrangling words, you'll find me dancing salsa, or hopping between cities.