How to Add a Column to an Existing Table in SQL Using the ALTER TABLE ADD Statement
SQL Server databases are widely used in various industries to store, manage, and manipulate large amounts of data. As the amounts of data grow, it becomes necessary to continuously maintain databases and optimize their performance. Adding new columns to the existing tables is a common task. In SQL Server, this task can be done using the ALTER TABLE command.
In this article, we'll explore the syntax and usage of this command in SQL Server, along with some best practices and considerations to keep in mind when adding columns to your database tables.
ALTER TABLE syntax
The basic syntax of the ALTER TABLE command used to add a new column to an existing database table is below:
ALTER TABLE table_name
ADD column_name data_type
Parameters:
- table_name is the name of the table that you want to add a new column to.
- column_name is the name of the new column you are adding.
- data_type is the data type of the new column you are adding (VARCHAR, DATE, INT, and more).
Note
Specify the size of the table where applicable, e.g., for the column of the VARCHAR data type.
To add several columns to a table in SQL Server, you can modify the standard command syntax in the following way:
ALTER TABLE table_name
ADD column_name1 data_type1,
ADD column_name2 data_type2,
ADD column_nameN data_typeN;
You can add as many columns to a table as needed and specify different data types for them all.
Key points
Before you add a new column to a table in SQL Server, note the following aspects:
- Ensure that you have ALTER permissions on the table to modify the table structure.
- Specify the new column name and data type in the query syntax to avoid command failure.
- SQL Server inserts a new column after the last column of the existing table.
- Keep in mind that a table can only have one primary key. If you attempt to add a new primary key column to an existing table, the query will result in an error.
Important!
The operation of adding new columns to large tables can consume a lot of resources. Therefore, check the query execution plan before running it.
Add columns to a SQL Server table using queries
Here, let us demonstrate how to use the ALTER TABLE command to add new columns to an existing database table. Several practical examples will be provided to illustrate the process - we'll use the sakila sample database.
Add one column
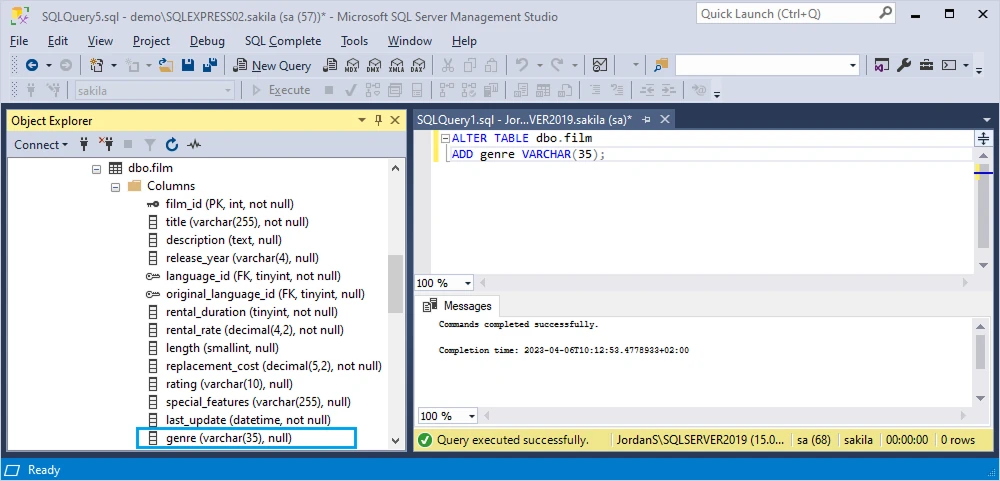
In this example, we'll demonstrate how to use the ALTER TABLE command in SQL Server to add a new column to the film table in the sakila test database. The new column will store information about the genres each movie belongs to.
ALTER TABLE dbo.film
ADD genre VARCHAR(35);
As you can see, the database management system automatically adds the new genre column to the end of the table.
Add multiple columns
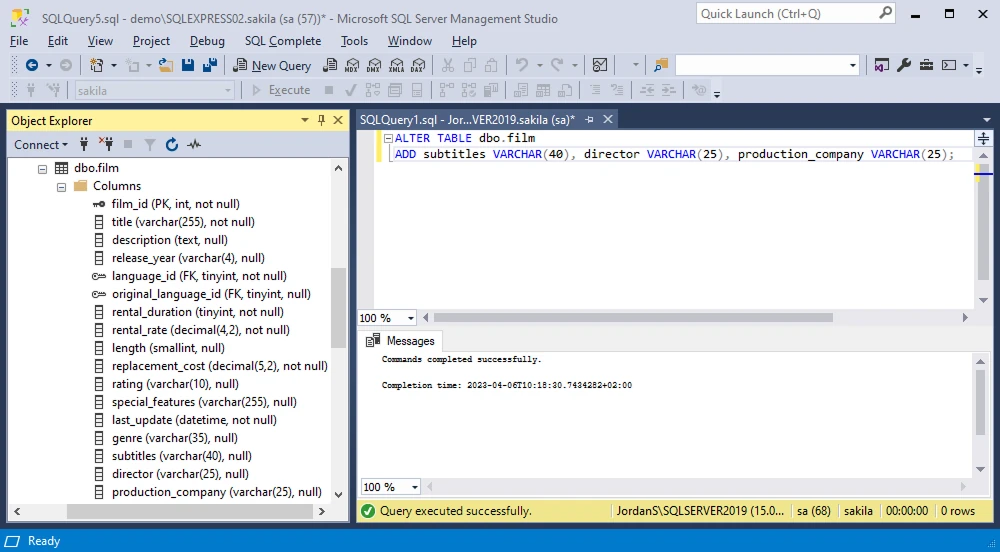
The following example demonstrates how to add multiple columns to an existing table in a SQL Server database. Let's imagine that we need to add additional information about the movies in our DVD store.
ALTER TABLE dbo.film
ADD subtitles VARCHAR(40), director VARCHAR(25), production_company VARCHAR(25);
SQL Server puts the new columns after the last table column in the same order as specified in the query.
Add a column at a specific position in a table
SQL Server does not provide a command to add a column at a specific position in a table, only at the end. Therefore, the workaround is to rebuild the table: create a new table with the desired column position, transfer the data to it, drop the old table, and rename the new one.
Step 1: Create a new table with the desired column order, including the column you want to add.
CREATE TABLE new_table (
	column1 datatype1,
	column2 datatype2,
	new_column datatype,
	column3 datatype3,
	...
);
Step 2: Copy the data from the existing table to the new table.
INSERT INTO new_table (column1, column2, new_column, column3, ...)
SELECT column1, column2, old_column, column3, ...
FROM old_table;
Step 3: Drop the existing table.
Step 4: Rename the new table to the original table name.
EXEC sp_rename 'new_table', 'old_table';
Note
This method involves table recreation and may not be suitable for production environments without downtime. Alternatively, tools like dbForge Studio allow column reordering visually without SQL scripting.
Add a column to one table based on information from another table
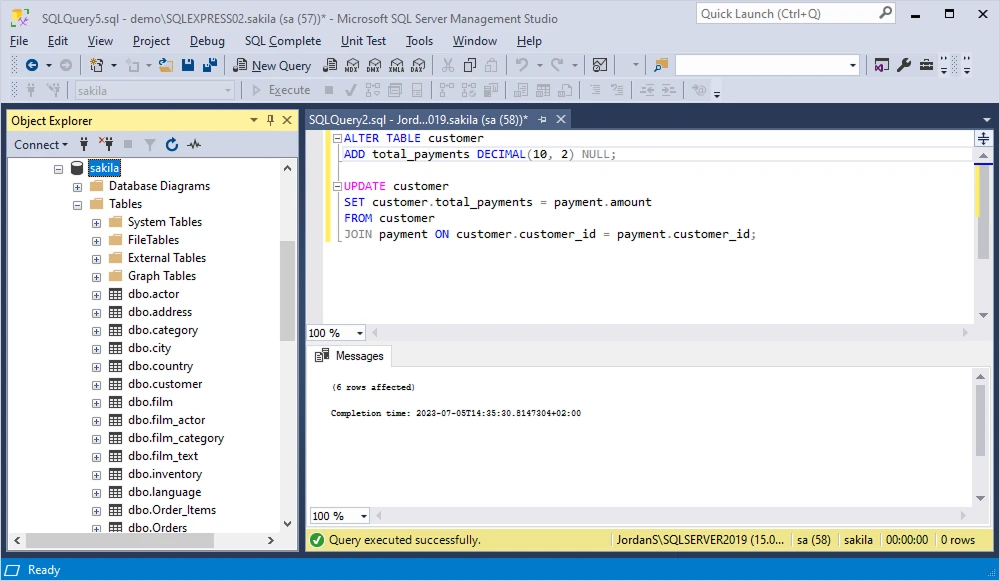
To add a column to one table based on information from another table in SQL Server, you can use the ALTER TABLE statement with the ADD column clause and a SELECT statement.
ALTER TABLE table1_name
ADD new_column_name datatype;

UPDATE table1_name
SET new_column_name = table2_column_name
FROM table1_name
JOIN table2_name ON table1_name.common_column = table2_name.common_column;
The ALTER TABLE statement adds the new column to table1, and the UPDATE statement populates the new column by retrieving the corresponding information from table2 based on the specified join condition.
Add a column with a default value
When you add a column with a default value, SQL Server applies that default to newly inserted rows. Below is the syntax for this functionality and an example:
ALTER TABLE table_name
ADD column_name data_type
    CONSTRAINT constraint_name DEFAULT default_value;
Example:
ALTER TABLE Employees
ADD Status VARCHAR(20)
    CONSTRAINT DF_Employees_Status DEFAULT 'Active';
However, keep in mind that default constraints streamline backward-compatible schema evolution. This means, for existing rows, the new column will be NULL unless you specify WITH VALUES, while for new rows, the new column will automatically get the default value if no explicit value is provided.
Using WITH VALUES to update existing rows with the default, here is how to do this:
ALTER TABLE Employees
ADD Department VARCHAR(50)
    CONSTRAINT DF_Employees_Department DEFAULT 'General' WITH VALUES;
Add a computed column in SQL Server
A computed column is not physically stored in the table (unless marked as PERSISTED); instead, its value is derived from an expression. This functionality can be helpful for calculations or derived attributes that you want to reuse in queries. In enterprise scenarios, computed columns help optimize derived field storage.
To use the ALTER TABLE command to add a computed column in SQL Server, here is the syntax you need:
ALTER TABLE table_name
ADD column_name AS (expression);
The expression in the syntax can reference other columns in the same table. Also, by default, computed columns are virtual (calculated at query time).
To make a computed column PERSISTED (physically stored and updated automatically), use this syntax:
ALTER TABLE Sales
ADD TotalPrice AS (Quantity * UnitPrice) PERSISTED;
Note
Only PERSISTED computed columns can be indexed. It is useful if you frequently query the derived value.
Performance considerations when adding columns to large tables
Altering extensive tables can be expensive in terms of time and resources. Below are some of the risks involved in this action:
- Long locks: The ALTER TABLE operation may lock the table for the entire duration.
- Impact on indexes: Adding specific columns (especially computed or persisted ones) may trigger index rebuilds.
- Table rebuild: Because SQL Server does not provide a single command to add a column to a specific position in a table, you need to rebuild the entire table in all such cases.
To avoid risks, follow these best practices:
- Schedule changes during maintenance windows.
- Schema modification locks may impact concurrency, so test before deploying on large production tables. You can perform the test in a staging environment with production-like data.
- For critical systems, consider creating a new table with the updated schema, copying data in batches, and then switching over.
- Always create backups before making changes.
How to rename a column in an existing table
Adding columns to tables often involves renaming existing columns. This is a common operation that takes place for many reasons, such as improving readability and clarity, aligning with naming conventions, fixing errors, adapting to business requirements, schema evolution, compatibility issues, and so on.
In SQL Server, we use the system stored procedure sp_rename to change the names of various database objects, such as tables, indexes, or individual table columns. The syntax of the procedure is:
EXEC sp_rename 'old_name', 'new_name' [, 'object_type'];
Therefore, to rename an existing column in a table, we specify 'column' as the object type:
EXEC sp_rename 'old_name', 'new_name', 'column';
Note
The
'old_name' value must be in the form of
table.column or
schema.table.column.
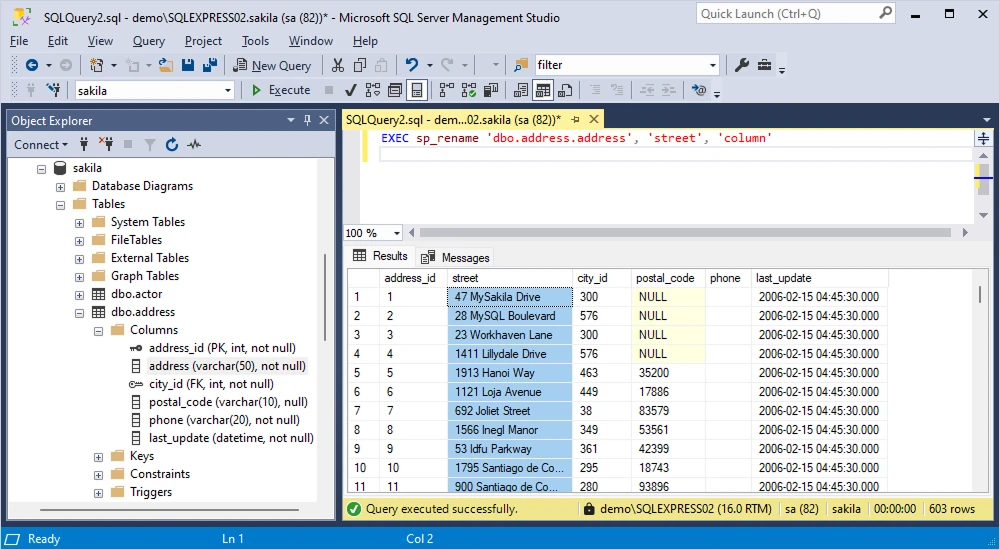
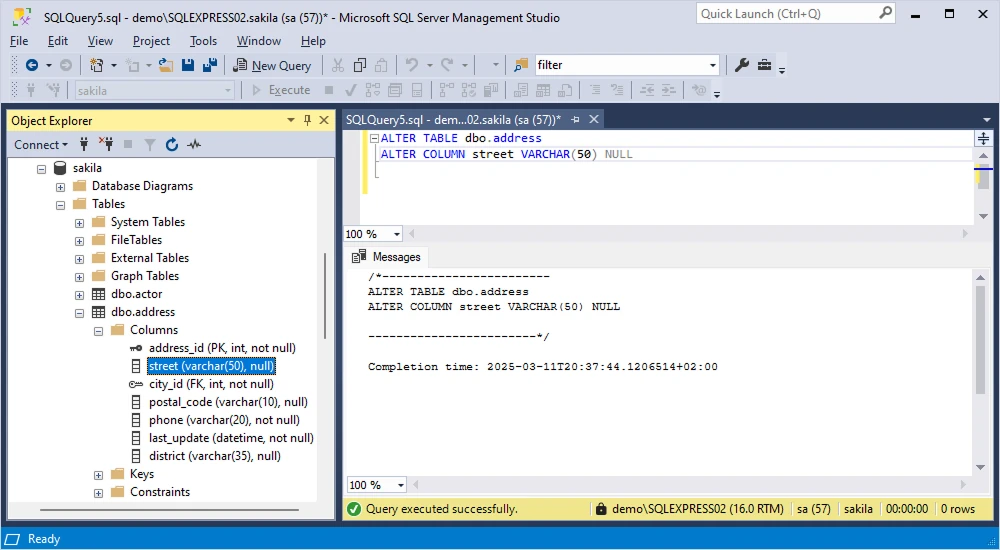
Let us see how to rename a column in a table in practice. In the dbo.address table, we have the address column that we want to rename to street. We use the below query:
EXEC sp_rename 'dbo.address.address', 'street', 'column'
If you rename a column, you may need to update references to it manually. The new column name is not automatically updated in views, functions, or stored procedures that rely on it. Modern database management tools like dbForge Studio for SQL Server that we'll explore further include the option of refactoring allowing you to automatically update all references to the renamed database object immediately.
Best practices for naming columns in SQL Server
Consistent and meaningful naming of columns in SQL Server helps with readability, maintainability, and team collaboration. These best practices will guide you when naming your database columns in SQL Server.
Recommendations:
- Use a consistent naming convention (e.g., PascalCase, snake_case).
- Avoid abbreviations unless they are widely accepted (e.g., DOB for Date of Birth).
- Do not use SQL Server reserved words (like Order, User, Table).
- Keep names concise yet descriptive (e.g., CreatedDate instead of CD).
- Consider adding prefixes only if necessary (e.g., IsActive for Boolean columns).
How to modify a column in an existing table
Renaming is not the only common operation that takes place concerning table columns. Database specialists often need to modify columns, changing their assigned data types, sizes, default values, adding constraints, and more. Let us check how to do this in practice.
How to change the column data type
SQL Server allows us to change the column data type by using the ALTER TABLE ... ALTER COLUMN statement to modify the data type and/or nullability.
The syntax of the query is:
ALTER TABLE table_name
ALTER COLUMN column_name new_data_type [NULL | NOT NULL];
Let us see the example. The street column in the dbo.address table we use for our tests was assigned the CHAR data type. This column does not allow NULLs. We want to change the data type to VARCHAR and allow NULL values. The query is:
ALTER TABLE dbo.address
ALTER COLUMN street VARCHAR(35)
However, changing the data type of a column is not always possible. If the column is part of a clustered or non-clustered index or referenced by a foreign key constraint, SQL Server will block direct modifications. To change the data type, you need to drop the index or foreign key constraint, modify the column, and then recreate the index or constraint. Alternatively, you can create a new column, migrate the data, rename that column, and drop the original column, as explained earlier.
How to add a primary key to an existing table
Every table should ideally have a primary key to identify rows uniquely. To add a primary key, use this syntax:
ALTER TABLE table_name
ADD CONSTRAINT constraint_name PRIMARY KEY (column_name);
Example:
ALTER TABLE Customers
ADD CONSTRAINT PK_Customers_CustomerID PRIMARY KEY (CustomerID);
Limitations:
- A table can have only one primary key.
- The column(s) must be unique and NOT NULL.
- You can define a primary key on multiple columns (composite key).
Composite key example:
ALTER TABLE OrderDetails
ADD CONSTRAINT PK_OrderDetails PRIMARY KEY (OrderID, ProductID);
Add a column to a table using SSMS
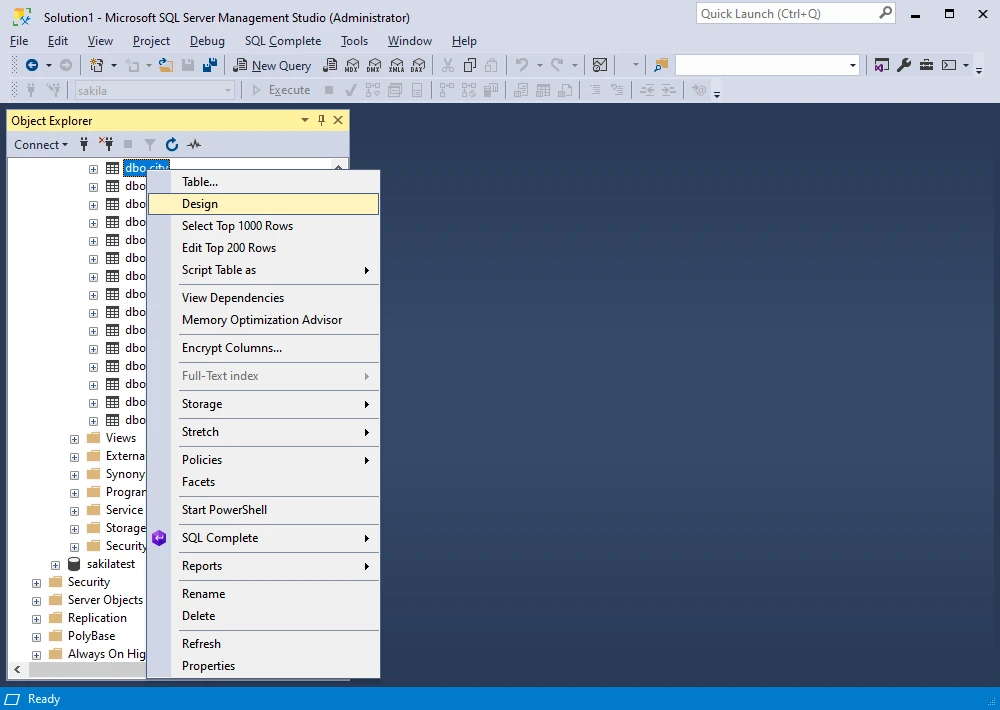
To add a new column to an existing SQL Server table using SQL Server Management Studio (SSMS), first, open SSMS and connect to the required database server. In Object Explorer, navigate to the database that contains the table where you want to add a new column, expand the database, and right-click the table you want to add a new column to. In the context menu that appears, select Design.
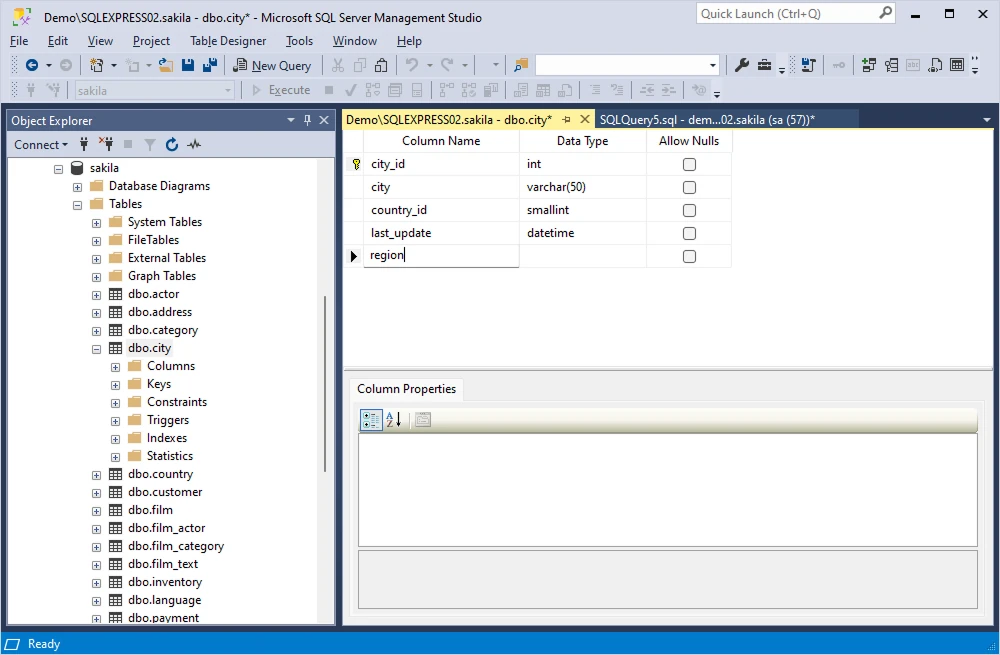
In the Table Designer window that appears, put the cursor on an empty row at the end of the list of columns. In the new column's row, enter the desired name for the new column in the Column Name field.
Next, use the Data Type drop-down menu to select the appropriate data type for the new column (e.g., VARCHAR, INT, DATE, etc.). Specify additional properties for the new column, such as its length, precision, or scale, according to your needs, using the corresponding fields in the Column Properties pane.
Save the new column by clicking the Save icon or selecting Save from the File menu and close the Table Designer window.
Add columns to a SQL Server table using dbForge Studio
dbForge Studio for SQL Server is a powerful IDE that provides a range of features to enhance SQL Server database development and management. Some of its capabilities include code completion, schema comparison and synchronization, SQL debugging, and data generation. It also provides a graphical interface that allows modifying tables (in particular, adding a new column or columns) without the need for manual coding. With dbForge Studio for SQL Server, you can easily reorder columns or insert mid-table visually, unlike pure SQL. Let's explore some of these functionalities.
Add a new column using the Studio
Let's take a look at how to visually add a new column to a SQL Server table using dbForge Studio. This approach is more user-friendly and intuitive than using SQL queries, especially for those who may not be as comfortable with writing SQL code.
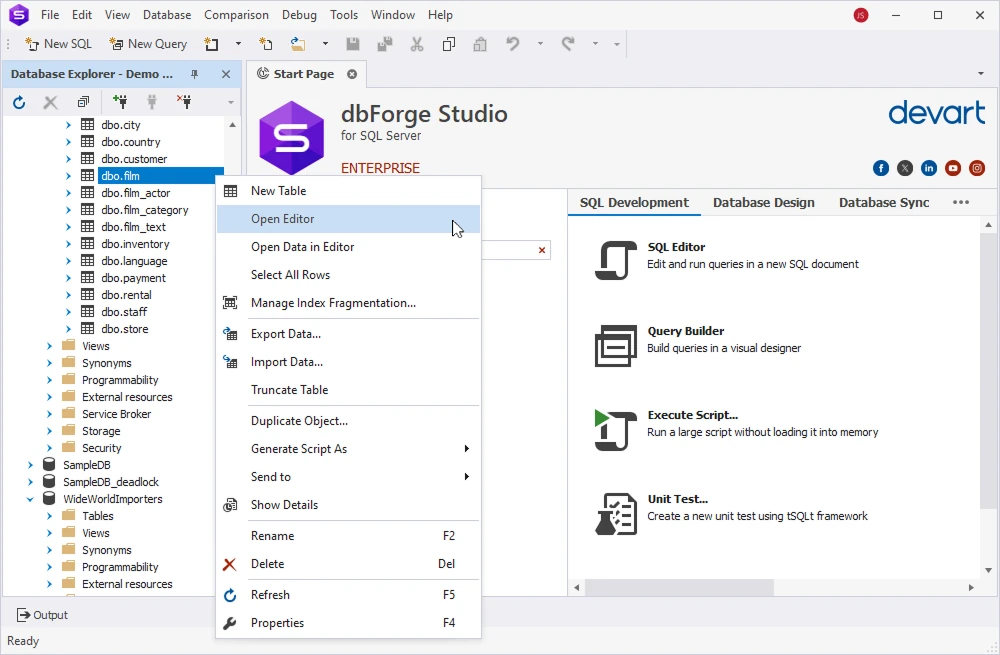
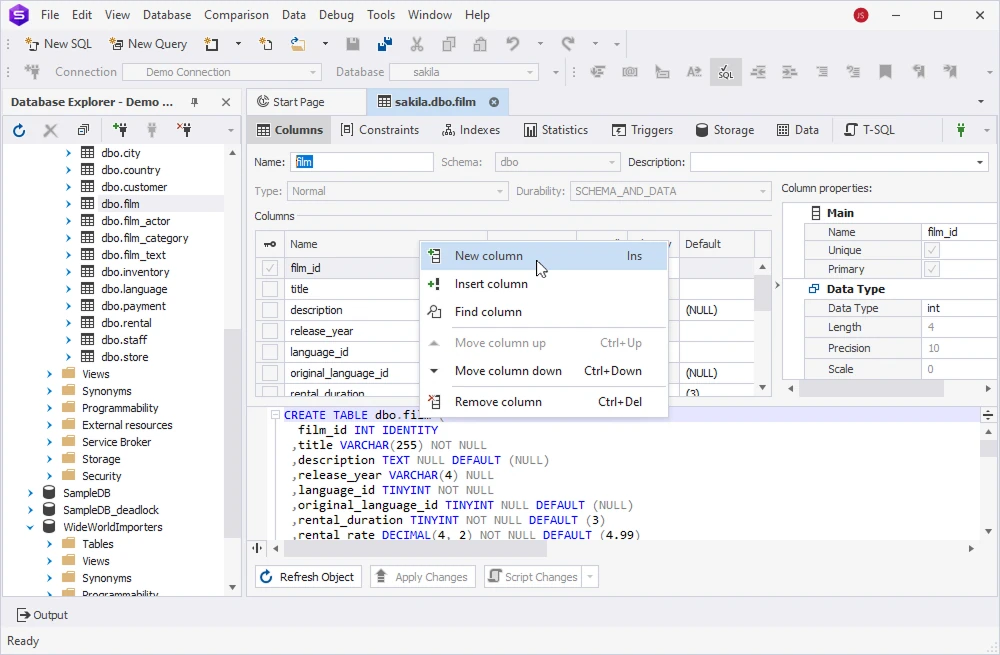
In Database Explorer, right-click the table you want to change and select Open Editor:
In the Table Editor window, right-click the column area and select New Column (or scroll the list down to get to empty lines):
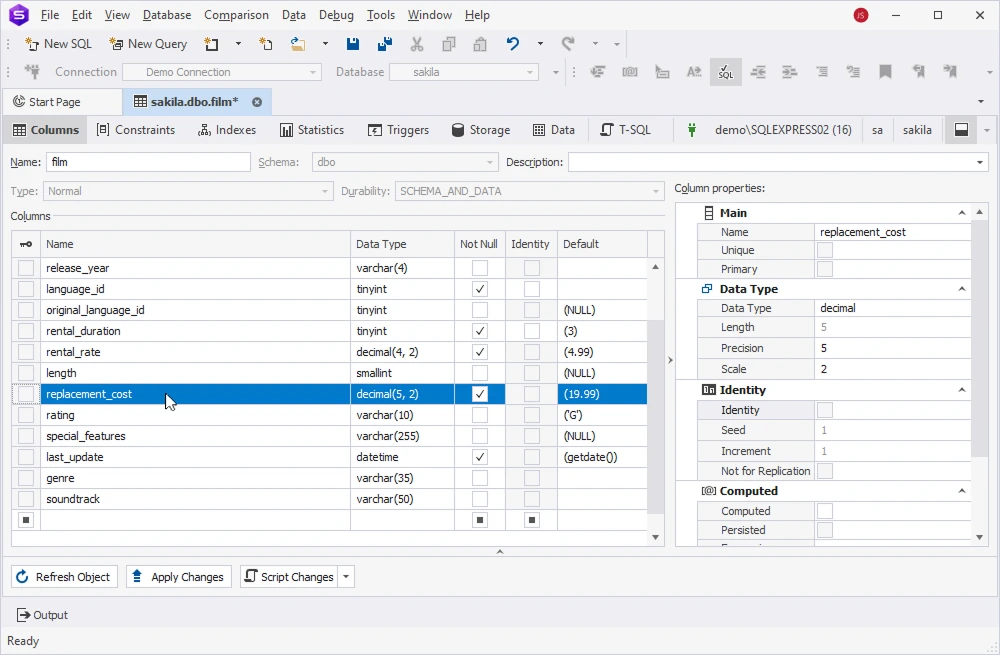
Enter the new column name and customize its properties such as data type, NOT NULL, identity, etc.
Once done, click Apply Changes to save the modifications.
Add a column in the middle of a SQL Server table
Adding a new column to a SQL Server table typically results in the column being appended to the end of the table. However, there may be situations where you need to insert a new column between existing columns. Let us look at how it can be achieved in dbForge Studio for SQL Server.
Note
Microsoft generally does not recommend changing the order of columns in a table, as it can have unintended consequences for code and applications that rely on the specific order of columns. Changing the order of columns can also cause problems with referential integrity constraints and other database objects that depend on the structure of the table.
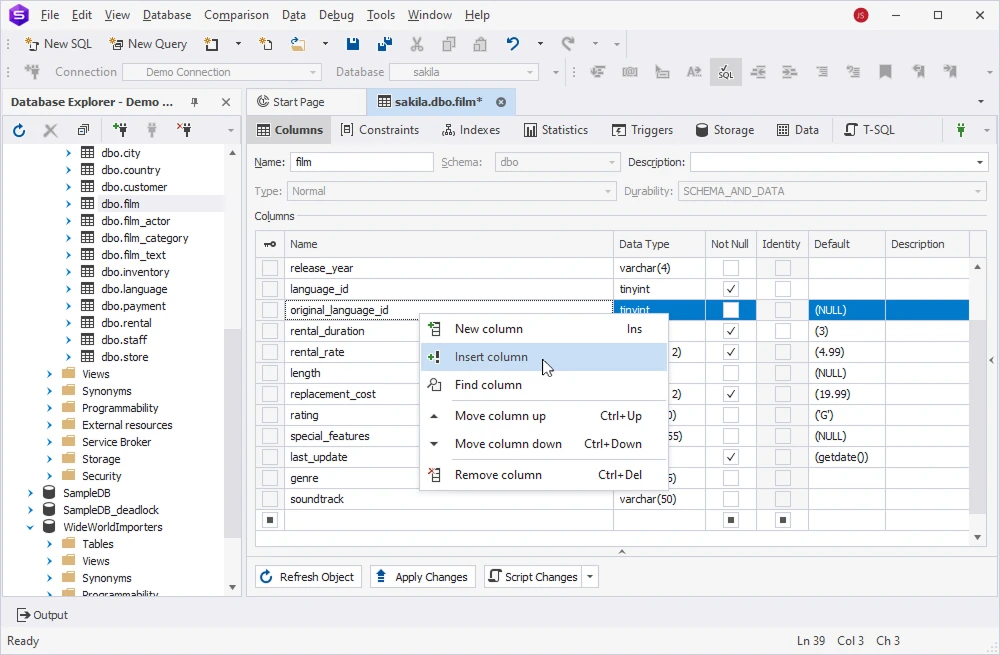
To insert a new column in the middle of an existing SQL Server table using dbForge Studio for SQL Server, open the Table Editor the same way we accessed it earlier. Then right-click the column name after which you want to insert your new column and select Insert Column.
Once done, click Apply Changes to save the modifications.
Add a nullable column to an existing SQL Server table
In dbForge Studio for SQL Server, you can choose between two methods to add a nullable column to an existing table. The first method involves utilizing the built-in Table Editor, which provides a visual tools for performing the operation without the need for coding. The second method involves using the SQL Editor, where you can manually enter the relevant SQL statement to add the nullable column. By default, new columns are added with NULL values for all existing rows unless specified otherwise.
Add a nullable column to a table using the Studio's Table Editor
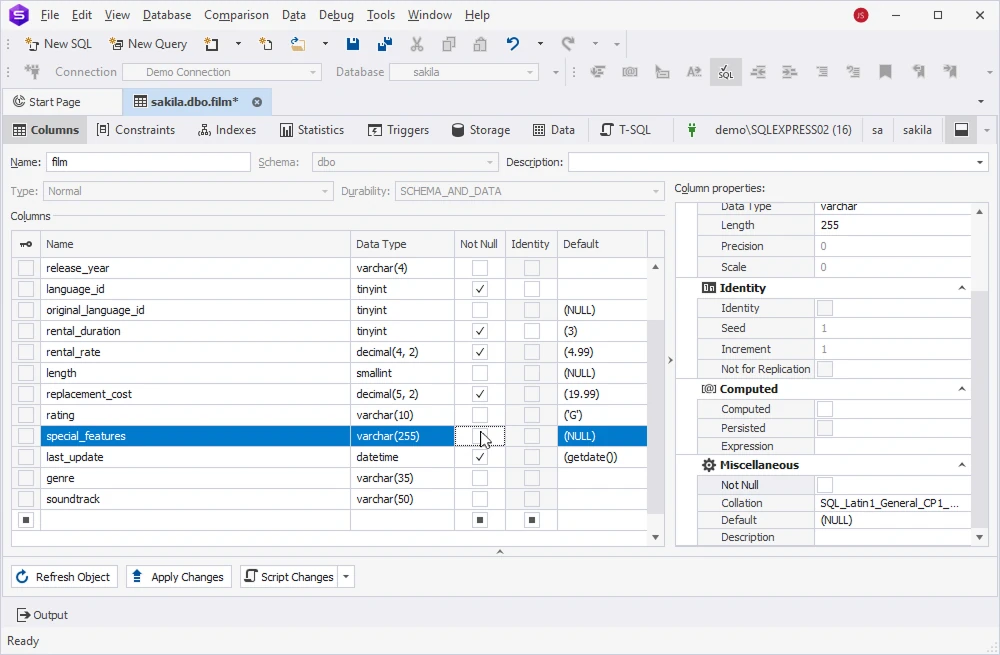
To access the Table Editor, right-click the table you want to add a nullable column to in Database Explorer and then select Edit Table from the context menu.
In the Table Editor, enter the name of the new column and specify its datatype. To allow the new column to accept NULL values, ensure that the Not Null checkbox remains cleared.
Add a nullable column to a table using SQL statements
In SQL Server, you can use the following code to add a nullable column to an existing table.
ALTER TABLE table_name
ADD new_column_name int NULL;
This statement adds a new column named with the specified data type of int. By including the NULL keyword, it allows the column to accept null values during data insertion.
Compare methods of adding a column to a table
The table below summarizes the methods for adding columns to existing tables in SQL Server, highlighting their key differences, strengths, and limitations.
| Method |
Syntax required |
GUI support |
Insert in the middle |
Refactoring |
Error prevention |
Index & constraint handling |
| ALTER TABLE |
Yes |
No |
No |
No |
Manual only |
Full control (manual) |
| SSMS |
Limited |
Yes |
No |
No |
Some wizards |
Limited (manual tweaks) |
| dbForge Studio |
No |
Full |
Yes |
Yes (auto update refs) |
Built-in checks |
Smart handling (constraints, FKs, indexes) |
Conclusion
Adding a new column to a SQL Server table is a relatively straightforward task that can be accomplished using either SQL queries or visual tools such as SQL Server Management Studio and dbForge Studio for SQL Server. Although both solutions provide a visual interface for adding columns to a table, dbForge Studio offers more flexibility and customizations for changing the scope of columns. Ultimately, the method you choose to add a column to a SQL Server table will depend on your specific needs and preferences.
FAQ
Can the ALTER TABLE ADD COLUMN operation be rolled back?
In SQL Server, this operation is not transactional and cannot be rolled back.
Can I use ALTER TABLE ... RENAME TO in SQL Server?
SQL Server does not support ALTER TABLE ... RENAME TO. To rename database objects in SQL Server, use the sp_rename system stored procedure.
Can I modify default values in columns using ALTER TABLE ... ALTER COLUMN in SQL Server?
In SQL Server, ALTER TABLE ... ALTER COLUMN is used to change a column's data type, size, or nullability. However, it does not allow the modification of the default value.
Is it possible to modify table columns in SQL Server using GUI tools?
Yes, modern GUI tools simplify database management tasks, including table modifications. Tools such as the default SQL Server Management Studio (SSMS) and dbForge Studio for SQL Server allow users to add, remove, and modify table columns visually with just a few clicks.
dbForge Studio for SQL Server also generates table modification scripts that can be saved and reused. Additionally, it automatically updates all references to renamed database objects, reducing the risk of errors.
Can I add a computed column in SQL Server?
Yes. You can use the ALTER TABLE ... ADD column_name AS (expression) syntax. If you want the column to be indexed or physically stored, add the PERSISTED keyword.
How do I add a column with a default value?
Use ALTER TABLE ... ADD column_name data_type DEFAULT value. To ensure existing rows also get the default, include WITH VALUES.
Will existing rows be affected when I add a new column?
By default, existing rows will have NULL in the new column. If you specify WITH VALUES, SQL Server fills existing rows with the default value.
Can I undo ALTER TABLE ADD COLUMN?
Not directly. You need to run ALTER TABLE ... DROP COLUMN column_name to remove the column. But be careful doing this because dropping a column deletes its data permanently.
How to handle large tables when adding a column?
Adding columns to large tables may cause long locks and rebuilds. Best practice is to schedule the change during a maintenance window, test on staging data, or migrate to a new table if downtime is critical.