Mastering Date Functions with dbForge Studio for SQL Server
In database management, manipulating date and time can be important for performing precise data analysis, allowing users to fetch meaningful data from database records.
For example, data manipulation simplifies operations such as calculating durations between events or filtering data based on specific time periods.
However, working with date and time can be tricky because the date formats may vary for different reasons.
It is also worth noting that effective date and time manipulation optimizes query operations. Users can tune their SQL queries to perform better and quicker by efficiently handling date-related functions and expressions.
This results in faster data retrieval and improved overall efficiency in database operations.
Furthermore, mastering date and time manipulation enhances reporting capabilities. Users can generate reports that are accurately timestamped, providing valuable information for decision-making processes.
Whether the reports are generated daily, weekly, or monthly, the efficient date and time manipulation ensures that they are timely and relevant.
In the article, we'll learn basic date functions and their usage. We'll also examine how to perform date calculations and format dates using SQL date functions, such as DATEADD, DATEDIFF, CONVERT and FORMAT, and dbForge Studio for SQL Server.
Getting started with SQL date functions
To work with date and time, you can use the GETDATE() function, which works in T-SQL, and CURRENT_TIMESTAMP, which follows the ANSI SQL standard.
GETDATE()
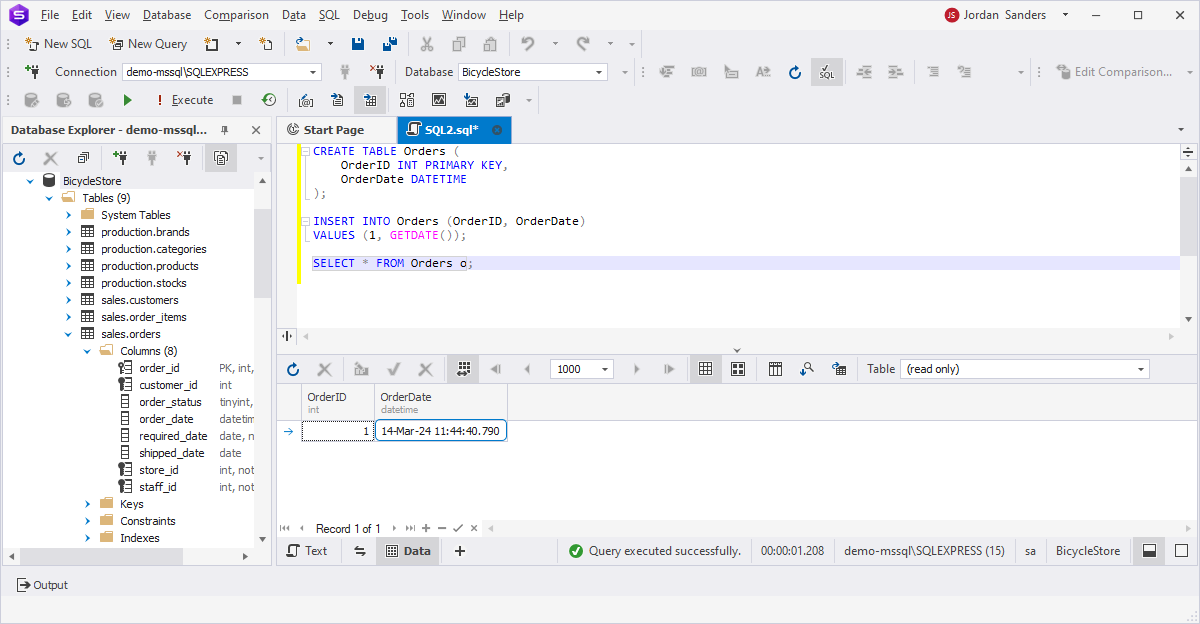
The function returns the current database system date and time in the 'YYYY-MM-DD hh:mm:ss.mmm' format. For example, you can use the function to insert the current date and time into a table or to get the current date and time for calculations.
The syntax is as follows:
To see the function in action, create a sample Orders table and insert the row with the GETDATE() function.
CREATE TABLE Orders (
OrderID INT PRIMARY KEY,
OrderDate DATETIME
);
INSERT INTO Orders (OrderID, OrderDate)
VALUES (1, GETDATE());
Then, retrieve the data, querying the SELECT statement. In the output, the query returns the current date for the order ID 1.
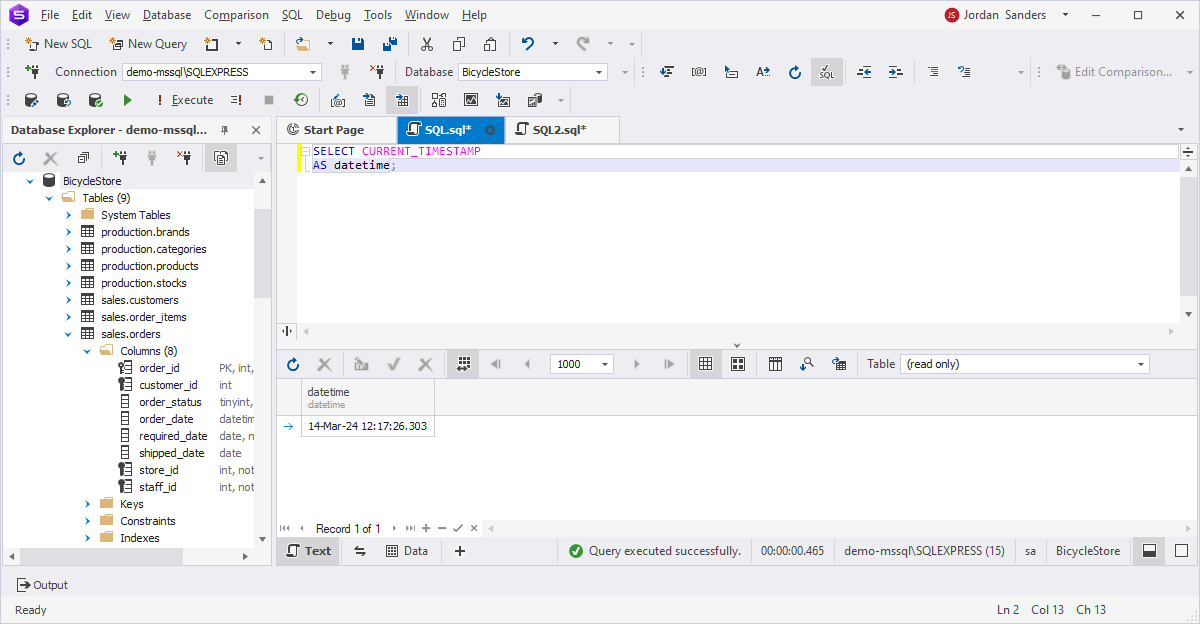
CURRENT_TIMESTAMP
CURRENT_TIMESTAMP is similar to GETDATE(). It also retrieves the current date and time as a datetime data type.
The format in which the function returns data is 'YYYY-MM-DD hh:mm:ss.mmm'. The syntax of the function is as follows:
For example, get the current date using the CURRENT_TIMESTAMP function in the SELECT query.
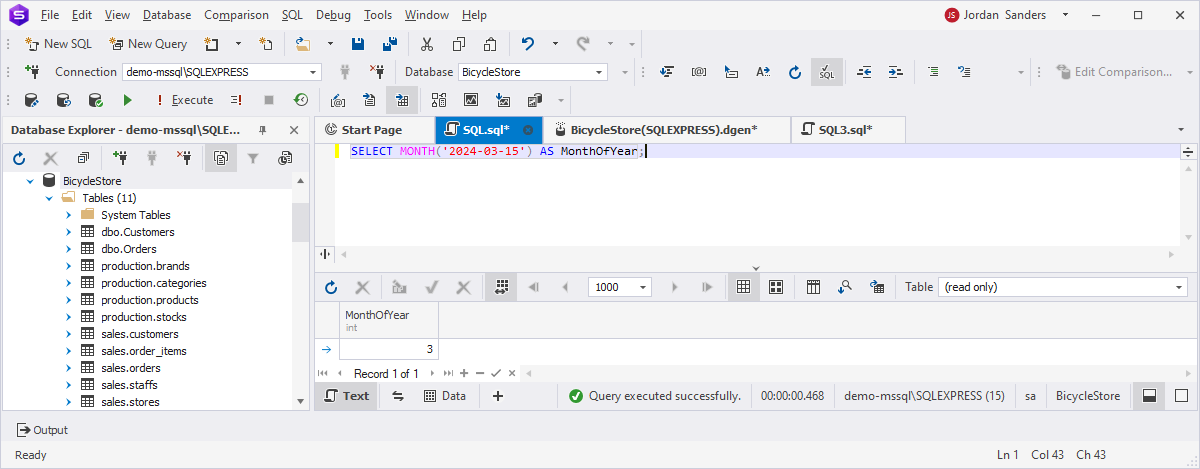
In SQL, you can also extract specific parts of a date for various data analysis and reporting purposes in SQL queries. They include date functions,
such as DAY() to fetch days, MONTH() to get months, and YEAR to retrieve year parts of a date. For example:
SELECT MONTH('2024-03-15') AS MonthOfYear;
The query returned only the month from the specified date.
Performing date calculations
Let us consider other SQL date functions to manipulate, analyze, and compare dates. For demo purposes, we'll create the Orders table and populate it with the random test data
using dbForge Data Generator for SQL Server developed by the Devart team. This powerful tool helps you visually generate meaningful data based on the predefined data generators.
CREATE TABLE Orders (
OrderID int NOT NULL,
CustomerName nvarchar(70) NULL,
OrderDate datetime NULL,
TotalAmount decimal(18, 2) NULL,
PRIMARY KEY CLUSTERED (OrderID)
);
To get started, look at the DATEADD and DATEDIFF functions for date comparison.
The DATEADD function adds or subtracts a specified interval, such as days, months, or years, to a given date. The syntax is as follows:
DATEADD(interval, number, date);
where:
interval (required): Specifies the date and time interval you want to add.number (required): Indicates the number of intervals to be added to the date.date (required): Defines the date you want to edit.
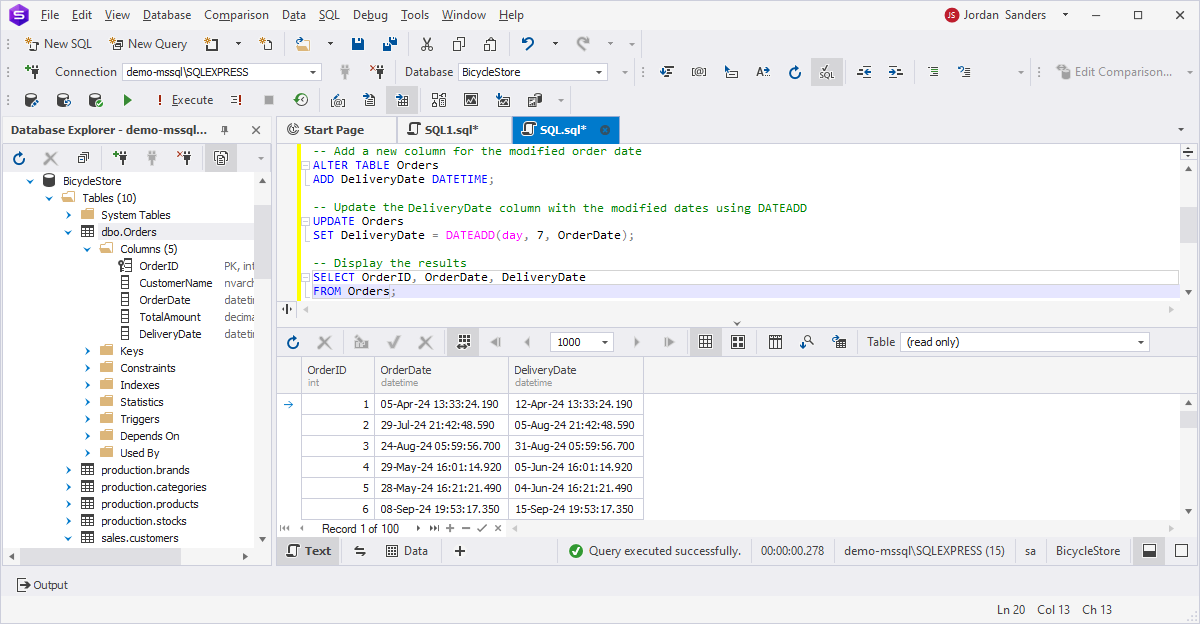
Now, return to our example and add the delivery date, which is seven days after the order date. To do this, modify the Orders table by adding a new column, DeliveryDate, which will display the date and time when the order will be shipped to the customer. Then, update the column with the modified dates using DATEADD and select the data.
ALTER TABLE Orders
ADD DeliveryDate DATETIME;
UPDATE Orders
SET DeliveryDate = DATEADD(day, 7, OrderDate);
SELECT OrderID, OrderDate, DeliveryDate
FROM Orders;
The results grid outputs the OrderID, OrderDate, and DeliveryDate columns. If you compare the OrderDate and DeliveryDate values, you can see that the DeliveryDate column displays values that are 7 days later than those in the OrderDate column.
Now, we'll examine the DATEDIFF function and how it is used in SQL. This function calculates the difference between two dates based on the specified interval, such as
days, months, or years. It returns a number indicating how many intervals are between the start and end dates. Depending on the arguments, this number can be positive or negative.
The syntax of the function is as follows:
DATEDIFF(datepart, startdate, enddate)
where:
datepart (required): Specifies the unit of time in which you want to measure the difference. This can be any valid date or time part, such as year, month, day, hour, minute, second, etc. For example, if you want to find the difference in years between two dates, you would specify year as the datepart.startdate: Represents the starting date from which you want to calculate the difference.enddate: Represents the ending date up to which you want to calculate the difference.
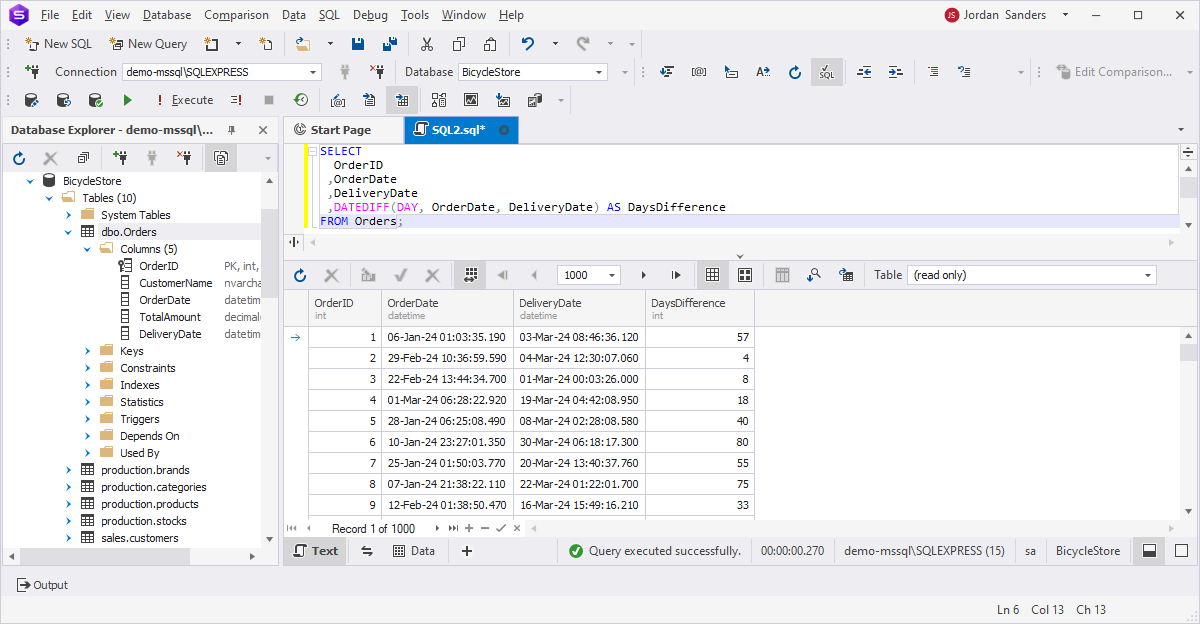
For example, calculate the difference in days between OrderDate and DeliveryDate by executing the following SELECT query with the DATEDIFF function:
SELECT
  OrderID
 ,OrderDate
 ,DeliveryDate
 ,DATEDIFF(DAY, OrderDate, DeliveryDate) AS DaysDifference
FROM Orders;
In the output, the query calculates the values and returns the difference between the order and delivery dates in the DaysDifference column.
If you want to get the specified part of the date as an integer, use the DATEPART function.
where:
interval (required): Specifies the part of the date or time that you want to extract. This can be any valid date or time part, such as year, month, day, hour, minute, second, etc.date (required): Represents the date or time value from which you want to extract the specified interval.
Suppose we want to extract the month from the OrderDate column in the Orders table.
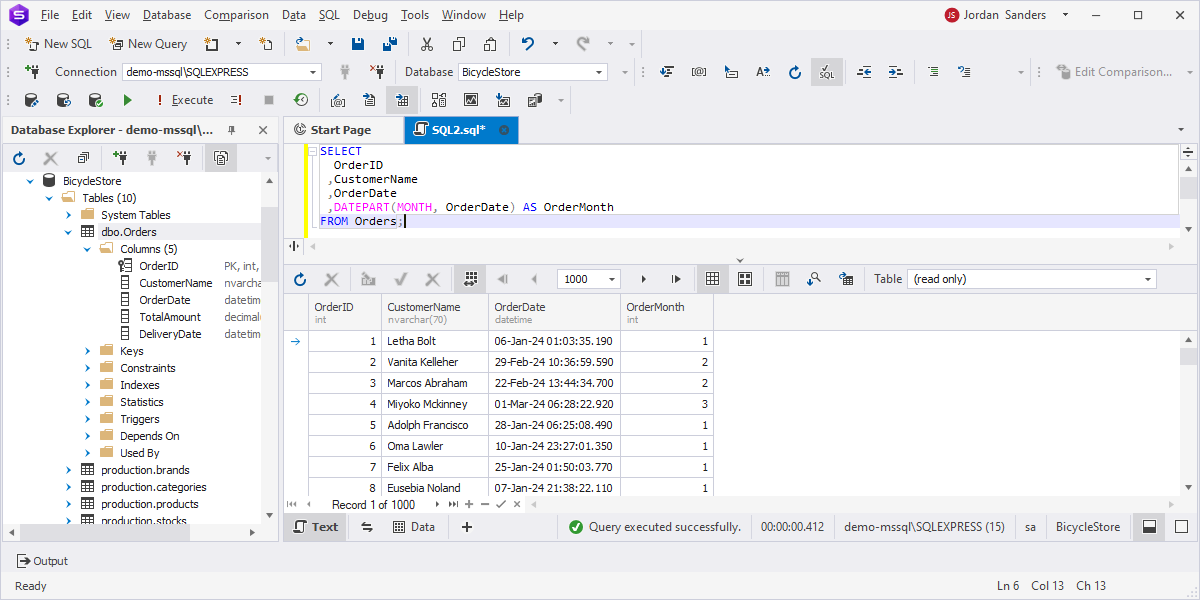
As you can see, this query will display the OrderID, CustomerName, OrderDate, and the number of the month from the OrderDate column for each order in the Orders table.
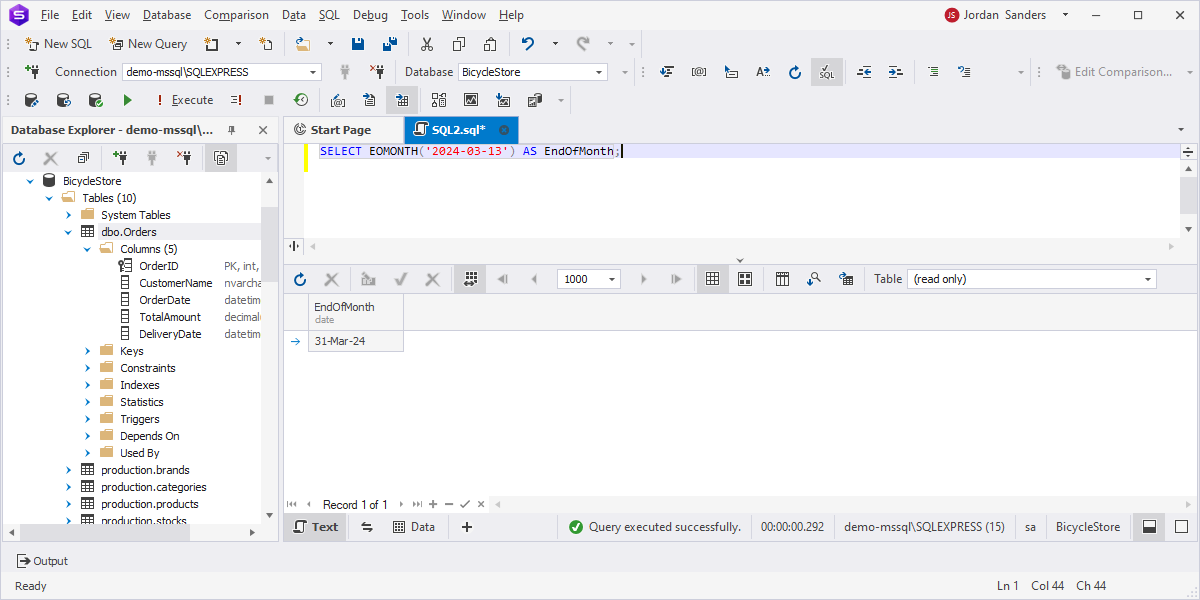
SQL Server also supports the EOMONTH() function, which returns the last day of the month for a given date. This function can be used to calculate the end of the month,
which is often useful in financial or reporting scenarios.
For example, if you execute the following SELECT query:
SELECT EOMONTH('2024-03-13') AS EndOfMonth;
It returns March 31, which is the last day of the month specified in the SELECT query.
Formatting dates in SQL
Formatting dates involves converting date and time values from one format to another to meet specific requirements.
However, this might be tricky due to the date formats, which may differ. SQL provides different functions to format dates and time, such as CONVERT and FORMAT.
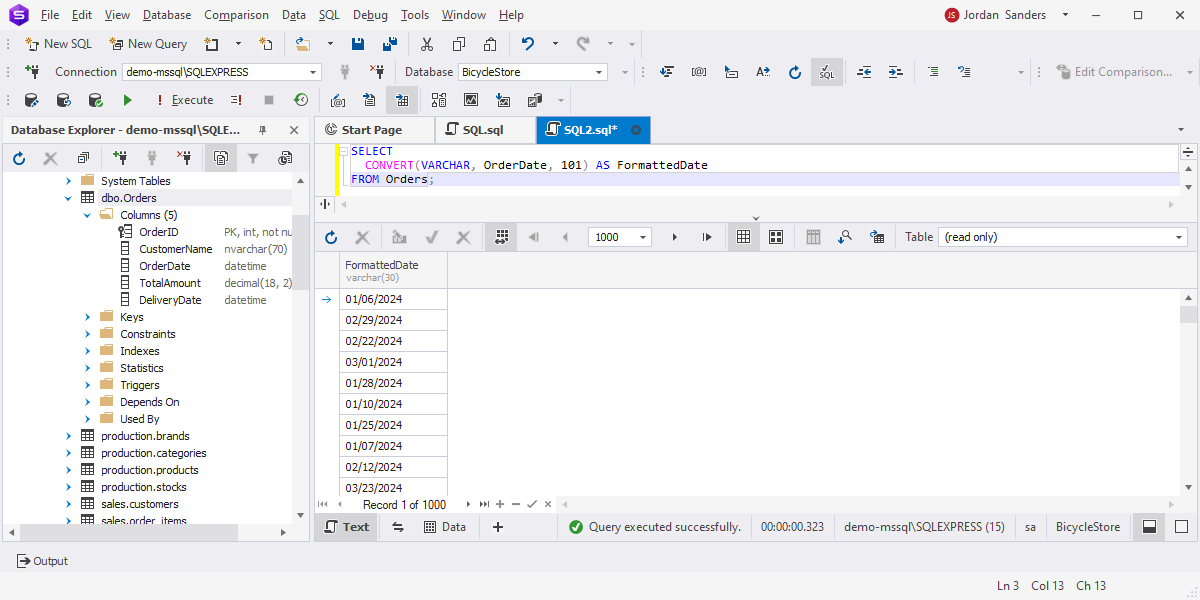
CONVERT()
The function converts a value to different formats, which allows you to customize the display. The syntax of the function is as follows:
CONVERT(data_type, expression, style);
where:
data_type: Specifies the target data type to which the expression will be converted.expression: Defines the value or column to be converted.style (optional): Specifies an integer that defines how the function converts the expression.
For example, convert the OrderDate column to a VARCHAR data type using the 101 style code, which returns the column values in MM/DD/YYYY format.
FORMAT()
If you want to display the dates in specific formats, use the FORMAT() function. It converts numbers or datetimes into text, specifying how they should be displayed. The syntax of the function is as follows:
FORMAT(value, format, culture)
where:
value: Represents the value or column you want to format.format: Specifies the target format for the expression.culture (optional): Specifies a string expression that identifies the locale information to use.
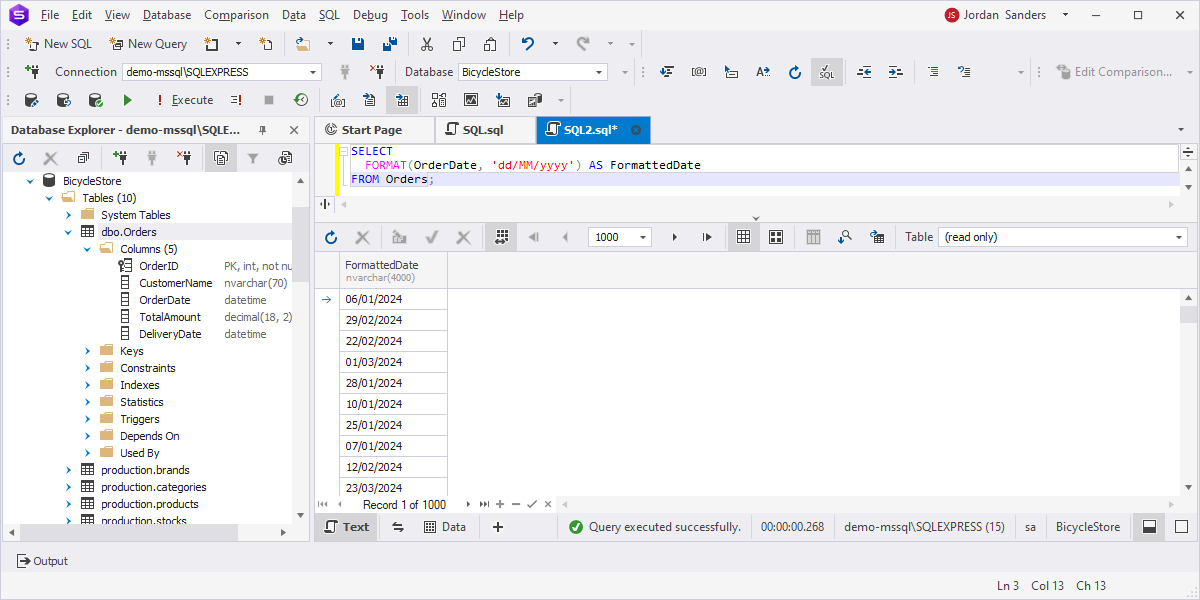
To demonstrate how it works, format the OrderDate column to the dd/MM/yyyy format, which represents the day, month, and year in a specific order separated by slashes.
When comparing the CONVERT and FORMAT functions, it becomes evident that the latter doesn't require explicit specification of a style code to display date and time values, which makes it more flexible than CONVERT.
However, it's worth noting that the FORMAT function may have performance issues when used on large datasets due to its computational overhead.
Why use dbForge Studio
To illustrate how to manipulate dates with SQL functions, we used dbForge Studio for SQL Server, an ultimate IDE for database development, management, administration, analysis, and deployment. So, why dbForge Studio?
- Enhance SQL coding speed with IntelliSense-style code completion
-
Make it easy to write and execute SQL queries, including date functions, in a user-friendly interface, which allows users
to quickly perform common operations, such as adding or subtracting intervals, truncating dates, formatting dates, and extracting date components,
without a need to write complex SQL code manually
-
Build SQL queries easily and quickly with the visual Query Builder, which is particularly useful for users who are not familiar with SQL syntax but still need to work with date functions
-
Test and troubleshoot date manipulation queries with query execution and debugging capabilities. Users can execute queries step-by-step, inspect intermediate results, and identify any errors or inconsistencies in date calculations
-
Streamline SQL Server database schema comparison and synchronization processes with data and schema comparison tools
- Generate random realistic data with predefined customizable data generators
- Automate repetitive database tasks using the command-line interface
- Analyze and enhance query performance to ensure efficient database operations
View this video to check out the benefits of dbForge Studio over SSMS and enjoy the best user experience!
You can download and install dbForge Studio to evaluate its advanced features and tools within a 30-day free trial period.
Best practices for using SQL date functions
When working with dates, you should consider some tips to efficiently manipulate them, avoid common pitfalls and errors, optimize queries, and improve accuracy that include date and time operations.
- Use indexes for the columns to be filtered or managed when querying date functions
- Assign appropriate data types to the table columns
- Avoid applying functions directly to date columns in WHERE clauses or JOIN conditions
- Use standardized time zones or UTC for storing and manipulating temporal data
- Consider using the method that works best with your database system when performing date arithmetic operations, such as adding or subtracting intervals from dates
- Consider truncating dates to day, month, or year when comparing or aggregating temporal data
- Analyze and update statistics on date columns regularly to reflect changes in data
Hands-On examples
So, in which real-world situations can you use date and time operations? These could include analyzing financial data, such as tracking transaction histories, calculating interest accruals, and forecasting cash flows,
managing logistics and inventory, scheduling tasks, appointments, and events. You could also use them in generating reports and calculating average trends for decision-making, as well as for social media and marketing campaigns,
such as scheduling posts, and analyzing user activity.
Let us now showcase the following scenario: You need to analyze order trends by tracking the number of orders placed by customers on a monthly basis. For demo purposes, use dbForge Studio for SQL Server.
To begin, create two tables - Orders and Customers - by executing the following CREATE queries in the SQL Editor of the Studio. To do this, open the Studio. In Database Explorer, right-click the database on which you want to create the tables
and select New SQL to open the SQL Editor. Then, type the scripts and click Execute on the standard toolbar.
CREATE TABLE Customers (
CustomerID INT PRIMARY KEY,
FirstName VARCHAR(50),
LastName VARCHAR(50),
Email VARCHAR(100),
PhoneNumber VARCHAR(20)
);
CREATE TABLE Orders (
OrderID INT PRIMARY KEY,
CustomerID INT,
OrderDate DATETIME,
ShipDate DATETIME,
TotalAmount DECIMAL(18, 2),
CONSTRAINT FK_CustomerID FOREIGN KEY (CustomerID) REFERENCES Customers(CustomerID)
);
Next, populate the tables with the test data using the INSERT INTO statement or the Data Generator tool available in dbForge Studio for SQL Server, which is much easier. For more information, see the Working with Data Generator documentation.
After the tables have been filled in with data, execute the following SELECT query to count the number of orders placed by customers each month.
SELECT
    YEAR(o.OrderDate) AS OrderYear,
    MONTH(o.OrderDate) AS OrderMonth,
    COUNT(o.OrderID) AS NumberOfOrders
FROM
    Orders o
JOIN
    Customers c ON o.CustomerID = c.CustomerID
GROUP BY
    YEAR(o.OrderDate), MONTH(o.OrderDate)
ORDER BY
    OrderYear, OrderMonth;
The results grid displays the total number of orders for each month. The data is grouped by year and month and arranged in ascending order.

Now, we can calculate the total number of orders placed by each customer and determine the average order frequency across all customers.
SELECT
    c.CustomerID,
    c.FirstName,
    c.LastName,
    COUNT(o.OrderID) AS OrderFrequency
FROM
    Customers c
LEFT JOIN
    Orders o ON c.CustomerID = o.CustomerID
GROUP BY
    c.CustomerID, c.FirstName, c.LastName;
In the results grid, we can see how many orders each customer placed.

Finally, we identify the five customers with the highest number of orders so that we can offer them a discount as a gesture of appreciation for their loyalty.
We also analyze orders placed within the last year - for this, use the DATEADD function to subtract one year from the current date. Note that GETDATE() will be used to
determine the start date for our analysis.
SELECT TOP 5
c.CustomerID,
c.FirstName,
c.LastName,
COUNT(o.OrderID) AS OrderCount
FROM
Customers c
LEFT JOIN
Orders o ON c.CustomerID = o.CustomerID
WHERE
o.OrderDate >= DATEADD(year, -1, GETDATE())
GROUP BY
c.CustomerID, c.FirstName, c.LastName
ORDER BY
OrderCount DESC;
The query returns the five top customers with the highest number of orders that they placed within the last year.

To sum up, we have explored a range of SQL functions to handle date and time operations. These include formatting dates, extracting specific parts of the date value,
retrieving the current date and time, adding or subtracting a specified date interval, and calculating the difference between start and end dates.
Beyond these tasks, dbForge Studio for SQL Server offers versatile tools with an intuitive interface, enabling smooth and easy execution of database-related tasks.
Further learning
The following guides can be helpful when mastering and working with SQL Server: