This tutorial provides a step-by-step guide on using Dapper for efficient data operations in .NET applications. With dotConnect for Oracle, we will create Dapper models, develop a console application, and implement CRUD operations using a robust connection class for smooth database interactions.
Why dotConnect for Oracle?
Advanced ORM support
Fully supports EF Core, Dapper, NHibernate, LinqConnect, and other technologies for efficient data management.
Full ADO.NET compliance
Conforms to the latest ADO.NET standards and innovations for seamless integration with .NET applications.
Oracle-specific data types
Offers many Oracle-specific features and fully supports all unique data types for accurate and complete data representation.
Secure connection options
Provides robust security with support for SSL/SSH connections, connecting via proxy servers, embedded servers, and HTTP tunneling.
IDE integration
Features native integration with Visual Studio and complete design-time support for accelerated development.
Priority support & frequent updates
Includes priority support, detailed documentation, and regular updates for continuous improvement.
Download and activate dotConnect for Oracle
You can start using dotConnect for Oracle immediately with a 30-day free trial. Choose one of the following installation options:
using Dapper;
using Devart.Data.Oracle;
namespaceDapperOracleExample{
classProgram{
staticasync Task Main(string[] args){
try{
using(var connection=new OracleConnection(DatabaseConnection.ConnectionString)){
// Open the database connection
connection.Open();
// Define the SQL query to retrieve data from the EMPLOYEE table string sql="SELECT * FROM EMPLOYEE";
// Execute the query and map the results to a list of dynamic objects var employees=connection.Query(sql).ToList();
// Display the retrieved data foreach(var employee in employees){
Console.WriteLine(employee);
}
}
}
catch(Exception ex){
Console.WriteLine($"An error occurred: {ex.Message}");
}
}
}
}
Update the connection string
To update the connection string, simply replace the placeholders in the connection string with your actual Oracle database credentials.
Run the application
To build and run your application, press F5 or select Start from the menu in Visual Studio.
Mapping to strongly-typed objects
Mapping query results to strongly-typed objects improves code readability and maintainability. You can follow the example code below to map query results to strongly-typed objects using Dapper.
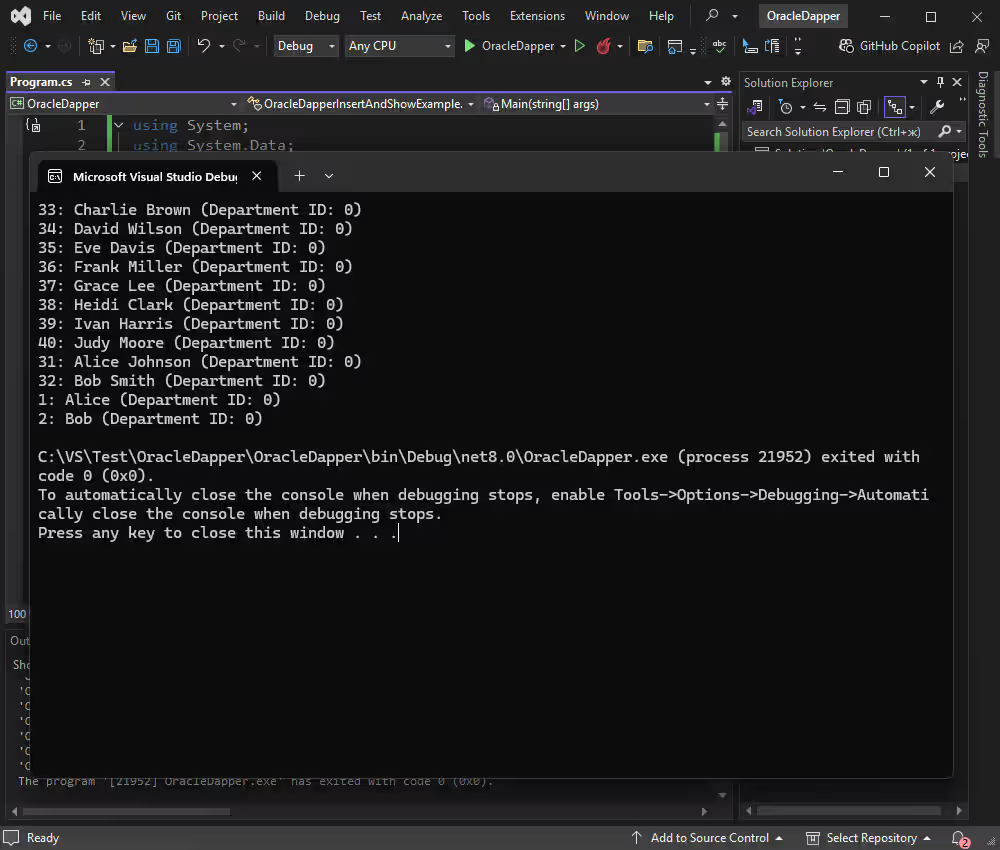
As a result of mapping, the query results are transformed into strongly-typed objects, allowing you to work with them more effectively in your C# application.
Insert new records using Dapper
Let's examine how to insert 10 new rows into the
EMPLOYEE table using Dapper in C#. This example assumes that your
EMPLOYEE table has two columns:
NAME and
POSITION.
using Dapper;
using Devart.Data.Oracle;
namespaceDapperOracleExample
{
classProgram
{
staticasync Task Main(string[] args)
{
try
{
// Sample data to insert with new names and positions var employees = new[]{
new{
NAME = "Karen White", POSITION = "Project Manager"
},
new{
NAME = "Liam Green", POSITION = "Software Engineer"
},
new{
NAME = "Mia Black", POSITION = "UX Designer"
},
new{
NAME = "Noah Blue", POSITION = "Data Scientist"
},
new{
NAME = "Olivia Red", POSITION = "QA Engineer"
},
new{
NAME = "Peter Yellow", POSITION = "Technical Support"
},
new{
NAME = "Quinn Pink", POSITION = "Recruiter"
},
new{
NAME = "Rachel Purple", POSITION = "Marketing Specialist"
},
new{
NAME = "Samuel Orange", POSITION = "Sales Representative"
},
new{
NAME = "Tina Grey", POSITION = "Business Analyst"
}
};
using(var connection = new OracleConnection(DatabaseConnection.ConnectionString))
{
connection.Open();
// Define the SQL insert statement without the ID column string insertSql = "INSERT INTO EMPLOYEE (NAME, POSITION) VALUES (:NAME, :POSITION)";
// Execute the insert operation for each employee foreach(var employee in employees)
{
connection.Execute(insertSql, employee);
}
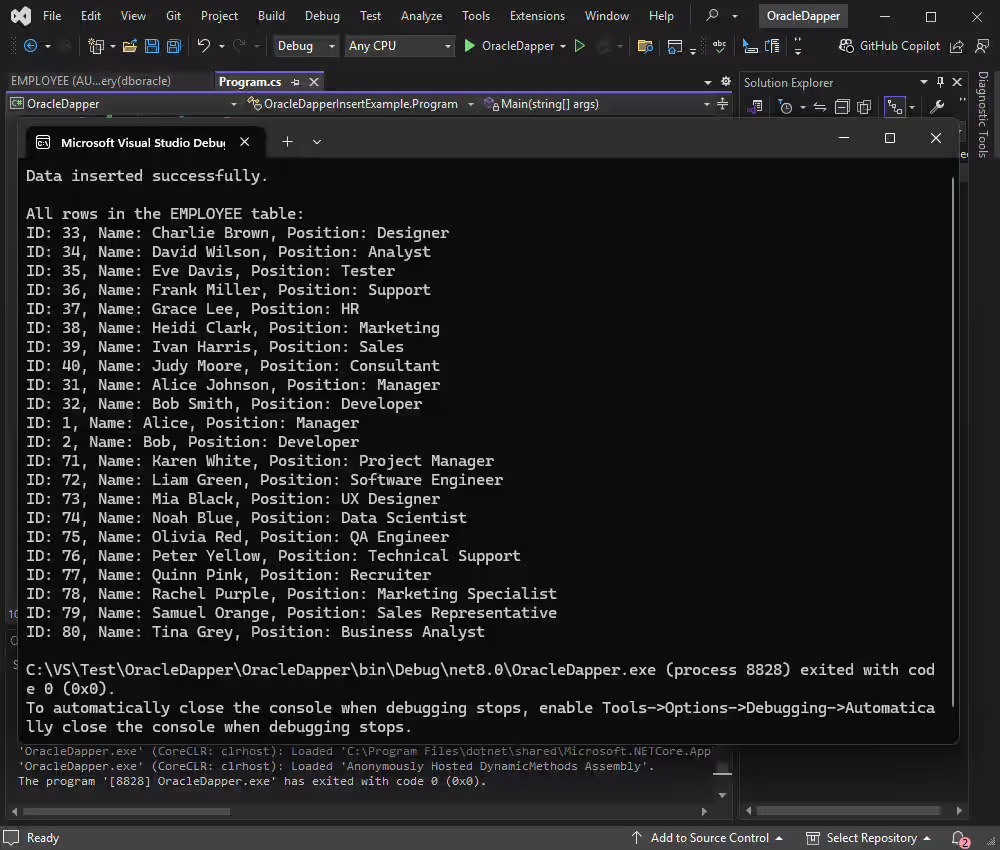
Console.WriteLine("Data inserted successfully.");
// Define the SQL select statement to retrieve all rows string selectSql = "SELECT * FROM EMPLOYEE";
// Execute the select query and map the results to a list of dynamic objects var allEmployees = connection.Query(selectSql).ToList();
// Display the retrieved data
Console.WriteLine("\nAll rows in the EMPLOYEE table:");
foreach(var employee in allEmployees)
{
Console.WriteLine($"ID: {employee.ID}, Name: {employee.NAME}, Position: {employee.POSITION}");
}
}
}
catch(Exception ex)
{
Console.WriteLine($"An error occurred: {ex.Message}");
}
}
}
}
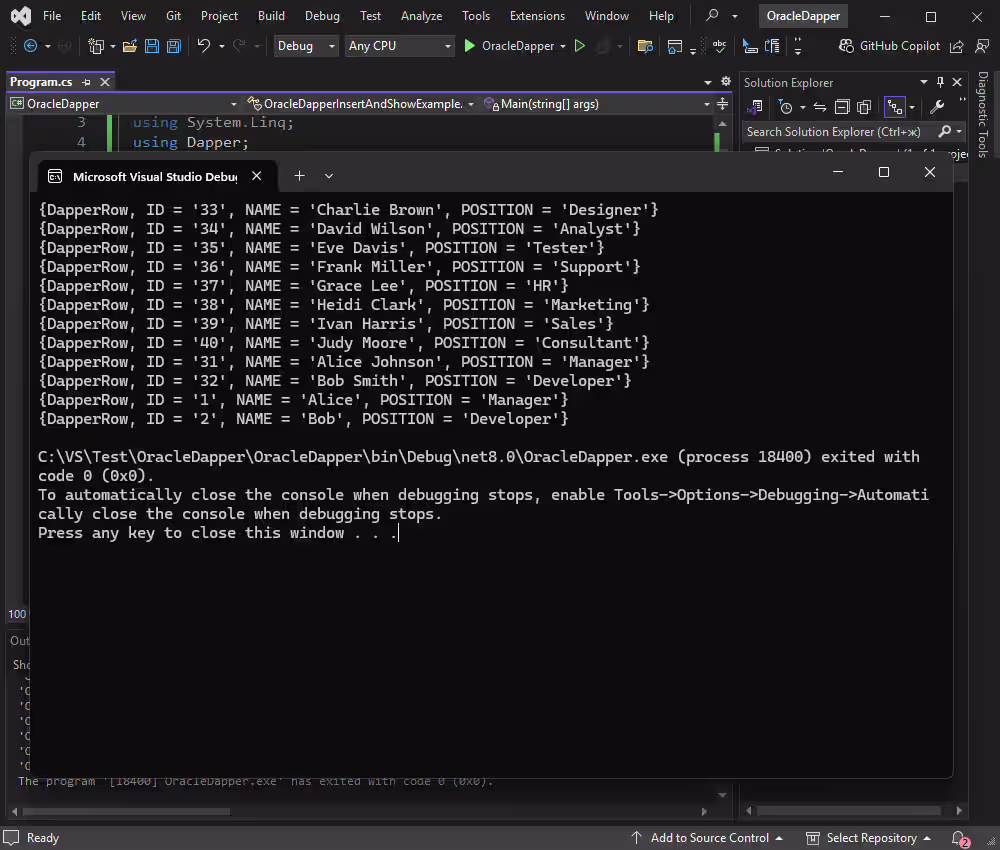
After running the program, you should see the following output in the console:
Delete Oracle data using Dapper
To delete rows from the EMPLOYEE table where the ID is between 71 and 80, you can use the following example with Dapper:
1. In the ActorController class, add the following method:
using Dapper;
using Devart.Data.Oracle;
namespaceDapperOracleExample
{
classProgram
{
staticasync Task Main(string[] args)
{
try
{
using (var connection = new OracleConnection(DatabaseConnection.ConnectionString))
{
await connection.OpenAsync();
string deleteSql = "DELETE FROM employees WHERE employee_id = :Id";
connection.Execute(deleteSql, new { Id = 63 });
Console.WriteLine("Employee deleted successfully.\n");
Console.WriteLine("Fetching all employees:\n");
var query = "SELECT employee_id AS Employee_Id, first_name AS First_Name, last_name AS Last_Name, email AS Email, hire_date AS Hire_Date, salary AS Salary FROM employees";
var employees = await connection.QueryAsync<Employees>(query);
foreach (var employee in employees)
{
Console.WriteLine($"ID: {employee.Employee_Id}, Name: {employee.First_Name} {employee.Last_Name}, Email: {employee.Email}, Hire Date: {employee.Hire_Date}, Salary: {employee.Salary}");
}
}
}
catch (Exception ex)
{
Console.WriteLine($"An error occurred: {ex.Message}");
}
}
}
}
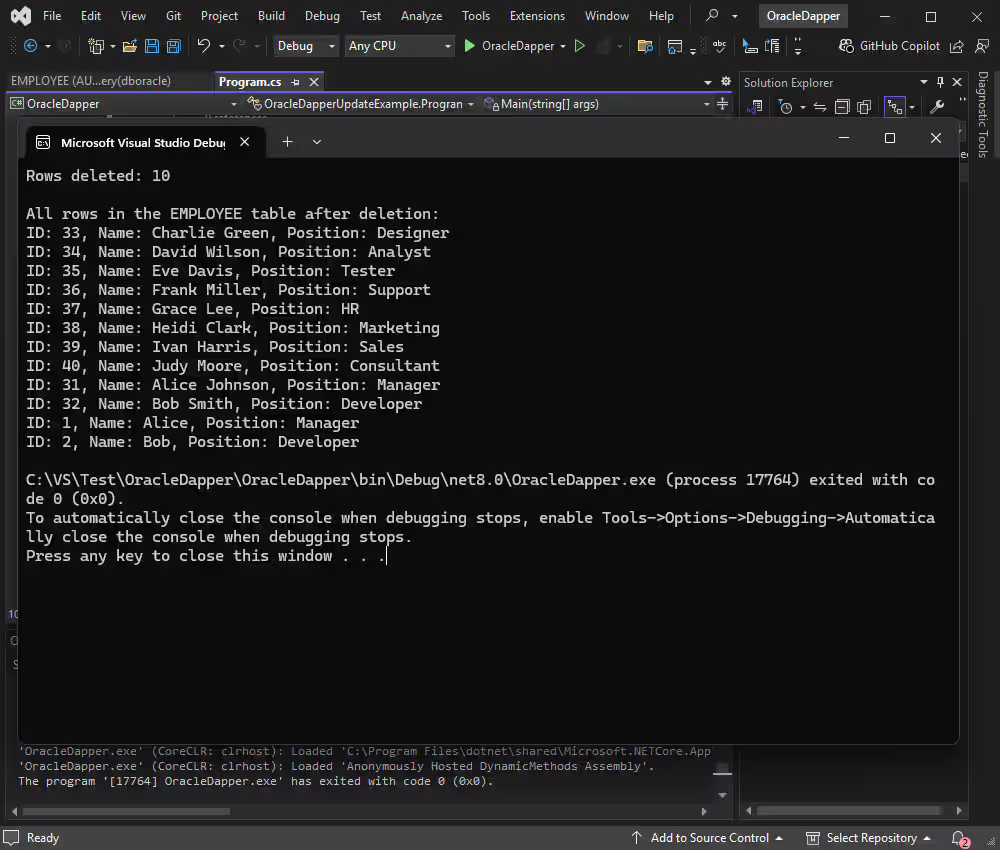
The retrieved data is then displayed in the console, showing the id, name, and position of each remaining employee.
Video tutorial: Connect Oracle using Dapper ORM
Conclusion
In this tutorial, we explored how integrating Dapper with dotConnect for Oracle streamlines data operations in .NET applications. The powerful features of dotConnect, combined with Dapper’s lightweight efficiency, provide a fast and flexible approach to managing database interactions. With these tools, you can confidently build scalable, maintainable, and high-performance .NET solutions that connect effortlessly to your database.
FAQ
How do you install and activate dotConnect for Oracle in a .NET project?
Install dotConnect for Oracle via the EXE installer or by adding the Devart.Data.Oracle NuGet package to your project, then obtain your personal activation key from your Devart Customer Portal and include it in the connection string via the License Key parameter for a working connection.
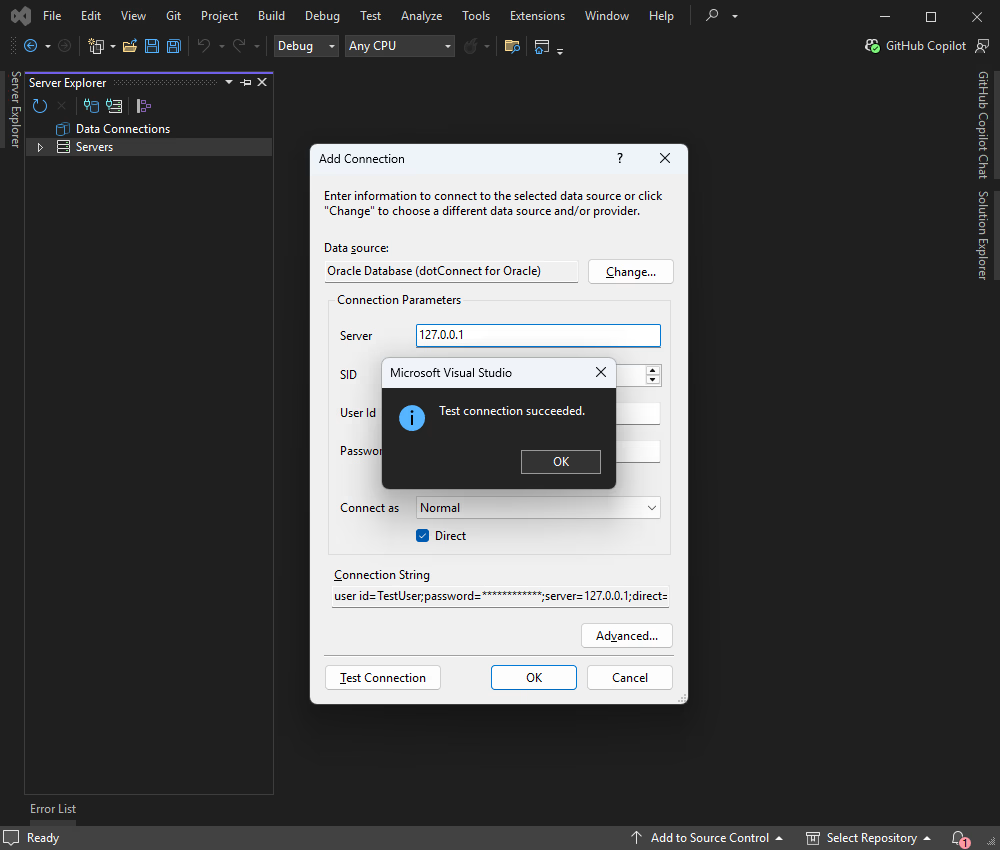
How do you create a connection to Oracle using dotConnect in C#?
Define a connection string that includes host, user ID, password, database, and the License Key value, then create an OracleConnection instance with this string and call Open() for it inside a try-catch block to test and handle connection errors.
How do you enable encryption for secure Oracle connections with dotConnect?
Use Oracle Native Network Encryption by configuring encryption in the sqlnet.ora file on both client and server sides. No special parameters are required in the connection string.
Can you connect to Oracle using Entity Framework Core and dotConnect?
Yes, you can either use Entity Developer to visually create an EF Core model from the database or run Scaffold-DbContext with a dotConnect connection string (including License Key) to generate the DbContext and entity classes.
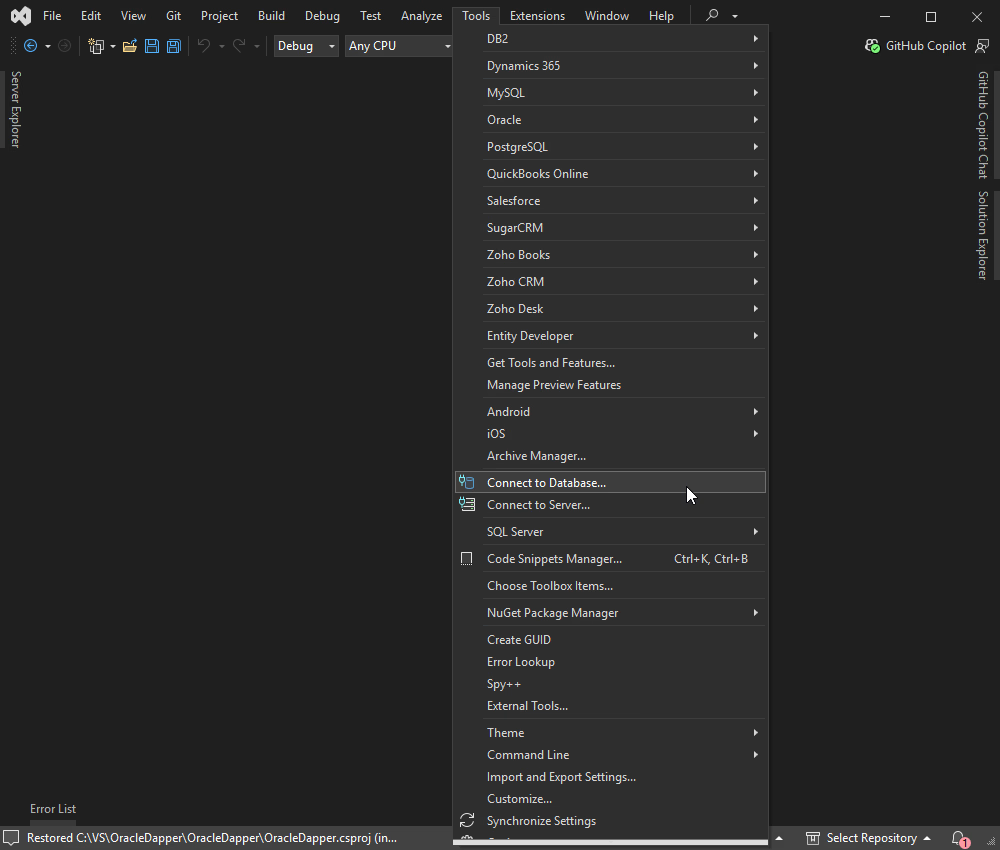
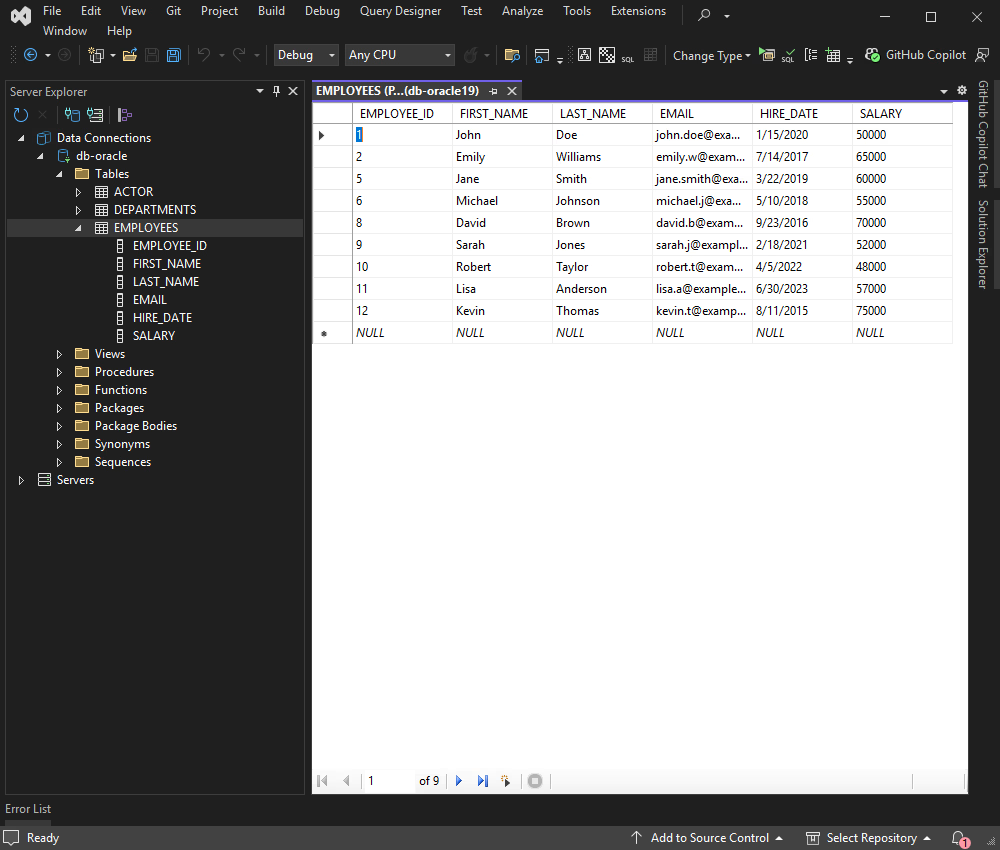
Is it possible to connect to Oracle using Visual Studio Server Explorer with dotConnect?
Yes, it is possible. All you need to do is navigate to Visual Studio Server Explorer, add a new Data Connection, choose dotConnect for Oracle as the data provider, enter your credentials, test the connection, and then browse Oracle data directly in Visual Studio.
I'm a technical content writer who loves turning complex topics — think SQL, connectors, and backend chaos–into content that actually makes sense (and maybe even makes you smile). I write for devs, data folks, and curious minds who want less fluff and more clarity. When I'm not wrangling words, you'll find me dancing salsa, or hopping between cities.