In this article, we'll demonstrate how to connect to Salesforce using Dapper and C# with the help of dotConnect for Salesforce.
Whether you're building custom business logic, creating reports, or automating workflows, this integration allows you to retrieve, manipulate, and interact with Salesforce data in an efficient and straightforward manner.
By using dotConnect, you can harness advanced features designed specifically for connecting C# applications to Salesforce, while Dapper ensures that you can perform high-speed and lightweight data queries.
Let's dive into setting up the connection and using Dapper for seamless Salesforce integration to help you get the most out of both worlds:
Salesforce's robust CRM capabilities and C#'s powerful programming features.
Why dotConnect for Salesforce?
Easy integration with Salesforce
Ensures effortless connection to Salesforce, enabling users to access data easily and intuitively.
No Salesforce API and SOQL learning
Supports familiar SQL statements, requiring no special knowledge of a complex API or SOQL.
User-friendly ADO.NET classes
Uses well-known ADO.NET classes, enabling an easy start and creating a convenient working environment.
Advanced ORM support
Fully supports EF Core, Dapper, NHibernate, LinqConnect, and other technologies for efficient data management.
Full ADO.NET compliance
Conforms to the latest ADO.NET standards and innovations for seamless integration with .NET applications.
Priority support & frequent updates
Includes priority support, detailed documentation, and regular updates for continuous improvement.
Download and activate dotConnect for Salesforce
You can start using dotConnect for Salesforce immediately with a 30-day free trial. Choose one of the following installation options:
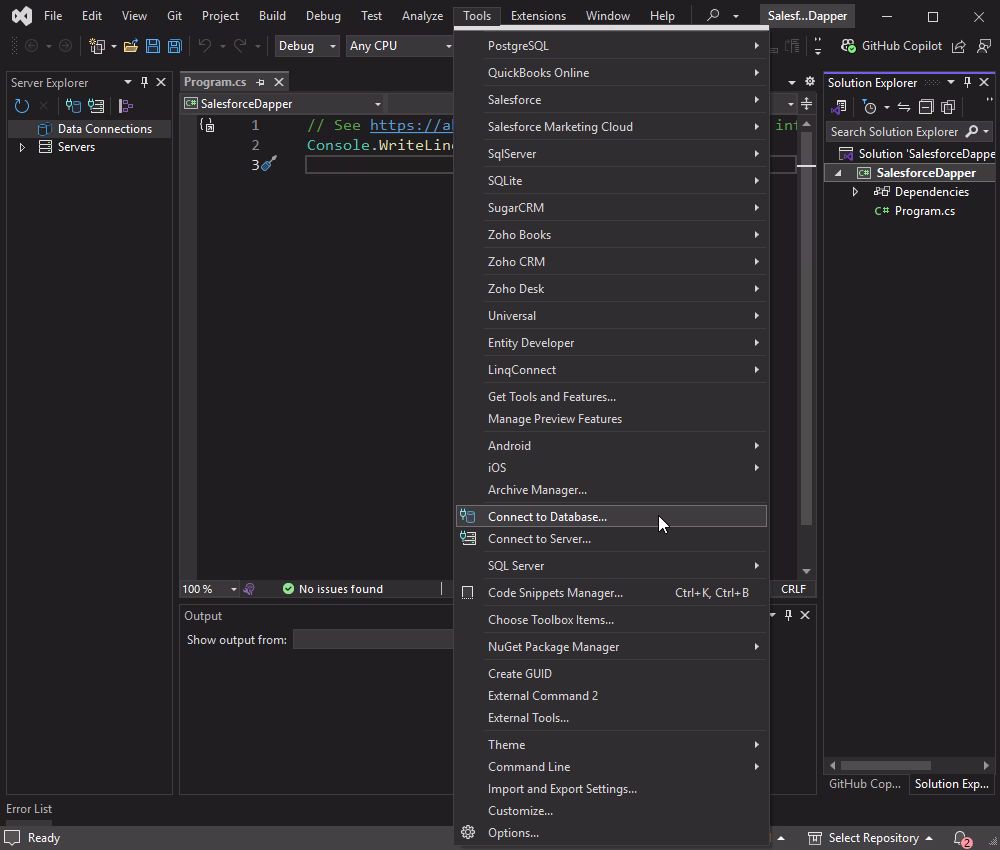
To connect to Salesforce using the built-in Data Explorer, navigate to Tools > Connect to Database.
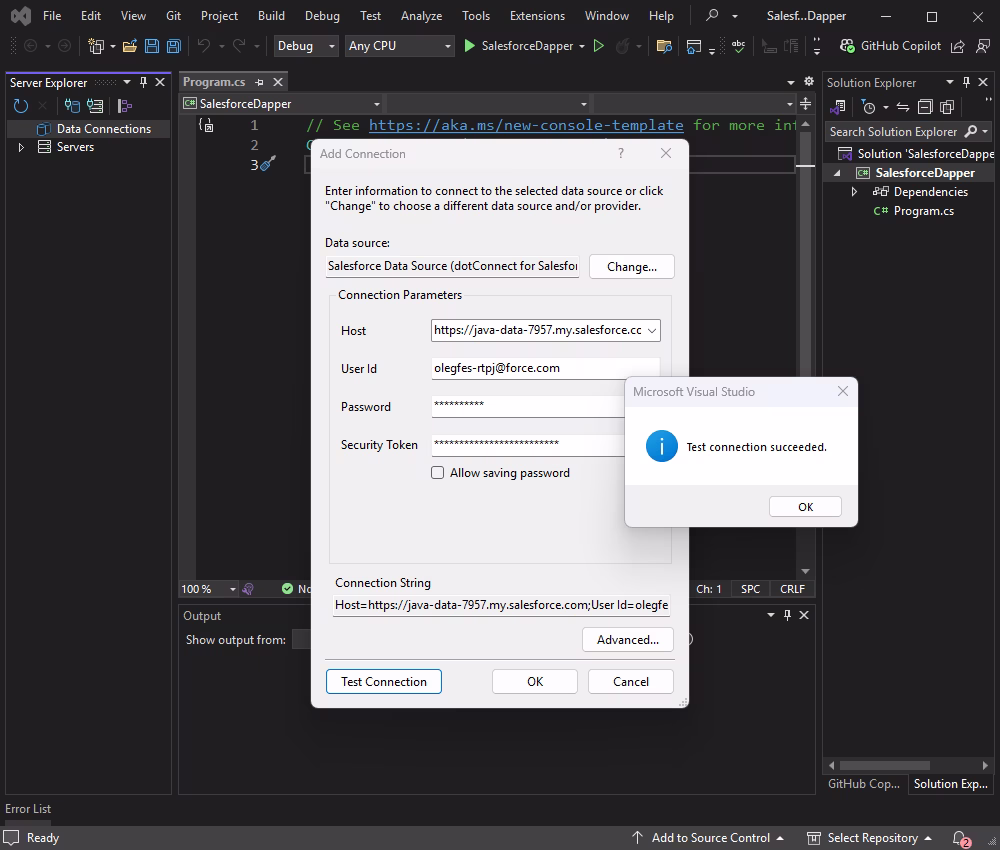
Select Salesforce as the data source, enter your server credentials, and click Connect.
To verify the connection, click Test Connection.
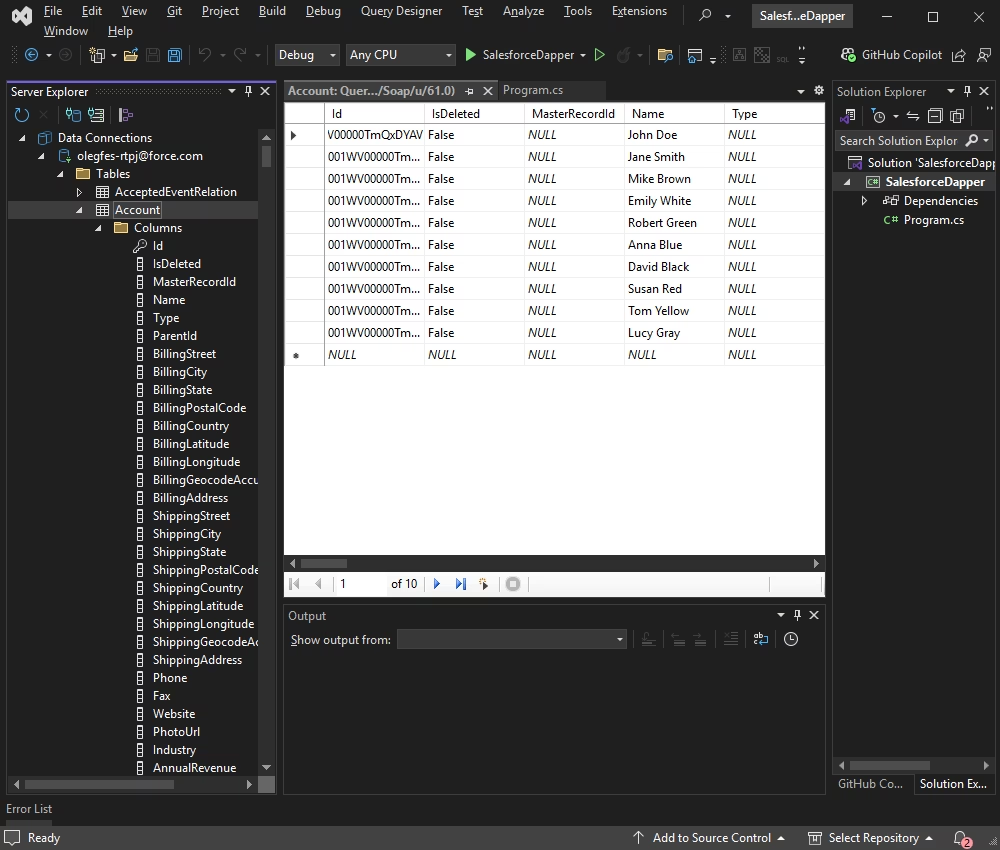
Once connected, you can browse tables, execute queries, and manage data directly within the Data Explorer.
Connect to Salesforce and retrieve data
The application will connect to the Salesforce database, execute the query, and display the data from the Account table in the console. The connection uses the
InteractiveOAuth, which requires no security token. In our example, we demonstrate this connection method, which is one of the most straightforward.
using Dapper;
using Devart.Data.Salesforce;
using System.Data;
classProgram
{
staticvoidMain()
{
string connectionString = DatabaseConnection.GetConnectionString();
using (IDbConnection db = new SalesforceConnection(connectionString))
{
try
{
db.Open();
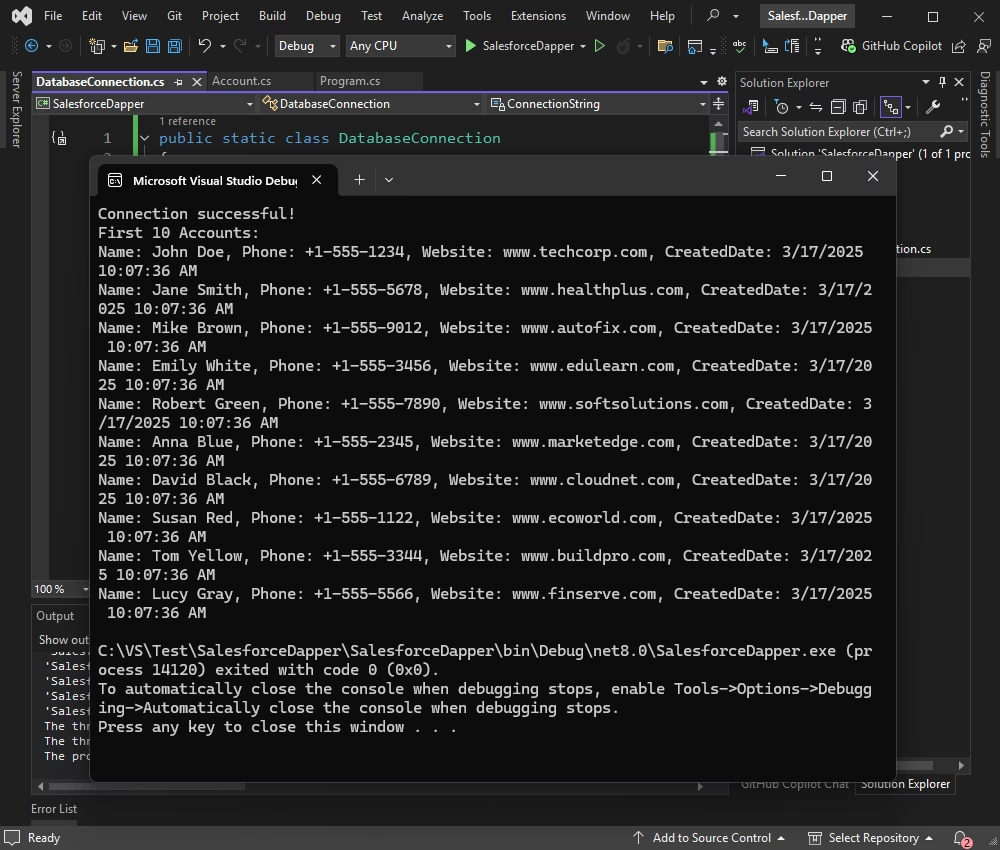
Console.WriteLine("Connection successful!");
string query = "SELECT Name, Phone, Website, CreatedDate FROM Account LIMIT 10";
var accounts = db.Query<Account>(query).ToList();
Console.WriteLine("First 10 Accounts:");
foreach (var account in accounts)
{
Console.WriteLine($"Name: {account.Name}, Phone: {account.Phone}, Website: {account.Website}, CreatedDate: {account.CreatedDate}");
}
}
catch (Exception ex)
{
Console.WriteLine($"Connection failed: {ex.Message}");
}
}
}
}
Connection strings
Property
Meaning
Authentication Type
Authentication method for connecting to Salesforce, such as UserNamePassword, AccessRefreshToken, AccessRefreshTokenInteractive, SessionId, etc.
Host
The Salesforce.com or Database.com login URL, such as login.salesforce.com, login.database.com, test.salesforce.com, etc.
User ID or User
Salesforce login account.
Password
Password for the account.
Refresh Token
Salesforce OAuth 2.0 refresh token used for the OAuth Refresh Token authentication.
Security Token
Automatically generated key used to log in to Salesforce from untrusted networks.
License Key
Your license key.
Update the connection string
Replace the placeholders in the connection string with your relevant Salesforce database credentials, or create a new JSON file named appsettings.json in your project
and include the connection strings.
Note
If you're using a purchased dotConnect for Salesforce license, include the license key in the connection strings.
Run the application
Build and run the application by pressing F5 or selecting Start from the menu.
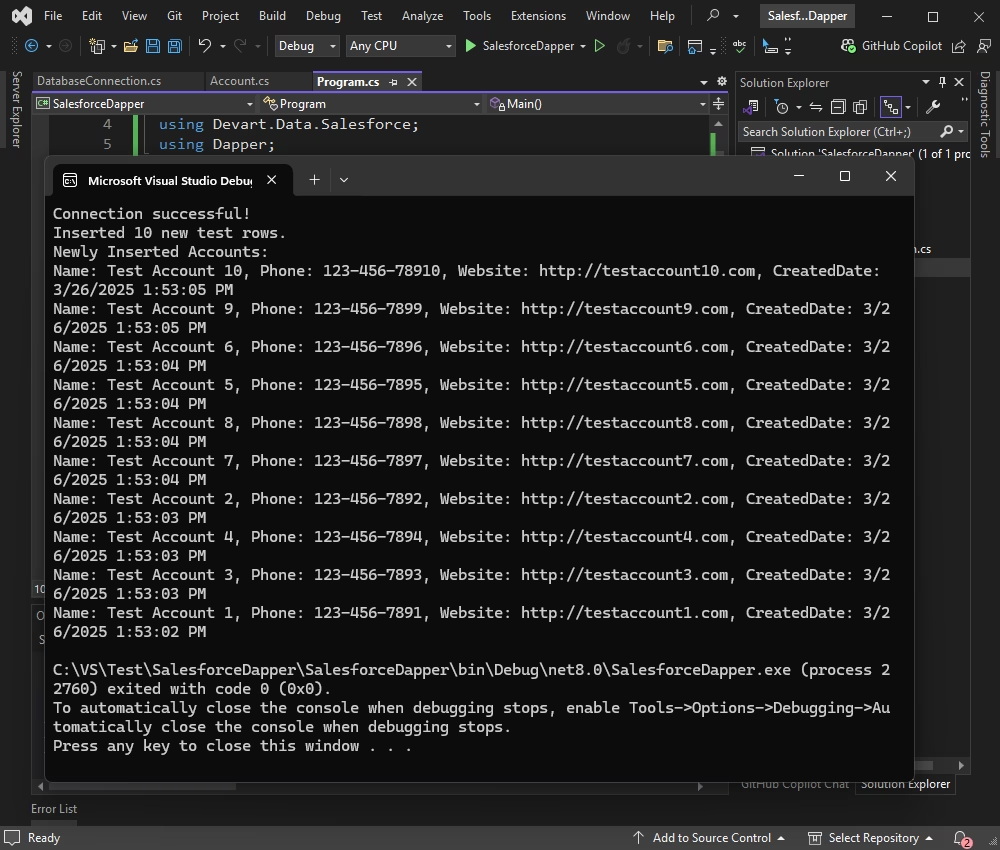
Batch insert new records using Dapper
This code generates 10 new account objects with test data and inserts them into the Salesforce Account table using a parameterized query:
using Dapper;
using Devart.Data.Salesforce;
using System.Data;
classProgram
{
staticvoidMain()
{
string connectionString = DatabaseConnection.GetConnectionString();
using (IDbConnection db = new SalesforceConnection(connectionString))
{
try
{
db.Open();
Console.WriteLine("Connection successful!");
// Insert 10 new test rowsvar newAccounts = Enumerable.Range(1, 10).Select(i => new Account
{
Name = $"Test Account {i}",
Phone = $"123-456-789{i}",
Website = $"http://testaccount{i}.com"
}).ToList();
string insertQuery = "INSERT INTO Account (Name, Phone, Website) VALUES (@Name, @Phone, @Website)";
db.Execute(insertQuery, newAccounts);
Console.WriteLine("Inserted 10 new test rows.");
// Retrieve and display the newly inserted rowsstring selectQuery = "SELECT Name, Phone, Website, CreatedDate FROM Account WHERE Name LIKE 'Test Account%' ORDER BY CreatedDate DESC LIMIT 10";
var insertedAccounts = db.Query<Account>(selectQuery).ToList();
Console.WriteLine("Newly Inserted Accounts:");
foreach (var account in insertedAccounts)
{
Console.WriteLine($"Name: {account.Name}, Phone: {account.Phone}, Website: {account.Website}, CreatedDate: {account.CreatedDate}");
}
}
catch (Exception ex)
{
Console.WriteLine($"Error: {ex.Message}");
}
}
}
}
The result is as follows:
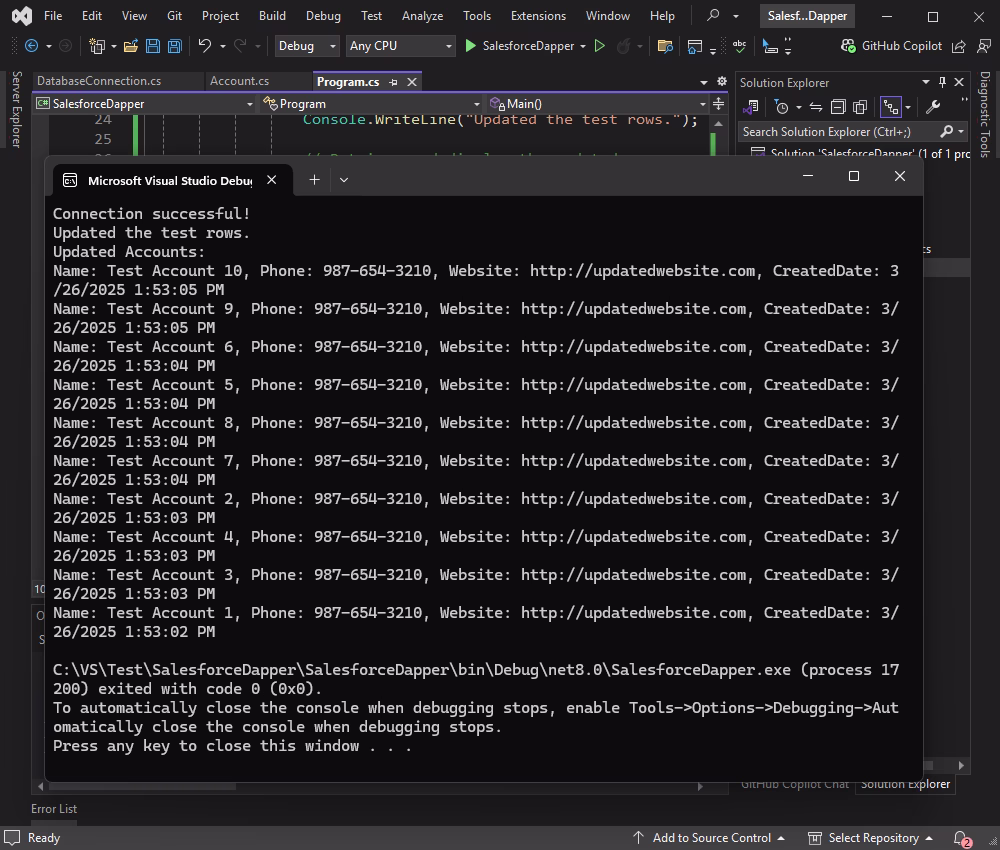
Update Salesforce data using Dapper
The UPDATE statement modifies the Phone and Website fields for all accounts with names that match the pattern 'Test Account%'.
This ensures that only the previously inserted test rows are updated.
classProgram {
staticvoidMain() {
string connectionString = DatabaseConnection.GetConnectionString();
using(IDbConnection db = new SalesforceConnection(connectionString)) {
try {
db.Open();
Console.WriteLine("Connection successful!");
// Update the previously inserted rowsstring updateQuery = "UPDATE Account SET Phone = '987-654-3210', Website = 'http://updatedwebsite.com' WHERE Name LIKE 'Test Account%'";
db.Execute(updateQuery);
Console.WriteLine("Updated the test rows.");
// Retrieve and display the updated rowsstring selectQuery = "SELECT Name, Phone, Website, CreatedDate FROM Account WHERE Name LIKE 'Test Account%' ORDER BY CreatedDate DESC LIMIT 10";
var updatedAccounts = db.Query<Account> (selectQuery).ToList();
Console.WriteLine("Updated Accounts:");
foreach(var account in updatedAccounts) {
Console.WriteLine($"Name: {account.Name}, Phone: {account.Phone}, Website: {account.Website}, CreatedDate: {account.CreatedDate}");
}
} catch (Exception ex) {
Console.WriteLine($"Error: {ex.Message}");
}
}
}
}
Let's test the application.
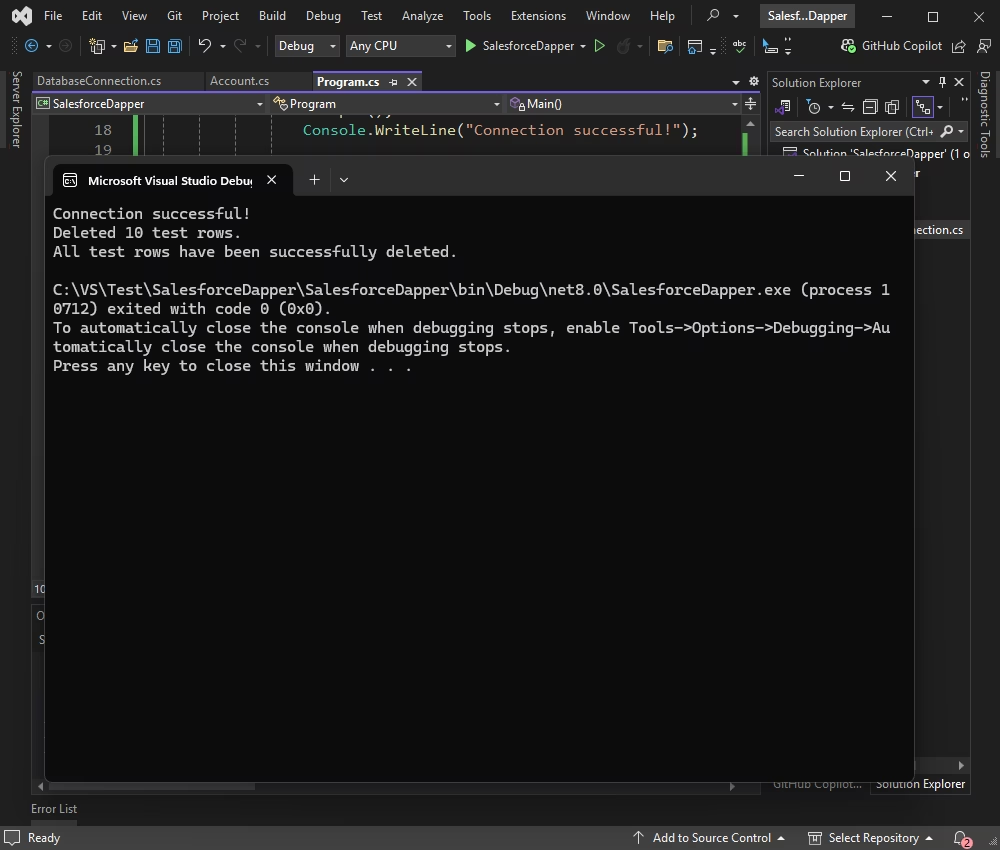
Delete Salesforce data using Dapper
The DELETE statement removes all accounts with names that match the pattern 'Test Account%'. This ensures that only the previously inserted test rows are deleted.
using Dapper;
using Devart.Data.Salesforce;
using System.Data;
classProgram
{
staticvoidMain()
{
string connectionString = DatabaseConnection.GetConnectionString();
using (IDbConnection db = new SalesforceConnection(connectionString))
{
try
{
db.Open();
Console.WriteLine("Connection successful!");
// Delete the previously inserted rowsstring deleteQuery = "DELETE FROM Account WHERE Name LIKE 'Test Account%'";
int rowsAffected = db.Execute(deleteQuery);
Console.WriteLine($"Deleted {rowsAffected} test rows.");
// Verify deletion by attempting to retrieve the rowsstring selectQuery = "SELECT Name, Phone, Website, CreatedDate FROM Account WHERE Name LIKE 'Test Account%'";
var remainingAccounts = db.Query<Account>(selectQuery).ToList();
if (remainingAccounts.Any())
{
Console.WriteLine("Some test rows still exist:");
foreach (var account in remainingAccounts)
{
Console.WriteLine($"Name: {account.Name}, Phone: {account.Phone}, Website: {account.Website}, CreatedDate: {account.CreatedDate}");
}
}
else
{
Console.WriteLine("All test rows have been successfully deleted.");
}
}
catch (Exception ex)
{
Console.WriteLine($"Error: {ex.Message}");
}
}
}
}
You can see that all test rows have been deleted.
Conclusion
Dapper's lightweight and fast data access, combined with the power of dotConnect for Salesforce, ensures that you can work with Salesforce data
efficiently without sacrificing performance. Whether building custom solutions, integrating Salesforce data into your business logic, or creating reporting tools,
this method provides a scalable and reliable approach.
As you continue to develop and extend your applications, the ability to connect to Salesforce using C# and Dapper will empower you to unlock the
full potential of Salesforce's rich CRM features and maintain smooth and effective data flow between systems. So, dive in and start building your Salesforce-integrated solutions with ease,
speed, and reliability!
FAQ
How do you install and activate dotConnect for Salesforce in a .NET project?
Install dotConnect for Salesforce via the EXE installer or by adding the Devart.Data.Salesforce NuGet package to your project. Then obtain your activation key from your Devart Customer Portal and include it in the connection string via the License Key parameter.
How do you generate a secure token using Interactive OAuth in dotConnect for Salesforce?
To use Interactive OAuth, set the connection string parameter:
Authentication Type=AccessRefreshTokenInteractive
When you call Open() on the SalesforceConnection, a browser window automatically opens for Salesforce login and consent. After successful authentication, dotConnect retrieves and manages the access and refresh tokens automatically, so no manual token handling is required.
Does dotConnect for Salesforce support SOQL?
Yes, dotConnect fully supports SOQL (Salesforce Object Query Language). You can execute SOQL queries using SalesforceCommand just like standard SQL commands, allowing you to retrieve Salesforce objects such as Accounts, Contacts, and Opportunities.
Can you connect to Salesforce using Entity Framework Core and dotConnect?
Yes, you can use Entity Developer to visually create an EF Core model based on Salesforce objects or run Scaffold-DbContext with the Devart.Data.Salesforce.EFCore package and a dotConnect connection string (including the License Key) to generate the DbContext and entity classes.
Is it possible to connect to Salesforce using Visual Studio Server Explorer with dotConnect?
Yes, in Visual Studio Server Explorer, add a new Data Connection, select dotConnect for Salesforce as the provider, configure OAuth or credentials, test the connection, and browse Salesforce objects directly from the IDE.
I'm a technical content writer who loves turning complex topics — think SQL, connectors, and backend chaos–into content that actually makes sense (and maybe even makes you smile). I write for devs, data folks, and curious minds who want less fluff and more clarity. When I'm not wrangling words, you'll find me dancing salsa, or hopping between cities.