

dbForge Studio for PostgreSQL
AI-powered IDE for database development, management, and data analysis across PostgreSQL and related cloud services
Data export and import are among the most frequent tasks when working with databases. They need to be simple, efficient, and, ideally, automated. Database administrators need powerful, reliable tools that let them export tables and entire databases with minimal effort.
PostgreSQL provides built-in tools for these tasks, such as pg_dump. Alternatively, you can use an advanced GUI database client like dbForge Studio for PostgreSQL, which offers robust data migration functionality and reduces the entire configuration process to just a few clicks.
This article explains how to export and import data in PostgreSQL using dbForge Studio.
dbForge Studio for PostgreSQL is an advanced, AI-powered IDE that supports the entire database lifecycle and covers all fundamental database tasks in PostgreSQL, Amazon Redshift, and related cloud platforms.
The data export and data import tools built into dbForge Studio enable data transfer between databases and external files in various formats, as well as directly between databases. Key capabilities include:
But before exploring dbForge Studio's export and import features, let's look at the native tools PostgreSQL provides.
dbForge Studio can simplify the process of restoring a PostgreSQL database from a dump significantly.
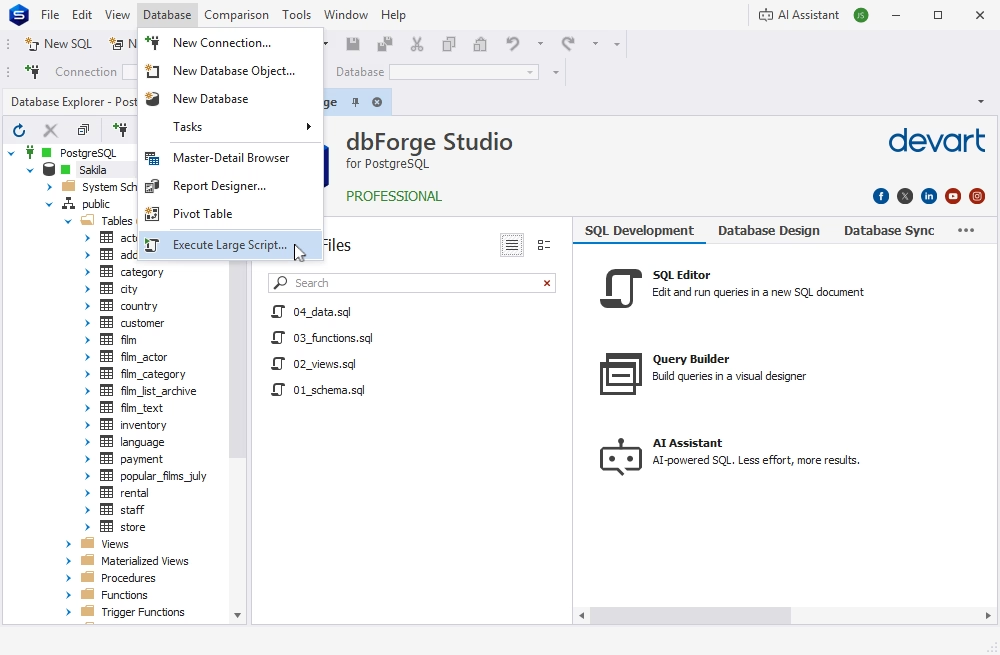
1. Click Database and select Execute Large Script. The Execute Script Wizard opens.
2. Choose the corresponding connection and database and browse to the SQL dump file. Select the SQL file encoding from the list and click Execute.
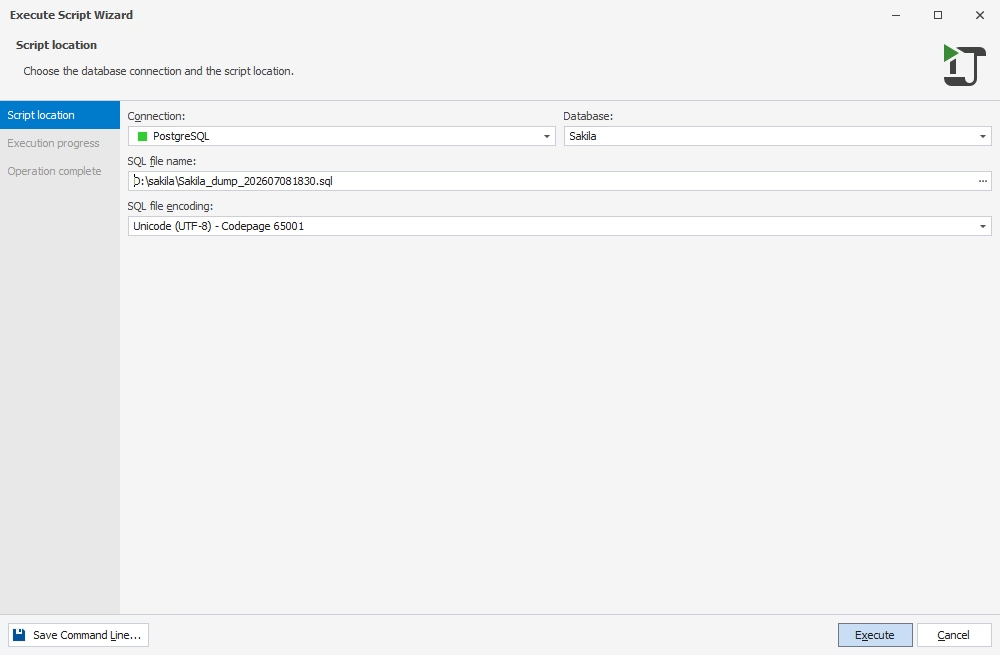
The previously saved schema and data will then be deployed.
For those who prefer not to write complex SQL scripts or manage dump-file parameters, a visual IDE offers a simple alternative. Its intuitive graphical interface lets you configure an export task in a minute, regardless of skill level. Follow the steps outlined below.
Select data for export
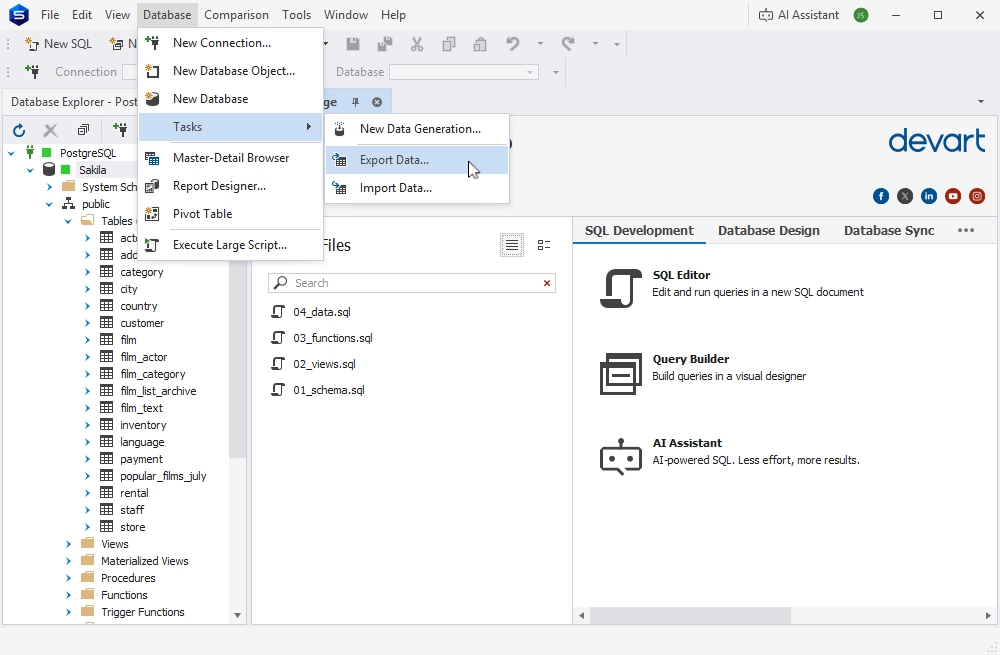
Open the Studio and go to Database > Tasks > Export Data to launch the export wizard.
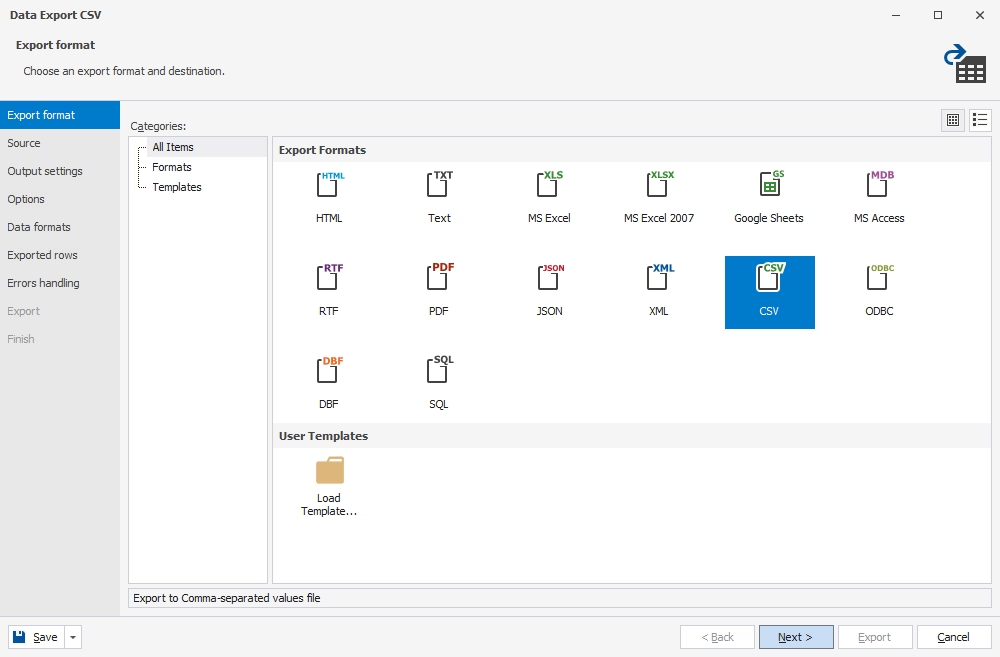
On the Export Format page, select one of the 14 available formats (this tutorial uses CSV). Click Next.
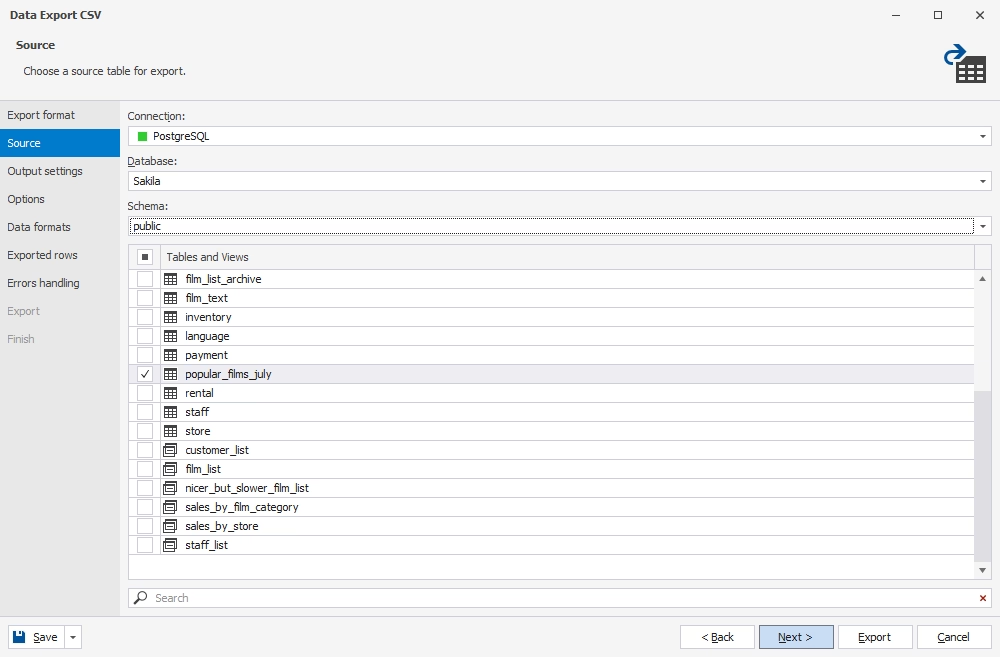
Specify the source database and table
On the Source page, choose the connection, database, schema, and table(s) to export data from. Click Next.
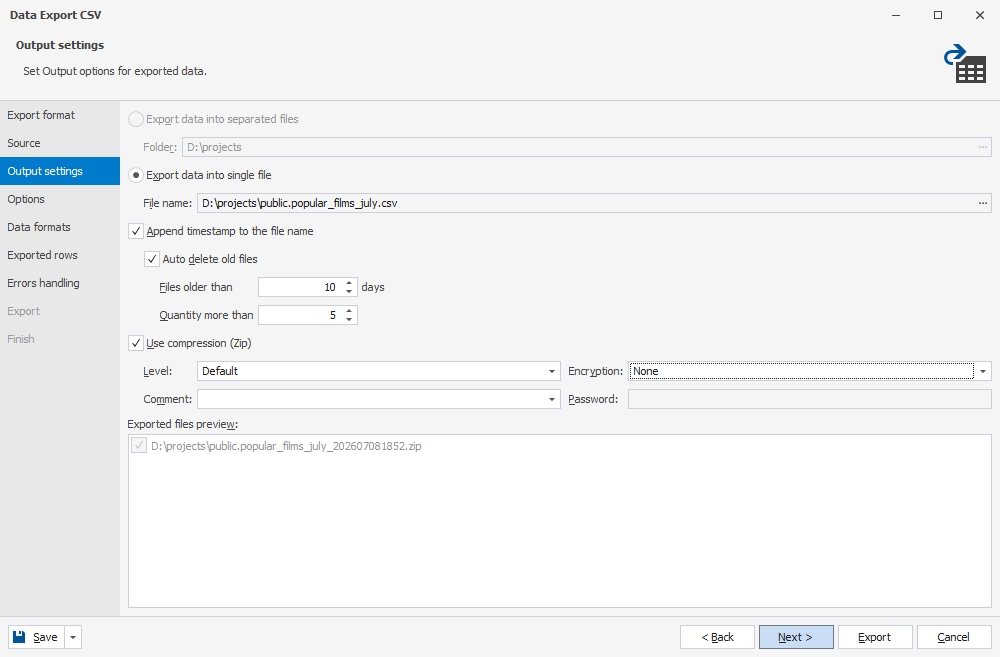
Configure the output settings
On the Output Settings page, specify the destination for the exported data. You can export to a single file or to separate files in case you are dealing with multiple tables at once. Click Next.
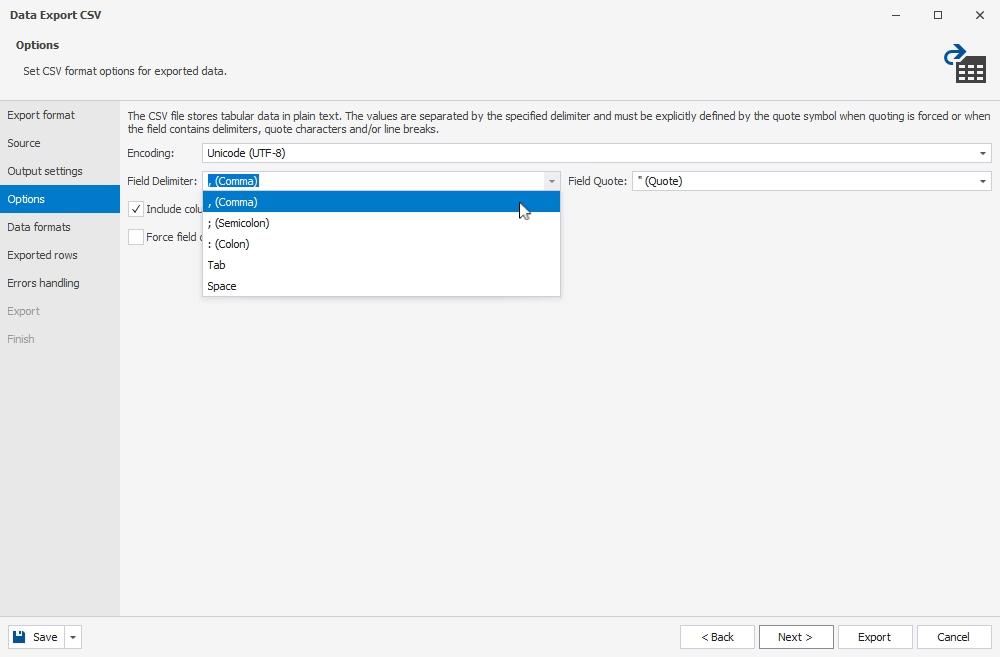
Set the CSV format options
On the Options page, choose the encoding and check the delimiter and quote character, if needed. Click Next.
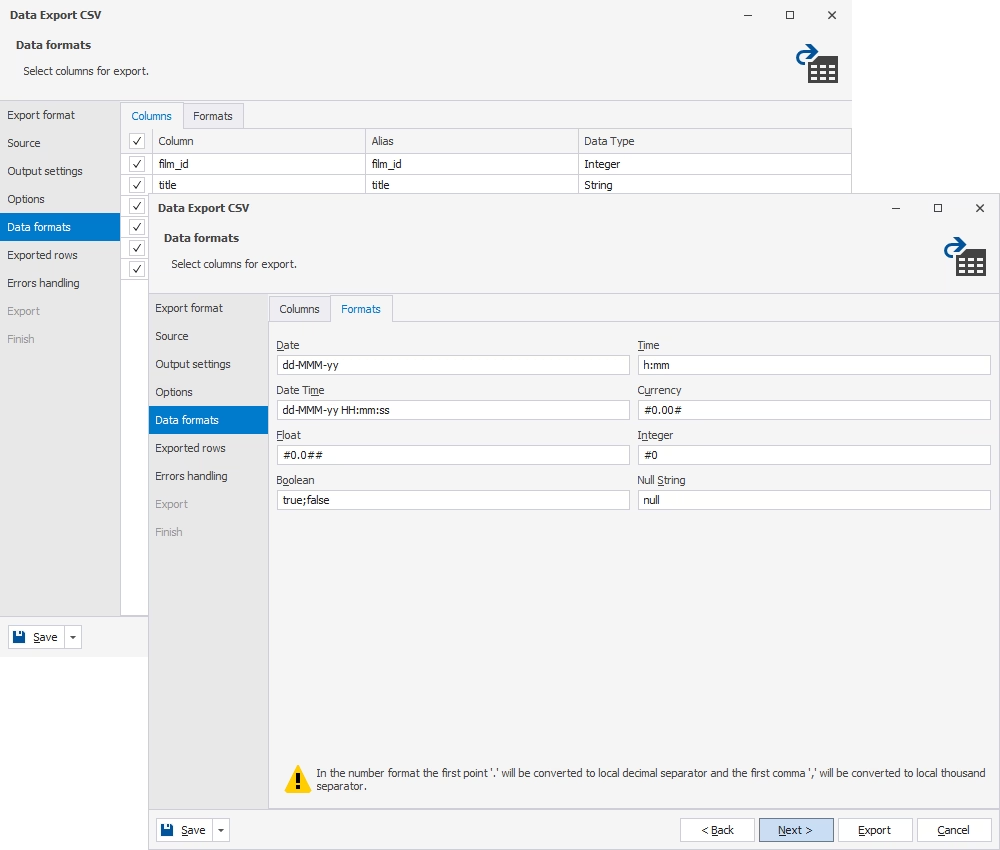
Check the data formats
On the Data Formats page, select the columns to export on the Columns tab, then check and configure the format parameters on the Formats tab. Click Next.
Specify the data range for export
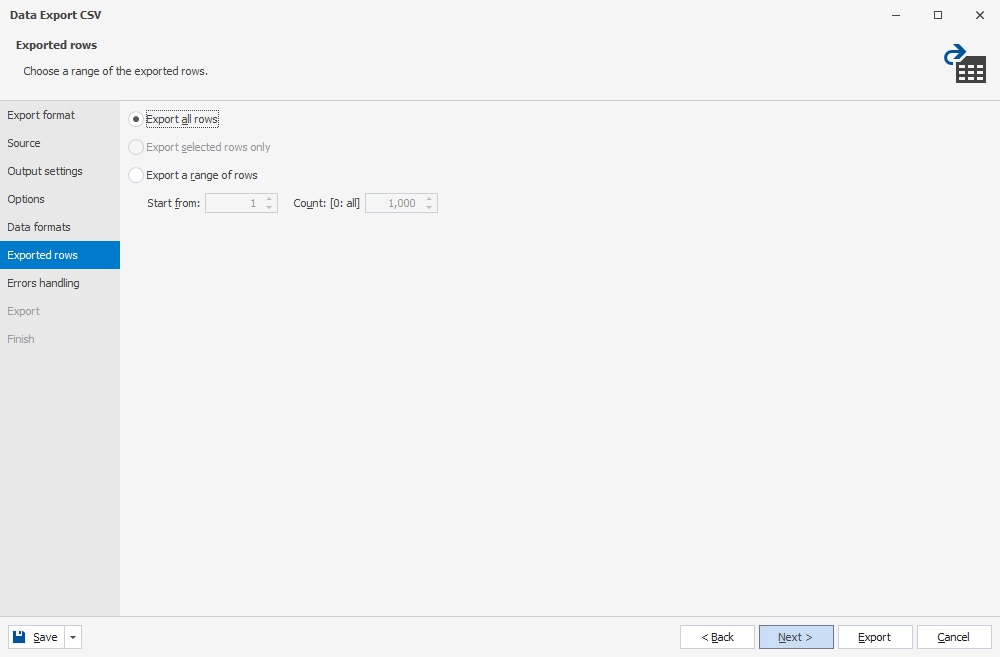
On the Exported Rows page, choose whether to export all rows or only a selection. Click Next.
Configure the error-handling behavior
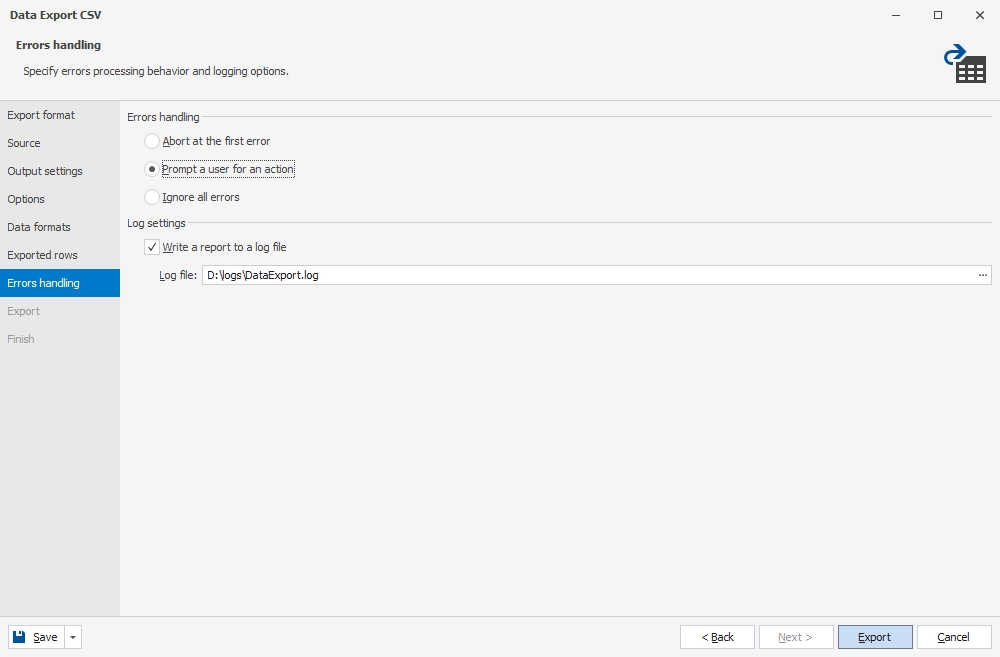
On the Errors Handling page, choose how the tool should respond to errors: abort the task, ignore errors and continue, or prompt for an action. You can also have dbForge Studio write a report to a log file. Click Export.
Review the results
If the task completes successfully, you can view the CSV file immediately, open the folder with all exported data files, or configure a new task.
Getting data into a PostgreSQL database is just as simple. dbForge Studio provides a data import wizard, letting you configure the task in a few clicks. Here's how:
Choose the source data file
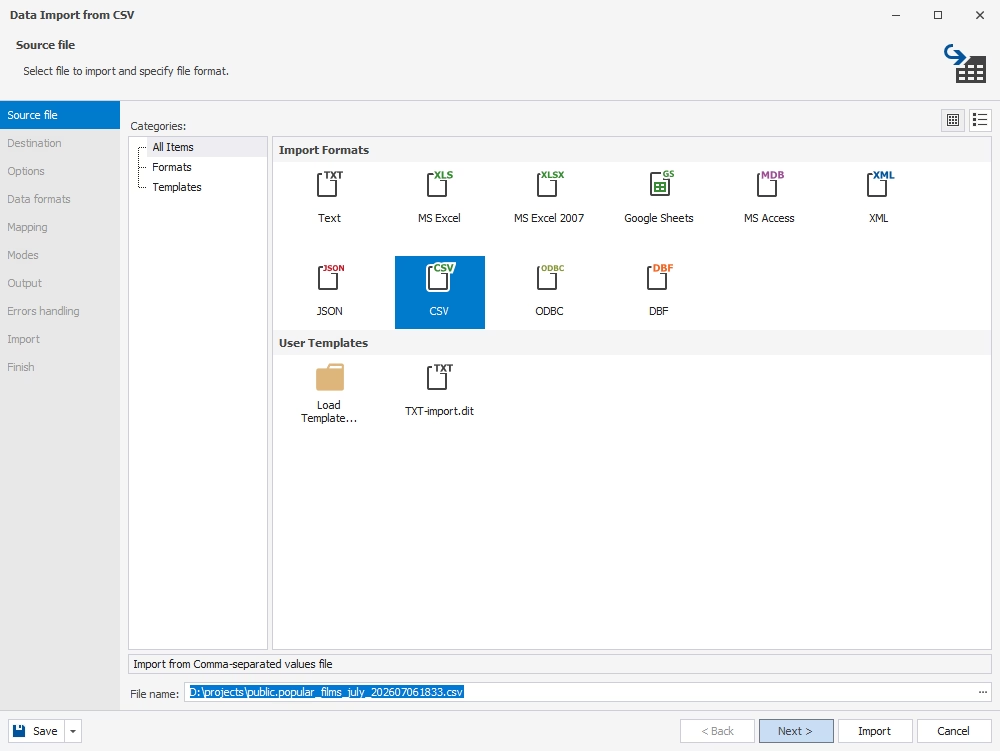
Open the Studio and go to Database > Tasks > Import Data to launch the import wizard. Select one of the 10 supported formats: TXT, XLS, XLSX, MDB (Microsoft Access), Google Sheets, XML, JSON, CSV, ODBC, or DBF (this tutorial uses CSV again). Browse to the file and click Next.
Specify the import destination
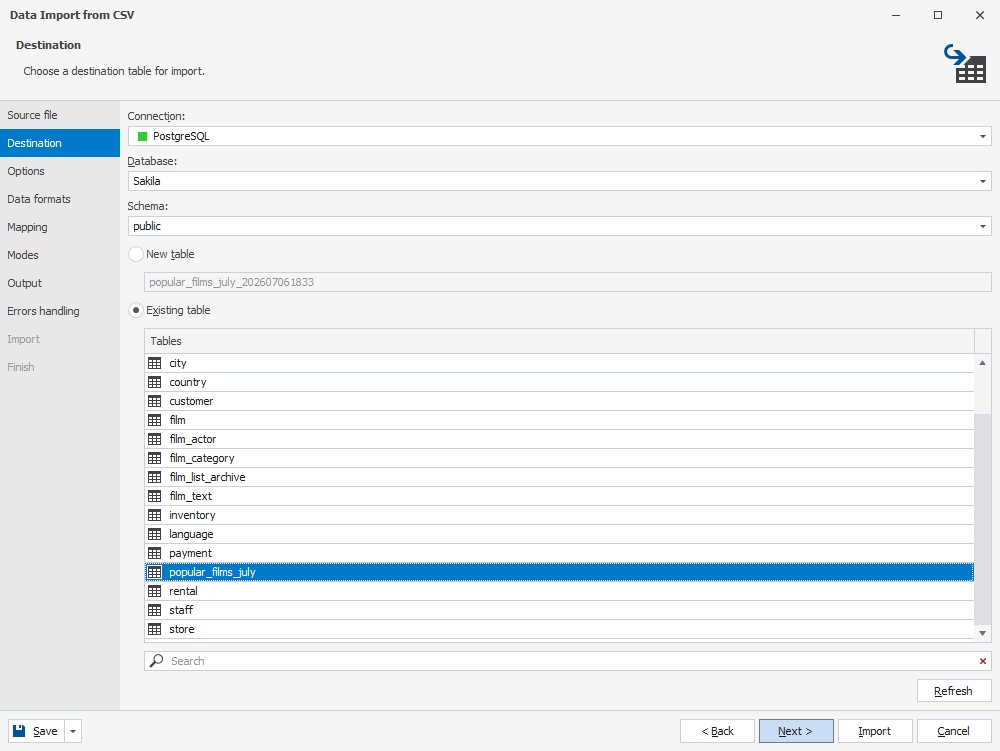
On the Destination page, choose the connection, database, schema, and target table. You can import data into a new table (dbForge Studio will create it automatically) or into an existing one, as in this tutorial. Click Next.
Check the import options
On the Options page, set the import options for the selected format and preview the imported data. Click Next.
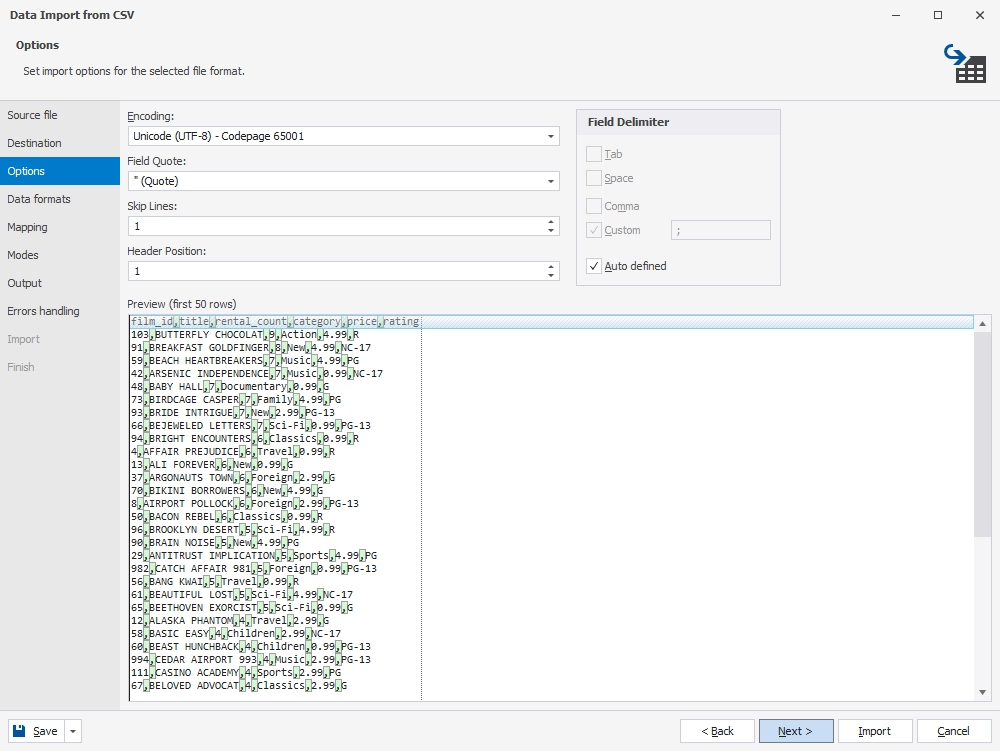
Adjust the data formats
On the Data Formats page, check and adjust the format and column parameters. Click Next.
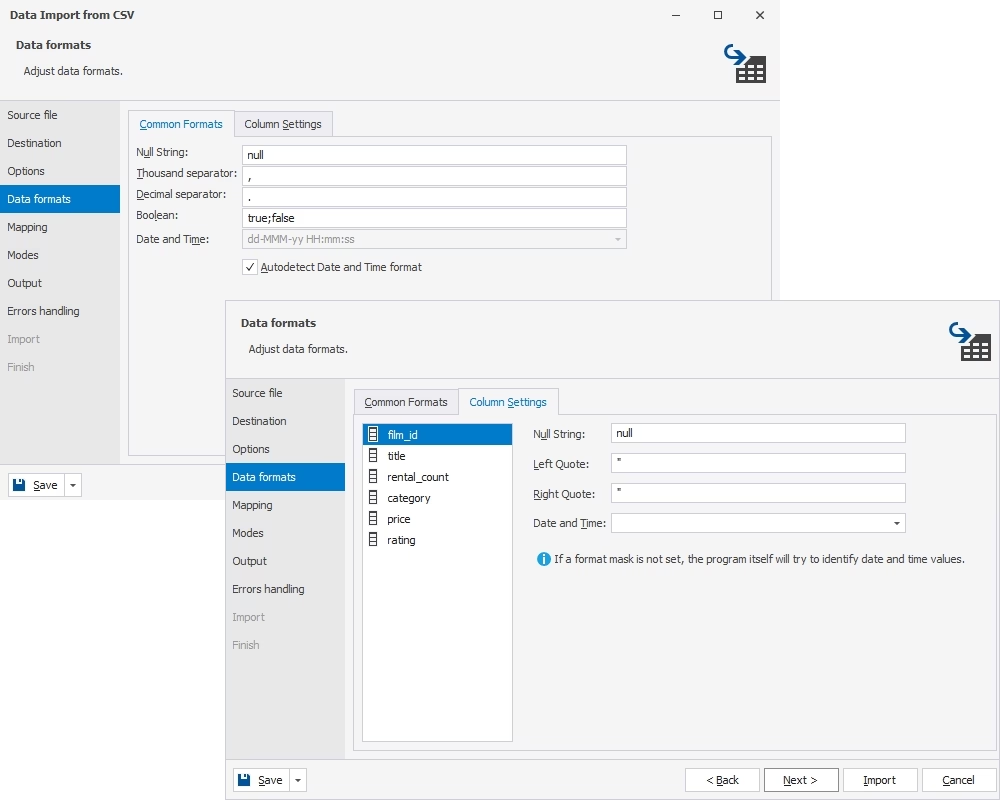
Map the source and target columns
On the Mapping page, map the imported columns. If you're importing data into a new table, the Studio maps all columns automatically; for an existing table, it automatically maps columns with matching names and lets you map the rest manually. Review the mapping and click Next.
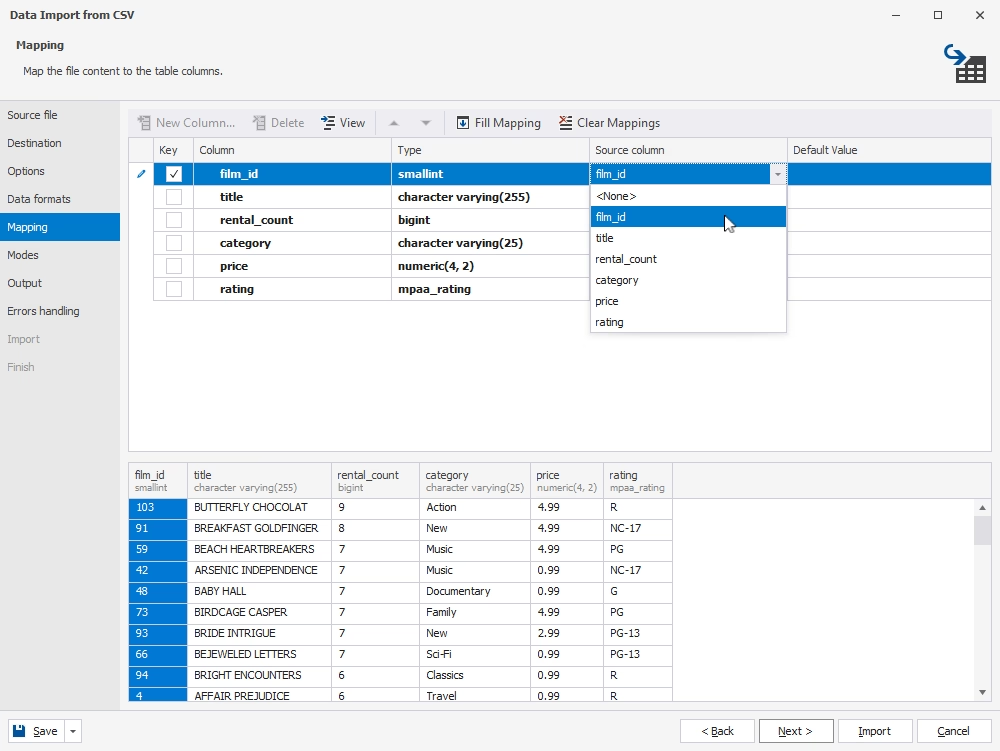
Choose the import mode
On the Modes page, select how to import the data: append new records, update existing data with new values, delete destination rows that match the source data, or repopulate the destination table. Click Next.
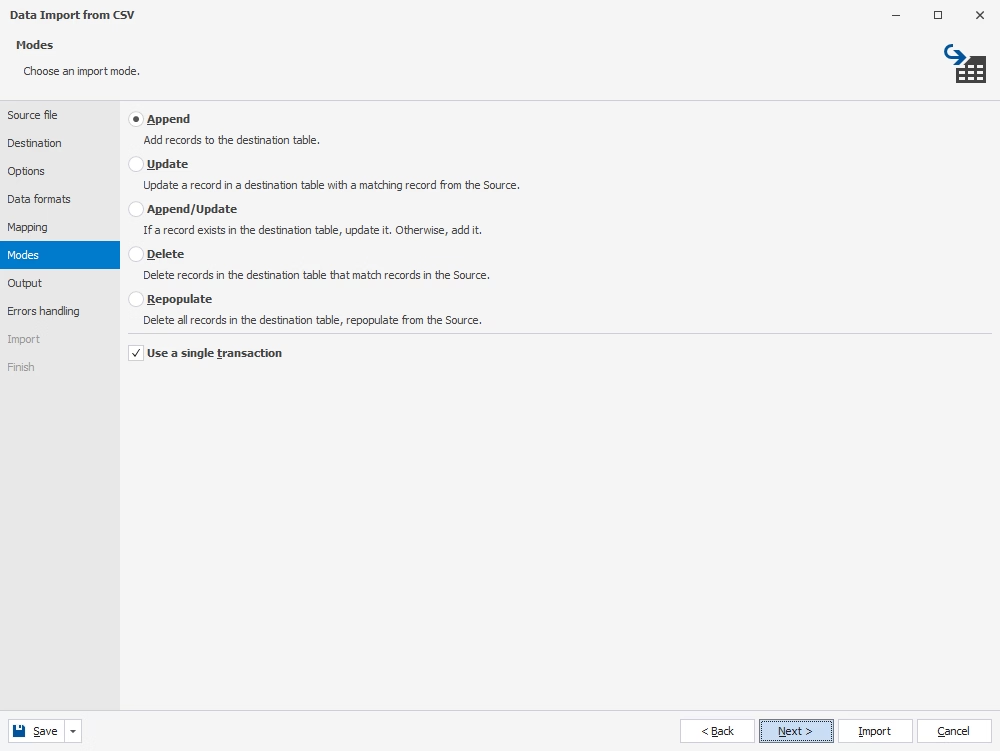
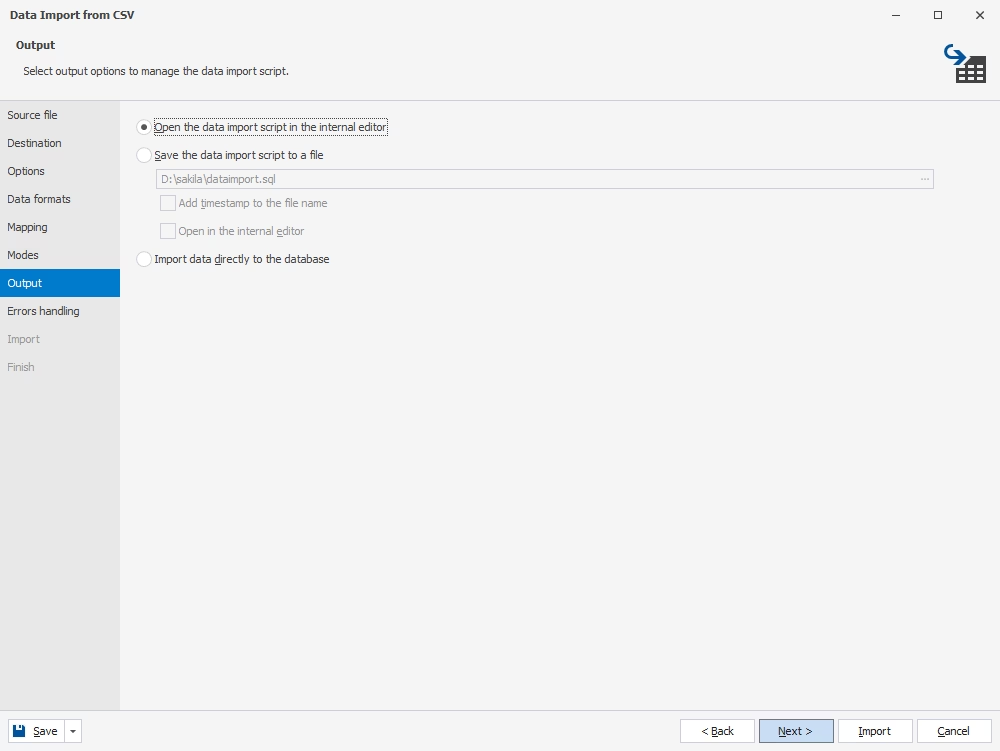
Specify the output options
On the Output page, decide how to handle the data import script: view it in the SQL Editor, save it for later, or execute it immediately to import the data directly. Click Next.
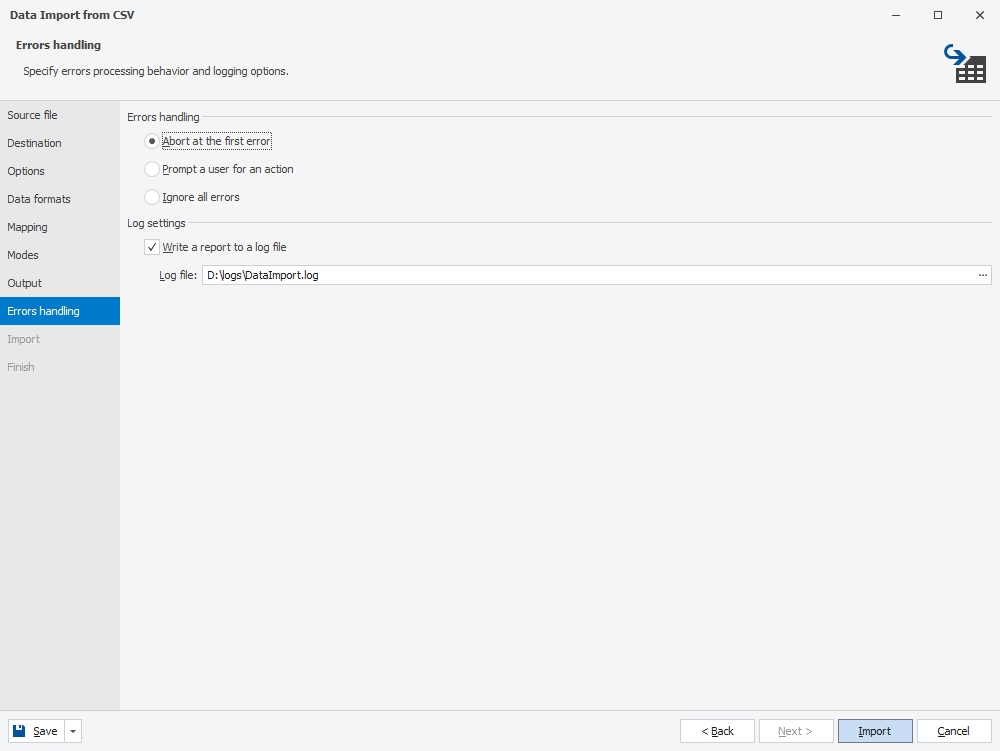
Set the error-handling behavior
Choose how errors should be handled — stop the task, continue despite errors, or prompt for an action — and optionally write a report to a log file. Click Import.
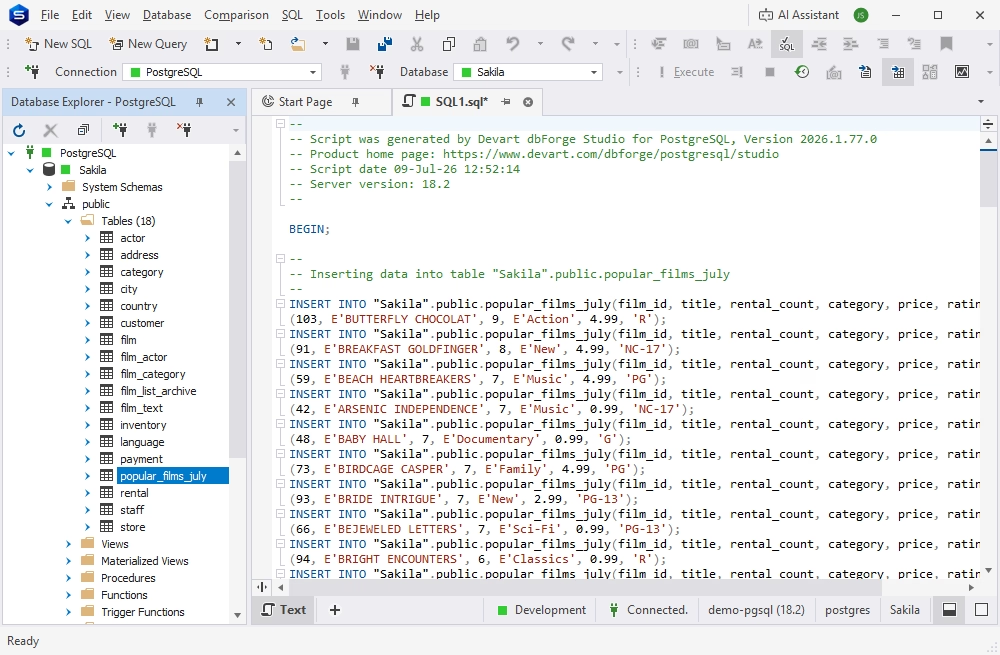
Review the results
In this tutorial, we chose to view the import script in the SQL Editor before executing it.
Since export and import are routine tasks, it makes sense to automate them. dbForge Studio lets you do this from the command line.
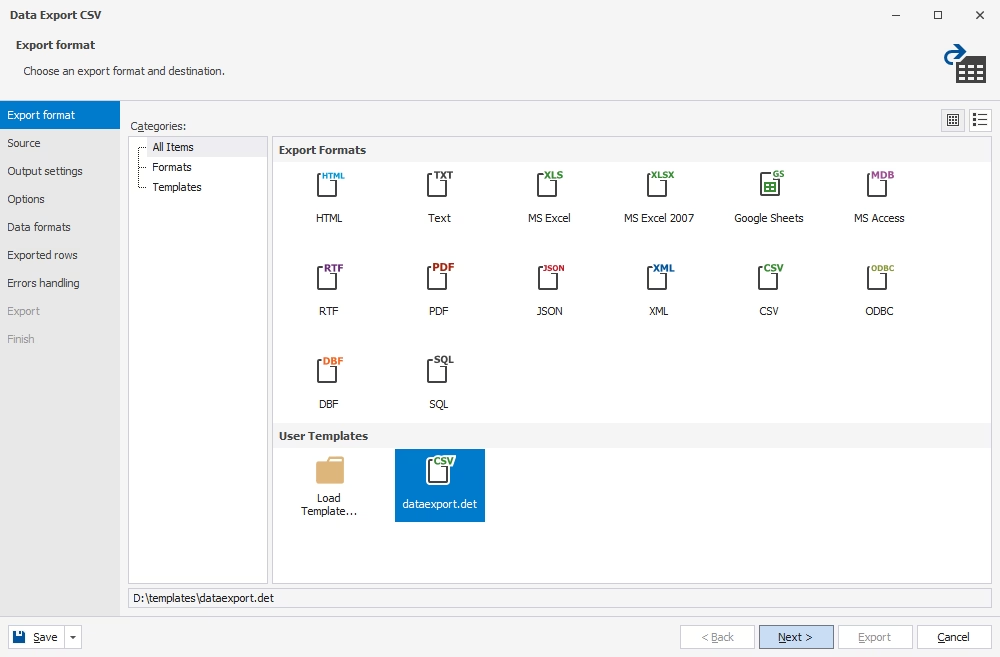
Save a task template
You can save your export or import settings as a template for future reuse. Once the task is configured, click Save and select Save Template. This button is available on every tab of the wizard.
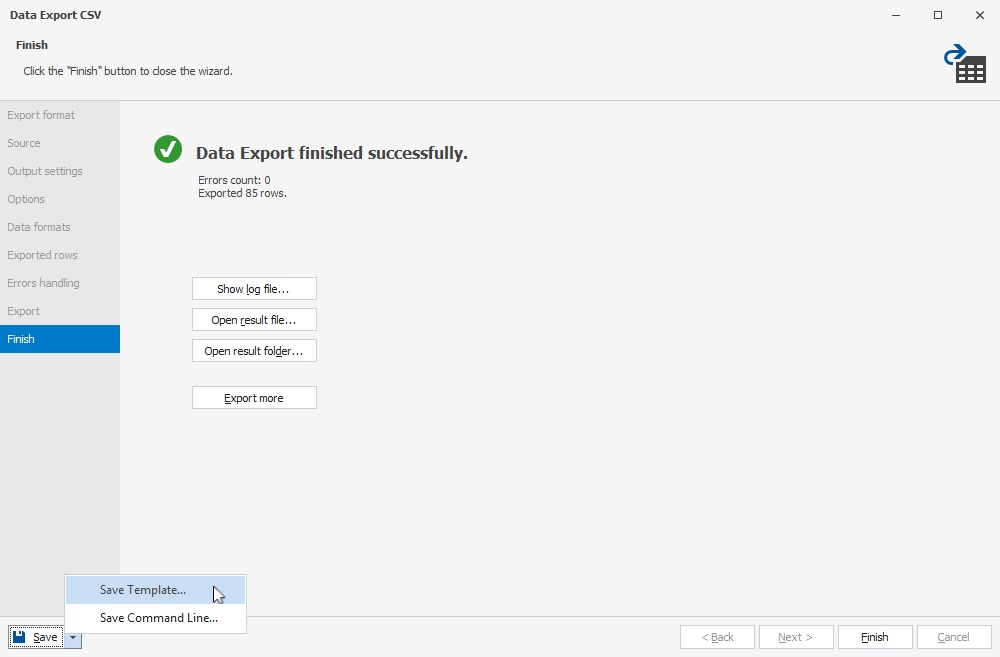
Next time, simply select the saved template to reuse it. Templates are also required for automating tasks from the command line.
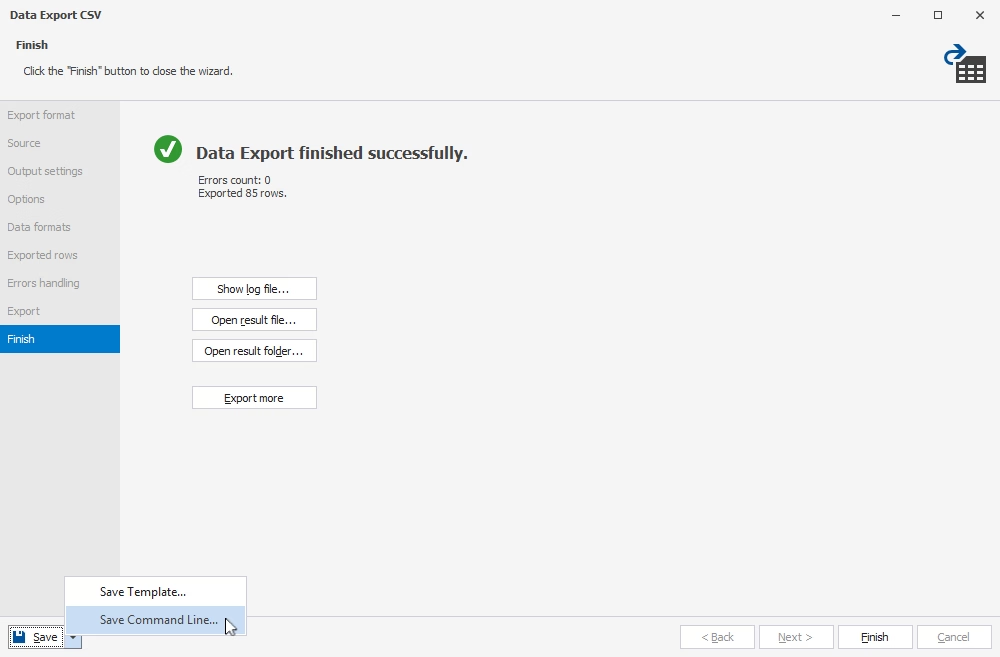
Automate a task via CLI
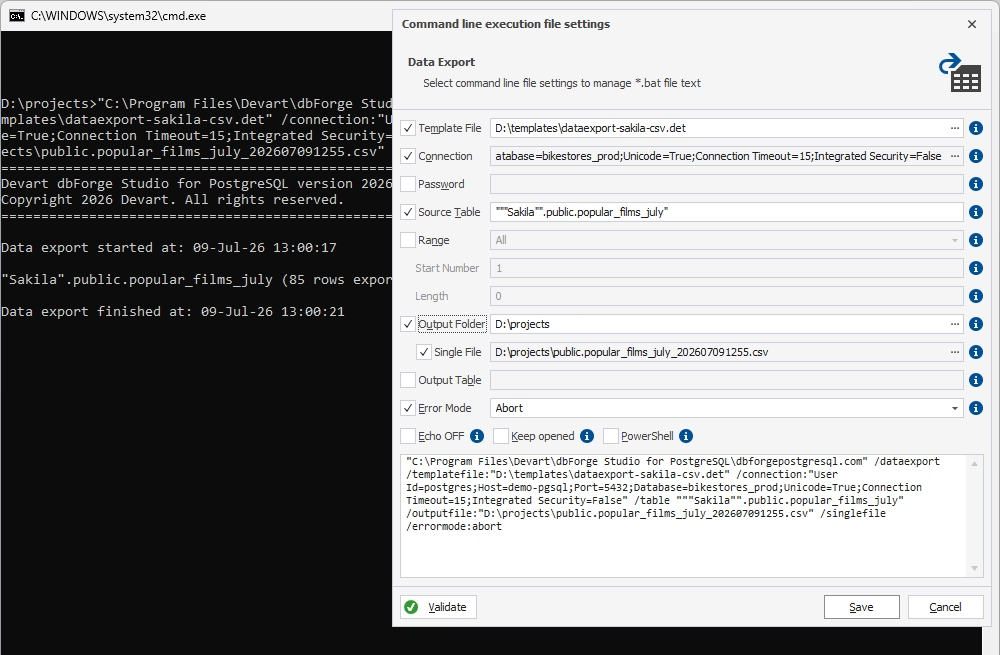
In the export or import wizard, click Save and select Save Command Line. Check the settings, add the necessary task template, and click Validate to confirm that everything is correct. Save the settings as a .bat file for easy reuse.
You can run the task immediately or schedule the execution of the batch file with Windows Task Scheduler.
dbForge Studio for PostgreSQL offers advanced tools for exporting and importing data. These tools significantly simplify PostgreSQL data migration, helping you boost productivity and get results faster.
Try the Studio yourself: download the fully functional free trial and explore everything this IDE has to offer.
There are several options. The simplest way is to export the entire database schema and tables in SQL using pg_dump, a command-line utility that dumps an entire database or specific parts of it (e.g., tables or schemas) and produces either an SQL script containing the commands needed to reconstruct the database, or a directory-based archive with a set of folders that's portable across different architectures.
The syntax is: pg_dump [connection-option...] [option...] [database_name]
To rebuild the database from an archive file, you can use pg_restore, the psql command-line tool (if the dump is in SQL format), or dbForge Studio for PostgreSQL. However, this approach is best suited to backups and migrations rather than plain data extraction.
You can also export specific tables to CSV using the server-side COPY command and the client-side \copy macro in psql. Finally, GUI tools support data export and greatly simplify configuring and running the task.
You can use the built-in COPY command and the client-side \copy macro in psql. Another option is pg_restore, which recovers a pg_dump archive. For fast and simple imports, GUI tools are preferable, since they let you configure and run the task visually.
Yes. GUI database tools, such as pgAdmin or dbForge Studio for PostgreSQL, provide import/export wizards that generate the underlying SQL for you, so you can configure and run the task instantly without writing SQL.
Yes. With the COPY command, you can export a single table, a list of columns, or the result of a custom SELECT query. With pg_dump, you can limit the export to specific tables (-t) or schemas (-n), or exclude objects. GUI tools typically let you select tables, rows, and columns visually.
Yes. The server-side COPY command and the client-side \copy macro in psql allow you to import data into an existing table. However, advanced GUI tools allow you to import data in a much more straightforward manner. Depending on the tool and its settings, you can get the new rows appended or have the existing data updated or even repopulated.
With plain COPY, you can specify the target column order or subset (COPY table (col1, col2) FROM ...), but the source file's columns must already correspond to the ones you list. GUI tools like dbForge Studio for PostgreSQL typically provide a visual column-mapping step so you can match source columns to destination columns precisely.
Yes, in several ways. You can wrap COPY, pg_dump, or pg_restore commands in shell scripts and schedule them with cron (Linux) or Task Scheduler (Windows). Alternatively, you can use an advanced GUI tool that supports task automation; dbForge Studio for PostgreSQL, for instance, generates executable .bat files with the export or import parameters, which you can use to automate your data migration jobs.
For export, dbForge Studio supports 14 popular formats: HTML, TXT, XLS, XLSX, MDB (Microsoft Access), RTF, PDF, JSON, XML, CSV, ODBC, DBF, SQL, and Google Sheets. For import, it supports 10 formats: TXT, XLS, XLSX, MDB (Microsoft Access), Google Sheets, XML, JSON, CSV, ODBC, and DBF.