SQLite is a popular, lightweight, cross-platform database that is widely used as a part of backend for many applications. This tutorial provides step-by-step instructions on how to connect a .NET application to an SQLite database.
Why dotConnect for SQLite?
Advanced encryption
Provides integrated support for the SQLite Encryption Extension with AES, Blowfish, TripleDES, Cast128, and RC4 encryption algorithms.
Advanced ORM Support
Fully supports EF Core, Dapper, NHibernate, LinqConnect, and more for efficient data management.
Full ADO.NET Compliance
Conforms to ADO.NET standards for seamless integration with .NET applications.
SQLite-specific data types
Includes specific features and fully supports all unique data types for accurate and complete data representation.
IDE integration
Features native integration with Visual Studio and complete design-time support for accelerated development.
Support & frequent updates
Includes priority support, detailed documentation, and regular updates for continuous improvement.
Download and activate dotConnect for SQLite
You can start using dotConnect for SQLite immediately with a 30-day free trial. Choose one of the following options:
The first option we explore is establishing a basic connection to a SQLite database with the help of C#. Depending on your requirements, you may need to extend this example by adding functionality such as executing SQL queries or handling various types of exceptions.
using Devart.Data.SQLite;
classProgram
{
staticvoidMain(string[] args)
{
// Path to the Sakila database file string databasePath = @"path\to\your\sakila.db";
// Connection string string connectionString = $"Data Source={databasePath};Version=3;License key=**********";
// Create a new SQLiteConnection object using (SQLiteConnection connection = new SQLiteConnection(connectionString))
{
try
{
// Open the connection
connection.Open();
Console.WriteLine("Connection successful!");
}
catch (Exception ex)
{
Console.WriteLine($"Connection failed: {ex.Message}");
}
}
Console.WriteLine("Press any key to exit...");
Console.ReadKey();
}
}
Refer to the SQLite connection strings guidelines for the parameters necessary to establish connection to SQLite databases and ensure proper communication between the application and the database engine.
Connect using the SQLiteCrypt encryption
In this tutorial, we use dotConnect for SQLite, a data provider that enables connections to encrypted SQLite databases. Although the provider does not include a built-in encryption extension, it is fully compatible with databases encrypted using third-party solutions.
To connect to an encrypted SQLite database with dotConnect for SQLite, configure the connection string with the required encryption settings, such as the encryption and password parameters.
Note
If you need to change the database password, use the ChangePassword method. To decrypt the database, specify an empty password.
The following example demonstrates how to use SQLiteCrypt encryption with dotConnect for SQLite to keep your SQLite database protected.
using Devart.Data.SQLite;
classProgram
{
staticvoidMain(string[] args)
{
// Path to the Sakila database file string databasePath = @"path\to\your\sakila.db";
// Connection string with SQLiteCrypt encryption parameters string connectionString = $"Data Source={databasePath};Encryption=SQLiteCrypt;EncryptionLicenseKey=00000-000-0000000-00000;FailIfMissing=false;Password=yourpassword;License key=**********";
// Create a new SQLiteConnection object using (SQLiteConnection connection = new SQLiteConnection(connectionString))
{
try
{
// Open the connection
connection.Open();
Console.WriteLine("Connection successful!");
}
catch (Exception ex)
{
Console.WriteLine($"Connection failed: {ex.Message}");
}
}
Console.WriteLine("Press any key to exit...");
Console.ReadKey();
}
}
Connect using the AES256 encryption
Next, we will demonstrate how to establish a secure AES-256-encrypted connection to an SQLite database using dotConnect for SQLite. The example below illustrates this process.
using Devart.Data.SQLite;
classProgram
{
staticvoidMain(string[] args)
{
// Path to the Sakila database file string databasePath = @"path\to\your\sakila.db";
// Connection string with AES256 encryption parameters string connectionString = $"Data Source={databasePath};Encryption=AES256;FailIfMissing=false;Password=best;License key=**********";
// Create a new SQLiteConnection object using (SQLiteConnection connection = new SQLiteConnection(connectionString))
{
try
{
// Open the connection
connection.Open();
Console.WriteLine("Connection successful!");
}
catch (Exception ex)
{
Console.WriteLine($"Connection failed: {ex.Message}");
}
}
Console.WriteLine("Press any key to exit...");
Console.ReadKey();
}
}
Connect using Server Explorer
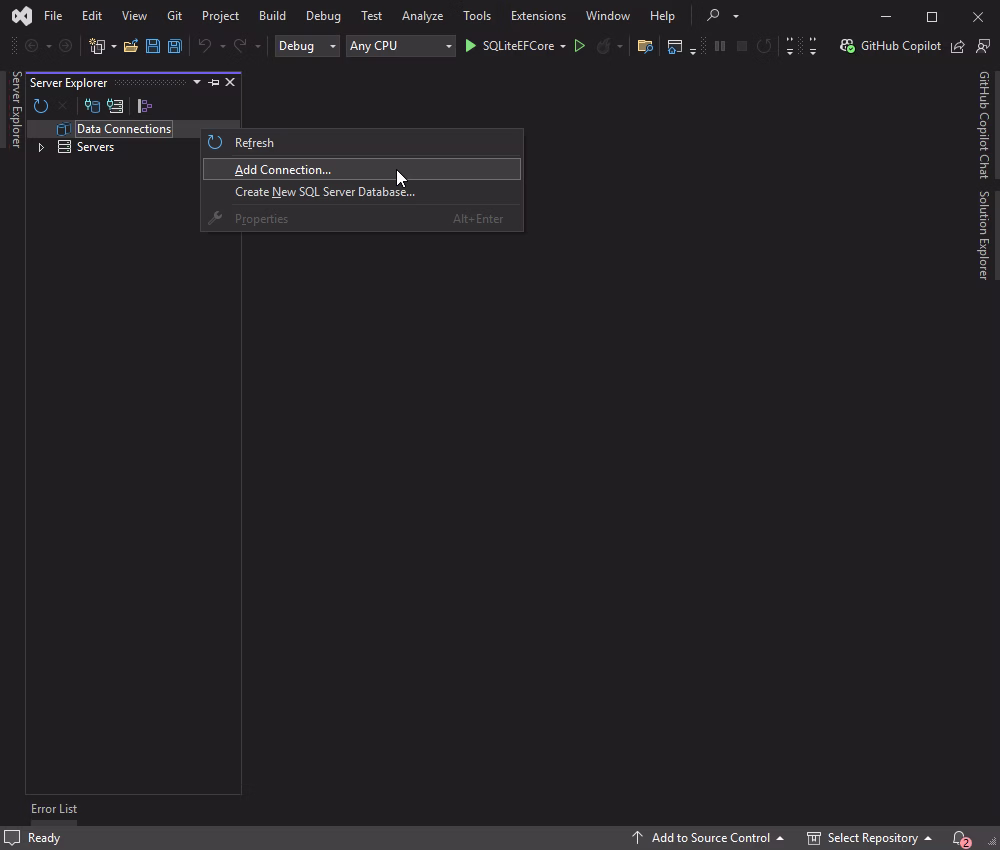
Server Explorer is a Visual Studio tool window that enables developers to browse, manage, and query server resources on local or remote machines. It also allows you to connect to databases (SQLite in this case) directly from within Visual Studio. Follow the steps below to connect to your SQLite database using Server Explorer.
1. Right-click Data Connections and select Add Connection.
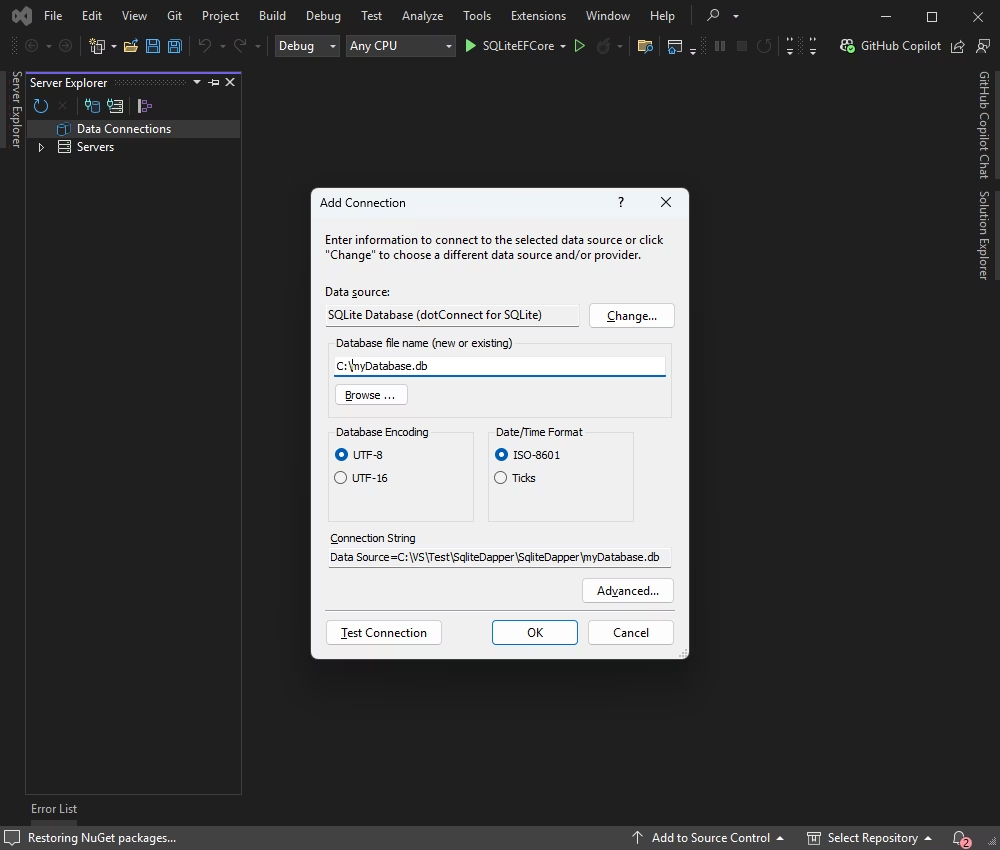
2. In the Add Connection dialog that appears, choose SQLite Database as the data source. Enter the path to the database you want to connect to, then click OK.
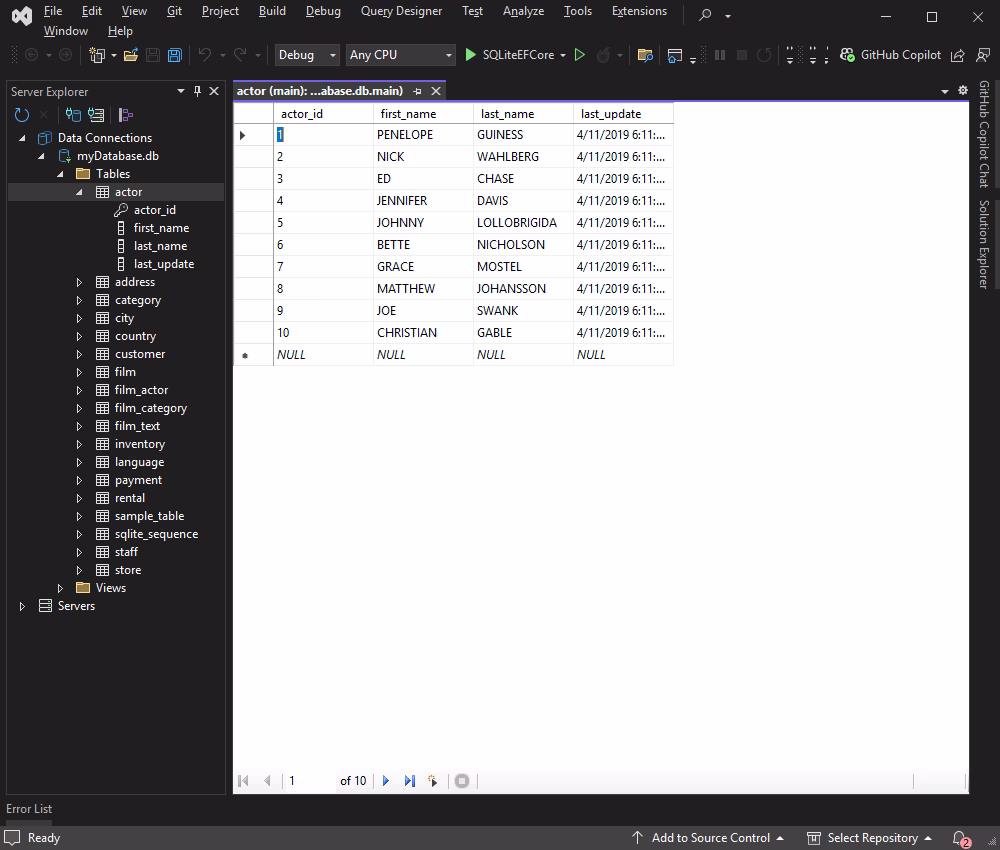
3. Once the connection is established, you can use Server Explorer in Visual Studio to browse tables, run queries, and manage data directly within the IDE.
Connect to EF Core using Entity Developer
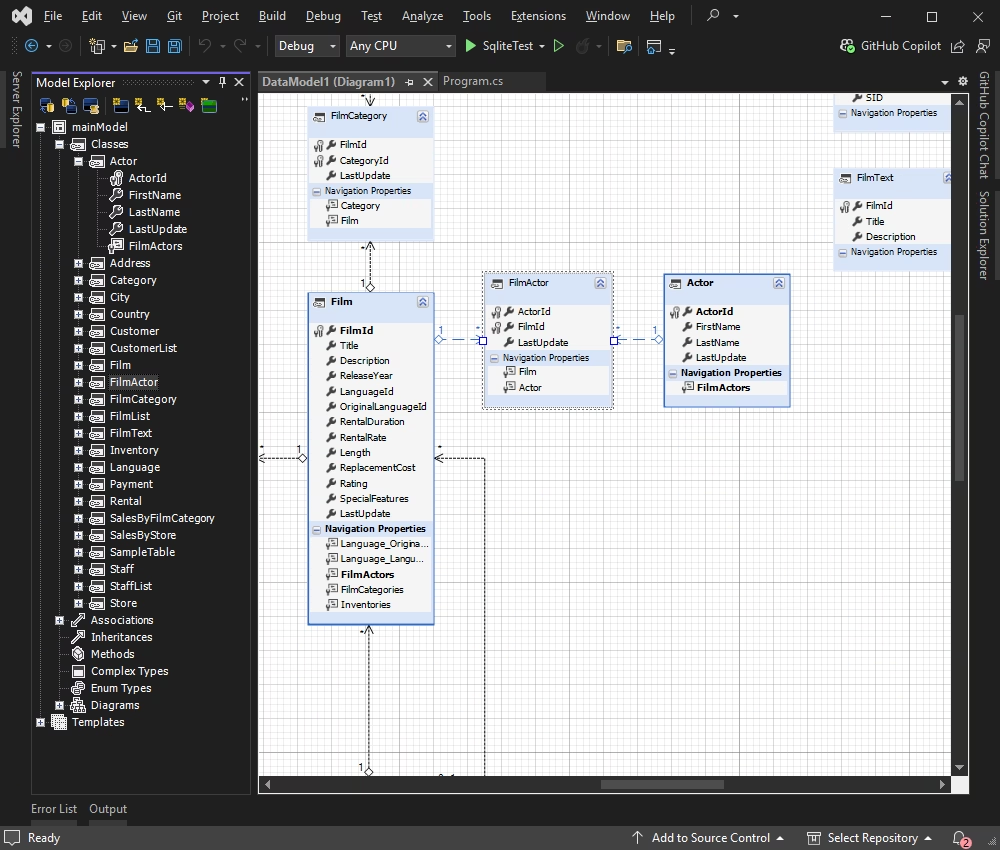
Entity Developer allows you to visually design and generate EF Core models, making database application development faster, easier, and more efficient. If you don't have it already installed, close your Visual Studio instance, download Entity Developer, and install it following the on-screen instructions.
Follow the detailed illustrated guide to create your database model using Entity Developer. When this process is complete, the model you created opens. You can work with the diagram and edit its fields and relations. It also allows you to generate SQL code for altering the database, or you can update the database directly from the model.
This guideline was tailored for Visual Studio. However, if you prefer using VS Code, JetBrains Rider, or another IDE, consider working with Entity Developer as a standalone application to manage your models efficiently.
Finally, open a C# Console application and enter the following code. In our example, the database connection properties are defined within the DbContext class.
namespaceSQLiteEFCore
{
classProgram
{
staticvoidMain(string[] args)
{
// Create an instance of your DbContext using (var context = new SakilaContext())
{
try
{
// Attempt to open the connection
context.Database.OpenConnection();
Console.WriteLine("Connection successful!");
}
catch (Exception ex)
{
Console.WriteLine($"Connection failed: {ex.Message}");
}
finally
{
// Close the connection
context.Database.CloseConnection();
}
}
Console.WriteLine("Press any key to exit...");
Console.ReadKey();
}
}
}
Connect to EF Core using Scaffold-DbContext
Finally, let us review using the Scaffold-DbContext command to connect a .NET application to SQLite. This command is used in Entity Framework Core (EF Core) to generate code for a DbContext and entity types from the selected database.
Make sure that you have EF Core tools installed in your development environment. If not, you can add them globally using .NET CLI with the following command:
dotnet tool install --global dotnet-ef
Install Scaffold-DbContext using Package Manager Console in Visual Studio.
Entity Framework Core will generate a DbContext class and the corresponding entity classes in the specified output directory (e.g., Models).
Always review the generated code to ensure it accurately reflects your database schema.
Video tutorial
Conclusion
We have reviewed different ways of connecting .NET applications to SQLite databases. In particular, we used dotConnect for SQLite to ensure flawless connectivity for efficient data access and manipulation. You can try dotConnect for SQLite with its on-the-fly connectors and flexible configuration in your work too. Just download your free trial and see the difference immediately!
FAQ
How do you install and activate dotConnect for SQLite in a .NET project?
Install dotConnect for SQLite either by running the Windows installer (EXE) or by adding the Devart.Data.SQLite NuGet package to your .NET project. Then, retrieve your activation key from the Devart Customer Portal and specify it in your connection string by using the License key parameter to activate the provider and connect successfully.
How do you create a connection to SQLite using dotConnect in C#?
Define a connection string that includes host, user ID, password, database, and the License key value, then create an SQLiteConnection instance with this string and call Open() inside a TRY-CATCH block to test and handle connection errors.
How do you enable encryption for secure SQLite connections with dotConnect?
Use SQLite Native Network Encryption by configuring encryption in the sqlnet.ora file on both client and server sides. No special parameters are required in the connection string.
Can you connect to SQLite using Entity Framework Core and dotConnect?
Yes, you can either use Entity Developer to visually create an EF Core model from the database or run Scaffold-DbContext with a dotConnect connection string (including License key) to generate the DbContext and entity classes.
Is it possible to connect to SQLite using Visual Studio Server Explorer with dotConnect?
Yes, add a new Data Connection in Server Explorer, select dotConnect for SQLite as the provider, enter your credentials, test the connection, and browse SQLite data directly in Visual Studio.
I'm a technical content writer who loves breaking complex tech topics into clear and helpful content that's enjoyable to read. With a solid writing background and growing skill in software
development and database tools, I create content that's accurate, easy to follow, and genuinely useful. When I'm not writing, you'll probably find me learning something new or sweating it out at the gym.