How to Copy SQL Server Database
Developers and DBAs often encounter a situation when they need to copy a database from one computer to another
for the purposes of development, testing, or diagnostics.
With dbForge Studio for SQL Server, you can
duplicate a SQL Server database in several ways:
- Detaching and attaching a database
- Comparing and synchronizing schemas and data of source and target databases
- Restoring a backed-up source database to a target database.
In this article, we will take a closer look at each method and determine the differences between them.
Move a SQL Database Using the Detach and Attach Method
NOTE: To use this method, a SQL Server version on the target must be the same or higher than the one on the source.
-
In Database Explorer, right-click a source database, point to Tasks, and select Detach Database...
from the shortcut menu.
-
The Detach Database dialog box opens with the name of the database in it. Click OK.
-
Duplicate the detached database from the source server to the target one:
- In desktop mode, press the Windows key and R at the same time, to show the Run command line.
-
The Run dialog box opens. Type "\\dbmssql" and click OK.
-
Copy the detached database file (*.mdf) together with the log file (*.ldf) and paste them to the target location or
the folder shared between two servers.
NOTE: To perform step 3, you need to have administrator privileges granted.
-
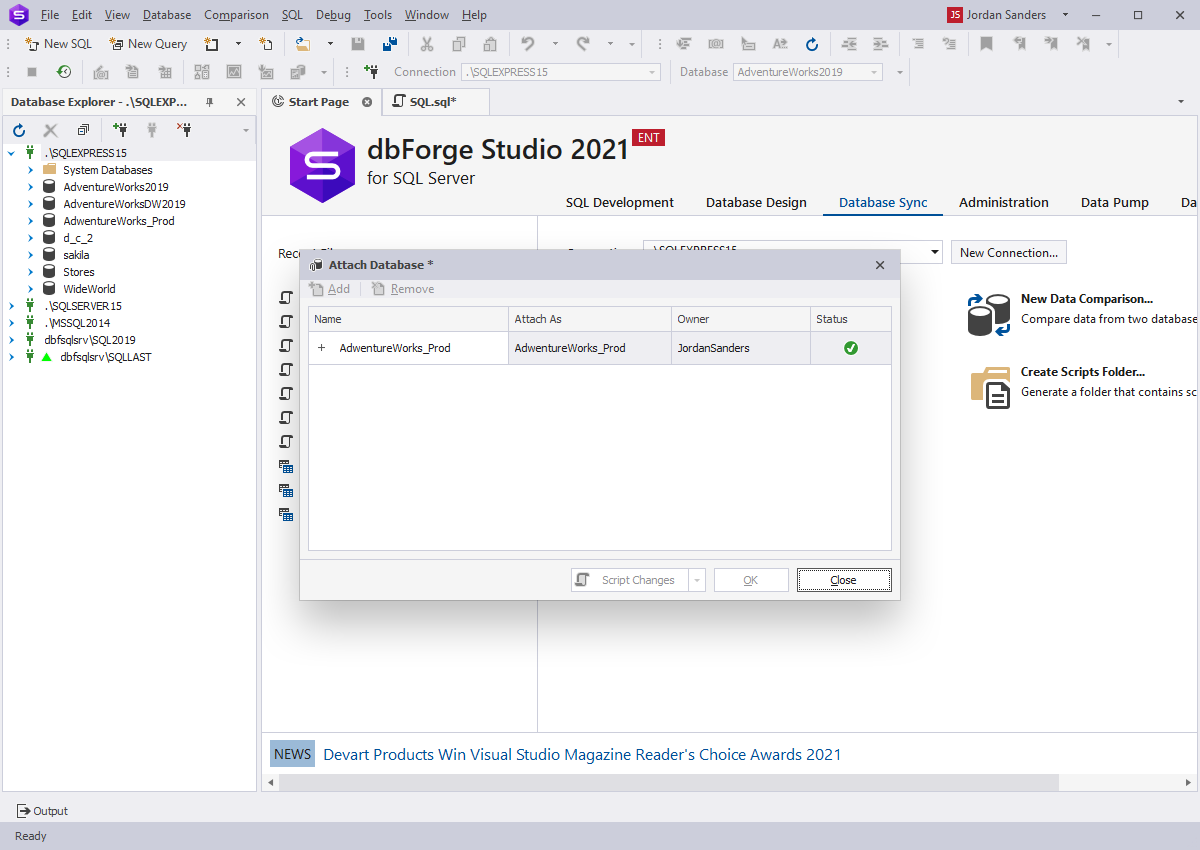
Right-click the target connection, point to Tasks, and select Attach Database... from the shortcut menu.
-
The Browse Files and Attach Database dialog boxes open. In the Browse Files dialog box, select the required database
and click OK.
-
The database file and log file will appear in the Attach Database dialog box. Click OK.
- Reattach the database to the source connection.
dbForge Studio for SQL Server enables to automate the above-mentioned procedure with help of the
SQL Server Copy Database Wizard.
The Detach and Attach Method pros and cons
-
Pros:
- It is the fastest way to copy a database.
-
Cons:
- A source database should be offline.
- All connections will be lost.
- A shared folder is required.
- A SQL Server version on the target must be the same or higher than on the source.
- The method cannot be used on Windows Azure.
Transfer a Database from one Server to Another Using Backup and Restore Method
NOTE: To use this method, the SQL Server version on the target must be the same or higher than the one on the source.
-
Back up the source database. See the detailed step-by-step guidance on how to backup an SQL Server database.
NOTE: You should back up the source database to the folder shared between the servers. Otherwise, you should move the backup file
to the target server - see step 3 for the Detach and Attach method.
-
Create a new target database: in Database Explorer, right-click the target connection and select New Database.
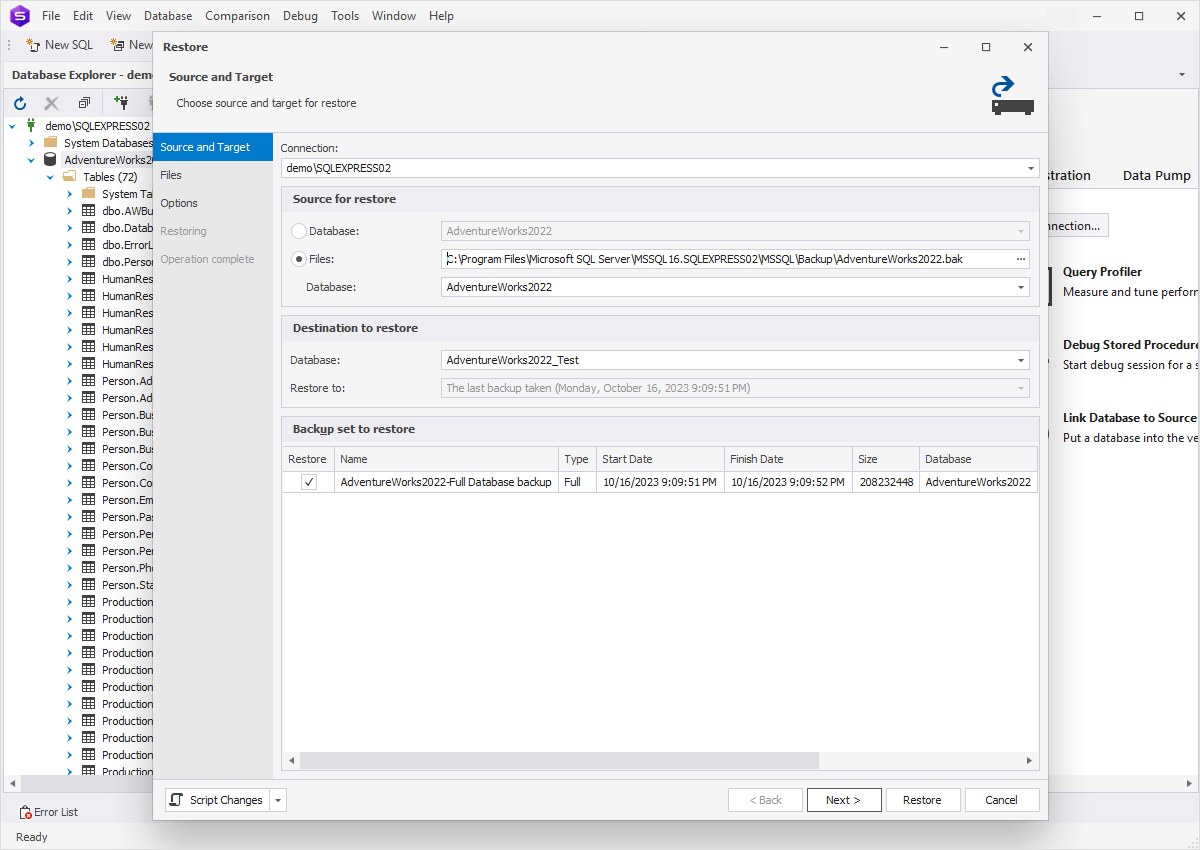
- Right-click the new database and select Restore. The Restore wizard opens.
-
On the Source and Target tab of the wizard:
- In Source for Restore, specify the path to the backup file.
- In Destination to Restore, select the target database.
- Click Next.
-
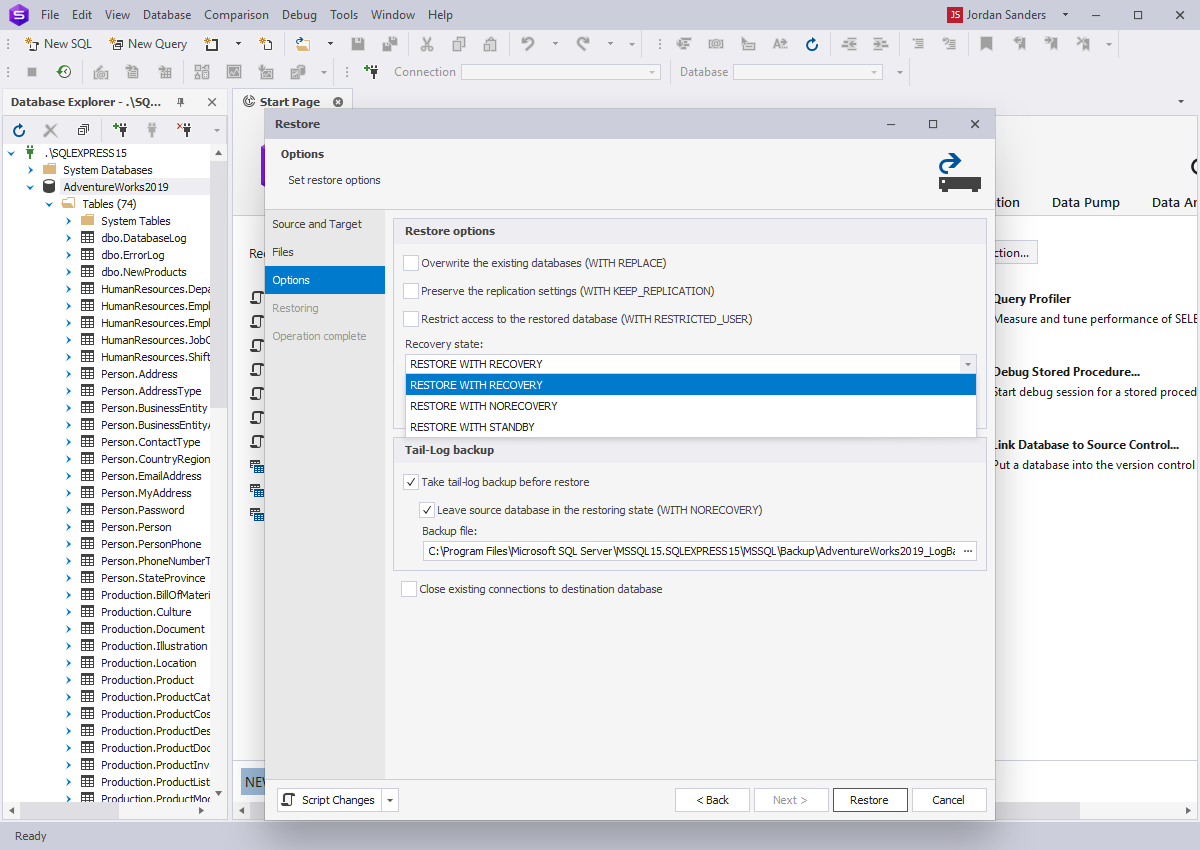
(Optional) On the Options tab of the wizard, set the required options for the backup procedure. Click Restore.
-
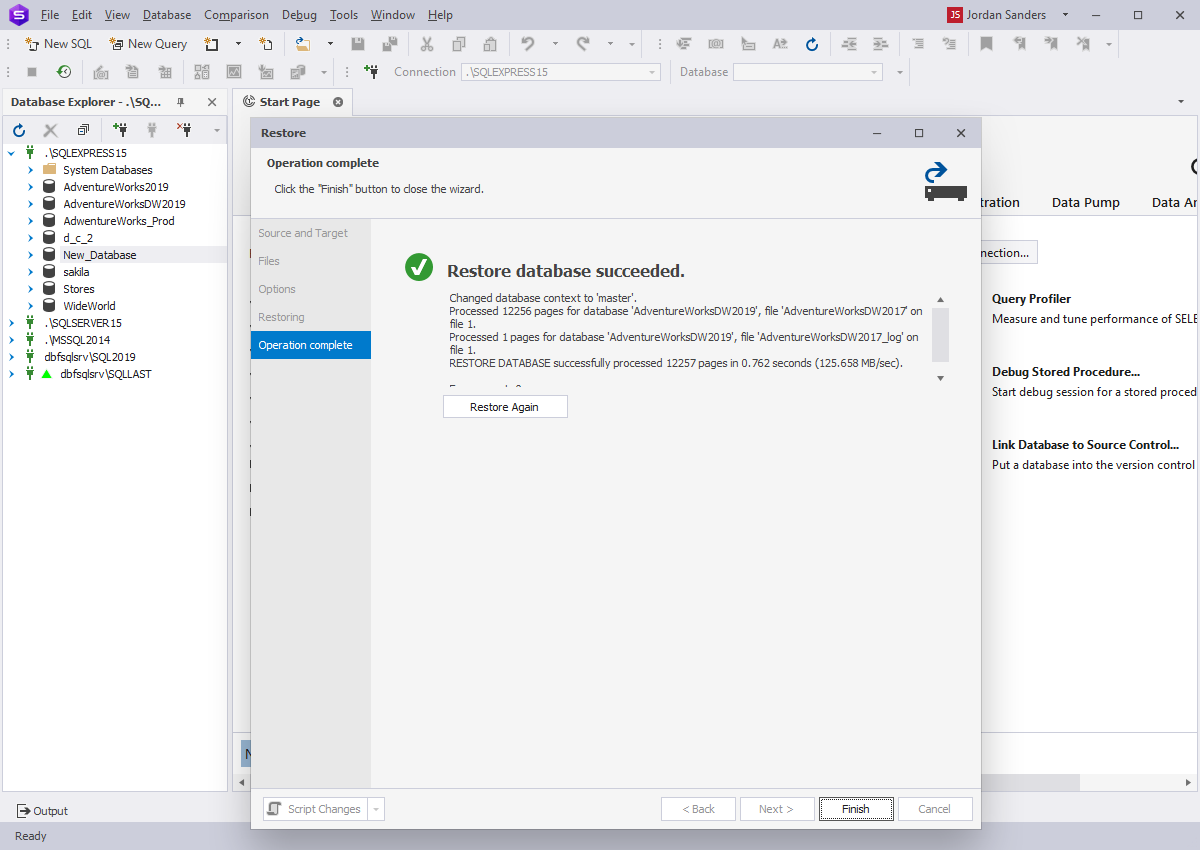
Wait till the restore process is completed and click Finish.
Backup and Restore Method pros and cons
-
Pros:
- A source database may remain online.
- Connections will be preserved.
-
Cons:
- It is a bit slower than the previous method.
- A SQL Server version on the target must be the same or higher than on the source.
- A shared folder is required.
- The method cannot be used on Windows Azure.
Create a Copy of Database Using Data and Schema Comparison and Synchronization Method
-
Create a new target database: in Database Explorer, right-click the target
connection and select New Database.
-
Compare and synchronize schemas of the source database with the target database.
See the detailed step-by-step guidance on how to compare and synchronize SQL schemas.
-
Compare and synchronize data of the source database with the target database.
See the detailed step-by-step guidance on how to compare and synchronize SQL data.
Schema and Data Compare&Sync Method pros and cons
-
Pros:
- The source database may remain online.
- Connections will be preserved.
- It does not require a shared folder.
- The method does not depend on the SQL Server version.
- It can be used on Windows Azure.
-
Cons:
- It is a time-consuming method.
Also, you can watch this video to learn how to migrate a database with the Schema and Data Compare functionality provided in dbForge Studio for SQL Server.