Copy Database Wizard
Though dbForge Studio for SQL Server provides several ways to copy SQL Server databases, the Copy Database wizard is the fastest and the easiest way to copy an SQL Server database from one server to another. This essential tool allows you to perform the delicate and potentially toilsome procedure of database duplication in several simple steps. During your work with the wizard, you can:
- Specify the source and target SQL servers.
- Select an action for a database: move, copy or override.
- Change database name on the target SQL server and the location of the Data and Log files.
- Transfer logins to the target SQL server.
- Save the database project to use it afterwards.
Working With the Copy Database Wizard
Step 1
In Database Explorer, right-click the source database, point to Tasks and select "Copy Database..." from the shortcut menu.

Step 2
The Source and target page of the Copy Database wizard opens. Optionally, you can click the Open button to load a previously saved project file. In the Source section, select the source SQL Server instance. In the Target section, select the target SQL Server instance. Click Next.
Step 3
On the Select databases page, check the boxes next to the database names you want to copy, move or overwrite. Please note:- If you select the Move option, the wizard deletes the source database automatically after moving the database.
- The Copy Database wizard does not delete a source database if you select the Copy option.
- You cannot copy a database from the source SQL Server instance to the target if the exact same database is hosted on the target SQL Server instance. In this case, you must select the Override option. If the option is selected, the target database will be overridden.
Optionally, you can use the Filter tool for quick search. Click Next.

Step 4
Optionally, on the Target databases page, you can change the name of the target database, as well as the directory for the Data and Log files. By default, the Data and the Log files are saved to a default file storage directory of the target server. The Status field shows whether the current database name is valid for creating a database copy. Click Next.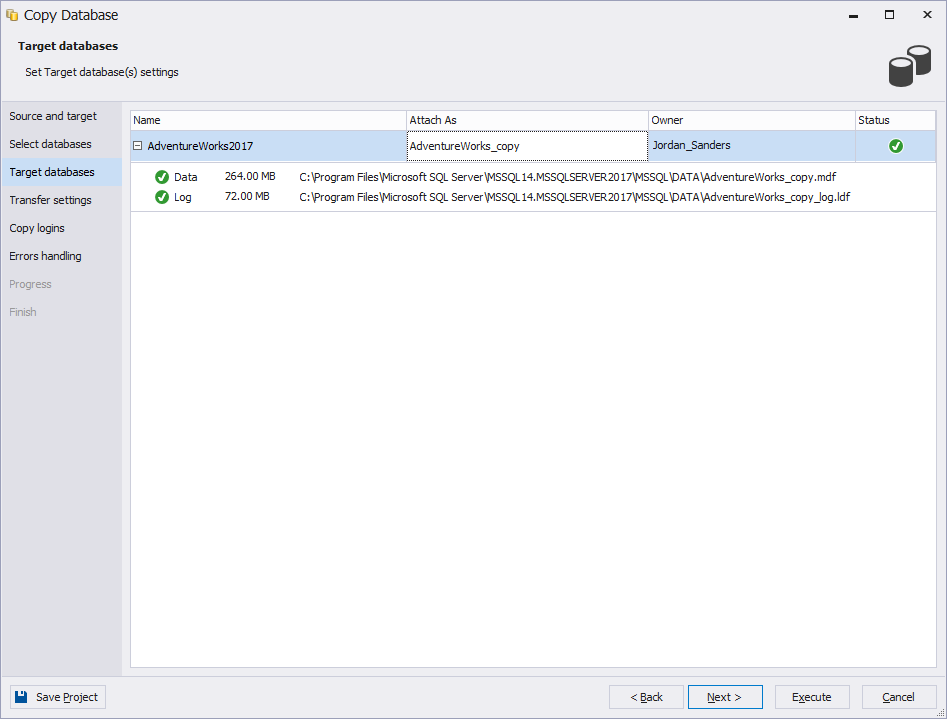
Step 5
On the Transfer settings page, select an existing Operating System Proxy Account or enter credentials for Windows Account Authentication. Click Next.An Operating System Proxy Account is needed to ensure that the SQL Agent has all the necessary privileges to access the file system of the computer on which the SQL Server is installed. The Operating System Proxy Account is linked with a Windows Account. SQL Agent will use the Operating System Proxy Account during the execution of file operations.
The wizard creates an Operating System Proxy Account when credentials for Windows Account Authentication are entered, and deletes it when the database duplication is over. For more information, refer to the MDSN entry.
Please note that an "Operating System" type job runs under the SQL Server Agent service account by default. Because of the product requirements, the account must belong to the sysadmin server role. Non-sysadmins need a proxy account to execute the "Operating System" job steps. Therefore, to run a job step of the "Operating System" type with the non-sysadmin owner, you need to set up a proxy.

Step 6
On the Copy logins page, select logins to copy. To ensure database operability, these logins should be available on the target server. If the target server contains the required logins, select Do not copy logins. Click Next.
Step 7
On the Errors Handling page, specify the desired error processing behavior and logging options. Click Execute to start copying database(s).
Step 8
Optionally, on the Progress page you can interrupt the database copying process by clicking the Cancel button.
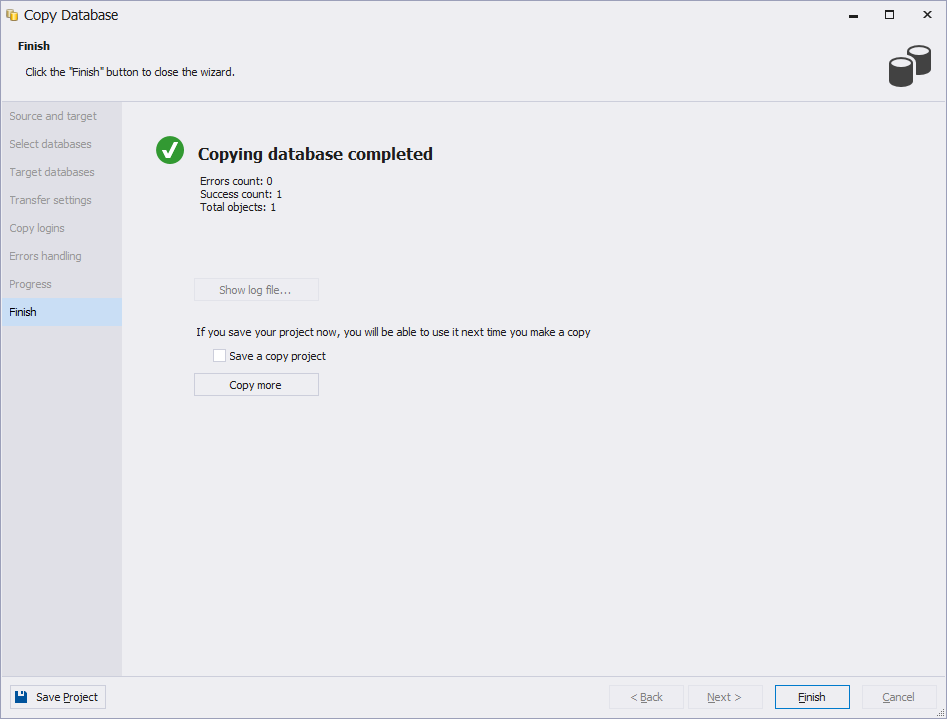
Step 9
The Finish page displays whether the database has been copied successfully. Optionally, you can:- Click Show log file button to view logging information.
- Select the Save a copy project checkbox to save the template of the completed database copying as a project.
- Click the Copy more button to perform another database duplication.
Click Finish to close the Copy Database wizard and complete the database duplication process.
Limitations and Restrictions
Before you start working with the Copy Database wizard, make sure to comply with the following limitations and restrictions.
- The target SQL Server version must be the same or higher than the source's version.
-
You can not copy or move the following databases:
- System databases.
- Databases marked for replication.
- Databases marked Inaccessible, Loading, Offline, Recovering, Suspect.
- You must be a member of the sysadmin server role on both the source and target servers.
- If the target and source servers are located on the same computer, SQL Agent should be run on the target server. Otherwise, SQL Agent should be run on both the source and target servers.
Also, you can watch this video to learn how to migrate a database with the Schema and Data Compare functionality provided in dbForge Studio for SQL Server.